
I've never been a huge fan of photo editing in Lightroom. In the past, I used it to organize my photos and for basic raw processing. But since the introduction of the new masking feature, I do a large part of my post-processing in Lightroom. Here, I share two videos, in which I show how I use Lightroom masks.
Masking Explained With 3 Simple Examples
Masks have been around in Lightroom for a long time. It has also been possible to use different masks and simulate what layers can do in Photoshop. For me, this was always messy, and the masks didn't feel intuitive to use. So after some pre-processing, I would quickly move over to Photoshop.
As I already said, this has now changed. I like how masks are now organized in Lightroom, and they have become very useful to me. Where in Photoshop I would apply several adjustment layers, all with their own masks, in Lightroom I can now use one of the masks and make many different adjustments in one go. Because of the new masking panel, toggling through the different masks has also become much easier. It now feels similar to layers in Photoshop. With luminance and color ranges and the ability to add, subtract and intersect masks, masks in Lightroom have become very powerful.
To get an overview of masking in Lightroom, I show you three practical examples for combining masks via addition, subtraction, and intersection in the video below.
Masking Brush Workflow
The "Brush" has been around in Lightroom for ages, but I never used it because it always felt like a chicken and egg situation. Either I first draw in the mask and then make the adjustments, or I make the adjustments and then draw the mask.
In Photoshop, on the other hand, I would first adjust the settings of an adjustment layer, invert the mask, and finally reveal the areas where I wanted the adjustment to be applied. This way, I first see the full effect of an adjustment and can then dial it in via painting in the mask with a white brush.
This workflow gave me the idea for the trick I share in the feature video. If you don't like to watch videos, I'll also try to line out the workflow here.
Visualize and Add Workflow
To first apply the settings and see their effect on the whole image, you must activate the brush mask.
-
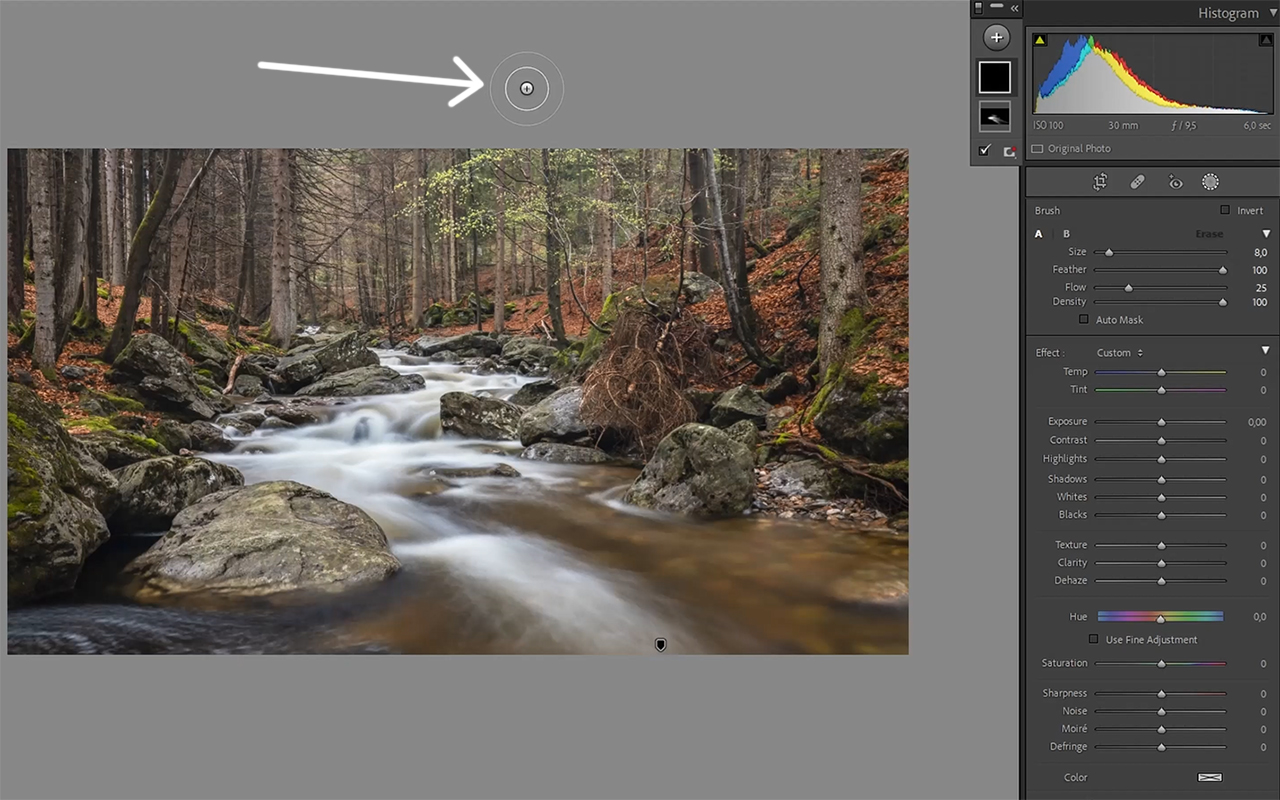
In the masking panel, select the "Brush". To activate the mask you must draw with it. The trick is to draw outside of the image. Use a small brush size, and zoom out to see a bit of the Lightroom canvas around the image. Apply a single brush stroke on this canvas.

-
Then, click on invert, and the settings you use will be applied to the whole image. It is similar to creating an adjustment layer in Photoshop and making changes.
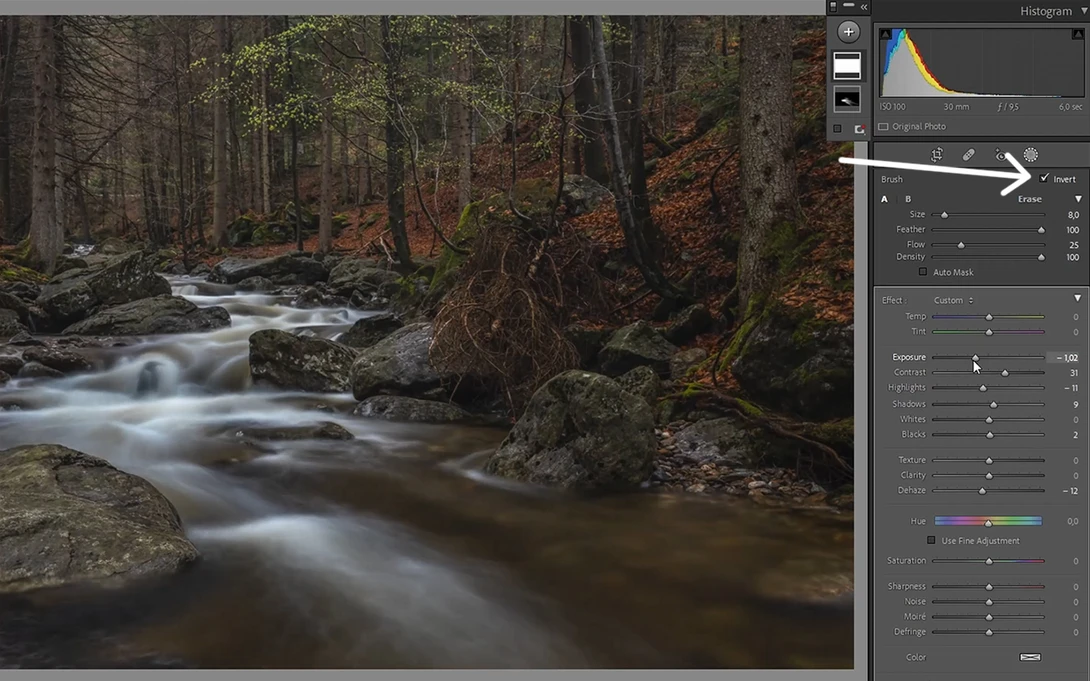
-
Next, re-invert the mask. All the settings you previously made will be hidden. In Photoshop, you would apply a black mask to the adjustment layer.
-
Now you can add in the effect. Use the brush with a low flow to gradually build up the effect in the desired areas.

This workflow is much more intuitive than first drawing the mask and then applying the settings or going back and forth between the two, in my opinion.
Visualize and Erase Workflow
You can also do the opposite: globally apply the settings first and then remove the effect from specific areas. The workflow is very similar to what I just showed you. Apply steps one and two, and then, instead of inverting the mask and drawing, use the "Erase" brush to remove the effect. Select "Erase" or hold down Alt (Option on Mac) while drawing.
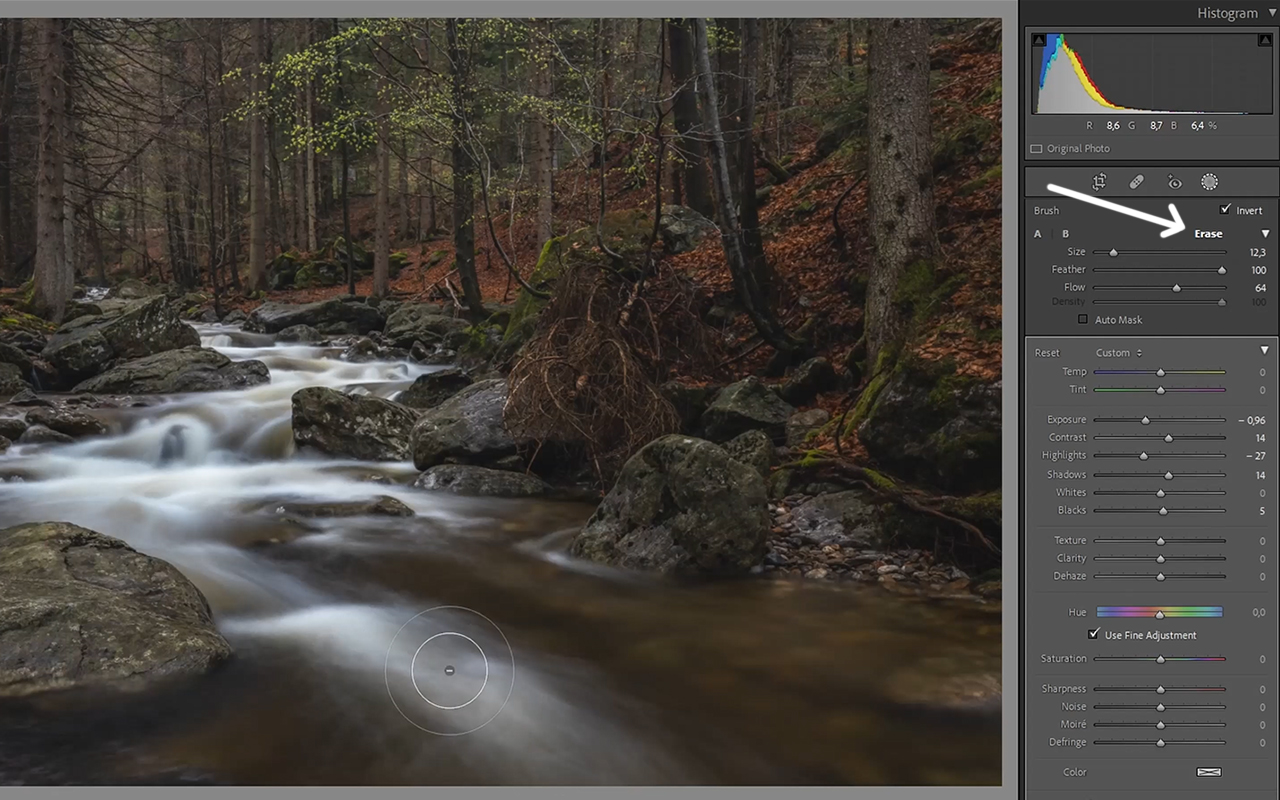
I use this workflow a lot if I want to guide the viewer through an image. I first darken the image globally, giving it a moody look. Then I remove the effect from areas where I want the viewer to look. In the above example, it's the flow of water.


Join the Fstoppers community for free
-
Post comments and join in the discussions
-
Browse the site ad-free
-
Share your work and get featured in the community
-
Compete in the photo contests for fun and prizes
5 Comments
I think Adobe needs to add this masking to Photoshop, I don't like working in two different programs for processing raw images.
You're in luck. The masking tool is available in the Camera Raw Filter in Photoshop. It functions identically to Lightroom.
Yes, camera raw and Lightroom have identical functionality.
Adobe adds this feature to Photoshop, making the software easier to use, especially when working with different adjustment layers.
The brush functionality in Lightroom is quite limited. (compared with PS)
Very Nice. I did this in camera raw and it works excellent. Thanks for the tip and making a non-video article to follow step by step.
Excellent tutorial - thanks for this