The export process in Lightroom Classic helps you efficiently share your images exactly as you envisioned them. However, without the right export approach, even your best edits might not translate well across different platforms or devices.
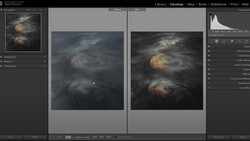
Coming to you from Aaron Nace with Phlearn, this practical video demonstrates key techniques for exporting images in Lightroom Classic. Nace begins with a brief but effective edit using Lightroom's masking tools to emphasize the subjects and enhance the sky, making straightforward adjustments that significantly improve the overall image without complicated steps. He then shows a clever way to use Lightroom’s cropping tool to quickly straighten horizons—a feature you'll definitely appreciate if precision is important in your photography. These editing methods aren’t just effective; they're quick and repeatable, essential qualities for anyone editing large numbers of images regularly. You'll also see a seamless use of Lightroom’s generative AI feature to effortlessly remove distractions from photos.
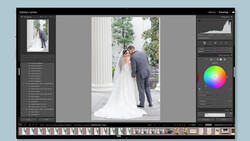
The video then moves into detailed guidance on Lightroom's export settings, a critical part of your workflow that's easy to underestimate. Nace highlights useful techniques such as custom file renaming to keep your exported images organized and clear, particularly when delivering proofs to clients or handling multiple versions of an image. This simple approach helps maintain clarity and reduces potential confusion, particularly when dealing with similar files or iterations like color and black-and-white edits. He emphasizes the importance of choosing the right file format, with JPEG as the go-to for most social media purposes, ensuring your images appear consistently across various digital platforms. For those concerned about security and rights management, Nace introduces the relatively new Content Credentials feature in Lightroom, which adds embedded security layers to your images—another critical step if your work will be widely shared.
Additionally, Nace explores practical advice on image resizing directly within Lightroom’s export dialogue, crucial for optimizing images for different uses like websites or client previews. By controlling image dimensions right at the export stage, you avoid performance issues caused by oversized files and reduce the risk of your work being misused before client approval. He advises against using output sharpening for social media uploads, as these platforms typically apply their own sharpening, potentially degrading your images.
The final section of the video covers watermarking, a valuable method for protecting your images during the client review process. Nace briefly previews how watermarks can be strategically applied to discourage unauthorized use without detracting significantly from the viewer’s experience. Check out the video above for the full rundown from Nace.


Join the Fstoppers community for free
-
Post comments and join in the discussions
-
Browse the site ad-free
-
Share your work and get featured in the community
-
Compete in the photo contests for fun and prizes
No comments yet