For anyone new to Lightroom or looking to solidify their skills, this guide lays out a step-by-step approach to building confidence with the software.
Coming to you from That Icelandic Guy, this practical video breaks down the essentials of learning Lightroom. It starts with the Library tab, where you manage and organize your images. Instead of overwhelming you with options, the video focuses on simple but effective steps like importing photos and using the “Pick” tool to mark favorites. Learning to pick and reject images early helps you save space and focus on quality work. The video highlights the importance of this tab for staying organized, which is especially helpful when dealing with thousands of digital photos.
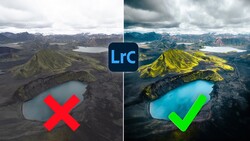
The Develop tab is where your edits come to life, and this video explains the basics clearly. Tools like the Basic Corrections panel and Tone Curve are demonstrated to help you understand how they shape exposure, contrast, and tones. Adjustments like white balance are explained with a simple, practical approach, and there’s a helpful introduction to clarity and texture sliders. The explanation makes it easier to avoid common mistakes, like over-editing, and instead focus on achieving a balanced, polished look.
The video also dives into more advanced tools, like masks, which allow you to fine-tune specific areas of an image. Whether it’s brightening a subject, darkening a sky, or shaping the light in creative ways, these features are presented in a way that feels approachable for beginners. The use of AI-powered masks for isolating skies or subjects is a major time-saver, especially if you’re new to detailed editing techniques.
To take things a step further, the video explores tools like the HSL sliders, which let you adjust the hue, saturation, and luminance of specific colors in your image. This is where you can refine tones and make your photos stand out. Additional features like noise reduction and sharpening are also covered, with tips on how to balance these adjustments to maintain image quality.
If you’re starting from scratch, practicing consistently is key. Take time to experiment with sliders and tools to develop your own style and confidence. Check out the video above for the full rundown.


Join the Fstoppers community for free
-
Post comments and join in the discussions
-
Browse the site ad-free
-
Share your work and get featured in the community
-
Compete in the photo contests for fun and prizes
1 Comment
The FAST and Furious of Lrc info!!! Great but a repeat often to get it into practice. First this is not a slam to great bit of info. Things I believe to be the very first but that is just me. Do the lens correction first and is a unchipped lens you can then find the lens in a list of makers and then the lens amongst all the makers lenses. Example of this many years ago ('15) Rokinon had a very hot lens used for Astro the 14mm F2.8, well Lrc was a little slow in getting it out by a year or two so you kept is a file then when it came out you could edit or even many years later, like I do by going back many times as SW get better. Today also beginners are going back to old film lenses that are less expensive not CHEAP (hate the word) or new makers non chipped lenses again not expensive we all like to play at a low cost! just for info not for lightroom and not known may many, the Sony A7 cameras mod 1's and 2's could have on camera apps (yes and wow) one was "Lens Compensation" where you can adjust many things and save under lens name and every time you use that lens you select it and just capture anything with it. https://www.playmemoriescameraapps.com/portal/
No longer available to buy but still available for download to some time in 2025. OK, my problem is some of the A7 mod 1 and 2's are still being sold NEW and now no way of getting the on camera apps.
To the point of this article, after the lens correction the somewhat unknown and very little used on the tubes by editors is the 4 little squares to the upper right of the Basic section, here is your cameras jpeg profiles that can be applied to your RAW image, for my astro images Portrait is best for beach tan as well as the Yin and Yang colors of Pegasus as well the blues in shadows being recovered - just an example.
Next is that color picker, you can see the numbers for each color under the histogram as well as under the picker and like stated you can see the changes in the image up in the left as you move around. Also stated picking on a white place is best BUT when not available pick a place where all colors are the same or mostly the same, a lot of reviews say all should be in the 40's - but your choice, you are the artist!!!
Next is the Tone curve, the curve is nice to play with and learn all the little things BUT you may like slider more so at the top you have a white somewhat S to the left this will give sliders way easier to use.
Last in the beginning of sections is the Color Mixer in the upper corner is a dot with upper and lower arrows click on it and then click on a color in your image you want to change in anyway just pick and drag up or down and Lrc with move the sliders of ALL colors that make up that color. This can be done for all three sections.
Also last is the Detail section where you should first adjust with the ALT key down and the whole image is white and sliding the masking key to the right will be less and if Lrc has not already selected a sharpening amount just slide it over a bit and then slide the Masking slider to zero in on the only things to sharpen. The one thing also seldom mentioned is the Denoise part where when selected Lrc will Denoise the image and you get to select how much from 1 to 100 and you can click on the lower right item and then pick and click on any part of the image to see what is affected and slide to the best denoise and sharpness you like. click apply and you get a DNG type file. A IMPORTANT THING is the image can be continued to be further edited afterwards, YEH!!! Even your masking sections, Another, YEH!!!
All this can really help in the beginning and ending of an edit!!!
I apologize for the ramblings just what you to know!!!
1. Images in foggy conditions will use most all of Lrc options so play to find most all.
again a last note Lrc now will do Panorama image combining some times!