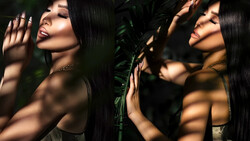
If you’re only making quick adjustments with auto settings or exposure sliders, you’re missing out on Lightroom’s most powerful tools. Understanding how to work with tone curves, masks, and color adjustments will push your images to the next level.
Coming to you from Anthony Gugliotta, this detailed video walks through advanced editing techniques in Lightroom, starting with the Develop module. This is where you’ll find every tool that controls how your image looks, from the basic exposure sliders to more advanced options like color grading and local adjustments. Gugliotta explains how to use the histogram to balance exposure and why making global changes before fine-tuning details leads to more natural results. He also highlights the importance of selecting the right image to edit—composition, lighting, and subject all play a role in how much you can enhance a photo.
A key part of this workflow is masking. Instead of applying edits to the entire image, masking allows you to adjust specific areas. Gugliotta demonstrates how to highlight key subjects using object selection and brushes, adding clarity and sharpness only where needed. He also covers dodging and burning techniques, which help create depth by selectively lightening or darkening areas of the image. By using auto-masking, he refines selections with precision, ensuring edits blend seamlessly.
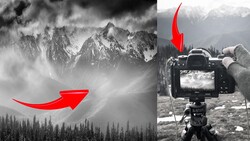
Color control is another major focus. Gugliotta walks through the tone curve and color mixer, showing how to make subtle adjustments that significantly impact the final image. The point color tool offers even more precision, allowing you to select and tweak specific hues within a mask. If a certain area has too much blue or lacks warmth, you can isolate and adjust just that color without affecting the entire image. He also demonstrates how to use radial gradients to enhance lighting direction, creating realistic glow effects that add mood and depth. Check out the video above for the full rundown from Gugliotta.

Join the Fstoppers community for free
-
Post comments and join in the discussions
-
Browse the site ad-free
-
Share your work and get featured in the community
-
Compete in the photo contests for fun and prizes
1 Comment
Great info for all. But to start should go to the main section and use the the 4 little squares click on it and use your pointer over each of the images, which are your cameras jpeg profiles that are not in the raw but if you take a capture in jpeg of each profile you will see the differences of each, the point is at the start you can see some differences that make a start. Next like stated here lens profiles - a little hint if using a non chipped lens most times you can select the maker and find the lens, Lrc generally has the most lens corrections of any other post editing program! Yes also stated the As Shot or the many WB selections you can choose BUT to the left you have the color picker this you can go over your image and under it and under the histogram you will see the % of each color, you can just pick on a white place or a place that should be white but in hard to find just look and the numbers as go over you image and look for all numbers to equal about the same in the 40's, this should be very close to what you saw when you captured it BUT now you become an artist and make your own colors choices but it is a start. All this before you touch a slider. The next thing is the in the center the remove tool and it is the best of all things and is to remove dust spots and objects, many do not clean their sensor or shoot at wide open and never see dust on the sensor but there will be little circles if you use say F8 or higher and a great way to clean your image if something got on your sensor when changing a lens.
I point out all this to begin with because very few mention at the start.