Post-processing is crucial because it helps you translate your vision and personal style into your photographs. Knowing specific editing techniques empowers you to shape images according to the mood and depth you're aiming for.
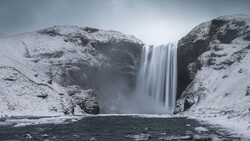
Coming to you from Andy Mumford, this practical video shares valuable masking techniques in Lightroom that help you precisely control how edits affect your photos. Mumford demonstrates the effectiveness of combining sky selections with linear gradients to avoid unnatural transitions. Instead of applying one uniform edit to the sky, intersecting masks let you gently grade brightness changes from the horizon upwards, mimicking natural lighting conditions. Mumford also shows how you can invert selections to target only specific landscape elements, enabling subtle enhancements like contrast adjustments without impacting unrelated areas. These skills let you manage tonal shifts more effectively, elevating the realism and visual interest of your scenes.
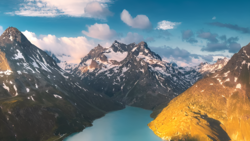
Mumford further explores how strategic darkening of edges or foregrounds can guide a viewer’s eye through your image, adding a sense of depth and direction. By employing linear gradients with care, he creates intentional paths that lead toward key elements or brighter sections of the photo. Rather than rely on Lightroom's default vignettes, Mumford suggests manual vignette creation using radial gradients for greater precision. This method lets you tailor darkness around your subject, preventing unwanted darkening of essential details like water reflections or distant horizons. Such attention to controlled editing refines your images, giving them sophistication without overprocessing.
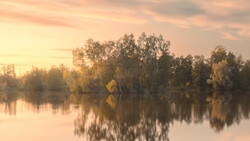
Additionally, Mumford emphasizes enhancing the natural light already present in scenes. He introduces techniques like using negative dehaze to subtly amplify existing light sources, mimicking the soft glow of sunrise or sunset. Adjustments involving slight warming of colors further augment the feeling of natural illumination. His method works particularly well in scenes where hazy or soft lighting conditions already exist, allowing you to deepen atmospheric qualities without creating artificial effects. These adjustments foster a more immersive visual experience for the viewer.
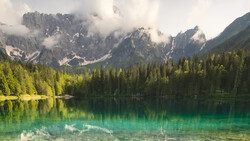
Color management is another focal point in Mumford’s approach. He illustrates how to delicately boost sunrise and sunset colors using Lightroom’s RGB tone curve channels. Rather than simply adjusting the overall temperature slider, which affects the entire image, selectively manipulating red, blue, and green channels provides nuanced control. Mumford shows the precision possible by slightly increasing reds for warmth and adjusting blues to add depth or moodiness, yielding richer, more vibrant skies. Check out the video above for the full rundown from Mumford.


Join the Fstoppers community for free
-
Post comments and join in the discussions
-
Browse the site ad-free
-
Share your work and get featured in the community
-
Compete in the photo contests for fun and prizes
No comments yet