Mastering contrast in your photos can make a significant difference in their impact. Lightroom's masking tools will help you target midtones is a powerful way to enhance overall contrast and make your images stand out.
Coming to you from Christian Möhrle - The Phlog Photography, this detailed video guides you through the process of using contrast to improve your photos. Möhrle begins by merging multiple images into an HDR file, a crucial step when dealing with high-contrast scenes. This technique ensures you capture all the details in both the highlights and shadows, setting a strong foundation for further adjustments.
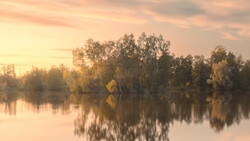
Once the HDR image is ready, Möhrle adjusts the basic settings. He starts by warming up the white balance to introduce a golden hour feel. Lowering the exposure brings out details in the sky, while raising the shadows recovers details in darker areas. These initial tweaks create a balanced image, making it easier to apply more specific adjustments later.
Möhrle then moves on to localized adjustments using Lightroom’s masking tool. He begins with a linear gradient to brighten the foreground, adding clarity for extra punch. Next, he uses a color range mask to enhance the sky, reducing exposure and increasing contrast to make the clouds pop. This step introduces a cool blue tint to the upper part of the sky, enhancing the overall mood of the scene.
Another color range mask targets the green highlights in the center of the image. By dodging these areas, Möhrle makes them brighter and more vibrant, adding depth to the scene. He further enhances the image by using radial and linear gradients, adjusting exposure, temperature, and clarity to fine-tune different areas. These adjustments ensure each part of the photo contributes to a cohesive composition.
The final part of Möhrle’s tutorial focuses on the midtones. Using a luminance range mask, he targets midtones while excluding the darkest shadows and brightest highlights. This selective adjustment allows him to subtly increase contrast. Adding a touch of clarity to the midtones gives the image an extra boost, making it look polished and professional.
To finish the edit, Möhrle applies some color grading, sharpening, and minor transformations. He uses split toning to add warmth to the highlights, enhancing the golden hour effect. Adjusting the calibration settings further pushes the colors, making the image more vibrant. Sharpening ensures that details are crisp, while a few final transformations correct any distortions and clean up sensor spots. Check out the video above for the full rundown from Möhrle.
And if you really want to dive into landscape photography, check out our latest tutorial, "Photographing the World: Japan With Elia Locardi!"


Join the Fstoppers community for free
-
Post comments and join in the discussions
-
Browse the site ad-free
-
Share your work and get featured in the community
-
Compete in the photo contests for fun and prizes
2 Comments
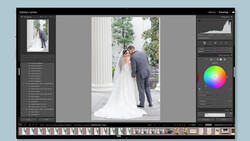
It is so wild how much you can do in Lightroom now. I've been using AI masks (mainly on photos with people) to tweak my subject and background separately. Never before have I really edited my background and subject separately with say the clarity slider, WB, or HSL before now. It makes some of those complex technique reserved for Photoshop almost seem obsolete.
#canceladobe