Enhancing the subject of an image is all about using the right techniques. The key tool here is masks, which allow you to control various elements of your photo with precision.
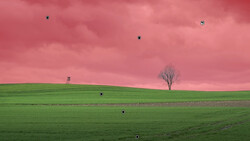
Coming to you from Christian Möhrle - The Phlog Photography, this detailed video showcases the power of masks in Lightroom. To start, Möhrle merges five images into an HDR file, retaining detail in both the highlights and shadows. This step is crucial for achieving a balanced exposure. He then moves to the Basic panel, dropping the highlights to bring out the colors in the sky while gently raising the shadows to avoid an artificial HDR look. Adjusting the blacks further refines the image, ensuring it doesn’t appear overly processed.
The next step involves enhancing the texture of the image. Adding texture sharpens details without affecting clarity or dehaze, which can sometimes be too harsh. A touch of vibrance boosts the overall color without oversaturating the image.
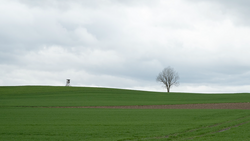
One significant challenge is the blue color cast on the mountains in the background. Möhrle uses a color range mask to target this area precisely. By adjusting the white balance towards the yellow spectrum, he effectively reduces the blue tint. Further, he darkens the mountains by lowering the shadows and blacks, adding contrast and making the subject stand out more.
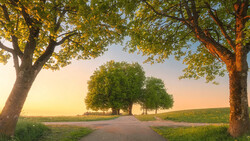
Another useful technique shown is using a linear gradient mask. This helps isolate the foreground, allowing specific adjustments without affecting the rest of the image. Brightening the exposure and increasing the temperature slightly removes any residual bluish color cast in the foreground. This step helps in creating a natural, balanced look.
For the sky, Möhrle uses a simple sky selection mask to bring down the highlights further, enhancing the detail. Adding a linear gradient over the upper part of the image and adjusting the blacks adds contrast, making the upper section more striking. This method ensures the sky complements the subject without overpowering it.
Möhrle then focuses on the subject, using an objects mask to enhance the highlights and whites, matching the church’s color to the sky. This technique ensures harmony in the image’s color palette. A luminance range mask targets the brightest highlights on the subject, making it more prominent against the darker background.
That's just the beginning, so check out the video above for the full rundown from Möhrle.
And if you really want to dive into landscape photography, check out our latest tutorial, "Photographing the World: Japan With Elia Locardi!"

Join the Fstoppers community for free
-
Post comments and join in the discussions
-
Browse the site ad-free
-
Share your work and get featured in the community
-
Compete in the photo contests for fun and prizes
No comments yet