

Efficiently and effectively creating impactful black and white images of people can be tricky, but utilizing ACDSee Photo Studio Ultimate's Light EQ tool, I've whittled my workflow down and kept the results just as high.
It's said that portraiture holds the viewer's attention longer than any other photographic genre. Whether that's true or not generally, it's certainly true for me. One particular type that is especially gripping to me is black and white portraiture, when used sparingly.
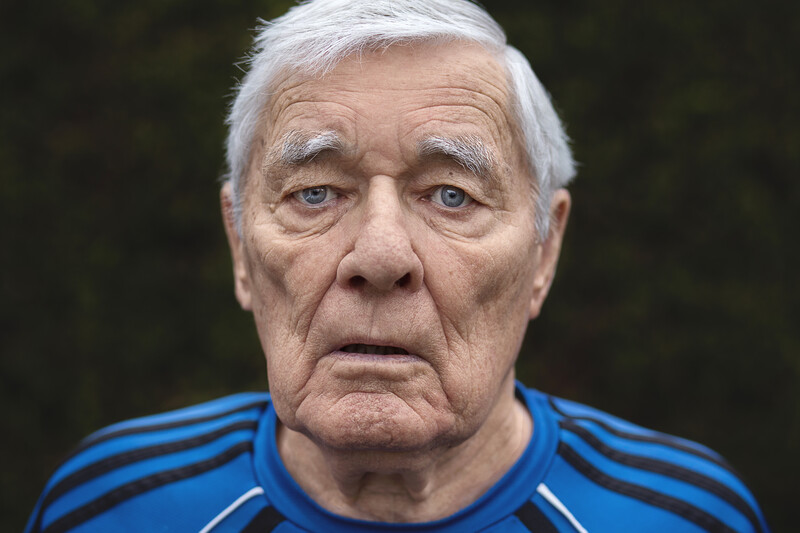
Picking the right portrait for black and white is an art in itself. For me, there has to be a number of aspects present. Firstly, and arguably most importantly, there must be contrast; this is true of all black and white images. Then, there must be a subject that benefits from monochrome. Typically, this will be as a result of rich texture, a film noir aesthetic, or a classic beauty feel. The portrait I chose to edit for this tutorial had a lot of reasons going for it. Firstly, there's a good amount of contrast. Secondly, there's a separation of the subject from the background that's clear. Thirdly, due to the subject's age, there is fantastic texture and detail to be brought out in the skin. Finally, as an aside, bright blue eyes act as their own form of localized contrast, which is always a bonus.
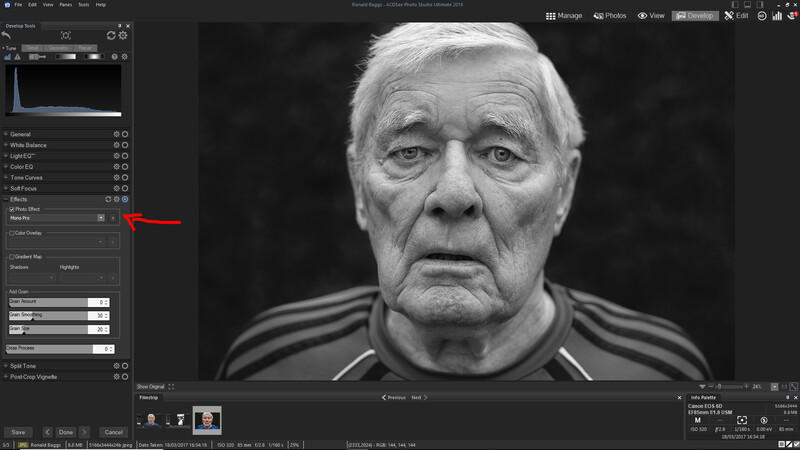
Firstly, locate the portrait you're looking to edit and open the Develop interface. On the left hand side, select Effects. I will use this to transform the image to black and white rather than the dedicated tool in Edit mode, as there is a preset that gets the image close to how I want it in a much shorter period of time.

Next, tick Photo Effect and select Mono Pro. This preset had the best dynamic range and least intrusive conversion, but there are plenty of other options, or of course, you can do it manually.
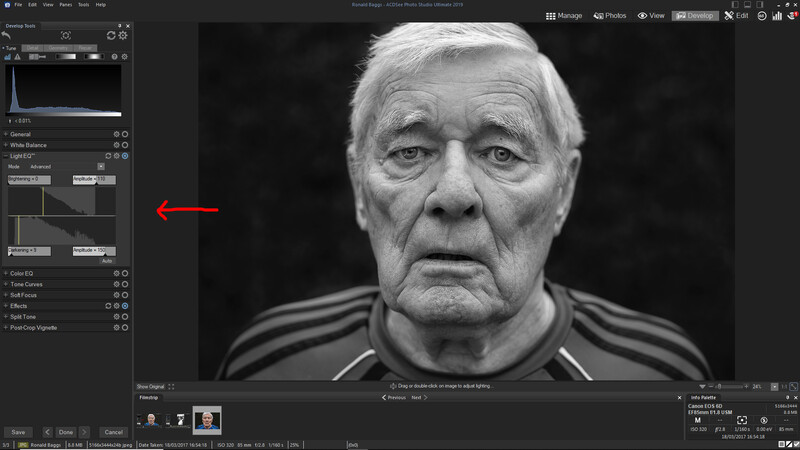
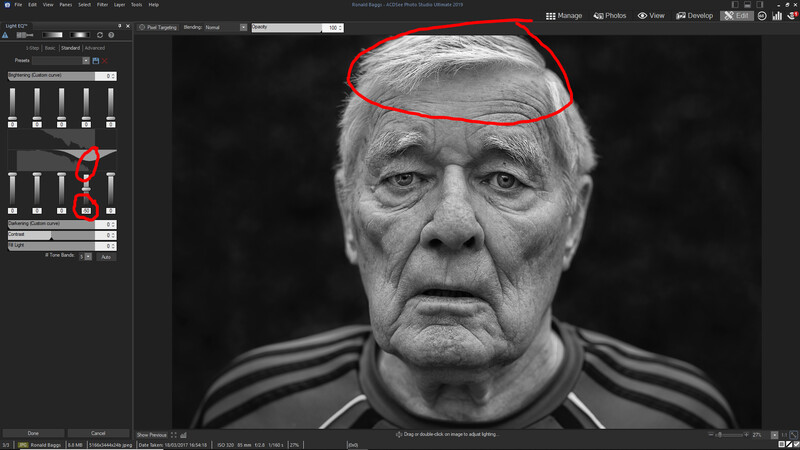
From here, move to Light EQ™ for some wholesale alterations. I really want to bring the shadows down to something a little darker with the intention of making the image more dramatic. I increase the Darkening only slightly and then the Amplitude to my tastes. This does a good job of refining the contrast, but without increasing the highlights on the hair and cheekbones, which would sap the somber tone. One area that is still bothering me, however, is the dreamy feel. ACDSee has a tool that can fix that simply. So now, we move over to the Edit tool.
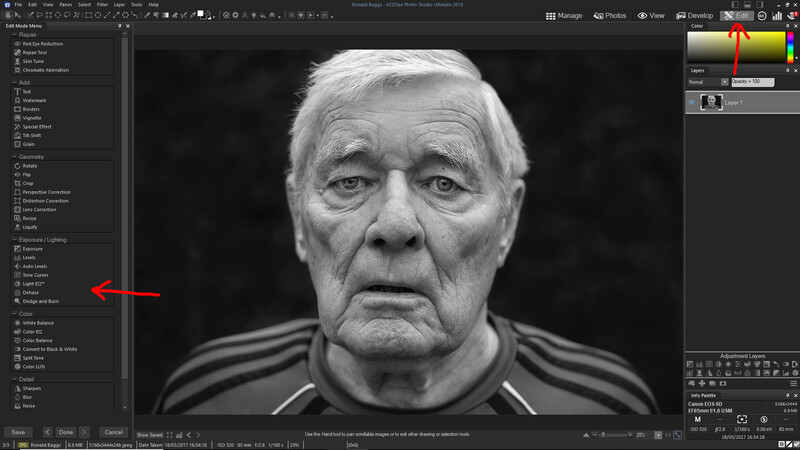
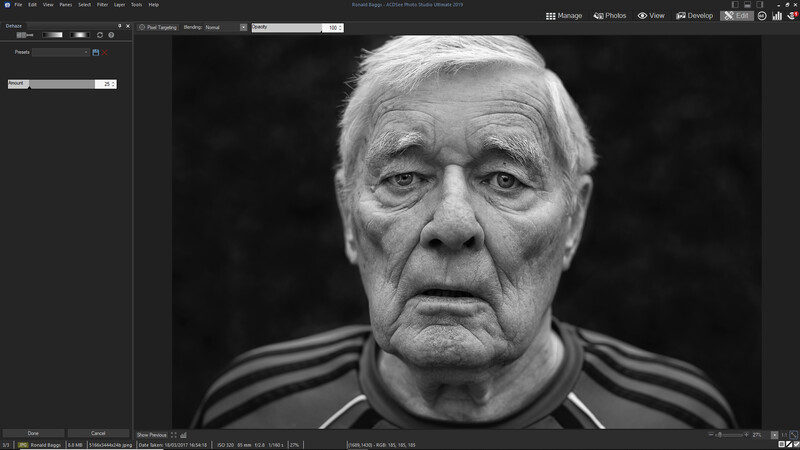
The Dehaze tool is perfect to bring forward the grittiness I want. After clicking to the Edit tool in the top right, select Dehaze. Adjust the slider to fit your tastes, but as with every adjustment I make, less is more.
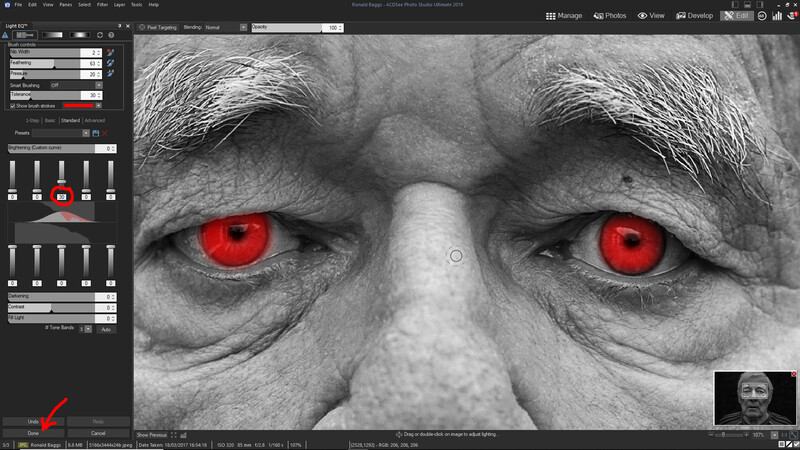
With that resolved, there is still a distracting element for me: the hair. Being as it is a light silver, it's reflecting light more than any other part of the image, and it draws my eye. So, I hop back into Light EQ™ and make more localized adjustments. Luckily, the fourth slider of the darkening panel has almost a complete monopoly on the hair's highlights, and lowering that fixes the problem. If this doesn't achieve what you want with the accuracy you desire, you can also alt/option + left click on the relevant area, and it will adjust based on that specific value. This is particularly great in colored images, but works well with black and white if you mask out any unwanted changes.
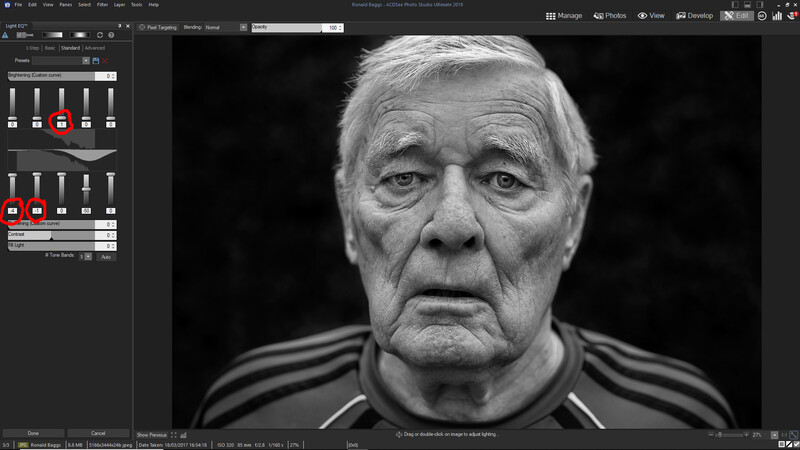
Next, I want to make some more fine tuning to the overall image's levels, and so in the Edit tool's Light EQ™, I make extremely subtle changes. If you're too heavy-handed on these sliders, you will create artifacts and damage the quality of the final image.
Now, we get to the real art of separating a quick conversion to black and white from a careful creation. Select the brush icon at the top of the left hand panel, and adjust the size and pressure. Next, paint along some shadows you want to be darker, and then, play with the sliders until it looks how you would like. Then, continue to paint over every shadow you want to bring out further. I zoom in to around 100 percent and carefully paint over the lines and shadows of the face with low brush pressure. High pressure might feel quicker, but it's sloppy and will show in the final image, with shadows spilling into your midtones.
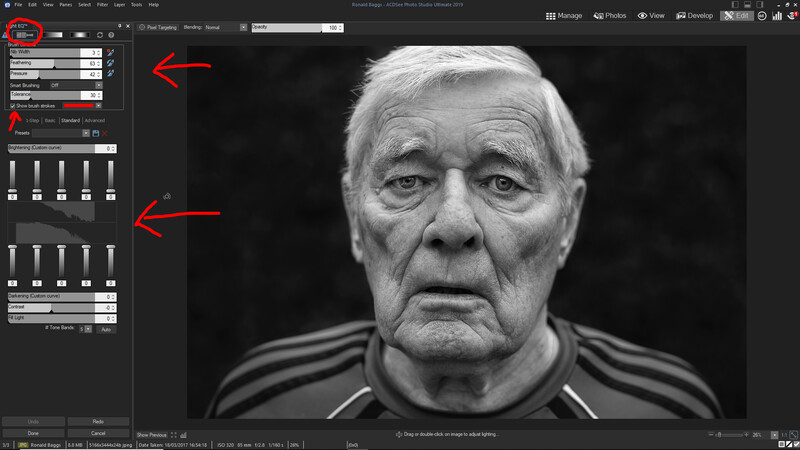
As you work, tick "Show brush strokes" on and off to see which areas you have covered and which you have missed. I like to go over all prominent lines and wrinkles, the pupils of the eye, and the outer ring of the iris. Again, don't go too far with this. As you can see, I only adjusted one slider by -4.
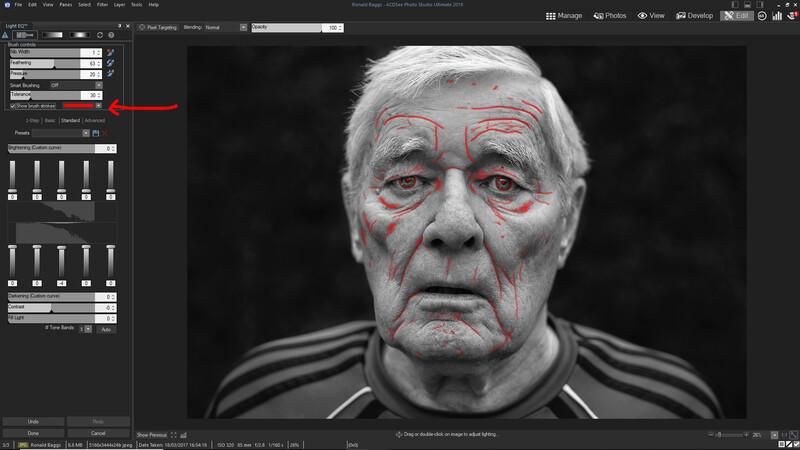
Once you're happy, click Done in the bottom left and then reopen Light EQ™. Now, I will paint over midtones and highlights I want to brighten. This image is intentionally darker than most, and so, I'm satisfied with the skin as it is. Increasing the highlights above the cheekbones wouldn't make sense with the mood of the image. My only concern is that those piercing ice blue eyes have been lost in the black and white conversion. To rectify this, I raise their brightness so that they catch the viewer's attention. This is done using the same brush technique as was used in the shadows. When you're happy, click Done.
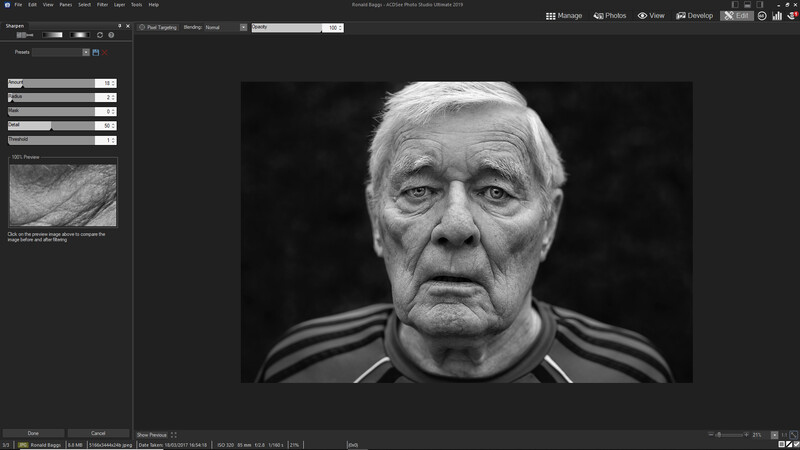
Finally, the image is a little soft for my tastes. In the Edit tool, I click Sharpen and then add a small dose of sharpening to really make the final image pop, but being careful not to overcook it. If the preview window in the left hand panel isn't clear enough, zoom in to a location in the image that has a lot of contrast. The eyes are usually perfect, with shadows, midtones, and highlights present. Ensure that you're not getting any artifacts or unwanted grain and noise.
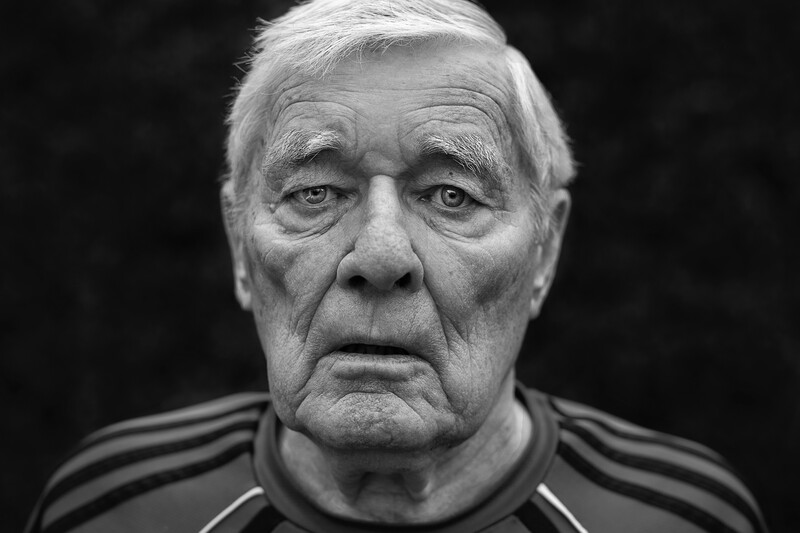
When you're happy, export the image, and go and get it printed! I love portraits of the aesthetically fortunate, but the images that stay with me are the ones with character and intrigue. That is perfectly complemented by a well-executed black and white conversion.
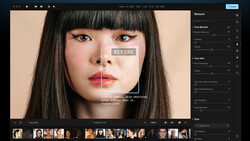
Here is the before and after of this process:
Try ACDSee Photo Studio Ultimate 2019 yourself by clicking here.
Let's see your favorite black and white portraits. Post them in the comments below.


4 Comments
really good & very detailed tutorial.. thank you for sharing Robert..
I use ACDsee too, I play much with the color sliders in the color EQ section to get the tone I wanted, and use burn & dodge in the edit tab.. simple but effective (for me)
There's a lot of freedom in how you achieve results in ACDSee which I really appreciate. I always find myself going back to Light EQ just as it's such a powerful tool.
Would it kill the author to state this is a Windows only product?