
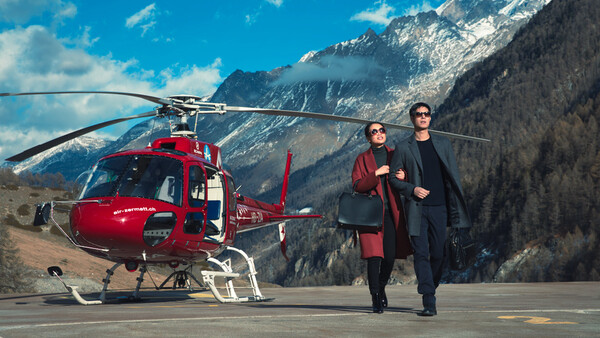
Editing a picture is all about making the most out of what your sensor has captured to make your creative vision come to life. How you see a scene will differ from what others, or even your camera, see at the exact same time and place. Adjusting your file in post-production is thus critical to share with others what you saw with your eyes and mind. In this article, I’ll show you one way to edit your images quickly using ACDSee Ultimate 10. You’ll see how to give a cinematic feel to your shots and also how to edit them in batch to save time.
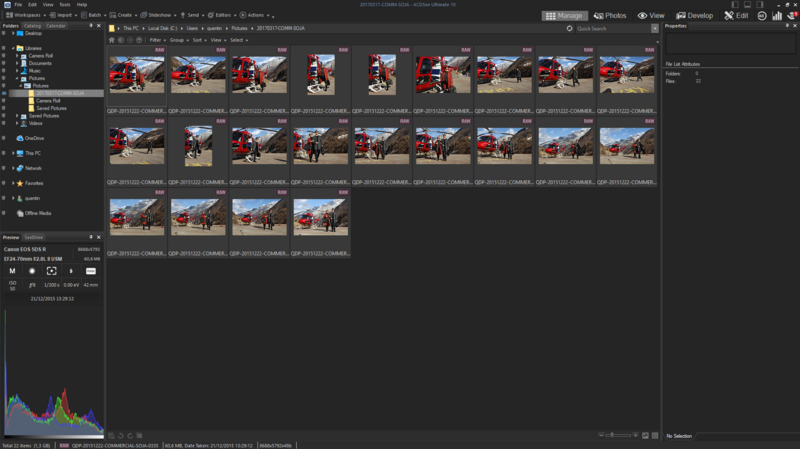
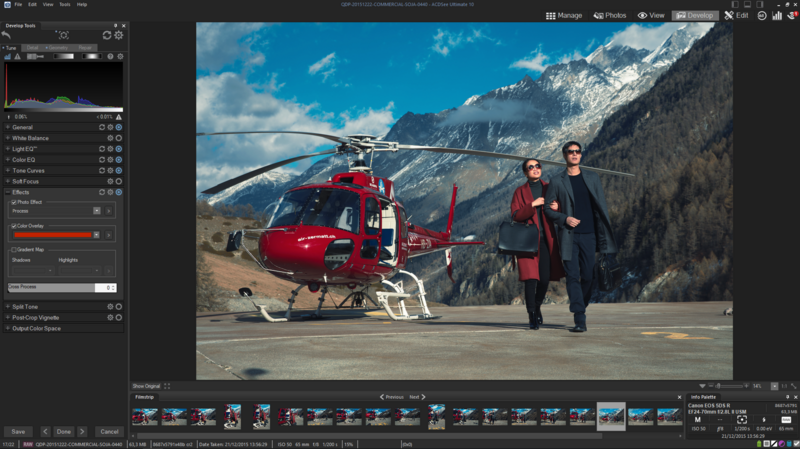
Starting with a bunch of files that were shot in the same conditions, I’m picking one that I like and represent best the series before switching to the Develop module.
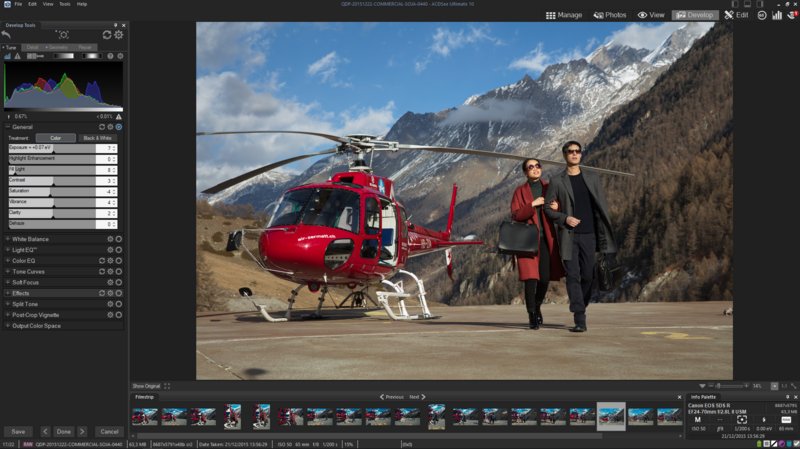
If you read my recent portrait retouching using ACDSee Ultimate 10 tutorial, then you’ll notice a few similarities such as the fact that I’m following the tools order to edit my image. The user interface is well designed enough that I don't have to jump around panels. By following the order, I make sure that I use every tool that I could to improve my photograph. So first, I start by adjusting exposure and then the general settings such as contrast, fill light, saturation, and vibrance. The changes made here are not critical and copying the values on your images wouldn’t make sense. My goal is simply to make the picture look properly exposed with enough contrast while retaining details in both the shadows and highlights. Not all images require such adjustments.
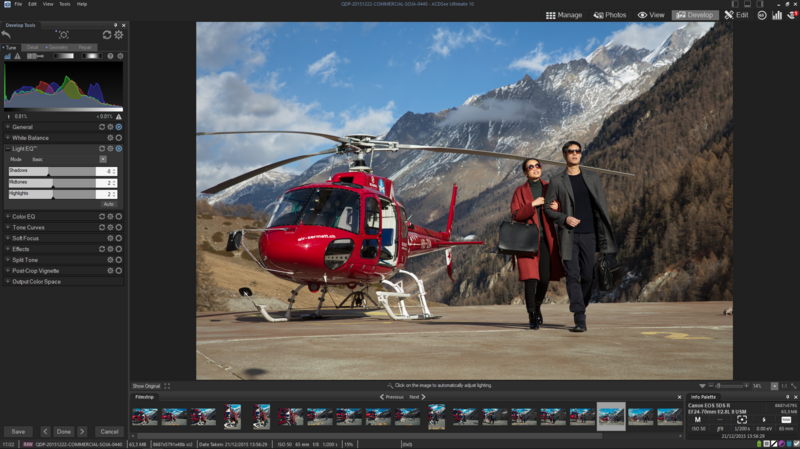
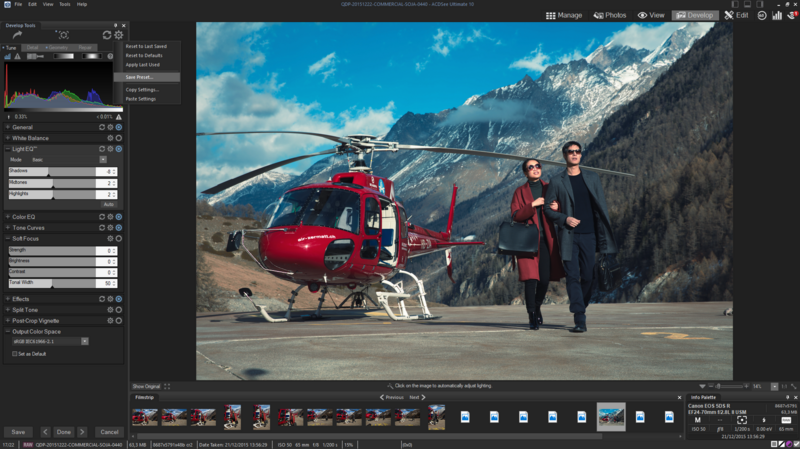
I then skip the white balance tool as it was already set in camera at the time of the capture. But shall you need to color correct your image, be sure to start there and then adjust your exposure if needed afterward – colors can trick your eyes. Once exposure and white balance are set, it’s time to move on to the fantastic Light EQ tool. In the previous tutorial, I didn’t use the Basic layout. However, this time I don’t need to refine my image’s tons extensively, thus having only three sliders makes my work faster and easier.
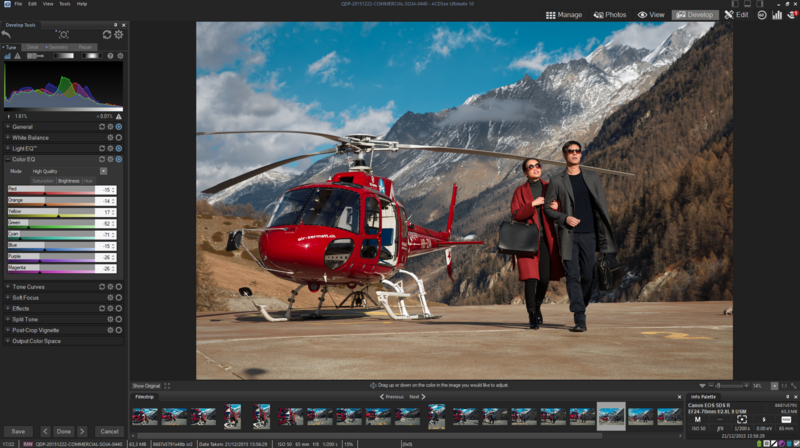
The next tool on the list is the Color EQ which allows us to tweak colors to our liking. My goal here is to restrict my image to mostly yellows and blues. To make this happen, I started by using the hue tab and changed the sliders accordingly.

You may notice the cyan slider being pushed towards the green. That’s because in this case, the cyan areas didn’t look good when pushed to the blues. I then desaturated them using the Saturation tab to make it less visible.

Finally, I adjusted the color brightness in the middle tab. I started by making the reds and blues darker to make them look deeper and then brightened up the yellows to make my models’ skin standout a bit more.
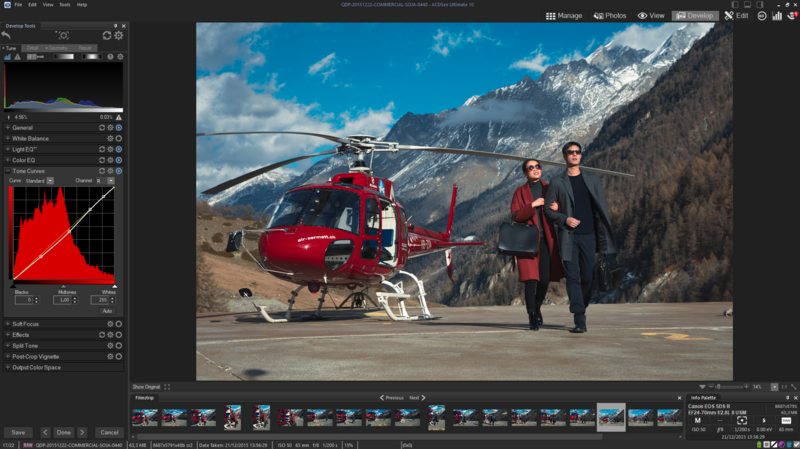
Now comes my favorite part when editing or retouching: playing with curves. I started by tweaking the contrast with the RGB curve. To get that cinematic look and more details in the darks, I lifted my black point. However, to maintain my contrast, I pushed down the shadows and lifted up the highlights a bit.

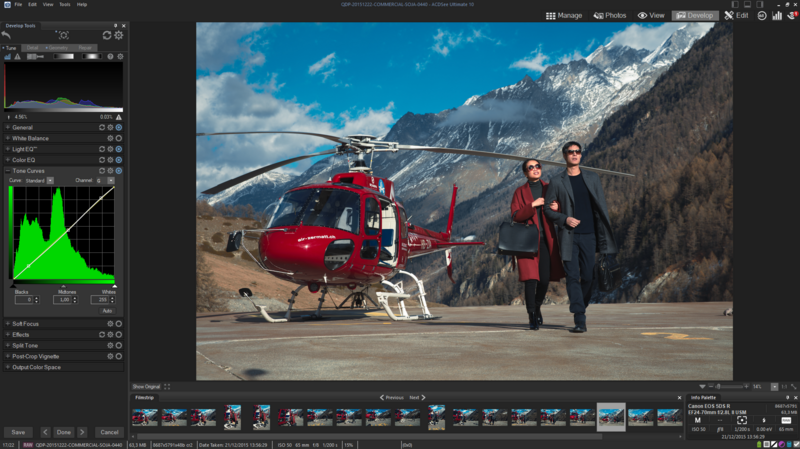
Then I adjusted the color curves, starting with the red. I removed some red by pulling the curve down and thus bringing up the cyan in the image.
The following adjustment is extremely subtle and one that should be when looking for a cinematic look. The green curve is slightly pushed in the highlights and pulled down in the shadows so that my skin tones look richer and more natural. But if the adjustment is too strong, then the overall cinematic feel will look strange.
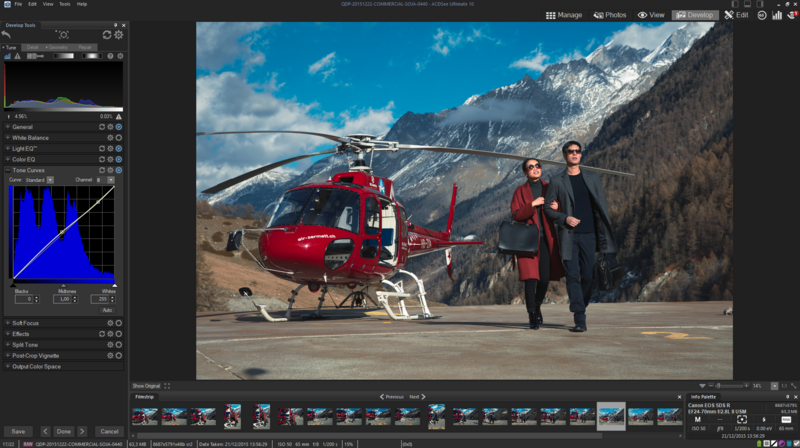
Last but not least, the blue curve. Be careful when playing with this as when adding too much blue, portraits have a tendency to look overly red. You may need to switch back and forth between the different curves until you get the exact look you want.
The last polishing touch I gave to the image was by using the Effects tool. The Effects work similarly to filters. You can try different presets with the Photo Effect drop-down menu and then adjust its opacity to get the perfect look. In this case, the Process filter matched my wish for a cinematic and cold look perfectly. I also added a bit of red in the Color Overlay in Soft Light mode to boost my contrast slightly. If you’re wondering why red, that’s just because it’s cyan’s complementary color.
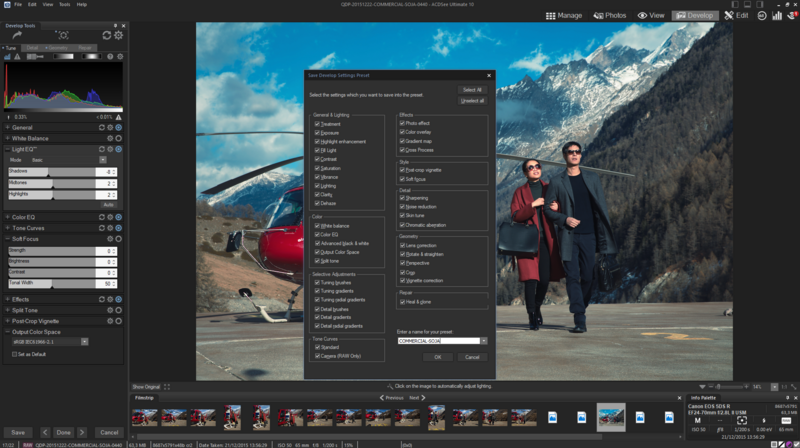
Now that my image is adjusted, I can create a preset by clicking the Options button in the Develop tools panel and then choosing Save Preset.
Then comes the time to select the settings we’d like to have so that when we apply the preset to other images, those same settings are being implemented. Be careful when picking adjustments such as white balance, exposure, contrast, or fill light. A preset will override your previous settings, and thus it may not be ideal to have general settings being selected. Here, I left them active as the preset will be used only for this set of images.
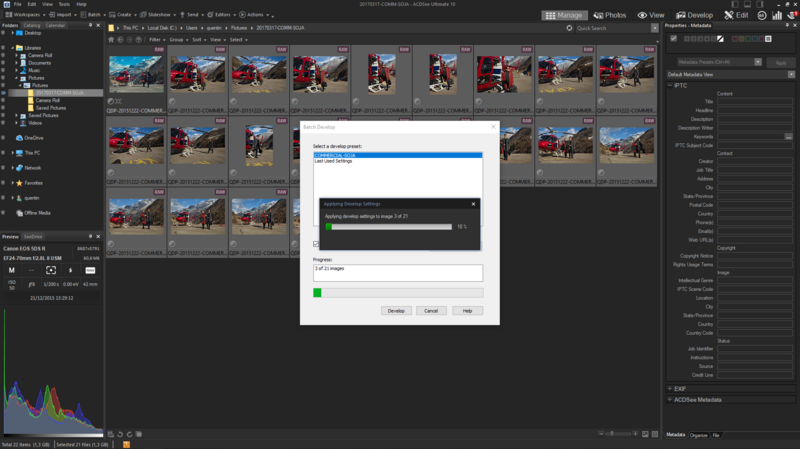
Applying the preset to a series is incredibly easy. Go back to the Manage module and select the image you’d like to alter. Then right click, choose Batch Process, and then Batch Develop to open the window allowing you to select the preset you’d like to apply.
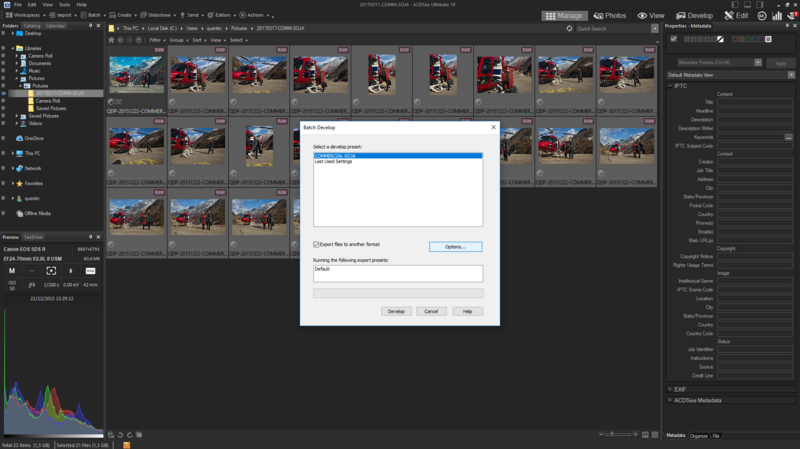
Select the preset, press Develop, and you can leave ACDSee Ultimate 10 do the work for you! Note that if you need or prefer working with the Edit module instead of the Develop module, you can also batch process adjustments achieved with it.
Batch processing and presets are huge time savers in any photographers’ workflow. ACDSee Ultimate 10 makes it clear by letting its users batch process both the Edit and Develop changes. When working on a large set of images or being pressed by a deadline, any ways to save a bit of time are always welcome.


Join the Fstoppers community for free
-
Post comments and join in the discussions
-
Browse the site ad-free
-
Share your work and get featured in the community
-
Compete in the photo contests for fun and prizes
1 Comment
Thank you Quentin...does Acdsee support support pen pressure on wacom...mine doesn't and the bottons on the pen don't work?? Merci je ne trouve pas de solution sur le site d'Acdsee..devrais-je installer des drivers moins recent?