
Nobody wants a noisy photo, that's why in this tutorial you'll find out how to remove high ISO noise fast using some helpful tools in Lightroom.
Although cameras have come a long way in the past few years there's one thing that'll guarantee a noisy shot every time: high ISO sensitivity. When you can't open up the aperture any wider, can't push the shutter speed any longer, and can't add any more light it's time to crank up that ISO to get a decent exposure.
DSLR and mirrorless cameras are brilliant at handling high ISO with relatively little ISO noise, but for those times when you need to turn it up to 11 but are worried about the results, here's a helpful little technique that you can use in Lightroom Classic to remove the pesky grain whilst maintaining detail in all the right places. I'm going to give you an example with a starting image shot at ISO 12,800!
Zoom in for a Good Look
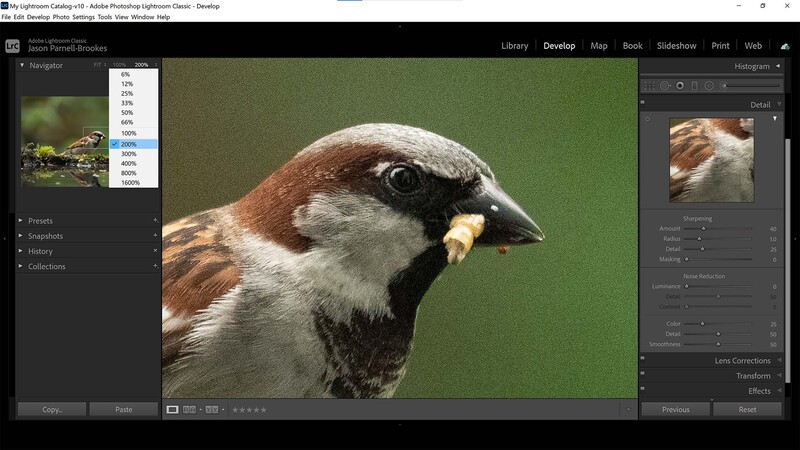
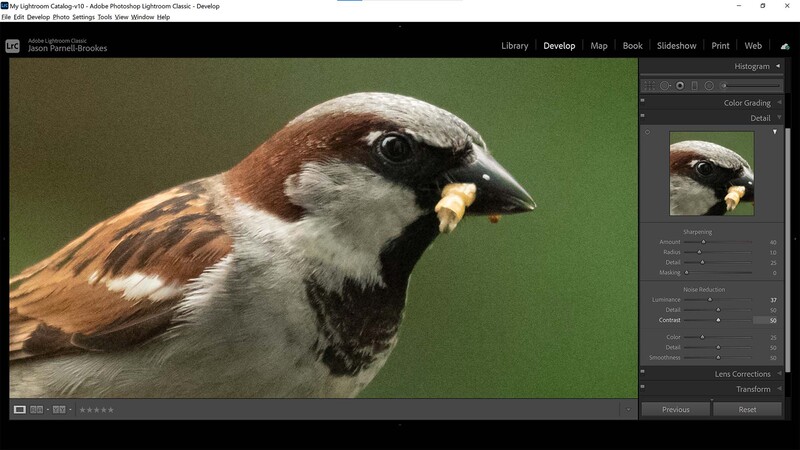
Before I can start working on the image properly I like to zoom in to fill the screen with a close look at my photo. To do this I set my zoom amount to either 100 or 200% depending on the size of the subject in my frame by going to the drop-down menu in the top-left of the window, next to the Navigator. That way, I can just single-click on the photo with my cursor and the image will bounce from Fit (filling the image window with the entire photo) and the extreme zoom. I decided to work on my image at 200% zoom because the male house sparrow in this shot was quite small and I wanted to concentrate on details around his head.
Introducing the Luminance Slider
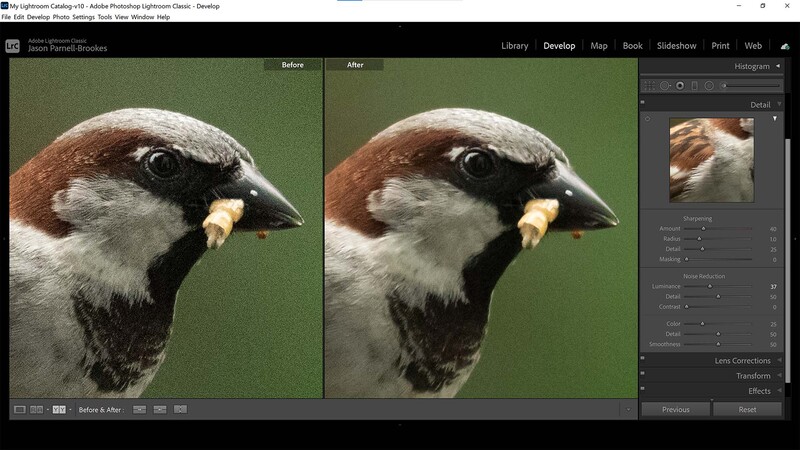
In the Develop module, I scrolled down to the Detail panel and navigated to the Noise Reduction section. Here I have a variety of sliders at my disposal for removing noise and artifacts in the photograph. The first slider (and the one that makes the biggest impact) is the Luminance slider. I increased the Luminance slider to +37 which did a good job at removing the fine high ISO noise.
The amount of Luminance you'll need to use will depend on the intensity of the noise in your photo. It's tempting to whack the slider right up to 100 (maximum) but avoid this if you can because there are some more steps to take to make things more accurate and realistic-looking.
Increase the Detail
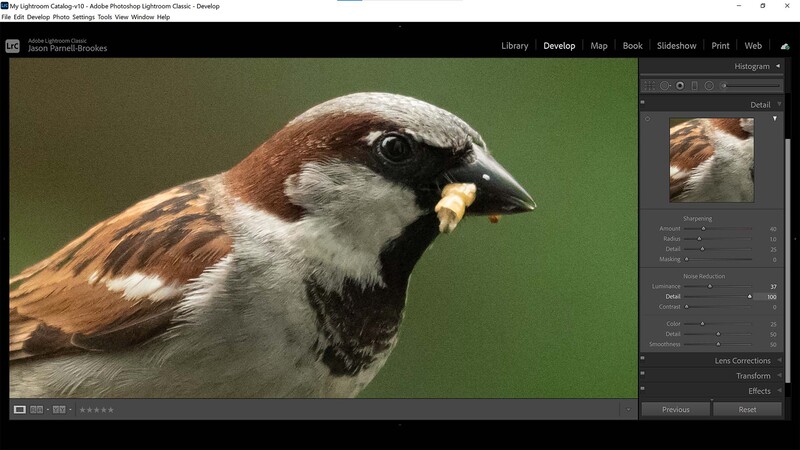
Right underneath the Luminance slider, I have the Detail slider. The best way to describe the Detail slider is that it reintroduces the fine textural details to the photo without undoing all the good work of the Luminance slider. I've boosted it up to 100 here to show you exactly how it works. The eye and head feathers are much more detailed now, but it has also affected the rest of the surrounding green background.
Back It off a Touch

I decided to drop the Detail slider back down to +50 because I wasn't keen on the added texture in the grainy green background or on some of the bird's feathers. Instead, there's a more selective way to apply the detail I'm looking for in this photo — something that'll really help regain some of that lost sharpness.
Boost Contrast Slider
I don't use the Contrast slider in the Noise Reduction section all that often, but I'm bringing it into the mix here because I felt as if the noise reduction I've applied so far has both removed a little sharpness from my male house sparrow, and taken away some of the dimensionality to the bird with some textures being glazed over. The Contrast slider helps to counteract this a little by refining the noise removal process over the areas between brightness and darkness.
Utilize the Adjustment Brush
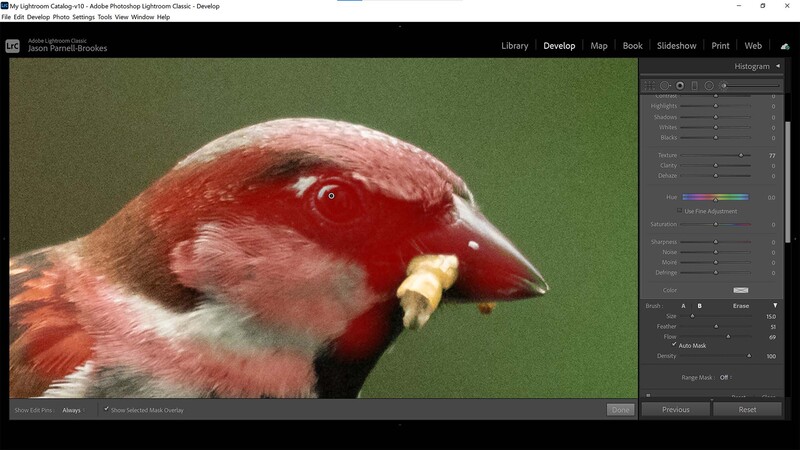
It's time to get picky. Head up to the Adjustment Brush and resize your brush so that you can paint over some fine details such as the eye and face. I set a medium Feather because I wanted the brush to be soft enough that it wasn't obvious exactly where I painted. I also ticked the Show Selected Mask Overlay button (keyboard shortcut O) so that I could see where I was painting.
Now, it's tempting to think that you should just turn up the Sharpness slider at this point. But please, don't! If you want to go down that route you'll just be undoing everything you refined in the noise removal process. Instead, there's a better tool to use: the Texture slider. I've boosted Texture right up to +77 and made a selection over only the most important areas that I wished to reintroduce detail to. Namely, the eyes, beak, and fine feathers that were all captured relatively sharply in the original image.
Add Detail Exactly Where You Want It
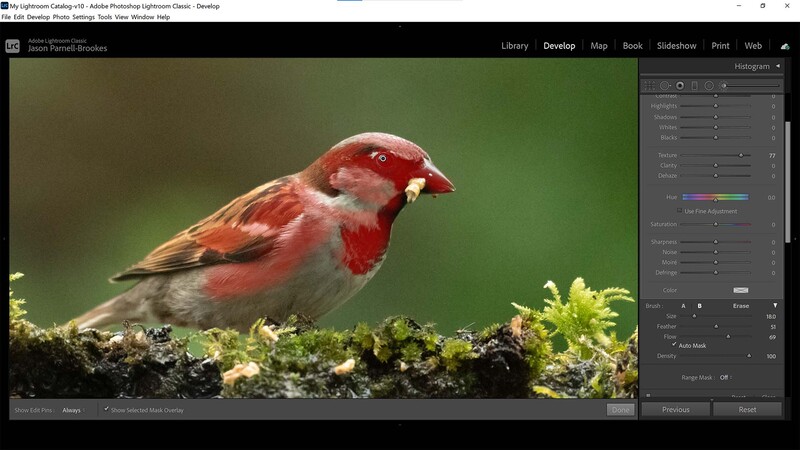
It's a good idea to take a step back and re-analyze the photo at this point. I like to zoom out and take in my subject as a whole before committing the brush edits. I noticed that there are some portions of feathers on the sparrow's body and wing that are sharp as well, so I continued painting over these areas to selectively improve the detail in those areas. This is an excellent way of keeping detail because you're not affecting the whole image, and portions that you want to keep smooth and noise-free (such as my green background here) will stay as such.
If you'd like to learn how to use Adobe Lightroom more efficiently on any device, make sure to check out our Mastering Adobe Lightroom course with Pye Jirsa. The content Pye covers will appeal to every level of photographer and will save you an incredible amount of time on your image editing. Save 15% by using "ARTICLE" at checkout.


Join the Fstoppers community for free
-
Post comments and join in the discussions
-
Browse the site ad-free
-
Share your work and get featured in the community
-
Compete in the photo contests for fun and prizes
13 Comments
For my part I've switched from using LR's noise reduction to using Topaz Lab's noise reduction tool. It works exceedingly well at NR while retaining as much detail as possible. My workflow is to perform lens corrections on import, then edit in Photoshop. Steps in PS include Topaz's NR first, then in a new layer, apply contrast correction using ALCE plugin (another amazing tool), then a final layers in Camera Raw for all other adjustments. Sometimes I'll mask the image background or foreground or both to apply changes in a localized fashion. But I digress. My point is that I used to use LR's NR but found Topaz's to be far better - but my experience may differ from others.
Well done article. Give this guy a raise.
Thank you ! great tips !
Good point on the contrast, I will be throwing that into the mix.
After LR I always take an image into PS for things LR can't do. Since I like contrasty photos I introduce more noise than most so often while removing it after the fact, if the image is worth the effort I'll do some selective blurring with a 10pt brush on dark areas and sharping in others, often at 2 or 3 hundred %.
To the author - you might want to read/view some tutorials on the use of the masking slider in the Sharpening section.
Came here to say the same thing. Showing the mask is a game-changer. Jason Parnell-Brookes should take a look at that.
That's doing it the hard way. DxO PhotoLab 4 Elite's DeepPRIME noise reduction is one-click simple and delivers amazing results. All my old noisy images can now be printed at least one full size bigger. And, if you batch process hundreds of images at a time (event/wedding photographers), PhotoLab saves hours and hours of image-by-image futzing with brushes and sliders.
DxO does a great job with removing chroma noise and preserving colours but the alterations it does to some images is questionable. Audubon has banned AI noise reduction for their photo contest. Also not a fan of DxO's colour processing and tonal adjustments which are inferior to Lightroom.
I completely agree with Robert Oslin and have a similar experience using Capture One (C1) which probably is nowhere near as as good as Lightroom (LR) when it comes to Noise Reduction (NR). Even so I can get some decent results using C1 but to match LR's capabilities I've found that I needed to use layers / masks in C1 to apply varying degrees of NR, but this is way too cumbersome.
Not only does Topaz take away the hassle of applying NR it seems to apply just the right amount of sharpness to created the perfect balance between NR, 'Sharpness' and 'Detail' retention and the best bit is that it integrates very well with the main RAW Processors and Photo Editors on the market i.e. LR, PS, C1, Affinity ... something that DxO sadly can't match IMO as it's integrated into the RAW Processor and not really usable as a plugin.
Final thoughts: Lightroom folks may argue that LR provides sufficient NR capabilities and I won't argue with that. At the end of the day Topaz is a worthy plugin and produces good results and it integrates well with many people's workflow from what I can tell. The only way to know for sure which works better for you is to suck it and see. Personally I recommend trying out Topaz to anyone and to make your own personal judgement call.
I use Lightroom and Topaz; LR alone is good enough for low-noise captures, especially when using the masking slider in the sharpening section so as not to increase apparent noise. Topaz is most useful for the higher-noise images.
Yep I suspected this and hence I worded my comment in such manner.
IMO It's a real shame that the C1 NR capabilities are not as good as LR, nor that I got a frosty response from Adobe when I contacted them back at the end of last year to inquire about why their then offer was not available for peeps who wanted to trial their product for a few days first.
Even though I am against the whole annual subscription model I was contemplating buying into the Adobe package, which isn't bad value when you look at astronomic perpetual license fee Phase One charges for C1, and I probably would have gone ahead if it wasn't for the poor response I got from their representative. Shame really as I suspect I may very well have enjoyed LR as much if not more than I do C1.
.
In any case C1's NR capabilities on its own are not as good as I was hoping and I tend to reach for Topaz more often than I would like.
.
Something Phase One IMO would do well to address in future although I suspect they can't be arsed given that they mainly seem to cater for studio & experienced photographers who have less need for NR capabilities.
"Nobody wants a noisy photo,"
Ahem, personal taste. Loads of people not only like grian/noise, but deliberately use it for effect.
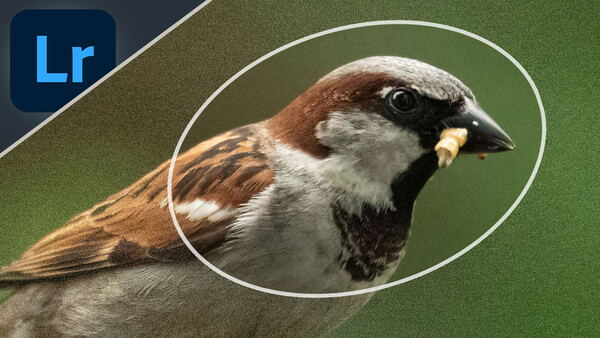
I'd have thought fewer folk want an image with smeary details I'd say. Which is what the circled 'improved' section at top shows.
Heck adding a smidge of grain to some digital particularly small sensor images can add some nice texture and enhave apparent detail. Removing it... hmmm, yet to see it look better - usually more plasticky and digital. Which is different from a high quality image that is not grainy to start with.
Excellent Tutorial Jason