As photographers, we have but one raw material to work with: light. You will hear this time and time again, you need to learn to see that light and learn how your camera sees it. Knowing what to look for is just the beginning. Figuring out how to use light, or more importantly how you will use it, is the larger part of your photographic journey. Today, I’d like to run you through five types of light I love and use often.
Backlight
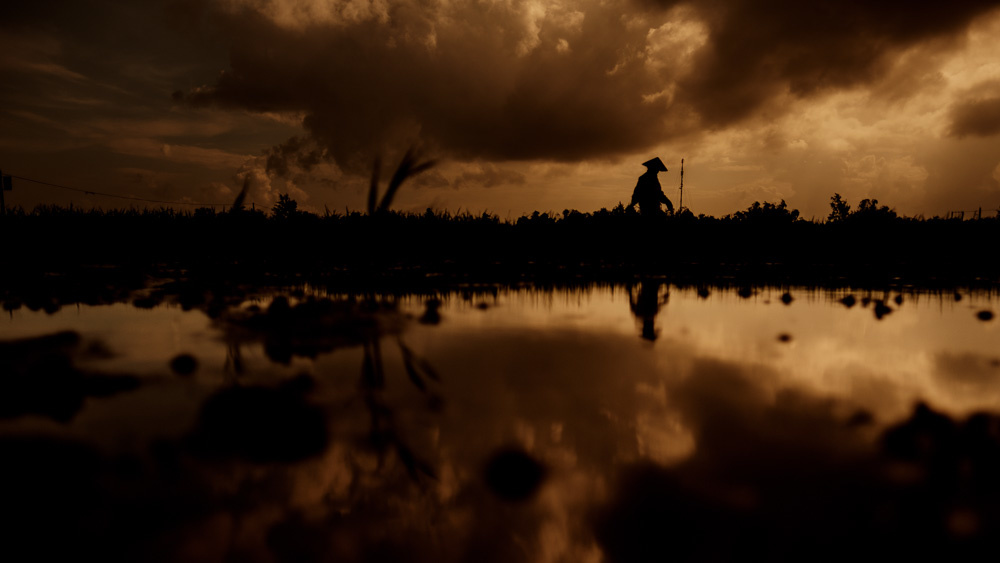
Backlight is a favorite of many photographers. It allows us to create various moods depending on atmospheric conditions and choice of exposure and framing. The only thing that all forms of backlight share, as the name suggests, is that the light source is behind the subject. Shooting this type of light presents its own set of challenges and each lens and camera will react differently. Here are a few things you can try.
Maybe one of the easiest ways to use backlight is to create silhouettes. With a strong backlight, this is easy. Simply place your subject between yourself and the light then expose for the background. If the light behind your subject is strong and there is no other illumination on it, you will end up with a black silhouette. One of your main concerns when photographing a silhouette is overlap. You want to be sure that your subject does not overlap with anything that might detract from its shape. This may cause the subject not to read well.

Compose so that the sun is just outside of your frame and expose for your subject. Try shooting this shot with a 50mm or 85mm prime and a wide open aperture like f/1.4 or f/1.8. You will achieve a softer look than normal due to the light flaring into the lens and reducing contrast. Different lenses will react differently to this type of composition, so experiment with each of your lenses.
Next, place the sun in your frame, allowing it to just peak out from behind another object. Stop your lens down significantly, to something like f/11 or f/16. This will create a star shape from the light of the sun and usually a lot of flare artifacts. Again, lenses all react differently to this. Try a wide angle lens like a 24mm and see what happens.
Finally, you can use this technique to play with atmospheric conditions like smoke, clouds, or dust. These things become illuminated when they are back lit and start to glow. This can create a lot of mood in your images and is one of my favorite ways to use back light. The warm glow of sunset lighting up the dust and smoke on the plains of Bagan in Myanmar is one famous example of this that attracts photographers from all over the world.

Top Light
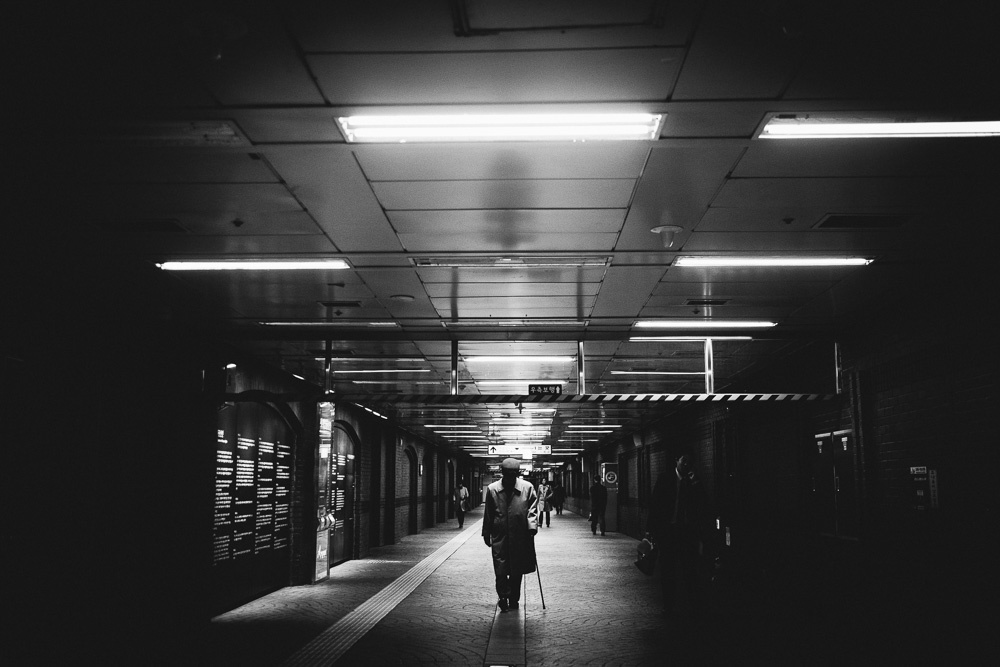
This one may not be useful for all subjects all the time, but it can create very dramatic scenes. A harsh beam of light coming from directly above your subject can make for an air of mystery or darkness that a more flattering light will not. I find it very useful when I am aiming to create a deeper, darker mood than my usual work. You can find this light when the sun is directly above (think alleyways with a slash of sun coming in) or when only ceiling lights are present (as with my image in the Seoul metro system below).

Window Light
Window light is another love of many photographers. It can be wonderful when photographing portraits, food, still life, or just about anything really. The soft yet directional quality of window light means that it crafts a very three-dimensional look right from the get-go. A window around eye-height for a portrait can produce a beautifully flattering portrait reminiscent of old paintings or illuminate food for a scrumptious looking dish with vibrant colors. The key when using this type of light is to expose for the highlights of what you are shooting to maintain the depth of the light. If you find your shadows going too dark, simply add in a reflector for fill opposite the window.

Door/Awning Light
This is one of my favorites. Once learned, this type of light becomes such an asset when out on location. The shade just inside a door, or under an awning can be beautiful at any time of day. However, it is extremely useful in the middle of the day when the sun is high. It gives you a gorgeous soft light that can be used in many different ways. The main reason I separate this from window light is that lighting coming inside a door tends to bounce off the ground as well with nothing to block it. This fills in shadows from the bottom as well, creating a glowing quality.

Hard Directional Light
This is something that took me some time to come to grips with and a little encouragement from my friend Fer Juaristi to get me actually using it. Light coming from an angle without any diffusion can produce beautifully defined shadows and only illuminate patches of a scene if you compose carefully. Exposing for the highlights and not letting anything blow out can lead to dramatic yet aesthetically pleasing results. By allowing the shadows cast to be a part of your scene, you can also include additional points of interest. Take the image below, for example. Early morning sun resulted in lovely shadows of the passers-by on this wall in Hoi An, Vietnam. I got my exposure just where I wanted it and then waited for the right character to enter my scene. The nearby trees were also used for additional visual interest.

Bonus: Sunrise/Sunset on a Stormy Day
For us here in Seoul, this is a rare light to see, but for those of you in regions with clear air and lots of clouds, keep an eye out for this one. When you have a sky covered in dramatic clouds, keep an eye out for breaks in those that will allow sunset light to softly illuminate your subject. Walk around this light; shoot it from many angles. How does it illuminate your foreground? What happens to the parts of the image the warm glow does not hit? Do you prefer it when this light is strong and bright, or when it too is filtered by a light layer of clouds?

In Conclusion
These are just a few types of light that I love and use. Of course, you can also use flash or reflectors to augment your light. However, these basics are useful to experiment with and learn to use. What is your favorite type of light? How do you use it?


Actually Dylan, I have no favourite - since I regard photograph as a study of light in all its forms and variations, each type of light is a challenge, and stimulates my creative urges. I do love available light in night shots (except sodium vapour lights - they basically force you to go B&W, because of their narrow colour gamut). The harsh sunlight of the middle part of the day that you left behind in Australia is a challenge, and often sparks my interest - especially with the shade effects it can produce. Late afternoon is fascinating - most 'togs turn their attention eventually to sunsets, so they only look west - but as you say, straight up above can also be interesting, particularly at that time of day - so can north, east, and south, although most people don't seem to turn on their imaginations to look around and explore those alternatives.
Great photos and article,nice balance between technical and aesthetic suggestions.
thanks for the article! I personally enjoy working with backlight and window light.
Door/Awning Light this one is my favorite too. I use this light when I do portraits photography.
Problem with lighting you can decide with help ring llights. I strongly advice it for make-up artists and photographers. Every professional vlogger uses a ring flash for taking stunning and eye-catching videos and photos. This kind of flash provides a lot of advantages and makes any photo or video unique and flawless. We have picked the best 5 ring lights so that you can become a top vlogger!
"A bright and quality ring lamp is an indispensable tool for creators from the beauty industry! Make better photos, use a lamp to work with a client - all this will help you raise your income."
https://www.bestadvisor.com/ring-lights