
The raw processing world often seems restricted to Capture One, Lightroom, and Camera Raw. However, these three are far from being alone. One alternative is called Alien Skin Exposure X2, and while you may have heard of it as a Photoshop plugin, it’s also a standalone app able to edit your raw files. Despite being younger than the other options, it offers a broad palette of features, and I would almost dare say it took most of the best functionalities found on the market to bring to life a very appealing photo editing software. After a few weeks working with it, here’s my review and why you should perhaps give it a try too!
Interface
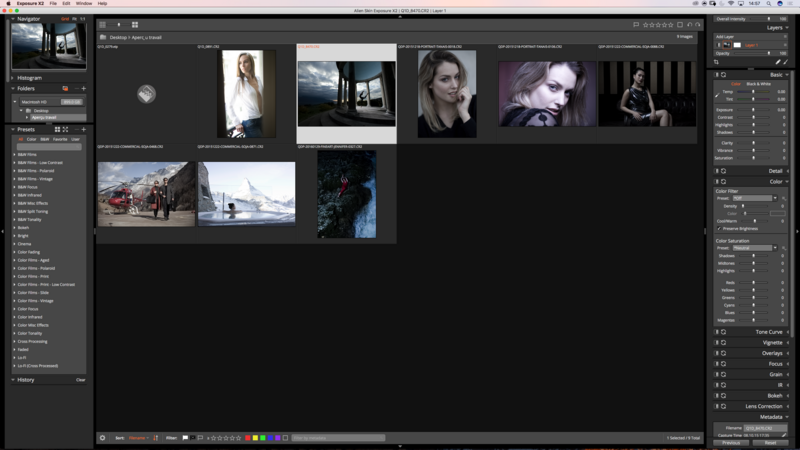
When opening the software for the first time, if you have already used an image editing app, you won't be lost. You find two toolbars, one on each side of the screen, while the center is used to display the images in a grid or full-screen mode. Unlike Lightroom, but similarly to Capture One, Alien Skin Exposure doesn't work with modules – no need to be in develop mode to edit your image, it can be done at any time.
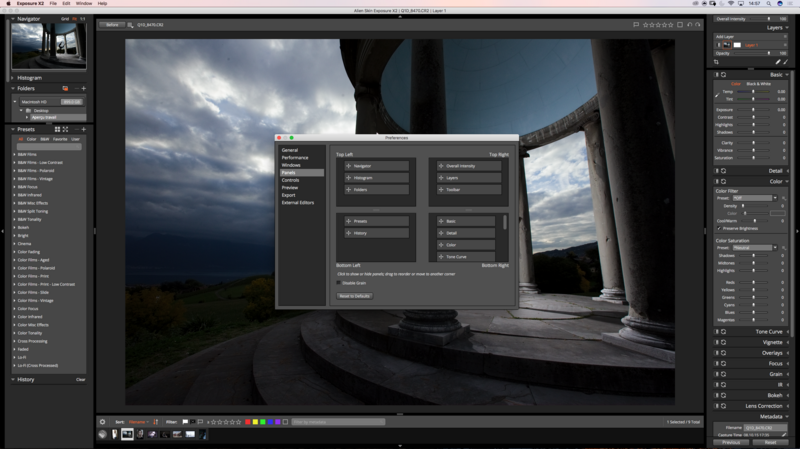
The interface is well designed by default with a layout that makes sense. However, you can personalize the interface to match your current raw processor UI. It may not sound like much, but when switching from one app to another, it's great to be able to match the interface you are used to so that the transition is smoother. No one wants to lose time learning a new interface.
Workflow
The first thing Capture One and Lightroom users will notice is the absence of any catalog or session. Alien Skin Exposure doesn't require any database to work; it's based on your current folder structure. Once you edit an image in the software, a new folder will be created in the one your image is stored in.
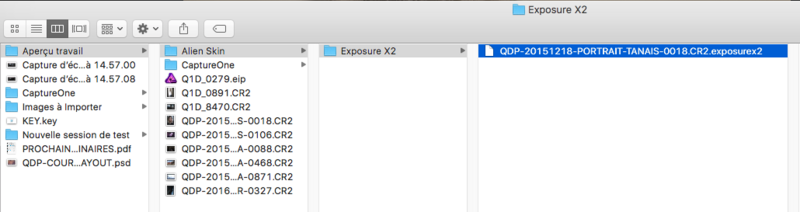
While this is surprising when being used to sessions and catalogs, it's quite useful. When moving files around, for example, you simply take the whole folder and move it. No need to relink files or anything like that. It even opens up new possibilities! Let's say you are working on a session on your computer and the session's files are uploaded to Dropbox in real time. So whenever you make any adjustment, the file containing the new settings are uploaded to Dropbox as well. If you have co-workers connected to the Dropbox as well and using Alien Skin Exposure, they'll be able to see the adjustments almost instantaneously – the only time it will take, is for the folders to upload and then download.
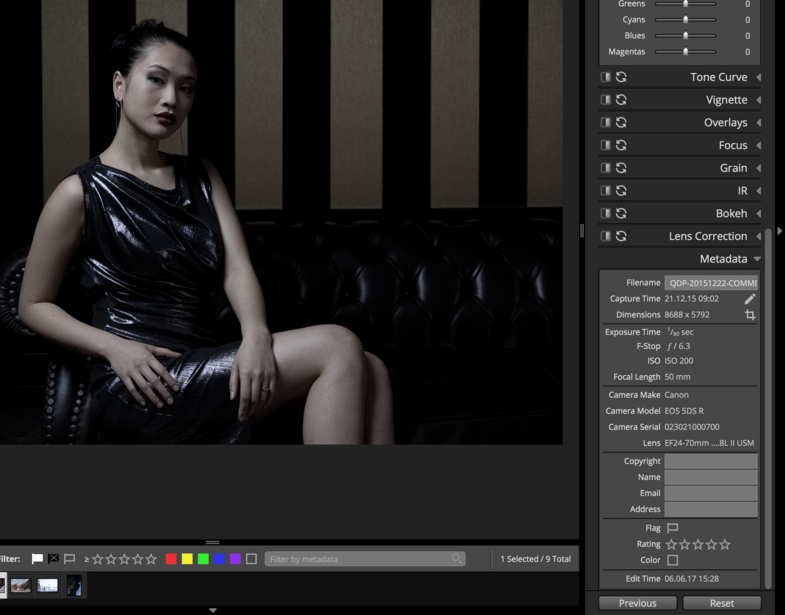
In terms of workflow, the software is quite complete and easy to learn. As there is no catalog or session database, there is no need for a file import feature. Just browse to the folder that contains your files and start editing! Culling is also easy and fast because the pictures are loaded extremely quickly, there is almost no delay when switching from one image to another. The only thing I missed was a possibility to edit advanced metadata. For now, just a few things can be changed by the user, but not all IPTC and EXIF data. If you wish to do so, you'll still have to rely on another software such as Photo Mechanic. I was told this would change with a future update, but I wasn't given any exact date or version.
Editing Raw Files
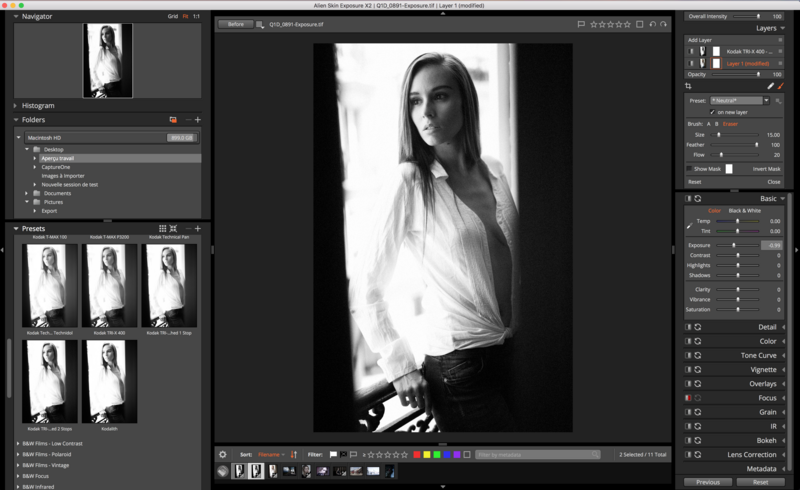
Files can be adjusted manually using the tools found on the right by default or using presets. Of course, you can start with a preset and then adjust it manually. Alien Skin Exposure X2 is delivered with well over 500 presets by default and most of them emulate famous film stocks. If you don't find the ones you want, you can naturally create your own by either tweaking one that exists or simply starting from scratch.
The manual adjustments are also similar to what's found in the Photoshop plugin or any other raw processing software for that matter. The different settings are classified in groups such as Basic for exposure, white balance, contrast, and the likes, or Details for sharpening and noise reduction. Thanks to these different groups, it's very easy to navigate the interface and find the sliders you need to refine your image.
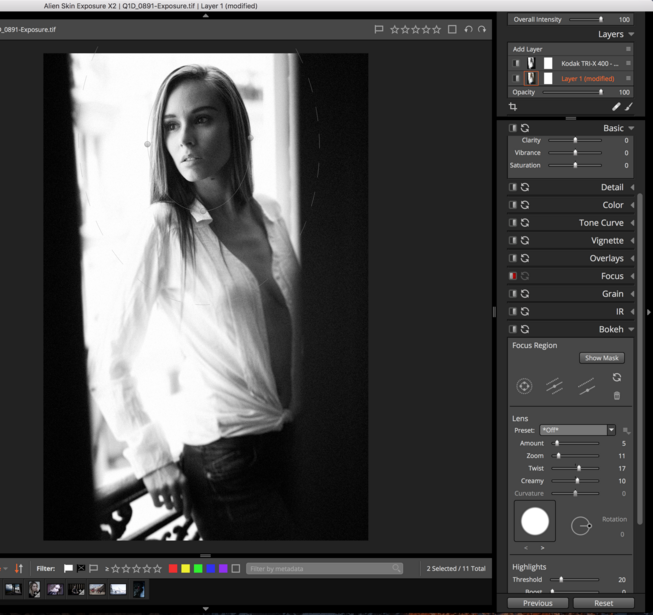
What I particularly like about Alien Skin Exposure are the Grain and the Bokeh tools. They are quite unique to the software and give beautiful results that I haven't found in any other app to date. The grain tool allows the user to add grain that looks more organic than what Photoshop or Lightroom does; it's even better than what Capture One achieves! The other feature, the bokeh tool, is meant to emulate the depth of field and bokeh effect created by some particular lenses. While it can look extremely terrible if the settings are set to the maximum, it creates a beautiful effect when tweaked a little bit. If you like the shallow depth of field medium format creates but shoot 35mm, this could be an alternative. It won't match the quality you get out of a medium format system, but it can give you a look that comes extremely close.
With the latest update, Alien Skin Exposure also introduced a layer feature. It's similar to what's found in Capture One or Lightroom, in the sense that you can create a local adjustment. However, unlike Lightroom, the settings are then displayed as layers. Even better yet, their opacity can be refined after the fact. No need to brush and erase to get the perfect opacity, simply play the layer opacity as you would in Photoshop. In the layer mode, every setting can be tweaked; there isn't a limitation to some of the tools. And if you are wondering, yes, it does come with a spot heal tool so that you can remove small blemishes quickly without having to open Photoshop.
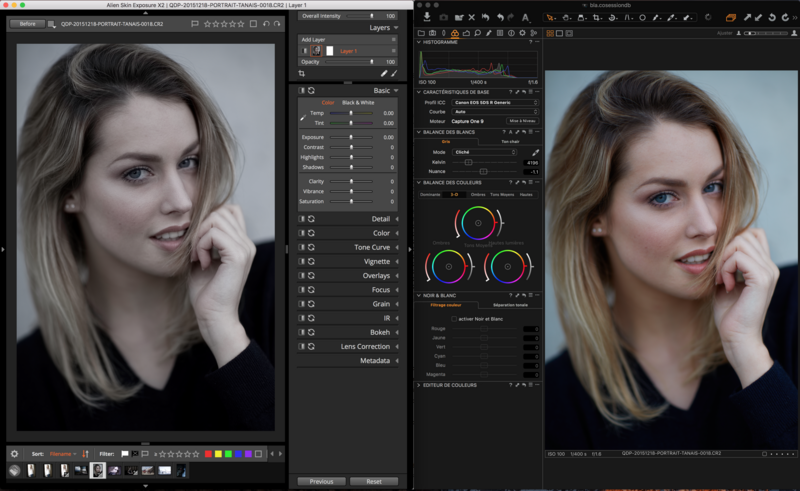
The editing and processing work extremely well. My only issue with the software as far as editing goes is the default rendering. When opening the files for the first time, they look extremely flat in comparison to Capture One or even Lightroom. I like to spend as little time in front of the computer editing and more shooting. So having files that look great right off the bat is great. With AES X2, I either need to use a preset or edit my file a bit before I can get to a result that even looks natural. It's not a big deal as a simple preset can solve the issue, but still, it's something to be aware of.
Photoshop Integration
Alien Skin Exposure started as a Photoshop plugin, so no need to say, it's quite well integrated as a plugin. It comes with a similar interface to the raw-processing software and the same features as well. The only difference is that the plugin will output the result as a layer, while the raw editing app is non-destructive and will require an export to get a JPG or TIFF file.
There is no real round-trip feature between the two apps. However, Alien Skin Exposure X2 reads PSD and TIFF files. So if you export your files as PSD or TIFF, then edit them in Photoshop or Affinity Photo, you'll be able to read them later on in Alien Skin Exposure X2 without any hack or trick.
So as you can read, the integration between the two apps is excellent and seamless. The only thing is like my previous issue, the file rendering. After editing a file in AES X2, the exported JPG and TIFF don't look the same, and both also look different than the original processed raw while watching all of them in AES X2. The color reading of processed raw files, JPEG, and TIFF is apparently different. Hopefully, this issue will soon be corrected because it could be a pain for those that need accurate colors in their images.

Pricing
Priced at only $149, the software is incredibly appealing for beginners who cannot justify a subscription to Adobe Lightroom. It's also cheaper than Capture One Pro, but it's not as reliable color-wise and doesn't offer the same level of customization. For the price, you'll get both the raw processing software and the Photoshop and Lightroom plugin, including the numerous presets.
What I Liked
- Files loading time extremely quick
- Interface easy to navigate
- No catalog or session database
- Affordable
- Photoshop and Lightroom plugin
- Broad range of tools, with some unique ones
What Could Be Improved
- Color precision
- Metadata editing
- Export process – some of my files couldn't be exported as PSD, only as TIFF
- Cannot display multiple images to compare when culling
- Local adjustment cannot be used in grid mode, only in full screen or fit
While I wouldn't see myself replacing Capture One with Alien Skin Exposure X2 for commercial, beauty, still life, or portrait work, I do believe it could be an appealing choice for wedding and event photographers. It's extremely fast to operate, almost every feature can be reached with a keyboard shortcut, and the presets that are included can help stream the creative process for those who are quickly lost with raw processing. Instagramers and people with less knowledge in the photography editing world will appreciate the numerous presets and their instantaneous previews. It makes editing more visual and quicker than most other software I've tried so far for less experienced users.
If you are not sure whether Exposure X2 is made for you or not, Alien Skin offers most of their software as free trials for 30 days on their website. So be sure to check it out and try it for yourself. I'd love to hear your thoughts on the software. Is there anything you miss from Lightroom or Capture One? Or the other way around, do you think it offers unique features that others are lacking? Let me know in the comments below.


Join the Fstoppers community for free
-
Post comments and join in the discussions
-
Browse the site ad-free
-
Share your work and get featured in the community
-
Compete in the photo contests for fun and prizes
3 Comments
Great article Quentin. I've never used any Alien Skin software in the past. This Raw processor looks pretty nice and has a UI very similar to Lightroom from what I'm seeing. The one feature that sounds the most appealing to me is the fact that it functions as a file browser at the system level, much like Adobe Bridge. Personally, I like that.
I use both LR & Capture One. Both are great, however they both have caveats as well. I love the tethering Capture One provides, but I personally dig the workflow, Raw processing & tight integration with Photoshop that LR offers. One thing is for sure, there is no perfect Raw processing software on the market. Does this by chance read .psb (photoshop large format) files?
I've never used Exposure for RAW processing, but I have been using it for film emulation for the past 5+ years. My biggest complaint with it is that you essentially have to create a "stamp visible" layer which adds much more size to the image than an adjustment layer. Aside from that, it's a great (if slightly overpriced IMO) piece of software. I'd prefer it to be $50-75 cheaper without the RAW processing since I don't use it.
Nice and interesting! I used to use Lightroom before and I tried Exposure X2 free trial. They are pretty similar and I find both a bit complicated to use. I actually use this: http://www.aftershotpro.com/en/pages/raw-file/ to work on my RAW files. But anyway, you made a great and helpful tutorial and made things easier for all of us who tried the Exposure. Thank you for sharing