
In this article, I share the photo editing workflow I use for all my photos, and if you want to achieve high-quality results, this is for you.
The focus of this article is not on the individual editing techniques, as I've written detailed articles on focus stacking, exposure blending, getting brilliant colors, and print preparation in the past.
Here, I present a workflow containing all the steps to create professional results that look great on the web and in print. I use Lightroom and Photoshop, but you can apply this workflow in any photo editing software.
Image Selection
When I'm out in the field, I invest a lot of time looking for compositions that best showcase the subjects I photograph, and once I find those, I set up my tripod and keep it in place for most of the shoot.
I typically take between 30 and 60 photos of the same scene throughout the morning or evening as the light changes, and I do focus stacking and bracketing of exposures for most of my photos.
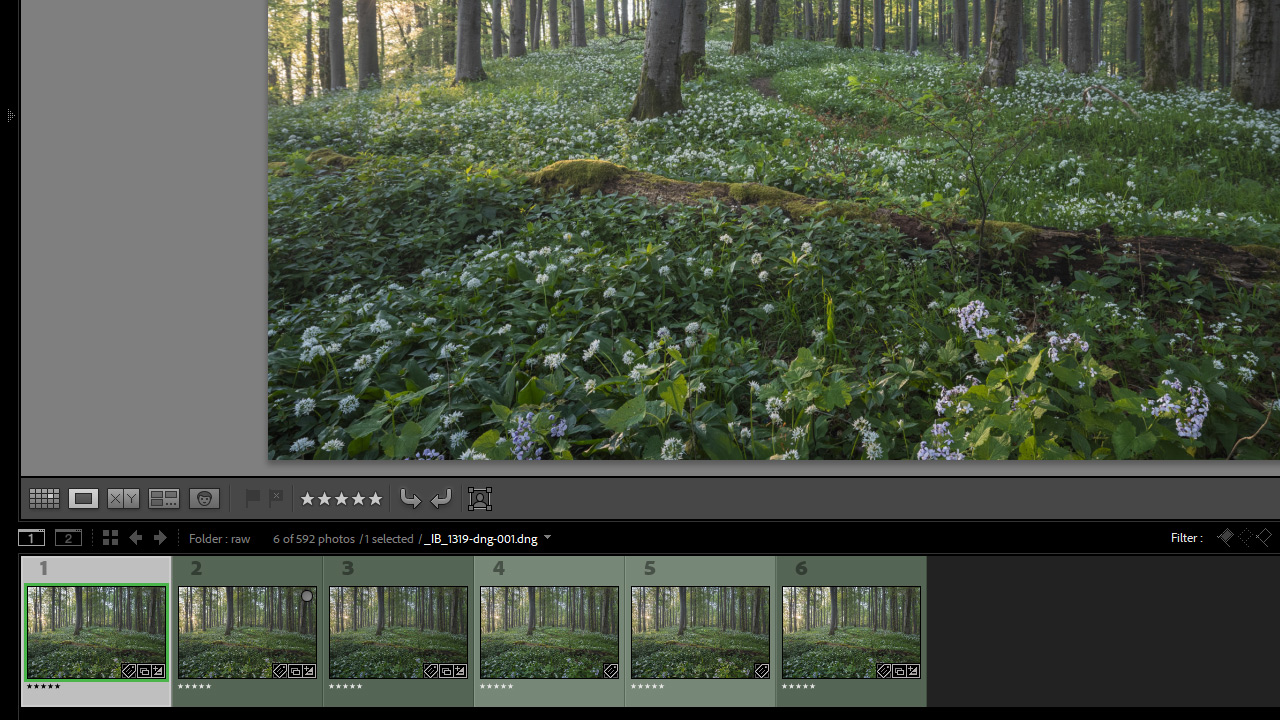
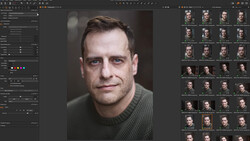
The first step in any photo editing is to go through this sequence of images and find the ones for the edit—it can be a single photo if no stacking or blending is required, while ten or more images might be needed for complex scenes.
In Lightroom, you can use the number keys to rate your photos: I like to use the key "8" to mark photos green so I can easily filter for those afterward.
DXO PureRAW
Since I started using DXO PureRAW, it has become integral to my photo editing workflow. I use its batch processing, mostly with default settings, on all the selected photos to reduce noise and increase detail—lens corrections and the removal of chromatic aberrations are also part of this step.
Since PureRAW duplicates the images I marked green before, I give the processed photos five stars using the "5" key to distinguish them from the originals.
Lightroom Editing
I filter for the green, 5-star photos, select one, and apply basic editing: I raise the shadows, bring down the highlights, fix color shifts, fine-tune colors and contrast, and use masks for some selective edits.
The goal is to reveal as much detail as possible to provide a solid foundation for further edits in Photoshop.
Synchronization
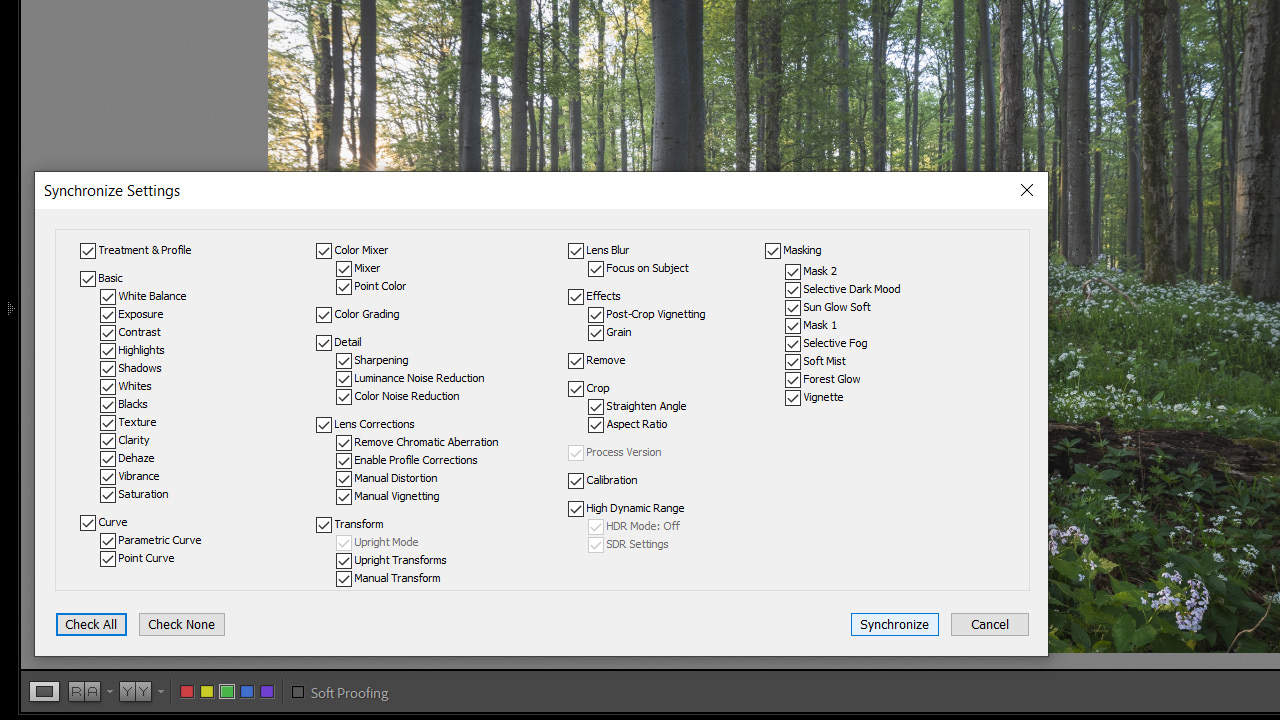
Once the edits are applied to one photo of the selection, they must be synchronized by selecting all images: hold down "SHIFT" while clicking on the first and last photo in the selection and click on "Sync..." at the bottom of the editing panel on the right. A "Synchronization Settings" dialog appears in which you click on "Check All" and "Synchronize."
Equalization
To make your life easier when blending bracketed exposures, you should equalize them beforehand. The goal is to get the photos to look nearly the same in terms of brightness, even though they've been captured using different exposure times. Use the "Exposure," "Shadows," and "Highlights" sliders to achieve this.
Exposure Blending
If you combine exposure blending and focus stacking, you'll usually only need exposure bracketing for the background images. And if you use tools like Helicon Focus to perform the stacking, I suggest doing the exposure blending first.
Select the images of the bracketing sequence, "right-click," and select "Edit In - Open as Layers in Photoshop." Because of the equalization, the blending can be done mostly with standard masks, while luminosity masks are seldom required.
Save the image as a 16-bit TIFF and return to Lightroom.
Focus Stacking
If you don't want to use additional plugins for the stacking, you can continue in Photoshop and use its automatic stacking feature or perform manual stacking.
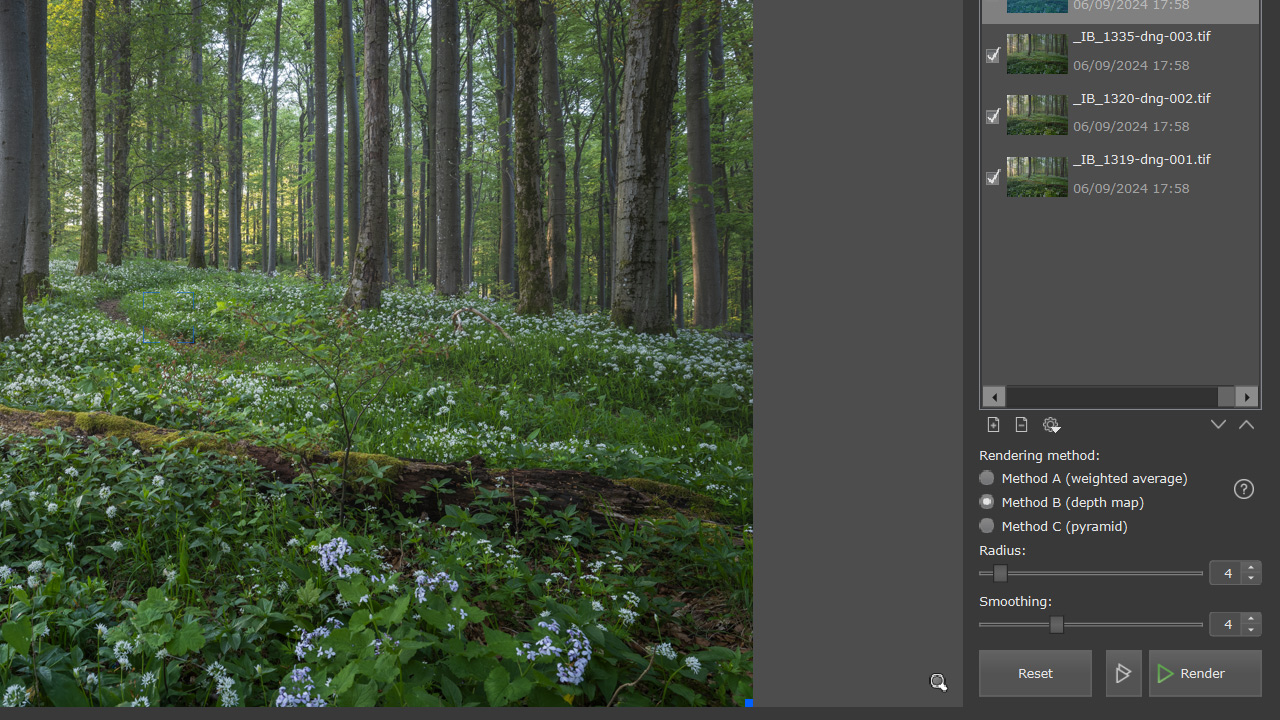
For the best results, I recommend Helicon Focus: Select the images of the stacking sequence and the blended background photo, and open them as TIFF via "right-click - Export - Helicon Focus (TIFF)."
I use Method 2 in Helicon Focus most of the time, combined with manual retouching for complex woodland scenes.
Cleanup
After saving the stacked image in Helicon Focus, open it in Photoshop. Now is a good time for cleaning up dust spots and minor distractions using tools like the "Spot Healing Brush," the "Remove Tool," and the "Clone Stamp."
Perspective
Some photos require perspective corrections and other image transformations, and you have more control by performing those in Photoshop than in Lightroom.
Pressing "CTRL/CMD+T" accesses the transformation tool, and by holding down "CTRL/CMD" and clicking on the corners of the image and dragging, you can achieve precise adjustments.
Contrast
I usually work on contrast first because changing contrast and brightness in an image also alters colors. You can start with some "Curves," which you apply selectively to the image using masks. With dodge and burn, you can further guide the viewer: Create an empty layer and set its blend mode to "Soft Light" before drawing with a black brush to burn and a white brush to dodge.
Color Efex
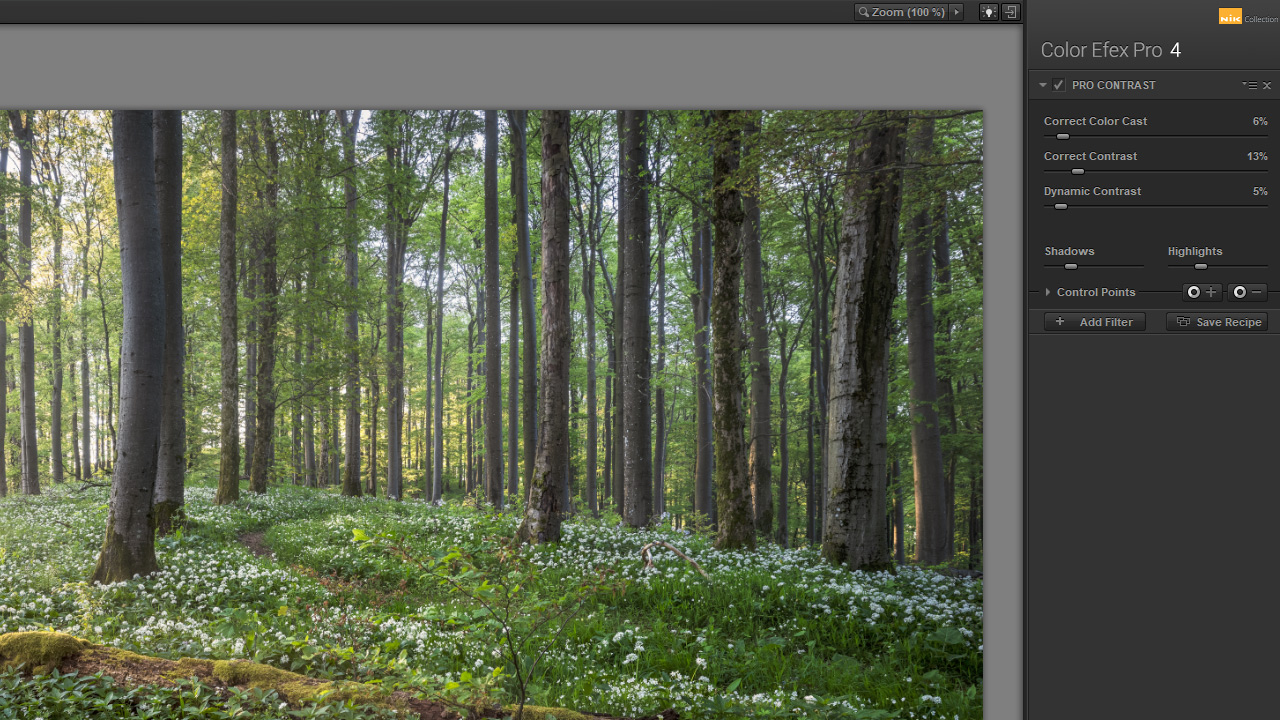
I like to bring more punch to my photos using the "Pro Contrast" in Color Efex, whose three sliders can create a big difference in a few seconds.
If you're using a Windows system, you can get Color Efex for free, as I explain in this article. Otherwise, you can either purchase the latest version from DXO or emulate this step using adjustment layers in Photoshop.
Color
From my experience, you'll have to reduce saturation in many areas of a photo after working on contrast. Dark tones will often attain a bluish color cast that should be reduced. If your image contains yellows and greens, use a "Hue/Saturation" adjustment layer to control those—reducing the luminance will often do the trick.
You can also become creative and introduce color contrast by selectively warming up parts of a photo while cooling others.
Luminar Neo
Most of the time, the creative editing is finished after the color adjustments. If you own a plugin like Luminar Neo, you can now experiment with some of the effects it offers. It can sometimes improve the look of a photo, but it doesn't always work, so be careful when applying effects.
Output Sharpening
The final step in any photo editing is the preparation for either web or print. The Web Sharpener makes the preparation for social media or your homepage very simple. Print preparation is a bit more involved, and depending on the size of the print, it can take nearly as long as all the previous editing.
Conclusion
These 14 steps might look like a lot, but with some routine and practice, an edit can be done in less than an hour, which is the average time I spend editing a photo. Difficult edits can take up to two hours, but since I started using tools like DXO PureRAW and Helicon Focus, those have become rare.
To conclude this article, I want to give you a final tip: Don't edit in one go. Especially after the creative edits, it's good to let a photo rest for a few days and then apply the finishing touches.


Join the Fstoppers community for free
-
Post comments and join in the discussions
-
Browse the site ad-free
-
Share your work and get featured in the community
-
Compete in the photo contests for fun and prizes
2 Comments
Kind of a long edit session, If you have not tried HDR lately I suggest 5 at +/- 2EV. You get 5 images all different exposure levels and you can use all or just select a few to merge. A little test I did lately is capturing hand held and on my A7RM5 it worked, great, but if using sticks no problem it will work even for DSLR's limited to 3 at +/- 2EV. Today we have cameras that do the focus stacking automatically. For the A7RM5 there is the super great Pixel Shift even now hand holding getting sharpness fore and away, have not tried yet but plan to.
I love Dxo also but some lens profiles are slow coming, the noise reduction can be confusing but also great. The best of Dxo is the the Nik Collection that they saved having the HDR Efex that will do 5 at +/- 3EV controls ghosting well but all the others are just as great. The Dxo PureRAW is a great start for noise.
One point to remember going from one editor to another is getting you lens profile first in your starting program and you denoise fixed for going to like PS/Lrc those are not available with a first work. Lucky that other major editors have links in PS and Lrc.
1. Captured hand holding 5 at +/- 2EV
2. Not knowing in the beginning about camera NR is turned off if bracketing but this was 3 at +/- 1EV and todays Lrc gets rid of the hot and dead pixels and does a great job of denoise in all synced before putting into HDR, saving a night on the beach of images from 2015,A7SM1
3. Using the A7RM2 and finding I could do hand holding 3 at +/- 2EV after forgetting plate for sticks and in dark places.
4. Highly recommend bracketing during Fall Foliage for you will be going negative on the EV dial to get detail in clouds lowering zebras, if in the capture.
notice the sharpness/detail near and far without focus stacking.
Just have fun with the editing some like just a little bit with both capture and editing.
This might sound like a shameless plug for the camera that I use but since switching to GFX cameras I barely have to edit the colours out of that camera. I just phenomenal and I'm not talking about the JPEG film simulations either even the raw files look pretty good and I don't have to do much to them. I really pulled back in my editing style as well and I'm definitely not going for the HDR look which I can't stand. I like fall off in the background as in the mountains in the background shouldn't be Pin sharp they should fall off and be a little bit soft like your human eyes see them. It's just me and the way I do things I don't like photos going through three or four different programs to get a final result. No thanks. I use one Program only and I'm not gonna say which one it is. I just upload them to that if I need to use the D noise it has that and then I do my editing in one program and I get great results and sell lots of photos. What it's probably made me do is work harder on light at the shooting end which means less editing.