
Alien Skin, the makers of one of the most popular Photoshop plug-ins for photographers, released the latest iteration of their standalone raw photo editor in November 2017. Back in June 2017, Fstoppers reviewed Exposure X2 and found it to be a realistic alternative for those who can’t justify the subscription for Adobe or Capture One Pro’s more expensive offerings. In this review, I’ll deliver an overview of the tools available, and give my own two cents on the raw photo editor.
The Look
Not much has changed since Exposure X2, which is a good thing. For those of you who use Lightroom or Capture One, you’ll be able to quickly familiarize yourself with the panels. If you don’t like the layout, however, you can simply drag and drop the panels to different areas to suit your editing style better. And, like was mentioned in the last review, there are no pesky modules.
The Feel
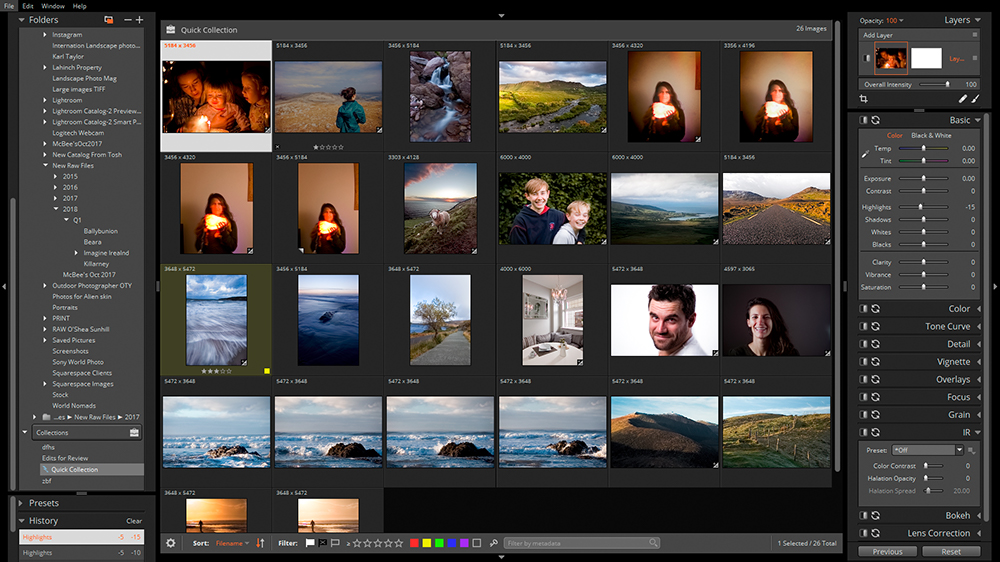
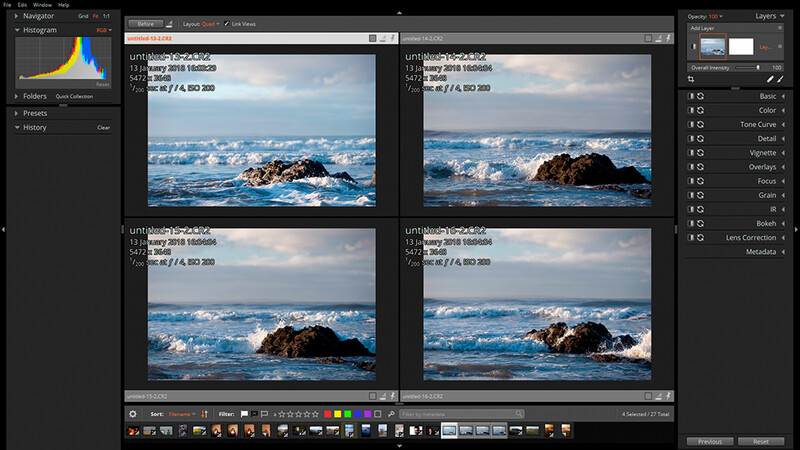
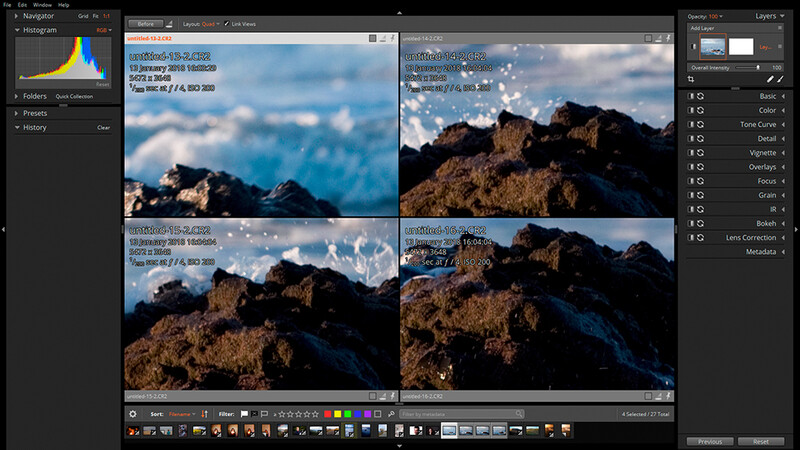
As stated above, from a distance it looks like any other raw processor. On closer inspection, you’ll notice a distinct lack of catalogs. To access the folder or file you want to work on, you just need to search through your Finder or Explorer on the left-hand panel, click on it, and boom, there it is; either the file shows up in grid view or you just select the photo you want. There’s no messing about with catalogs, or any importing needed. Also, because this is a non-destructive raw editor, all the editing you do is stored in a sidecar file, which is stored in a separate folder within the folder you’re working in. This makes life much easier because if you’ve experienced the dreaded “the file cannot be located” in Lightroom, then you’ll understand how frustrating it can be to re-link your photos to your catalogs. Also, from my experience, Exposure X3’s files only end up being around 4 KB each. As long as your folders aren’t enormous, browsing photos is a very painless experience. The 1:1 previews render quickly, however, panning can be a little slow sometimes. Culling is made quicker, however, with the option to compare up to four photos at the same time. You can also link them, zoom into 100 percent, and they will all pan to the same area. It must also be noted that in this comparison mode, you can hover over any preset in order to view it on all the selected photos at the same time.
Another handy feature is the ability to upload your files to Dropbox. If a colleague also has Exposure X3 on a different computer you can edit a file and the photo will change on your colleague's end as you’re making adjustments. The time it takes for the adjustments to take place is the time it takes for the data to upload to Dropbox and download to the other computer. I sat down with the CEO of Alien Skin, Finley Lee, to try this out; He's in the U.S.A. and I'm in Ireland. While the edits aren't instantaneous, the results are still very impressive. It all hinges on your Internet speed, so Alien Skin advises that you set up a call as you're editing.
Exposure still works great as a plugin for Photoshop and it can also read PSD files, while round-tripping is painless, especially with the option to “edit copy in,” which prevents you from overwriting your Exposure file. Exposure will bring in all the layers of the document composited together as long as you save with the “preserve compatibility” option in Photoshop. Unfortunately, it can’t convert the Photoshop layers to Exposure layers yet.
Editing Panels
- Basic - Much like any other raw editing software, including brush tools and spot healing brushes.
- Color Filter/Saturation - You can select a color to apply as a filter, target the saturation in the shadows, midtones, and highlights, and also use the saturation sliders to increase or decrease the saturation of a particular channel.
- Tone Curve and Split Toning - The Tone Curve works just like the one in Adobe Camera Raw or Lightroom. While Split Toning works a little differently to what I’m used to in Lightroom, it’s simple to figure out.
- Detail - Works very similar to Lightroom's sharpening and noise reduction.
- Vignette - Same again, but in X3 there’s a distortion slider which can give the vignette a lumpy/hap-hazard feel, and you can change the lump size. There’s also an option to put the focus of the vignette in a particular location, which updates in real time so you can see the effect before you apply it.
- Overlays - You have the options of Border, Light Effect, and Texture. All come as presets but there are five different blend modes and you can change the opacity on each. Similar to Vignette, there’s a Protect Location option which can selectively reduce the effect in your chosen location.
- Focus - A creative filter that can add extra sharpening for a crunchy feel and/or an Orton-like effect.
- Grain - This is what Alien Skin is famous for. The grain effects are very natural (as long as you show restraint, of course). You can control the overall strength and/or the amount in the shadows, midtones, and highlights, the type of grain including roughness, color variation, and push processing, and the size of the grain.
- IR - Adds an effect, not unlike that of an infrared filter.
- Bokeh - Lets you add creative blurring effects. You can choose from a preset list of popular lenses or create your own using circular or linear gradients.
- Lens Correction - Will correct for lens distortion according to make and model. While they don't have the option to fix chromatic aberration, I've been informed that it is something that they're looking at introducing.
- Metadata - Contains all EXIF data with the ability to change/add keywords, copyright information, etc.
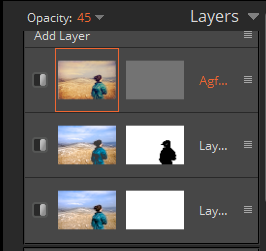
Almost all of the editing panels have a selection of presets to choose from, and also the option to save your edit, specific to that panel, as your own preset. Not only that but because you have the option to put each adjustment on a separate layer, you can change the opacity of any layer you want or invert a layer, like in Photoshop, and brush it into your desired location.


The Experience
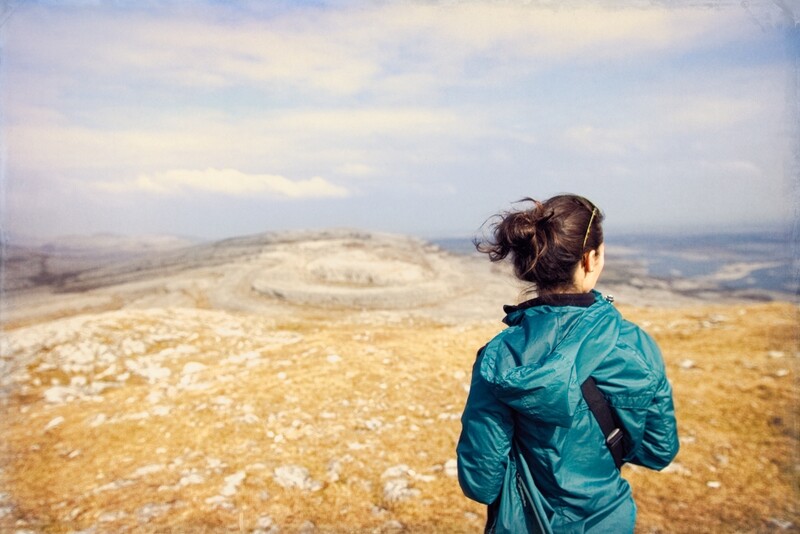
As a landscape photographer, I feel that it does need some work, particularly in shadow recovery. In saying that, as long as you don't have a crazy dynamic range in your shot you'll be able to edit with confidence. The lack of lens aberration correction is also a bit of a pain as you will have to do a round trip to a different program to sort it out. The real fun, however, is to be had with the many presets which make use of Alien Skin's amazing grain emulator. The emulator, combined with the creative filters, gives you an endless list of creative avenues to wander down. And because they're so easy to implement and control, you can concentrate on creating as opposed to faffing about with overly technical controls and obtuse editing paths.
What I Liked
- Easy file management
- Fast rendering times
- Great integration with Photoshop and Lightroom
- Amazing selection of high quality presets including the best grain emulator out there
- Affordable
- Dropbox syncing
- Can now export your file as TIFF
- Layers
What I Didn't Like
-
Poor shadow recovery
-
Can be a little sluggish while panning
- Color toning and adjustments are not as controlled or as subtle as Lightroom
Conclusion
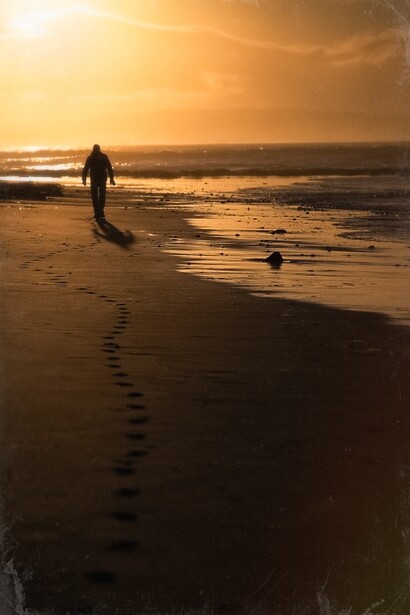
While the program is a notable improvement on the previous iteration, I still can't see it replacing Lightroom on my own machine due to the negative points listed above. I have to say, though, that this program really did surprise me. It's a joy to use, and when used with the right types of files the results are incredible. Where this will shine, in a professional capacity, is for wedding photographers. The grain emulator gives astoundingly accurate representations of film, and the creative filters have the ability to add subtle nuances to any wedding portfolio. And judging by the responsiveness of the Alien Skin team, and their snappy program updates, I think that the big boys will start feeling the heat soon because if Exposure keeps getting better it might just start replacing Lightroom and Capture One Pro on photographers computers. Until then this is still a very worthwhile investment for anyone looking to add something different to their workflow or for those who don't want to fork out big money to Adobe for a rental or pay twice as much to own Capture One Pro.
You can buy Exposure X3 for $149, or start a month's free trial to see if it suits you over at Alien Skin's website.


Join the Fstoppers community for free
-
Post comments and join in the discussions
-
Browse the site ad-free
-
Share your work and get featured in the community
-
Compete in the photo contests for fun and prizes
9 Comments
I agree the program can be a bit sluggish and the develop tools are pretty average (I use Capture One which has the best develop tools including highlight and shadow tools that are insanely great) however, you never mentioned the biggest reason to use and own X3 and that's the Presets!
Hundreds of beautiful and accurate film emulations which are far better than those available anywhere else including 3rd party add-ons for Lightroom and Capture One. Both black and white and color presets that are easily customized for a very "pro" look. Polaroid looks, Kodachrome II, Portra 160, Infrared B&W looks etc - all fantastic!
Thanks for your input, Lance, but I mention the presets several times in the article and also give Alien Skin great kudos for their grain emulator.
I've been using X2 and now X3 for a while and I have to say that in my personal opinion this together with Affiniy Photo is the best solution for photo editing even for a professional photographer. Why would anyone want to shell out their hard earned money for Adobe products is beyond me. Great job Alien Skin team.
Glad to see there is another quality product available for photographers. The more competition, the better it is for all of us.
Indeed, Dan. There seems to be an upsurge in competition lately. It's great to see, and long may it continue!
After working with Adobe products for a felt lifetime, it isn't easy to change to another product, especially if you want the max in image postproduction. And Adobe is still leading there. But I must admit that Exposure X3 is comming very close to Lightroom and even is a much better choice working with Fuji RAW. Lightroom has definitely it's flaws there.
Exposure X3 seems much faster, but as Mike has stated correctly, is not doing all that well on shadows, thus leaving out the enormous potential in dynamic range most state of the art cameras offer.
The bottom line is that the alternatives, including Exposure 3, can offer interesting price tags (not that big an issue for a pro), but are not at the same level with Adobe (yet). I guess it will be only a matter of time. Besides, a pro user should keep an eye on the sustainability of the products as well. That's a big point for Adobe in my opinion.
I use Exposure X3 (as well as Luminar 2018 an Iridient X-Transformer) as interesting and sometimes usefull "sidekicks", but will probably still stick with Adobe a little while ...
Great contribution, there, Kees. While I don't have any experience with Fuji files, I would agree with everything you just said. Not there on some of the finer details, but getting close. If you're a pro it's still worth it alone, for the presets and grain emulator.
I have been looking at Mastin Labs presets and wondering whether or not this would be a better run for my money. Could someone help me to differentiate between exposure x3 and presets such as VSCO or Mastin Labs?
Hi John. Exposure X3 is it's own, stand-alone, raw photo editor, which can also be used as a plug-in. The other products you mention are not raw editors, as they either integrate with your digital camera or work as a preset in e.g. Lighroom.
I have not used Mastin Labs, so I can't really give you a comparison. All I can say is that I love Exposures X3's presets. You can go in and tweak the details as well, to suit your style or particular photo, or just change the opacity to reduce the overall intensity.