
As a photographer you are probably confronted every now and then with unacceptably high noise levels. This may occur when using extremely high ISO levels, or perhaps when lifting shadows too much in post processing. You can try to reduce noise by one or two sliders in Photoshop, Lightroom, or similar software, or by stacking a couple of photos.
Did you know some photographers were deliberately trying to increase the amount of noise in the analog days of photography? Of course, it wasn’t called noise in those days, but grain. Nevertheless, those photographers loved the grainy feel of their photos. They exposed a 400 ASA film as were it a 1,600 ASA and corrected the underexposure during the development of their films, thus introducing an increased amount of visible grain. I used this method to get faster shutter speeds for my concert photography and took the grain for granted.
Today, most cameras have amazing high ISO capabilities. If your exposure is correct, so you don't have to recover any underexposed parts, it is almost impossible to see noise at ISO 1,600, ISO 3,200, or even ISO 6,400 with some cameras. Perhaps, if you enlarge your image on screen up to 100%, some noise may be visible. What you find to be an acceptable amount of noise is very personal. But sometimes you might want to have absolutely no noise whatsoever. Using a good noise cancellation program is not always the solution, and removing noise may lead to loss in detail, just like the sample below.
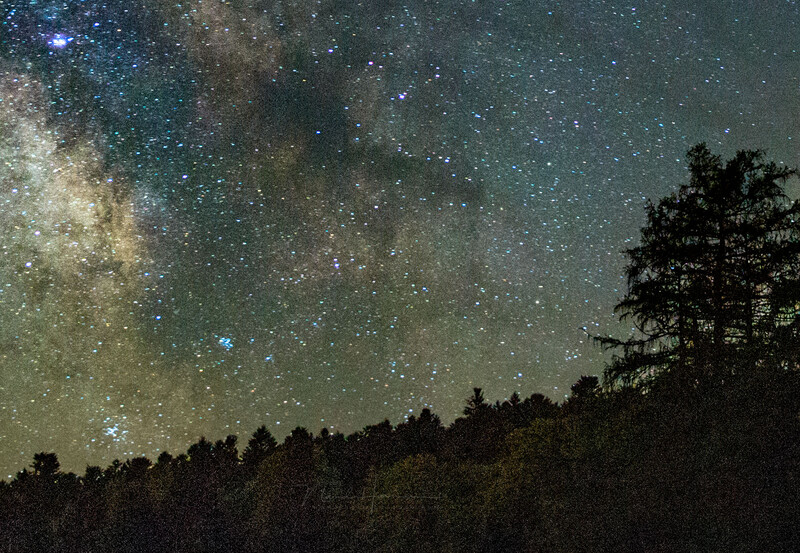
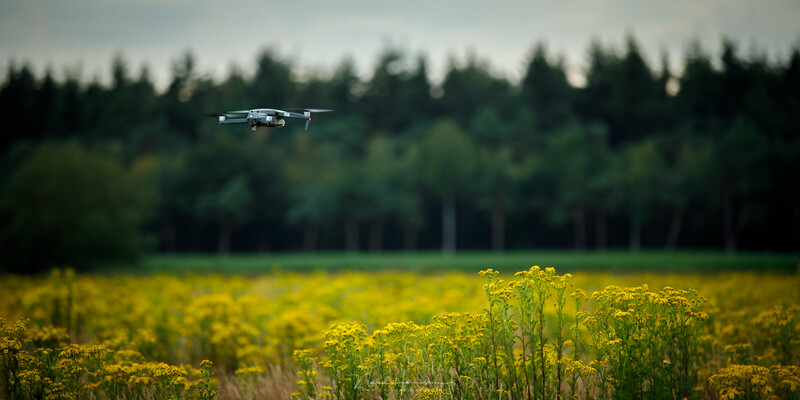
Since I also use a drone for my photography, I am confronted again with higher noise levels compared to my full frame DSLR cameras. The 1” sensor of the DJI Mavic Pro 2 produces noise in situations where a decent full frame camera wouldn’t. Of course, the small sensor size is largely responsible for this, but that is not the point. No matter what the reason may be; the noise levels are increasing rapidly when post-processing the DNG files up to extremes. It is influencing the image quality a lot, and noise reduction will only lead to an unacceptable loss in detail. Unless you use stacking multiple images for noise cancellation. A technique often used by astrophotographers.
The stacking technique makes use of the random nature of noise. By making a series of images without moving the camera, every single image will have a slightly different noise pattern. When combining these images in a smart way, it is possible to cancel out the noise, without loss of detail. Because we make use of the random noise in a series of images, it may be clear this technique does not work with a series of copied images.
The downside of this method is the limited use of the technique. It needs a stationary scenery, without (a lot) of movement, and you need to shoot on tripod – although it might be possible to shoot without it in high speed mode and aligning the images afterwards. It all depends on the situation.
There are a few things to keep in mind; moving objects will become fuzzy, or disappear completely in the end result. Also lens distortion corrections can give unexpected results, just like the stacking of the star trail images I showed in a previous article here on Fstoppers. And you also need software that is able to work with layers, just like Photoshop.
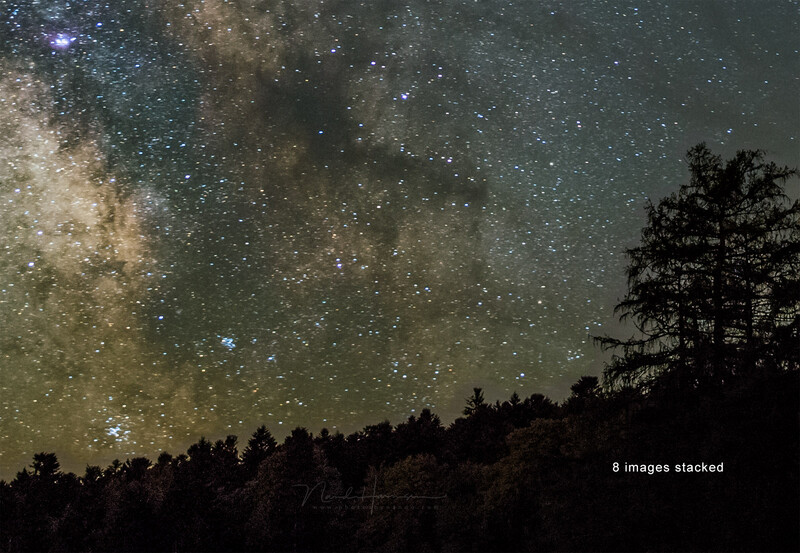
This technique can also be used for other purposes. I already mentioned astrophotography and star trails, but also super resolution, deliberate removing moving subjects in a scenery, and long exposure simulation use a similar technique.
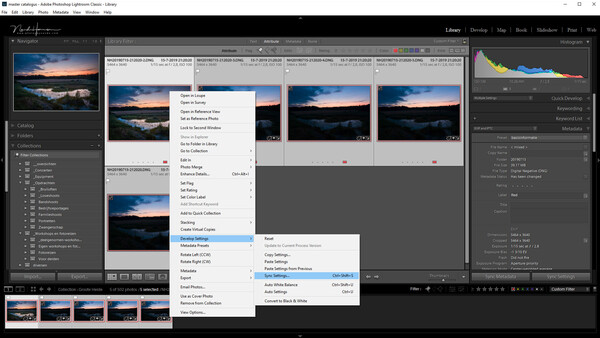
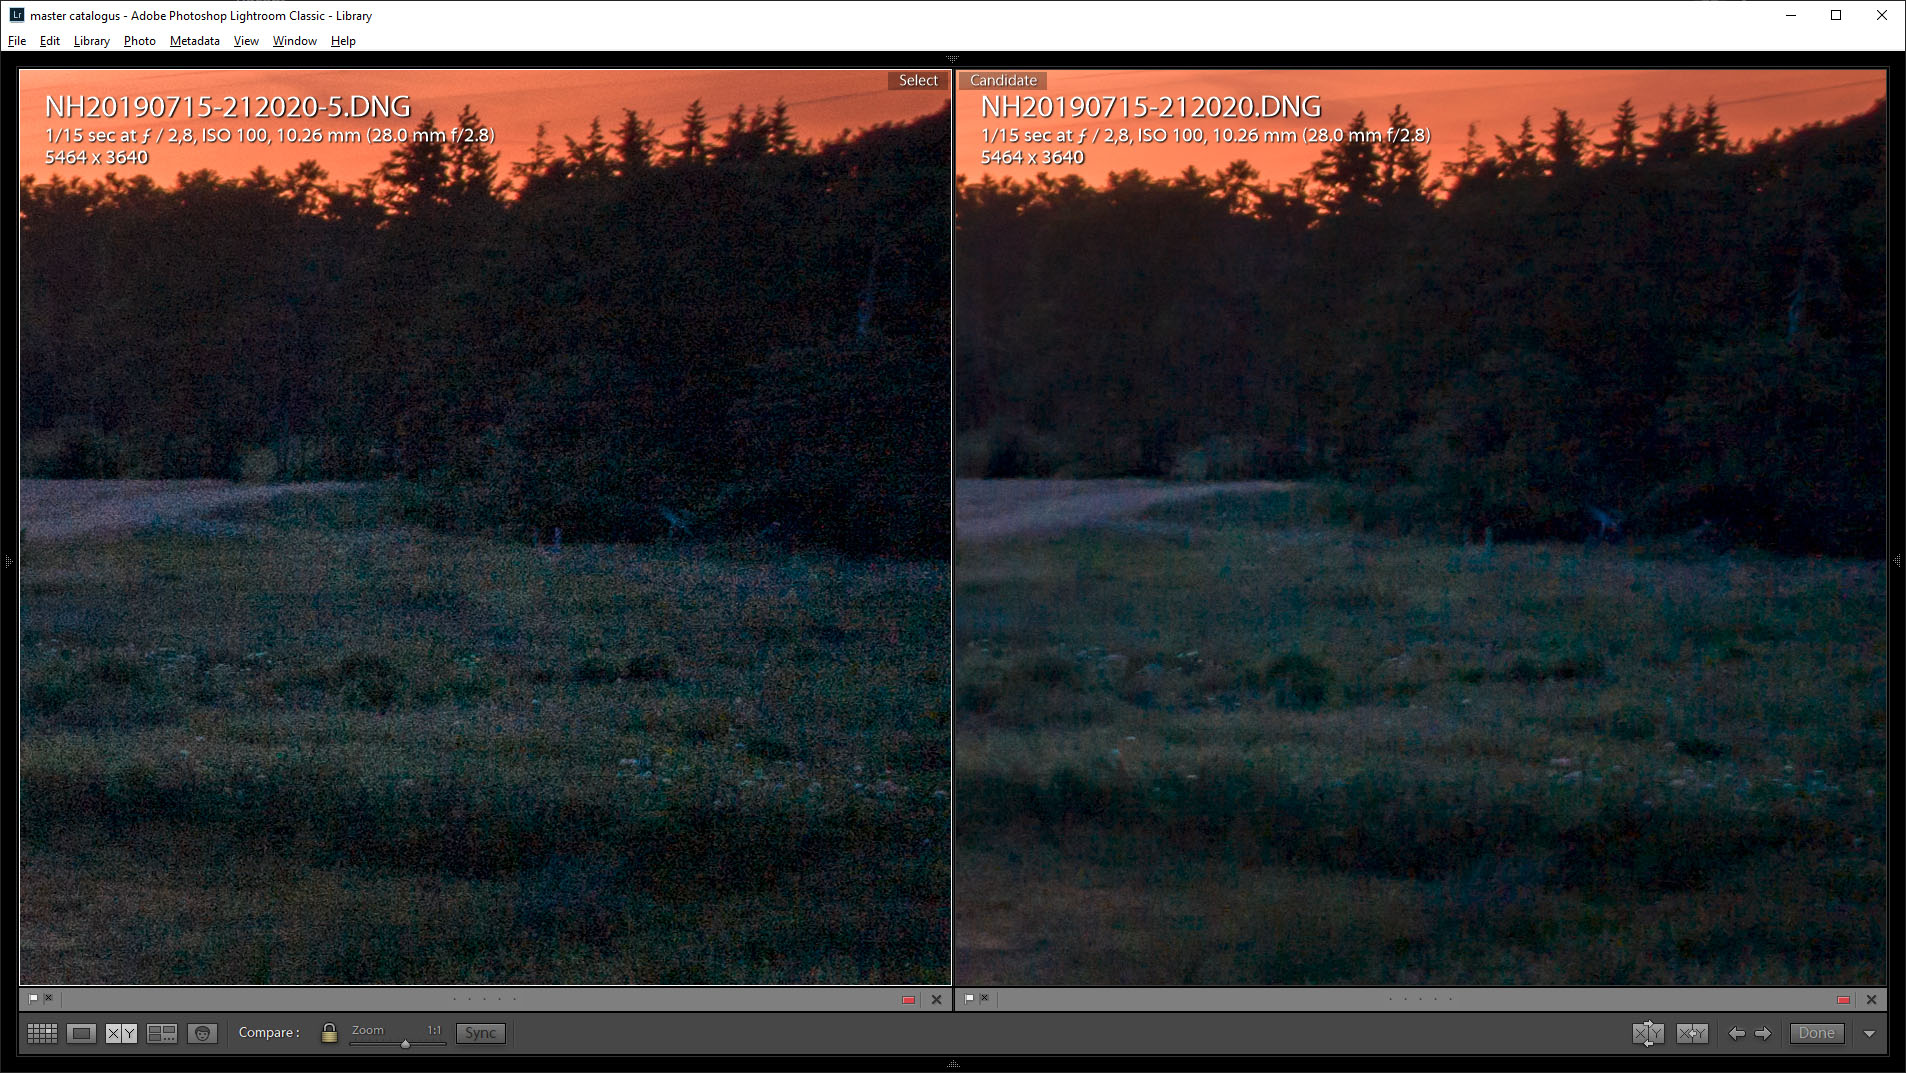
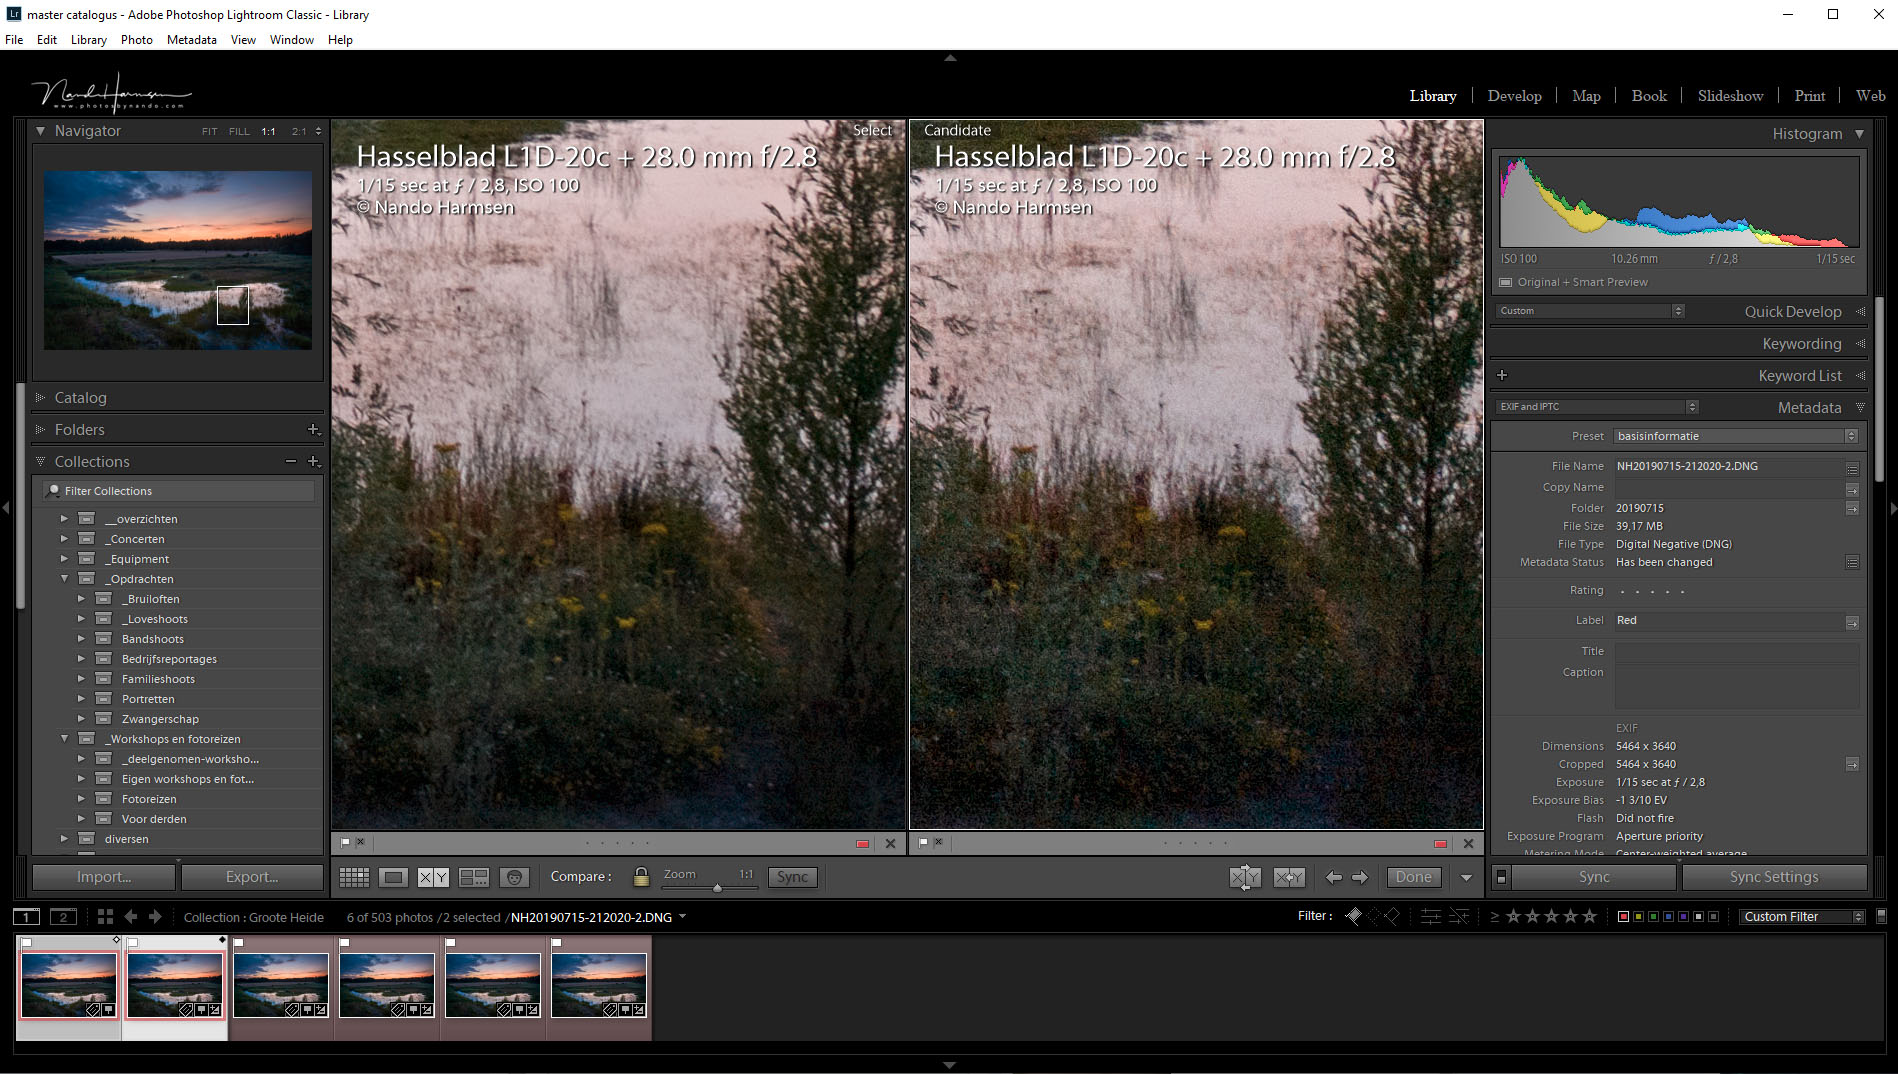
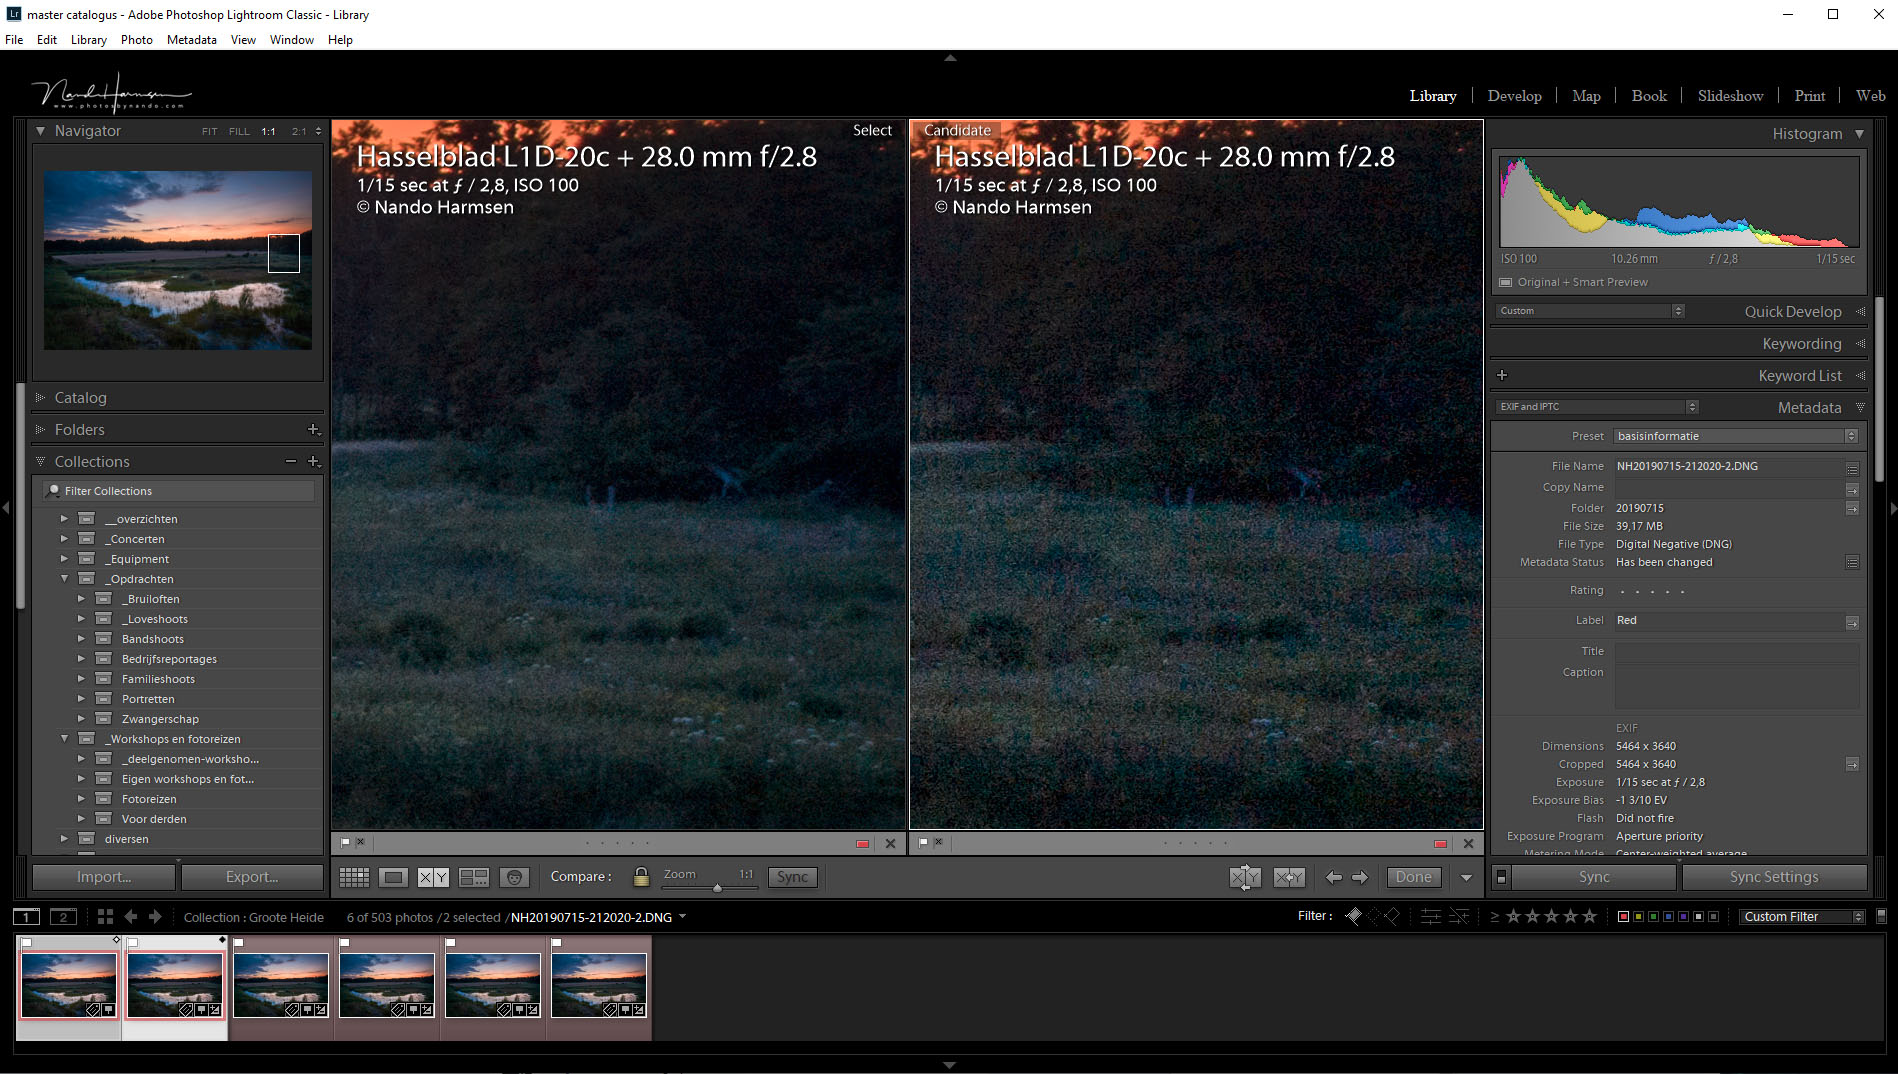
Let me show how stacking images works and how it affects noise levels. I use Lightroom and Photoshop for this, and I selected a photo I made with my drone during the late twilight. I did set my exposure settings for the brightest spot in the image, to prevent blown out highlights, and ended up with ISO 100, f/2,8, and a shutter speed of ¼ of a second. I made a burst of five sequential images.
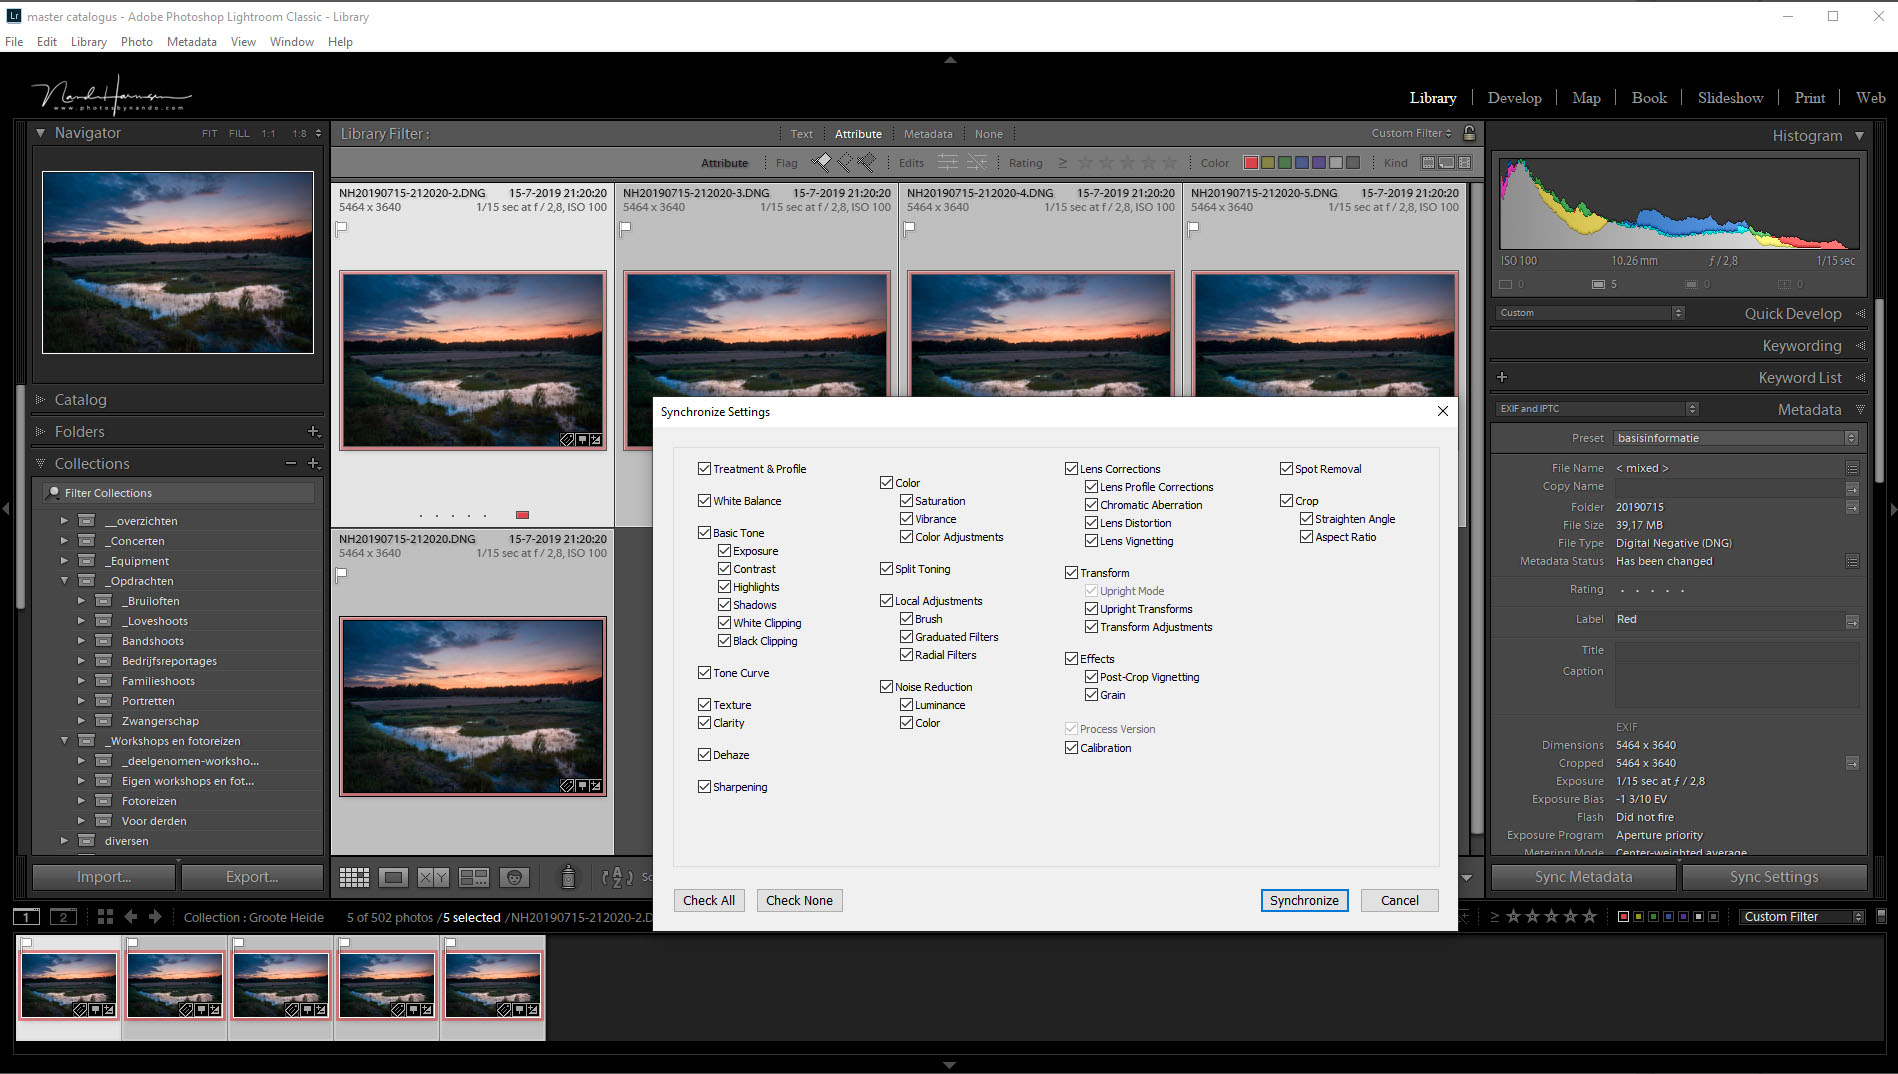
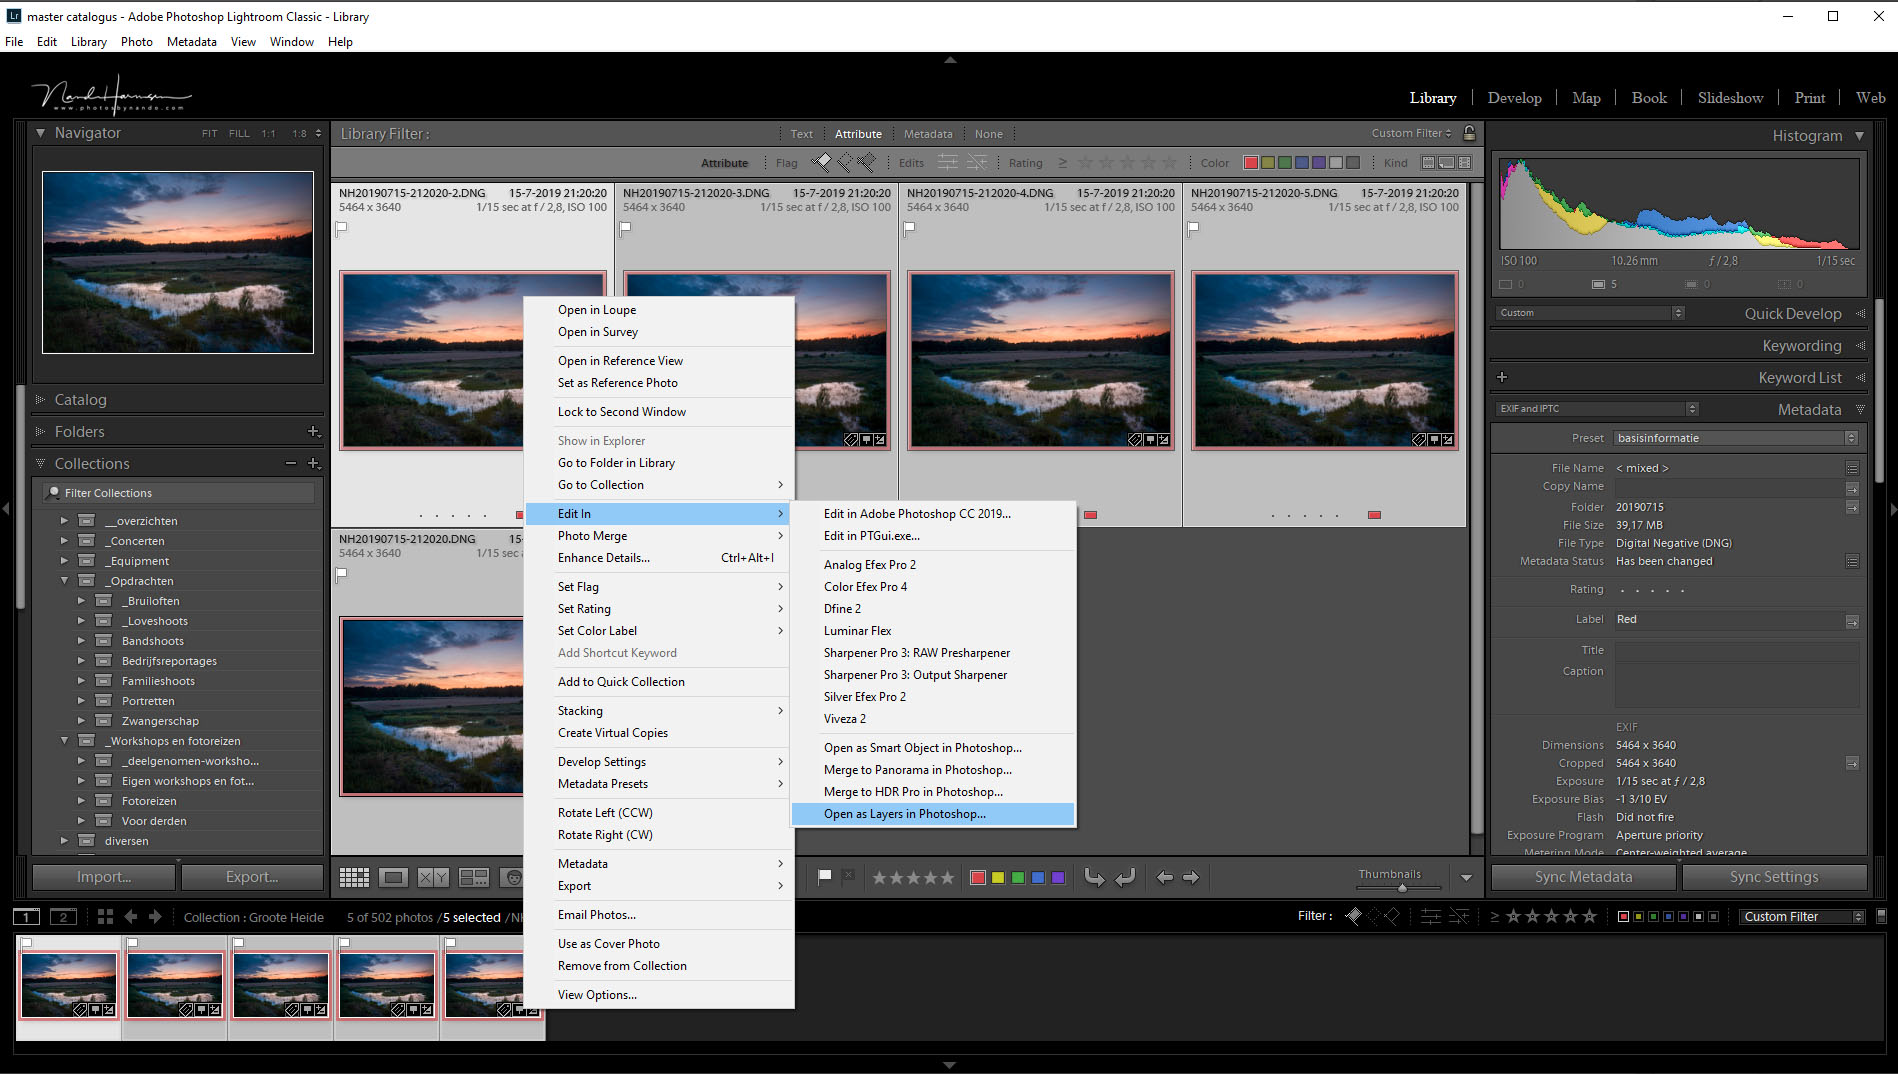
After I imported all images in Lightroom, I edited one of the five images to my liking, making use of the dynamic range of the drone camera. I copied all settings to the remaining four images. I made sure to set sharpening and noise reduction to zero, and disable all lens distortion settings. Next, I have transferred all images as layers into Photoshop.
Now I have all images in Photoshop, as layers on top of each other. First, I must be sure the images are perfectly aligned. If I would use a camera on tripod, this step is probably not necessary, but a hovering drone may cause a slight misalignment, especially when there is a lot of wind. You can align the images automatically by choosing [edit/auto-align] in the menu. Make sure you disable the option vignette removal and geometric distortion and let Photoshop do an automatic projection.
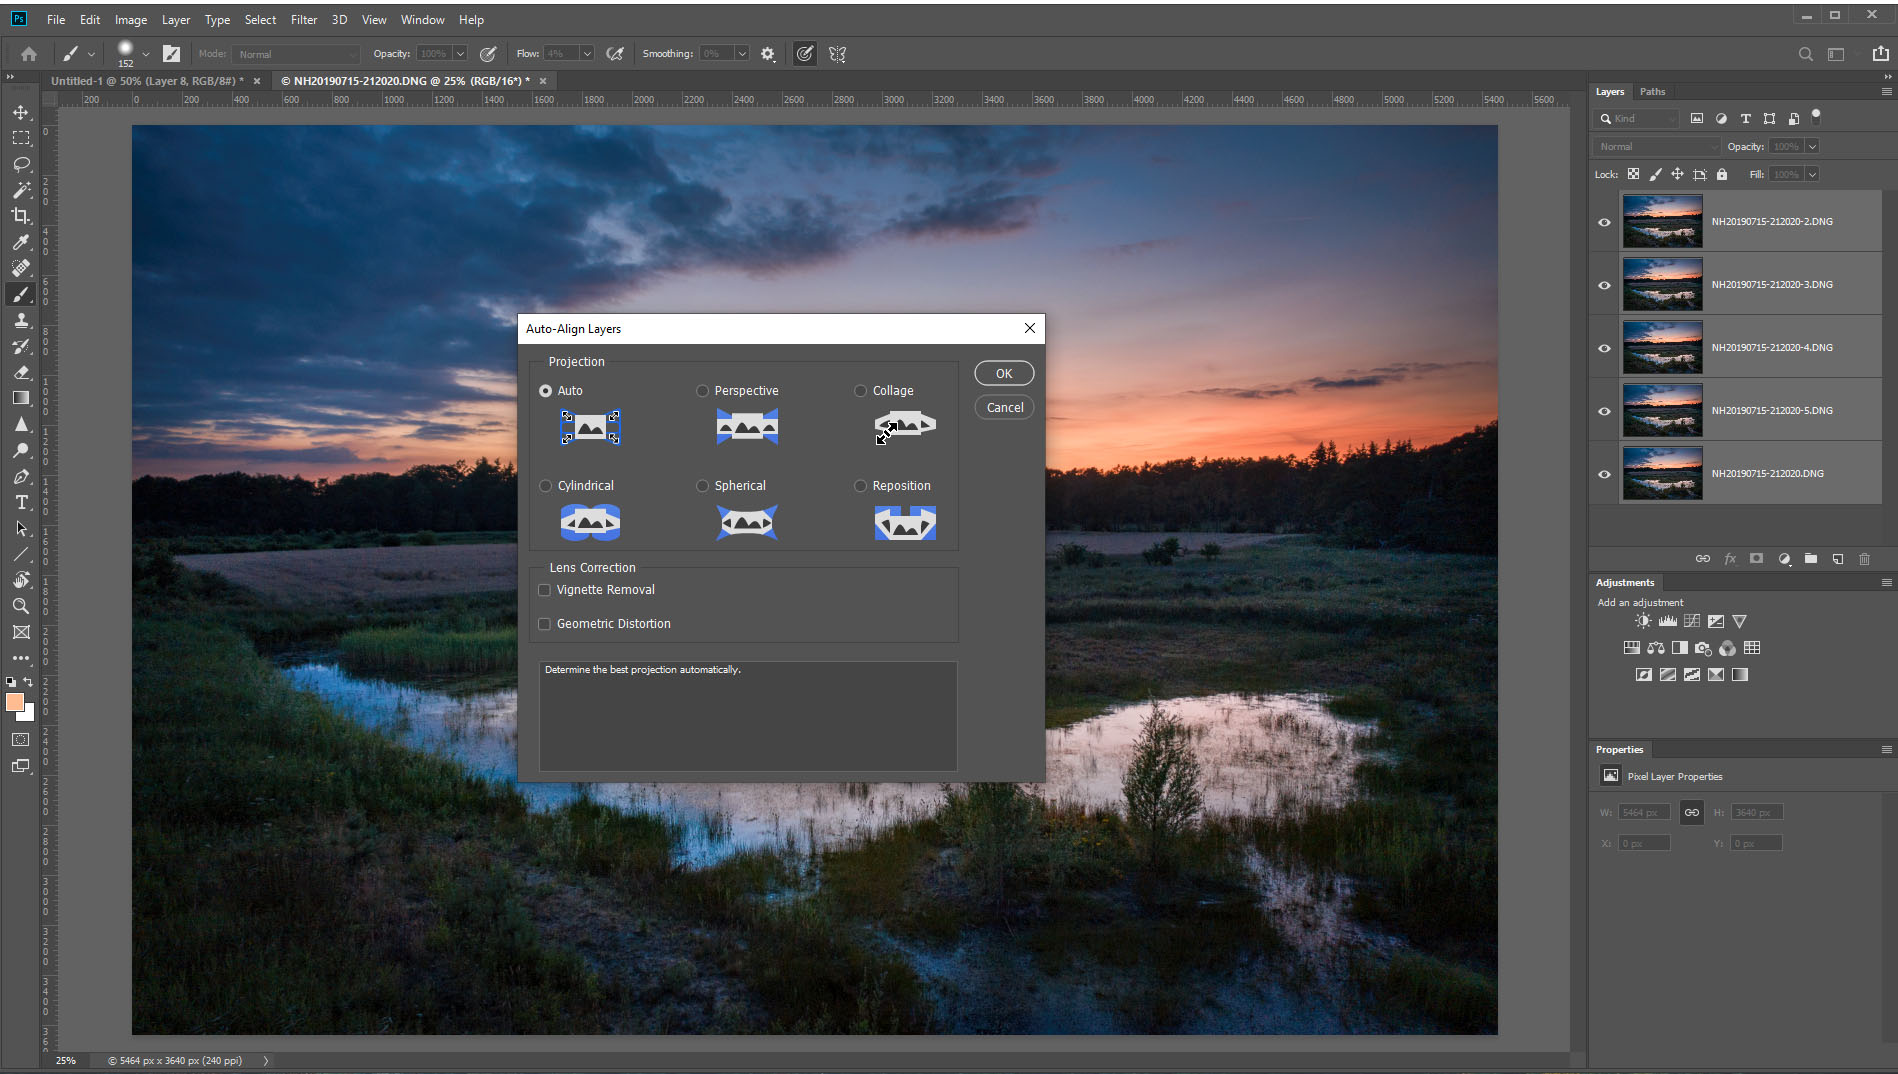
Check if all layers are perfectly aligned. If one image may still be misaligned, delete that layer. But remember, the more images you stack, the better the results.
If everything is to your liking, select all layers again and transform it into a smart object. You can find this option in the menu [Layer/Smart Objects/Convert to Smart Object]. Depending on the size of your image, and number of layers, this may take a while. When the smart object is made, you can stack the layers in the smart object with the option Median, that can be found in the menu [Layers/Smart Object/Stack Mode/Median].

![By using the stack mode [median] all layers that are present in the smart object will be merged and the noise will disappear. The method is more effective when using more images.](https://cdn.fstoppers.com/media/2019/07/22/nando-stacking-noise-reduction_0004_layer_11.jpg)
After the stacking is done, you might want to rasterize the image, so it becomes a normal layer again. This will reduce the file size. After this last step I am ready to save the file, which is then automatically added to the Lightroom catalog.
That’s it. You successfully stacked the images and reduced the noise levels without loss of detail. Just look at the result and compare it with one of the original images.
The more images you stack, the better the result will be. I find five images from the drone the minimum, and rather have ten images, which is easy to accomplish, of course. This stacking method works not only for drone footage, but also for photos made by any other camera, as long as there are no moving subjects in the frame. Even the slightest moving tree branches, or leaves, may cause strange results. So there is a limitation to the method.
If you don't have the possibility to work with smart objects, you can manually adjust the opacity of the layers to get the same result. The first layer should be at 100%, the next one above at 50%. The third layer must have 33% opacity, the fourth 25%. The fifth layer must be set at 20%.
Have you ever used this method for removing noise? What is your experience with it? And if you haven’t used it, would you consider trying it? I would love to read about it in the comments.
If you'd like to take your photo editing to a new level, make sure to check out the variety of Photoshop tutorials and plugins that will speed up your workflow and help you create stunning, professional work. Save 15% by using "ARTICLE" at checkout.


Join the Fstoppers community for free
-
Post comments and join in the discussions
-
Browse the site ad-free
-
Share your work and get featured in the community
-
Compete in the photo contests for fun and prizes
13 Comments
It's a neat trick and you can do it as well in Affinity Photo. For stars/night skies I would choose StarStax.
I used to use imagemagick to produce a mean of multiple tiffs as Photoshop was unable to cope with even 16 100MP files. With the most recent firmware update of the Phase One IQ4 there is no need to waste time on this, the back can produce the result as raw directly out of many exposures.
Well... not everyone can afford a Phase One IQ4 of course ;)
Maybe this technology will trickle down to more accessible cameras - like the focus sweep feature for stacking. :)
Perhaps it will.
👍
Sequator is another great program for noise removal in astrophotography
We see these articles come up from time to time and it's always helpful. Thanks for the refresher
You're welcome. Thanks for the comment
Brilliant! Thank you for the clear explanation. A technique that I shall try with my next drone shooting session. Cheers.
Good luck :)
I'm using that for years now, it usually works great. For easier handling I created a PS action. Some time ago I was visiting a cave (Marienglashoehle in Friedrichroda, Thuringia, Germany). I couldn't use a tripod so I set ISO to 12000 and took about a dozen shots per image. The other people were a bit confused, though. ;)
And the result was very good, I guess. I made an action in PS too. Very convenient.