
Being a good photographer often means knowing where to position your lights to create the desired effect. However, the placement of your lights is only part of the equation; sometimes, it's just as important to set the color of your lights as well. In today's video, I'll show you three different lighting setups that also use color to alter the final images.
I want to be upfront and say that this video and post are sponsored by Profoto. As a professional photographer, I personally have to shoot with all sorts of different strobes and flashes depending on the situation in which I find myself. When you boil it all down, a flash is a flash and light is light. So, even though I can personally say that Profoto has consistently been my favorite manufacture of portable strobe lights, everything I outline in this post and video can be done with any brand of flash or lighting system. Heck, if you crank up your ISO and shoot wide open at f/2.8, you can even reproduce these lighting setups with a few flashlights if that's all you own. Regardless of where you are in your own photographic journey, my hope is to show you just how easy it can be to create dramatic images that contain both interesting shadows and highlights as well as unique colors and tones.
Grids, Snoots, and Gels, Oh My!
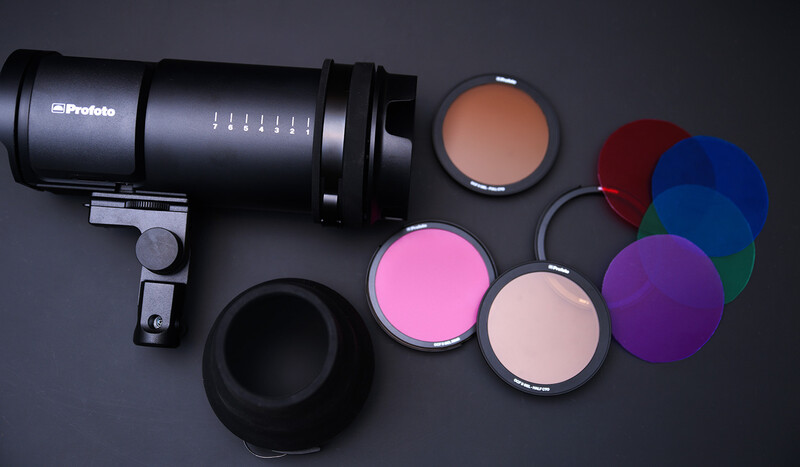
This photoshoot was inspired by a new set of light modifiers I received in the mail by Profoto. Recently, they released their new OCF II Grid and Gel Kit as well as their new OCF II Snoot. If I'm being frank, I was never a big fan of Profoto's previous gel holders, and the set of B10 grids I own are just bulky enough that they aren't the easiest things to pack in a modest backpack. I usually find myself packing one 10-degree grid and then just taping whatever pieces of leftover gel film I have in my backpack to the front of my strobes. Of course, this also means I have to pack a bulky roll of gaffer's tape too (or more times than not, use the greasy electrical type that somehow never leaves my bag). If you've ever found yourself using gels in a pinch, using the gaffer's tape method never looks professional and rarely holds the gels as securely as I would like.
With their new OCF II lineup, Profoto has joined the world of magnetic light modifiers. My favorite thing about Profoto is that they have designed, hands down, the best light modifier attachment system of any strobe on the market. With the new OCF Grid and Gel Holder, you can now easily pop a bunch of modifiers on top of each other and have them all stay secure with strong earth magnets. If you want to warm up the light hitting your subject, simply add a 1/2 CTO gel to the holder, and you are ready to go in seconds. If you double up the 1/2 CTO and the Full Stop CTO gels together, you can easily create the color of the setting sun in the late afternoon. They also released their new OCF II Snoot, which allows you to fire just a narrow beam of light onto your subject. Unlike a grid that also eats up a lot of power, the Snoot can focus your light while still remaining powerful to overcome brighter ambient light.
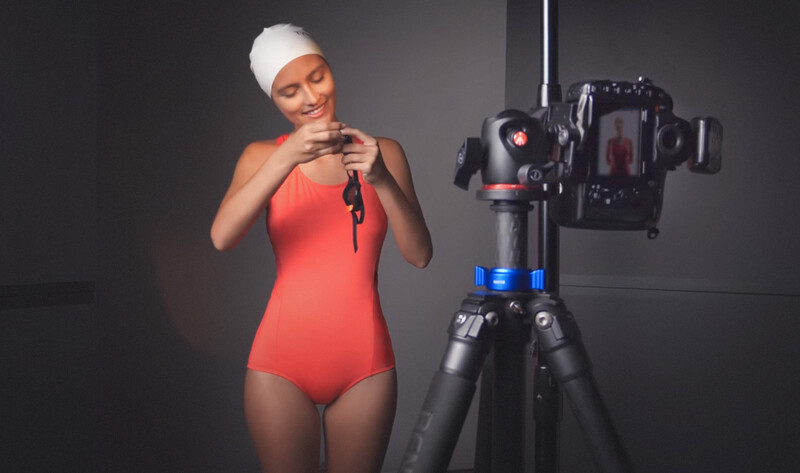
After playing with this new gel holder, the new collapsible snoot, and some of the gels that are included in the kit, I thought it would be fun to experiment in the studio and see if I could create a few dramatic portraits that looked very different from each other. I'd like to thank our rockstar model, Krystal Xamairy, who has been working with us a lot lately here in Puerto Rico, as well as our friends over at V-Flat World for making these awesome collapsible V-Flats used throughout this shoot.
The High Key Background
The first image in this series is a standard shot that every photographer gets hired to shoot from time to time, and that is the high key, pure white background look. This can easily be achieved by firing one or two strobes into a flat wall or roll of paper (the closer to white in tone, the easier). The reason I like to use two lights instead of one is that I'm more easily able to make a large section of my background pure white without any sort of vignetting or hot spots appearing on my background. However, for this setup, I'm not going to fire my strobes directly into the background at all.
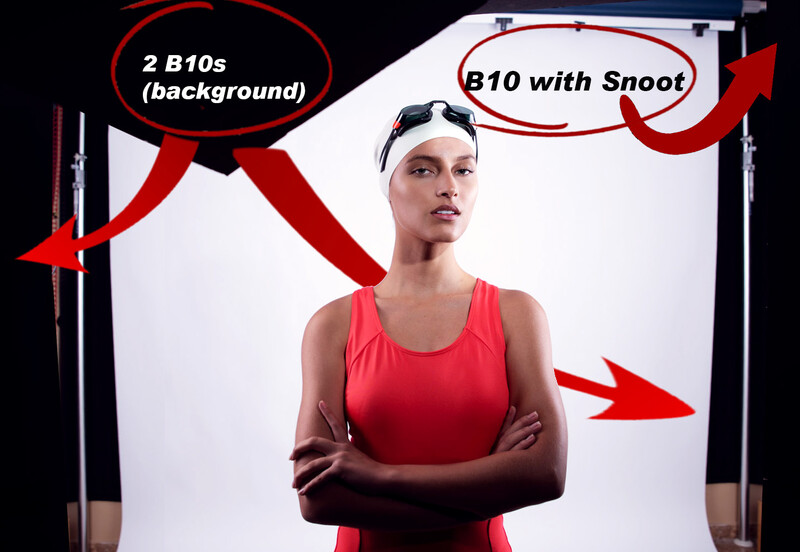
Enter the v-flat! V-flats are just two large boards taped together that form a "v" shape when they are stood up on their ends. What I love about the V-Flat World boards mentioned above is that they are black on one side and white on the other side, and they break down so they can easily fit in your car (or ship to your destination photoshoot). By setting up the V-flats so that the white cove faces a white wall, you can essentially fire a strobe into the V-flat, which in turn casts a large, soft light onto your background. This helps spread the light from a small strobe like a Profoto B10 and turns it into a huge source that creates a more even spread. Keep in mind, using this "bounce" technique does eat up a lot of power, so you might find yourself turning your strobes up close to 1/4th power or even full power.
What is so great about using V-flats to light your background is not only can you get nice, even light spread over your entire white wall, but if you position the edge of the V-flat board just right, you can also create a sort of rim light effect on your subject. The trick here is to make sure some of the light hitting the whiteboard farthest from your model bounces forward and lights up the side of their face and body. Usually, this effect would be done by placing two strip softboxes behind your subject pointed at your camera. However, if you tweak the position of your v-flat just right, you can make two strobes look like you are actually using two or three lights all at once. Since my studio is pretty small and has pure white ceilings, I also added a piece of black foam-core just above Krystal so that no stray light bouncing off my ceiling illuminated her face from above.
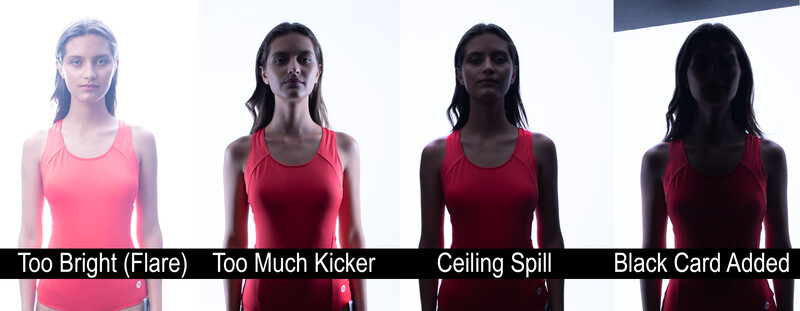
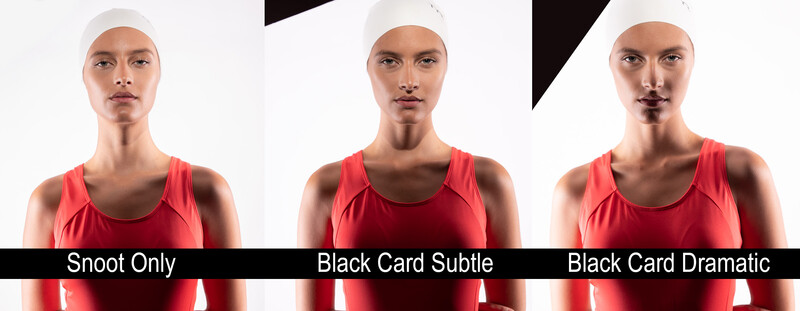
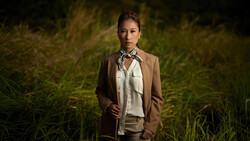
Now that we have our background pure white and a little white light spilling onto the sides of our model, we now need to set a key light to illuminate her face. I could use any light modifier to light up Krystal's face, but I want to create an edgy-looking portrait with lots of shadows. Therefore, a beauty dish or softbox isn't going to be the best option for my key light. A grid or snoot would work much better, and since I just got the new OCF II Snoot in the mail, I wanted to see what I could do with a very small light source. To create even more shadows, I also held another piece of foamcore up in front of the snoot so I could cut some of the light off Krystal's swimsuit as well as her clavicle and parts of her neck and face. In the photos below, you can see the snoot by itself in the first image and then a few variations using the foam-core.
Simply Change Your White Balance
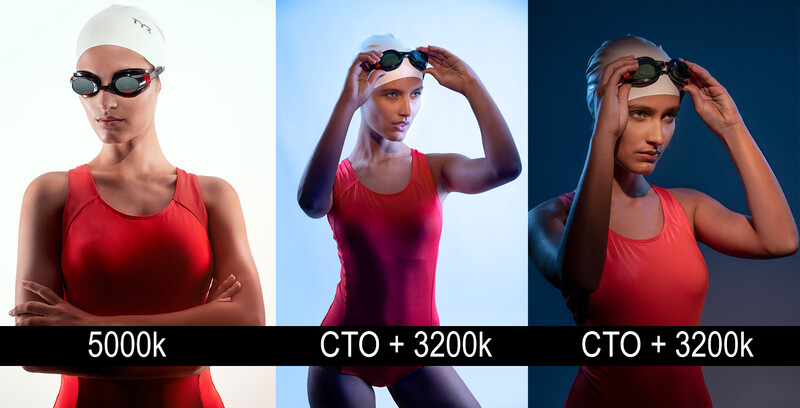
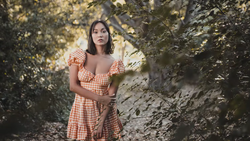
For the second lighting setup, I wanted to create a completely different looking image without actually changing any of the light positions. One trick I've been using for over a decade involves using a strong CTO gel on your key light and then essentially color-correcting your camera for the increased warmth. Since strobes and flashes are typically balanced for daylight, you will want to set your camera to about 5,000 Kelvin to create white-looking light. By adding both a full CTO and 1/2 CTO gel from the Profoto Gel Kit, my flash now turns incredibly warm. If I dial my camera down to 3,200 Kelvin or even cooler, I can make my gelled strobe appear closer to white, but all of my non-gelled lights will now register strong blue. By simply gelling one strobe and leaving the others daylight-balanced, you can easily create contrast in colors that completely alter the style of your photos. You can see how different the middle and right images look from the normal non gelled image on the left.
Also, you can experiment with the background density simply by turning down your strobes firing into your v-flats. For the brighter image, I simply dialed down my two B10 strobes two stops, but for the darker image on the right, I dialed them both down an additional three stops.
This trick works in the studio, but you can also use it outdoors too. When you change your white balance outside from 5,000 K to 3,200 K, your sky will also turn bluer, and sometimes, it can even appear different shades of cyan depending on the time of day you are shooting. Experimentation is the key, as well as playing with the number of CTO gels you stack on your flash. The more warmth you add, the lower you can drop your white balance, but the more extreme the color contrast will become.
A Colored Fill Can Make All the Difference
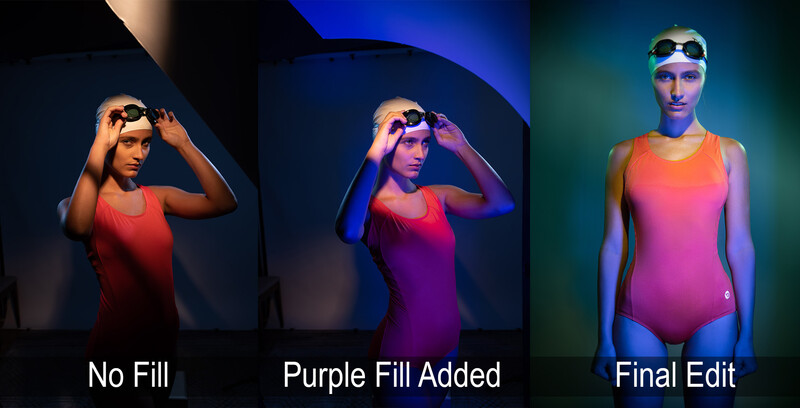
The third and final lighting setup I wanted to share involves simply adding a gelled strobe from the front. This will add a color cast to your shadows if you leave the flash powered down, but don't let a subtle pop of light fool you. This technique will give your images a very different look that's even more exotic-looking than the white balance trick mentioned above.
With this technique, you can add or remove the background and rim lights if you want. I wound up keeping my background strobes on, but I turned them pretty far down so they just barely illuminated my background paper. Also, because I wanted to create as much color contrast as possible, I left the 1.5 stops of CTO on my key light and kept my white balance set to around 3,200 K. To add color to my fourth light, I simply cut out a piece of purple gel from a gel pack I bought on Amazon and slipped it into my blank Profoto Gel Ring. This gel holder works just like the permanently constructed CTO gels, but since it is blank, you can add any colors you wish to it. The Amazon gels mentioned above work well because they are stiffer and denser than normal Rosco gels you might be familiar with, and they keep their shape inside the CFO gel holder much better.
This effect is super interesting, and you will definitely want to experiment with different color gels on your fill light. Remember, the goal is to fill in just the shadows with color so your flash can be set very, very low to achieve the desired effect. If you find your subject has too much of a color cast, chances are your fill light is too bright. One caveat here, though: it will be nearly impossible to completely color-correct any of the colors in post, so make sure you aren't casting any extreme colors on areas of your model where you don't want them. It pays to take the extra time to zoom into your model's nose, chin, eyes, and any other highly reflective areas to make sure you are happy with where your colored strobe is injecting light.
I hope you enjoyed this photoshoot and were able to take something away from this studio lighting session. If you never tried photographing a subject in front of a pure white background or if you have never experimented with lighting someone with something like a snoot, I'd encourage you to try both techniques separately and then together. I love testing new light modifiers and seeing what kind of highlights and shadows I can create with tools that I might not always think to use for a portrait session.
If you enjoy this kind of content, maybe sure you subscribe to the Fstoppers YouTube Channe,l because we try to release video content like this every week. We've also recently launched our all-new Fstoppers Live Channel, where we will be doing a lot more live content, including Critique the Communities, Photography News, and of course, more Coronavirus Journals.


Join the Fstoppers community for free
-
Post comments and join in the discussions
-
Browse the site ad-free
-
Share your work and get featured in the community
-
Compete in the photo contests for fun and prizes
4 Comments
Nice!
I liked it. Thanks!
Not sure if the shoot is about the model or just advertise for profoto...
It’s about 3 different lighting setups you can use to be more creative.