
Photography is all relative to the creator and the viewers, so the decision of whether to underexpose, overexpose, or to expose your portraits evenly is obviously subject to personal preference. There is merit to any of the methodologies that you could apply to your own photography and it really just comes down to figuring out what works best for you and your gear.
Even then, this article isn't meant to be a debate about best practices or even which gear is best. I've just found, through the course of my own experience, that some techniques tend to work better for me and my workflow than others and I have found that others have had similar experiences.
I can tell you this: I almost always underexpose my images. I shoot with a Canon 5D Mark III and I've been using that camera for almost four years now so I feel like I have a fairly good idea what it's capabilities and limitations are. Again, let me reiterate, much of the decision to modify your exposure up or down will depend on how well you know your own gear and how you use it. One of the things that I have learned about my own raw files created by the 5D is that it is so much easier for me to recover shadow areas than it is to bring back my highlights. So if I really have to choose between my exposure settings because of a high contrast scene then I will opt to underexpose simply because my chances of evening out the exposure in postproduction will be much higher with shadow control.
I've been doing a little digging online and, this probably won't surprise you, I found some differing opinions. There are plenty of people that advocate shooting underexposed images the entire time and simply using postproduction to balance out your exposure. Yet there are others that firmly believe that you should never underexpose your shots. I found this video by Cole's Classroom to be on the one side, where he recommends to shoot underexposed images and he shows you how he brings back his shadow images.
https://www.youtube.com/watch?v=MGIKbXcqgn4
There is also this video by Tony and Chelsea Northrup that takes an approach a little differently than what Cole's Classroom suggests. Or does it?
They urge their viewers to stop underexposing their portraits. I've watched this video several times now to make sure I didn't miss anything and I noticed a couple interesting points. In each example that Northrup uses, take a close look at his raw images before any modifications. Every single one of his raw images, straight out of the camera, was underexposed. Throughout the entire video, he tells us to stop underexposing our portraits but both portrait examples and even his wildlife example shows raw images that are in fact underexposed. With each example, he uses his Adobe Camera Raw controls to bring his exposures back up to an even range for his subject matter. So when he tells us to stop underexposing our portraits, I honestly think he's talking about the output file itself, and not necessarily the raw file.
Just for fun, I played around with a simple portrait in Lightroom after watching both these videos to try and see how much control I could take over an image that had been underexposed. So here are a few before/after sliders to give you an idea what I was looking at.
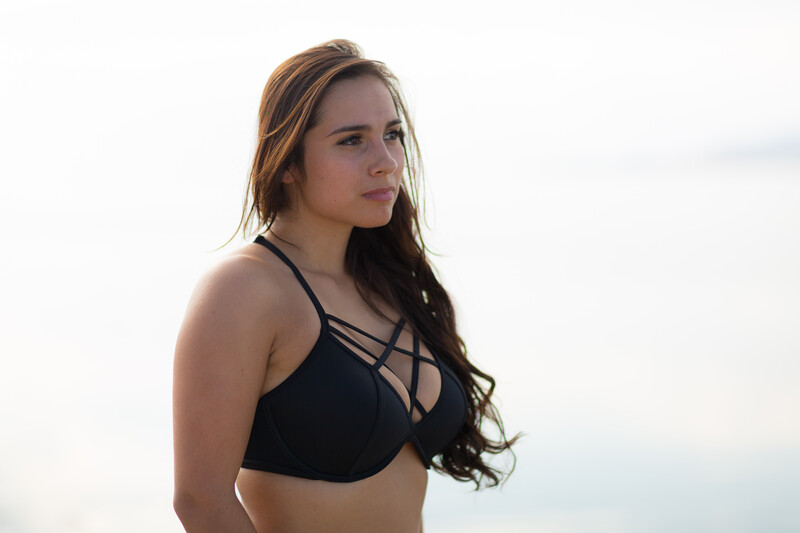
In this example, we have the original shot straight out of camera compared to the same shot where the only difference is that the exposure has been bumped up +1.5.

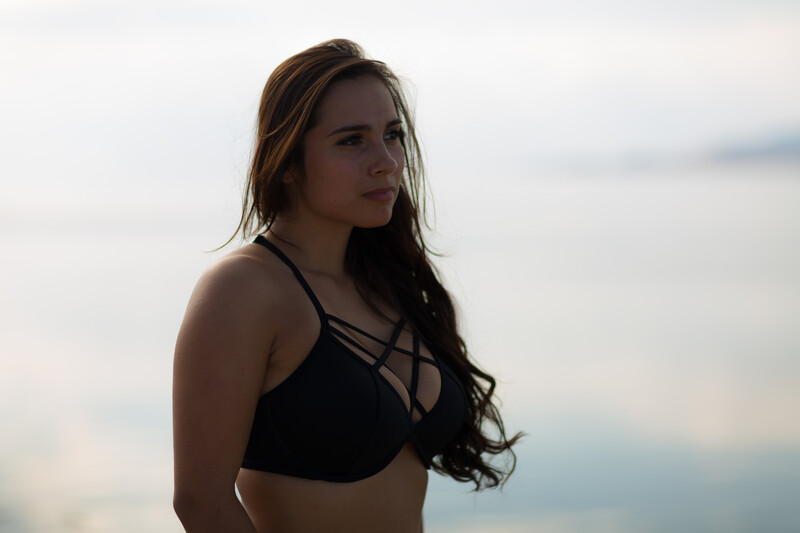
Now in this comparison, we're looking at the image straight out of camera compared to one where the exposure has been bumped up +1.5 and the highlights have been dropped -100.

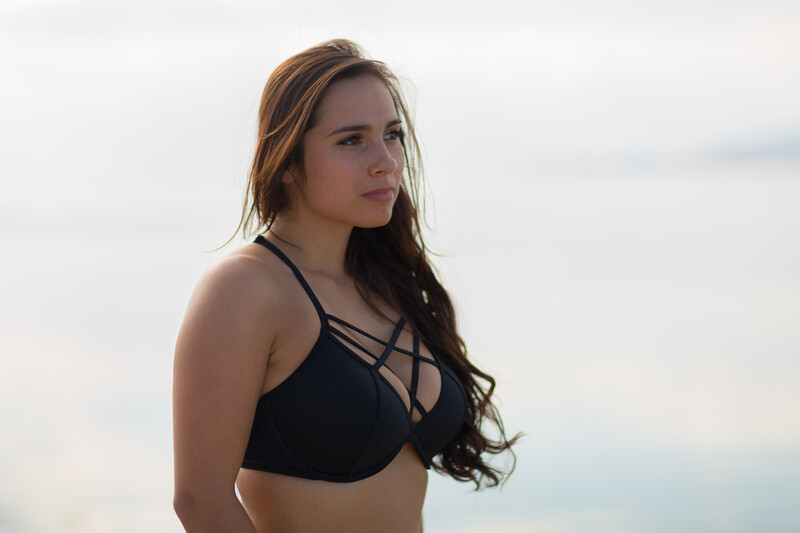
Now just so we can compare the simple difference of using the highlights slider on the image after the exposure has been bumped up, this comparison is the difference between the two edits. The only difference is that one has had the highlights dropped in conjunction with the exposure boost.

I looked through my archives to find a shot where I had actually overexposed it, just to see if we could compare those shots against these where they had been underexposed but none of the images I had on file had any highlights that were recoverable. That's not to say that highlights can't be recovered, but in my own personal experience, it's much easier to recover, or even out, exposures that have been underexposed. In both the tutorial videos that we looked at, each of the instructors used underexposed images and then brought their exposures back up in post.
In the video by Northrup, he mentions watching your histogram several times throughout the video. That right there is probably some of the best advice that could help us know whether to underexpose or overexpose or evenly expose. He talks about clipping his whites or blacks while comparing histograms. Basically, clipping blacks or whites means that you have so much of either black or white that the entire pixel registers as a solid color (white or black), at that point those pixels are not recoverable and will stay the solid white or black that they are. Paying attention to your histogram, in camera, is your best way of determining while on the shoot, what your chances are of taking better control of your image in postproduction. If you're shooting a subject that has intense highlights and shadows to the point where you're forced to clip one or the other then that is where advanced processing techniques like exposure blending and HDR have come into play.
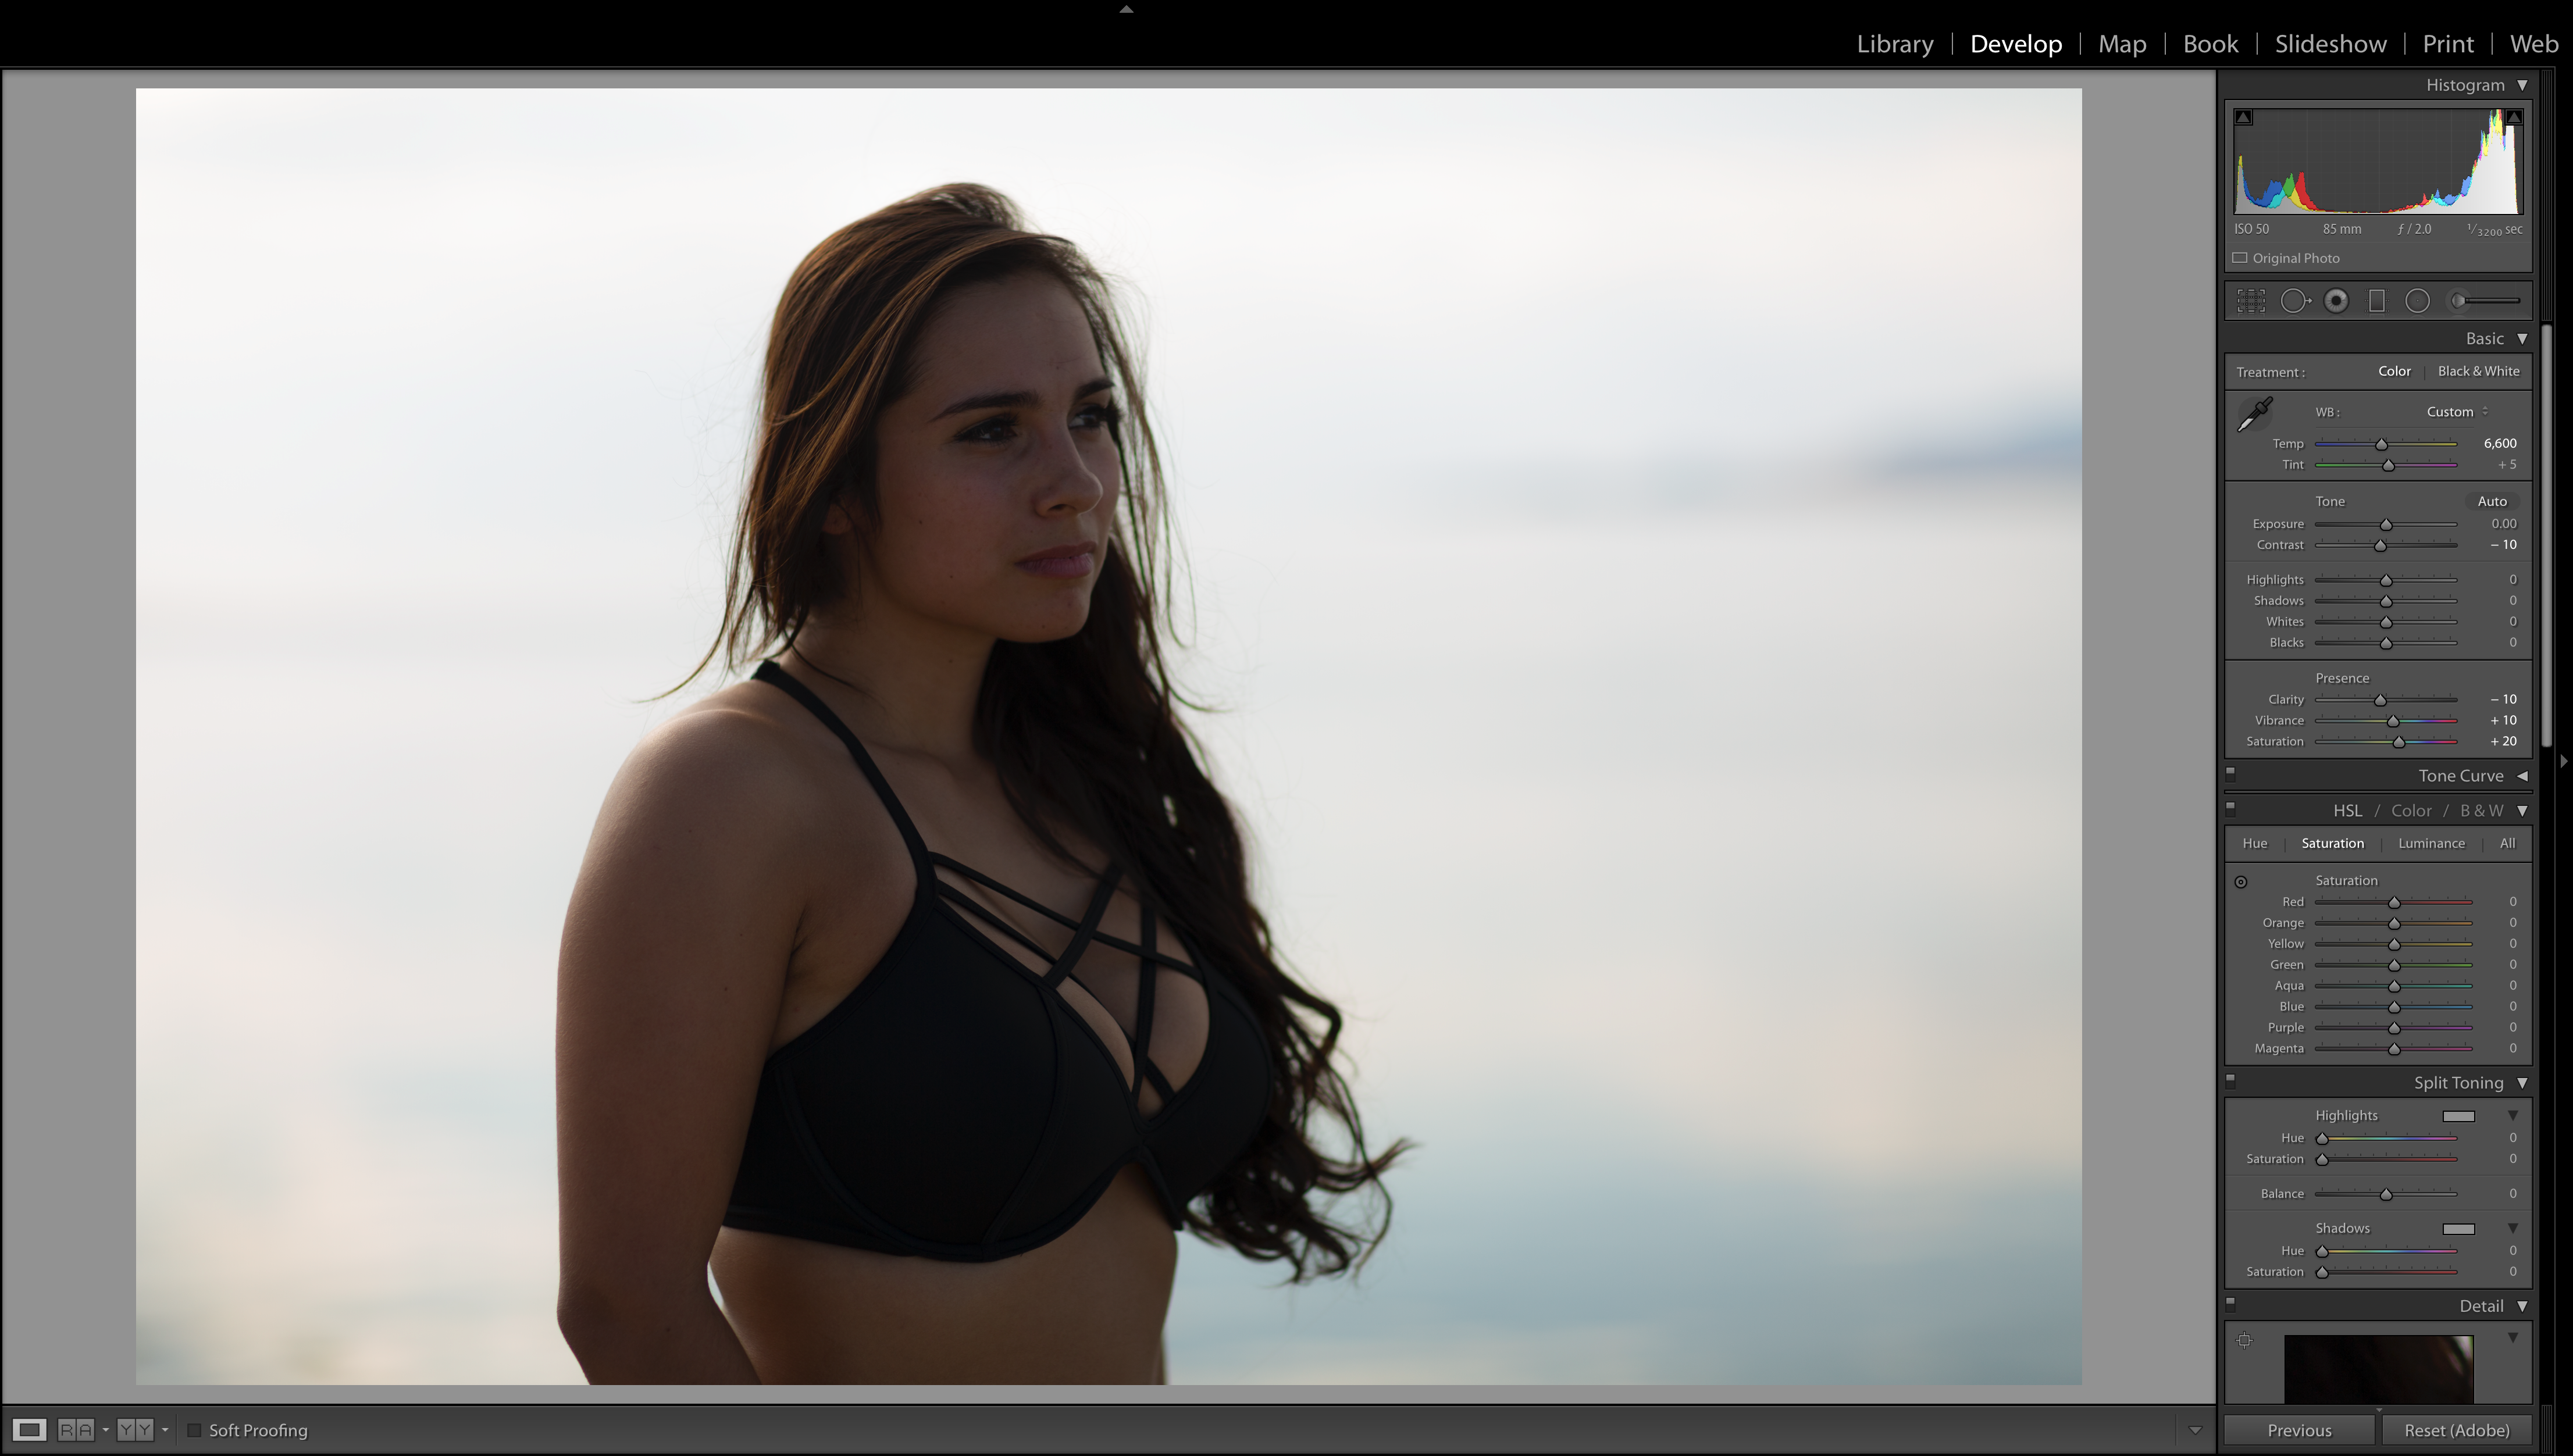
If you take a look at the histogram of my example shot here in Lightroom, you can see that I have a fairly decent histogram. Sure, to the eye the shot is indeed underexposed, but I've preserved all the necessary data so as to have better control over the shot in postproduction. If I were to call it done and post this shot to Instagram, then that's what Northrup is telling us to avoid. I've preserved my histogram, but that's just to set myself up for more postproduction control. Now I can make the most of that digital negative.
Technology is continually advancing, cameras are getting better and better every year, and maybe one day I'll end up owning a camera that is able to preserve highlights as well as it does the shadows. But for now, for my gear, I find that slight underexposures help me make the most of my images in postproduction.
Make sure to comment if you've found any other shoot or editing techniques that have helped you make the most out of your shots. I've found that film is still better at highlight recovery than any digital format; give me some Kodak T-Max 100 and I can preserve highlights all day long, but digital is a different beast. So if you found a better method to preserve your highlights in digital negatives then by all means let me know because I simply have not figured that one out.


Join the Fstoppers community for free
-
Post comments and join in the discussions
-
Browse the site ad-free
-
Share your work and get featured in the community
-
Compete in the photo contests for fun and prizes
28 Comments
Outdoors, I always slightly underexpose with digital. Indoors I might overexpose by 1/3 of a stop, but no more. With film, I almost always overexpose about a stop.
While there are a a few instances where the photographer may intend to photograph a portrait as a silhouette (grossly underexposed), or as high-key & over-exposed (for the intended effect), I would bet that 95% of all portraits taken are shot with the intention of correctly exposing for skin tones. With that said, I firmly believe there is a correct way to expose the skin, and incorrect way.
Every camera's exposure latitude yields the most natural (and correct) color & contrast when properly exposed.
With that said, I'm inclined to strongly disagree with your opening statement: "Photography is all relative to the creator and the viewers, so the decision of whether to underexpose, overexpose, or to expose your portraits evenly is obviously subject to personal preference."
Sorry, no. There is the right way - which yields a great shot SOOC, and the wrong way - which requires hours in post.
The unfortunate byproduct of digital photography is that many people rely on "fixing it in post" instead of actually understanding exposure, and using it correctly.
If you're a portrait photographer who is afraid to share the picture on the back of your camera after you've taken it, you're doing it wrong.
The most accurate way is to exposure for the skin. Use the spot meter on your camera :-)
"If you're a portrait photographer who is afraid to share the picture on the back of your camera after you've taken it, you're doing it wrong."
I disagree. There are plenty of situations working outdoors in which I'll underexpose the subject to protect background highlights knowing full well I'm well within the limits of imperceptibility by any normal viewing process when it comes to that vs. blowing the highlights to expose the skin correctly in camera. And it doesn't take hours in post; it takes about 10 seconds with the sliders in Lightroom.
What's more important to you? Maintaining correct exposure of skin & the tonality of your subject - which is the central point of a portrait, or the out-of-focus background? Expose for the most important element in your scene, not the least.
In environmental portraiture, the scene is still a part of the frame. A big, white blow out is a huge visual distraction as opposed to a welcome, visual part of the frame that harmonises the colours in the image.
Do you think in this image that a blown out white sky would not detract? I bracketed this shot (this is the - 2/3 exposure comp shot) and I can assure you the skin tone looks exactly the same in both. If I were in a lot closer I would have just exposed for the skin and let the sky blow out because it's not an important part of the image.
+1 to Alex. I often see arguments like, "I'd rather spend my time shooting than hours behind a computer." and obviously I agree with that statement... but if I've deliberately over- or under-exposed a portrait session to improve the technical image quality, I just select all those pictures in Lightroom and adjust the exposure all at once. It's literally 5 seconds for the entire set of images, and the end result might be portraits with skin tones that are 2-4 times smoother, cleaner, and more realistic.
Other stuff, like removing a stray hair from the face, is WAY easier to fix during the shoot than in post. I definitely try to get that stuff right in-camera.
I think post processing work is specific to every photographer and the genre they shoot. Don't misinterpret me.
You will achieve the best skin tones if you expose for them.
If you're getting over exposed backgrounds, try shooting during the Golden hour instead of high noon, or find a wide open sky to cast natural light onto your subject. That approach generally yields both the foreground and background to be within the same exposure latitude.
I spent hours trying to get the proper skin tones in post and I also noticed what Michael says - if you really want have great skin tones, you need to expose for skin, otherwise an typical colour profile used in ACR (or any other RAW converter) will shift colours during changing exposure in post. Moving Exposure slider in RAW converters doesn't explicitly means the same as changing exposure on field in terms of colour rendering. Twisting/Unvarianting camera profiles in theory should help, but personally If I got exposure right I'm happy out of the box, otherwise there is... a lot of pain in post.
Hey, I agree with your main point about working to get the best exposure possible in-camera. I probably could have elaborated a bit further with my opening statement. What was in my mind was more along what you hit on, the topic of creating deliberate silhouetted shots, or creating images with a moodier feel be it high key images or low key images. I simply was trying to keep the article more about exposures than to differentiate the differences between what one might call low-key and what someone else might deem underexposed. That's all.
I do concur with the point you're making, it really is better to set yourself up with a better image SOOC than it is to try and fix blunders in post production. But sometimes it's nice to have the latitude available with the raw format so as to push the capabilities of the digital negative.
And yes, spot metering for the win! Every time!
There's a huge difference between having to salvage something in post versus having post-processing being part of your process. Anyone who ever made a darkroom print was post-processing. Jpeg's are post-processed, you're just letting an engineer do your creativity for you.
@Michael Kormos. You obviously forgot that post-processing a shot is not a feature of digital photography. In classic film photography, you "post-process" the shot in the darkroom by dodging/burning areas you want to over/under-expose. The aim of combining a shot and its post-processing is to have a photo with details in the shadows AND highlights on the subject AND the foreground. If we can afford the time to do that, or need to do it, we might well do it. On the flip side, if we are shooting for news for example where the turnaround is really short before delivery, then yes, expose correctly for the subject and only the subject, even if that means the background is pure white or pure black. Your technique should depend on what you want to accomplish, not shooting in some arbitrary way because some fool told you it's like that.
To clarify, yeah, my video was about the exposure of your final published picture. I made it for beginners who tend to use autoexposure for their portraits and then publish them without any editing, and most camera's AE systems will underexpose portraits. It depends on the scene and the skin tones, but generally the right brightness is with the face brighter than middle grey.
BUT, while I'm here, I'm a big advocate of ETTR (exposing to the right), especially for portraits where 1 extra stop of brightness reduces noise in skin tones by 1/2. Don't blow out highlights in the face because you'll lose detail, but most camera's raw files allow for 1-2 stops of covered highlights, so you can almost always shoot portraits at +1 exposure compensation and get cleaner results.
Honestly, I've never understood editors who deliberately unexpose their portraits. I've tried, but I'm completely unable to see any benefit in side-by-side testing. All I see is extra noise. If someone can tangibly show the benefit to a raw file, I'd love to see it.
I really think it depends, if you are in a situation where you have to think fast and you only get a chance to take one exposure, then yeah I'm going to underexpose by a half or full stop (to what I think the scene is, not necessarily what the camera tells me is +/-0) to make sure that I protect the highlights.
Also, if I have to shoot at ISO800 and bump it to "1600" in post, I don't really care because if the story/moment/expression/light is there then that will more than compensate the difference in 1 stop of noise ... to me anyway
I'm glad I understood your video correctly. :) That's why I summed up my brief about it the way I did. I also think you're 100% on the money when it comes to exposing for the skin, especially the face.
I'm on your side, I've seen countless of images that have been posted in what seems to be a clearly underexposed state. I don't understand it either. Definitely not what I would have done.
The title of this article is a bit misleading: "To Underexpose or Not?" My answer would be "It depends."
Oh, it's for portraits.
I will underexpose sunrises and sunsets from -1/3 to -2/3. This is something that I've carried forward from film to digital and for those photos, my white balance is also set to daylight (yet another carryover from film).
Nope. I'm not saying that at all. I do shoot both 35mm and 4x5 Velvia from time to time. But because of your comment, I've ordered some Kodachrome 25 off Ebay just so I can have the chance to play with it, thanks for the suggestion! :)
This is like asking “should I underexpose or overexpose on film?” The answer would be “well, what is the film?” Same here: all sensors are different. The answer for a 5D Mark I, Fuji S5, and D810 will all be different (just to name 3 cameras with radically different shadow/highlight relationships)
I guess a better title would have been more along the lines of 'Get to know your camera better." Because you're right, my experience is limited to Canon cameras, and I would simply not be surprised to see largely varying results from different bodies. I can tell you this, I do find the entire topic fascinating, how some sensors do better than others. If there was a list, that detailed all that for each body, I'd love to read that list!
My experience is much different. The 5D MKlll bodies I use always capture better files with generous exposure, or exposing to the right. I find my MKlll meters are easily fooled and tend to underexpose which in my opinion is never helpful for my work. I hope metering in the MK4 is improved.
Under-exposure leads to noise. Other brands, Nikon for example, behave differently. The choice of RAW converter is also a factor.
See, now that is fascinating. I've often wondered how different some bodies act compared to others. Maybe I'm using old firmware, I haven't checked in a while. I have noticed exactly what you're talking about, how the meter can be fooled fairly easily. If you end up doing any field testing in this realm with the MK4, I'd love to hear the results!
i always underexpose by 1/3 of a stop all my work. i can easily correct that automatically in LR. it is the simplest way i've found to protect the highlights , also, if needed i bring up the shadows in post. The secret? SHOOT RAW AND ONLY RAW... its the best way.
This subject is everywhere!
For obtaining the best file with the best information possible the correct and scientific way (not artistic one), is exposing to the right, that is: bringing the histogram to the right, normally until just before clipping your highlights.
That point could be further away than the histogram seems to tell because that histogram is from a rendering JPG the camera produces. Normally you have some room that varies depending on the scene and the way your metering is set to work.
Depending on the scene, you can even clip lights if that means recovering a higher percentage of the information in the shadows. If the image is mostly low-key, could happens that clipping a 2 or 3 percent area of your highlights file area allows you to recover texture from clipped black areas in a 30 or 40 percent of the file, for example. For me the best file is the file with most information, clipping is clipping on dark or highlights. So to obtain the best file implies compromising the area with the less clipping damage. Sometimes you have to blow up some highlights, sometimes you have to paste some blacks.
But that is the way the sensor works. We are not scientists, we are craftsmen and artist and our decisions are based on the results we want to obtain. We have to know how our sensor and our gear works, how light behaves, etc but only so we can play knowingly and create our vision.
I don't see any benefit in underexposing, I prefer to correct expose or overexpose and then bring down the exposition in Lightroom so I can recover shadows without creating noise because I'm not really recovering shadows, I catch the information on camera and then hide it so I can decide where is necessary and bring it back for my purpose. Isn't that beautiful?
I don't think that the fact that the cameras today can bring back information is a reason for underexposing. I think that underexpose without a purpose is simply wrong. I'm very shock with all the thought that photographers are giving to this subject. Is not an artistic decision, is a scientific fact.
All photographers seem to agree (at least the photographers I love to learn from) in the fact that Photoshop is not for creating fantastic images from very bad RAWs, is for taking a fantastic RAW and enhance it. Well, it's exactly the same. The power in the sensor of the camera is not for recovering underexposed information, is for creating the best file possible for our purposes.
For me, the outstanding power of the sensors today is for shooting in difficult and extreme conditions, for recovering shots when you couldn't shoot properly or you made a mistake...
The only times I understand an underexposed file is when I want an underexposed photo. And in this case, I prefer not to underexposed on camera, if it is not necessary to save highlights, because if I underexpose in post I have a cleaner file with the same underexposed exposition I first intended to catch.
If I want noise, I add noise latter, which is another reason in favor of to not underexpose: the noise that Lightroom or photoshop generates is more beautiful than the noise the digital sensors produce when they don't catch enough information.
So the only time I really understand underexposing is when I need to save highlights because other way I prefer to underexpose in post.
And now the other question. Of course you can take very bad RAWS and pass your time making fantastic images with them in photoshop. You have the program, you have the power and you don't hurt anyone doing it, don't you?
Of course you can underexpose and recover shadows in post if your sensor allows you to do that, you have the camera, you have the power and you don't hurt anyone.
But I sincerely think that most of the photographers who are doing that don't understand how the sensor works and my guess is that they, in time, are going to change his mind.
Until now and from what I know, none of the photographers I admire and learn from, are doing that. In the moment that one of them begin underexposing without a reason or recommended that, then I'll give it a try.
Thank you, Samuel! This is easily one of the most comprehensive, information rich, comments I think I've ever seen. I find myself both underexposing and overexposing by 1/3 to a full stop in various scenarios, just depending on what data in my scene is most important for me to preserve. I really don't have a consistent pattern, since my subject range is fairly varied.
I am always on the search for more education and better practices to adopt in my own work so, now you've piqued my curiosity, who are the photographers that you admire and learn from? I'd love the chance to expand my sights of who to follow and from whom to learn. :)
Hi Rex! Thanks, man!
Yeah, exactly the way always has been done, 1/3 to 1 choosing what's important and what isn't.
That was my way of saying that in my opinion no professional photographer (professional in Ansel Adams way not in Brooklyn Beckham way), that is, a good craftsman and technician who knows his trade, underexpose with no reason.
I really learn from them all. I mean, I don't really are fond of Henri Cartier-Bresson but I feel and respect the weight that has in photography history. And that can be said from every old good photographer because without Bresson, for example, it did would not exist, Robert Frank, which I love. It really doesn't matter if one photographer is before or after another. They are all connected. We value one photographer in relation with all the others.
That's the best advice I can give, learn from them all, stuck with the ones who talk to you. For me is Robert Frank, Lewis Hine or Weegee for example. I love the guts, the visceral. I'm not so font about technique. I'm going to take heat for this but I do not enjoy Ansel Adams work. I respect it so much, I admire his brain but is so perfect... I'm looking for the imperfection, for the element who unbalanced everything and make your world tremble. I'm not emotionally interested in perfection, I feel it boring.
One think: for me everyone is an artist, only some people develop that side and others not. I think that every person, no matter how untalented, can become a good photographer if they simply follow a method. This phrase is not mine but I don't remember who said it: "one blur photo is an error, ten are style". No matter how good a photo is, if you take that photo and take it apart from every point of reference, doesn't mean anything anymore. And no matter how bad a photo can be, if you create a series of similar photos and presented them in a uniform well-related way, you have a body of work. Some people gonna love it, some gonna hate it, in reality is the same, the only possible negative thing is the indifference. No artist is liked by everyone, nor hated.
So the only thing that is in our way is our own instability, our insecurity, do not really know who we are. Once we know, we focus on one thing and work in that direction and we produce a consistent work. No matter the quality, quality is always subjective. but we create something that can be read for others. Is that simple.
Contemporary photographers is most difficult. The old ones have the incontestable virtue of opening the way when it wasn't always easy or glamorous to be a photographer. They had to create everything.
Today is so easy and technology make this world so rich... I love the fact that digital brought the power of development to us. I remember an article in which an editor from Magnum Agency showed some old good known photos before and after the editing process, and the photographers really have less than half of the merit. The editor made the shot iconic. It wasn't so common to have a black room before. Today we all have, thanks to the digital technology, an even more powerful tool.
The result is that every day you can discover a new talented photographer though, the line between photography and illustration are less and less clear in some cases.
I love these landscape photographers for example:
Ian Plant: http: www.ianplant.com/index
Miles Morgan: www.milesmorganphotography.com/441665/personal-favorites/
Elia Locardi: www.elialocardi.com/Galleries/Portfolio/
Ryan Dyar: www.ryandyar.com
And Gary Randall which I discovered from a Fstoppers recent article and make me realize how much the four I mentioned are in debt with: https://gary-randall.com/
Felix Hernandez: http://www.hernandezdreamphography.com/work This guy is nuts!
Lindsay Adler: https://www.lindsayadlerphotography.com/index This girl is what I call a perfect complete photographer. She has everything. She is very technical, she has a vision, creativity, a lot of energy, the personality... This girl is everything I want to be in photography, mostly for the fact that she masters precisely the styles I want to get in.
Roberto Valenzuela: http://www.robertovalenzuela.com/ fantástic communicator and occasionally Honey Badger :D (if you follow his workshops understand the joke)
And the list is long, there's a lot of Fstoppers photographers that you already know two. I only follow the people who photograph the styles I want to get in, but I love other too like food stylist Rob Grimm, is so perfectionist, I love it!
And I don't think that I can discover to you a lot of photographers that you already don't know, but if you look for new sources of inspiration, look painting, architecture, comic books, illustration...
Look the work of Norman Rockwell: https://www.google.es/search?q=norman+rockwell&source=lnms&tbm=isch&sa=…
Bernie Wrightson: https://www.google.es/search?biw=1536&bih=759&tbm=isch&sa=1&q=bernie+wr…
Frank Miller: https://www.google.es/search?biw=1536&bih=759&tbm=isch&sa=1&q=frank+mil…
Study Bernie Wrightson's work, see how he uses light, lines, texture, density, elements in his image to guide the eye of the viewer not directly to the point of final interest, like in photography normally we are used to, but guide your eyes over the whole image so he can reveal tou you the history before and after that moment. All that is applicable in photography.
When we look this Rockwell's illustration we see through time, we know, instantly, who won the fight:
And I don't have anything against Brooklyn Beckham. I don't even saw his photos but I heard some very bad critics and I use it for to make a point. My bad. Now I feel terrible.
I think it really depends on the situation. If you underexpose in an already dark setting then expect plenty of noise when you try to recover shadows, and the opposite in bright environments. Of course there are always exceptions. I'm not an expert by any means, just speaking from experience.
Don't be so hung up on overexposing, shoot in RAW. There is one, discontinued, application that is the best for rescuing highlights and that is Aperture. RAW converters CAN rescue highlights regardless of what many purport. A digital camera cannot provide an exact representation of the information it has recorded in RAW, so it is vital that post-processing is required.
Adobe Camera Raw has a setting under the Camera Calibration Tab, a drop down menu that sets the three versions of the plugin according to it's release and subsequent updates. Take an overexposed file, show highlight clipping. Under the 2010 and 2013 settings there is a significant difference in clipping displayed. What Adobe did in their 2013 update is not include an algorithym that technically and correctly removes and thus fixes the highlight clipping, they simply adapted the preview to show less, not remove more. This is effectively duping the user into thinking it has rescued more of the highlight. Adobe Lightroom is ACR with a fancy interface.
For fashion and beauty use Capture One, for everything else Aperture.