Working in Photoshop with multiple layers and then trying to navigate to those layers to make tweaks to your edits can sometimes be time-consuming and at times also very annoying if you have forgotten to name the layer. In this quick tutorial, we'll show you a couple of methods to quickly and easily navigate to the layer you want to isolate and edit without using the scroll wheel.
I mentioned naming the layers in my introduction, if you don't already do this can I suggest you do it's good practice, in general, to get into the habit of naming layers and groups, firstly for your own sanity and secondly, especially for shortcuts like this. The image shown has a total of 44 layers which isn't too much but it can still be time-consuming to wade through for individual edits and tweaks.
Method 1
Go to the select menu and choose Isolate layers and the current layer you are on, be that a group or individual layer will only be displayed in your layers panel. This method will isolate the current layer you are on. Use this in conjunction with method 3 and a wider choice of layer selections are available.
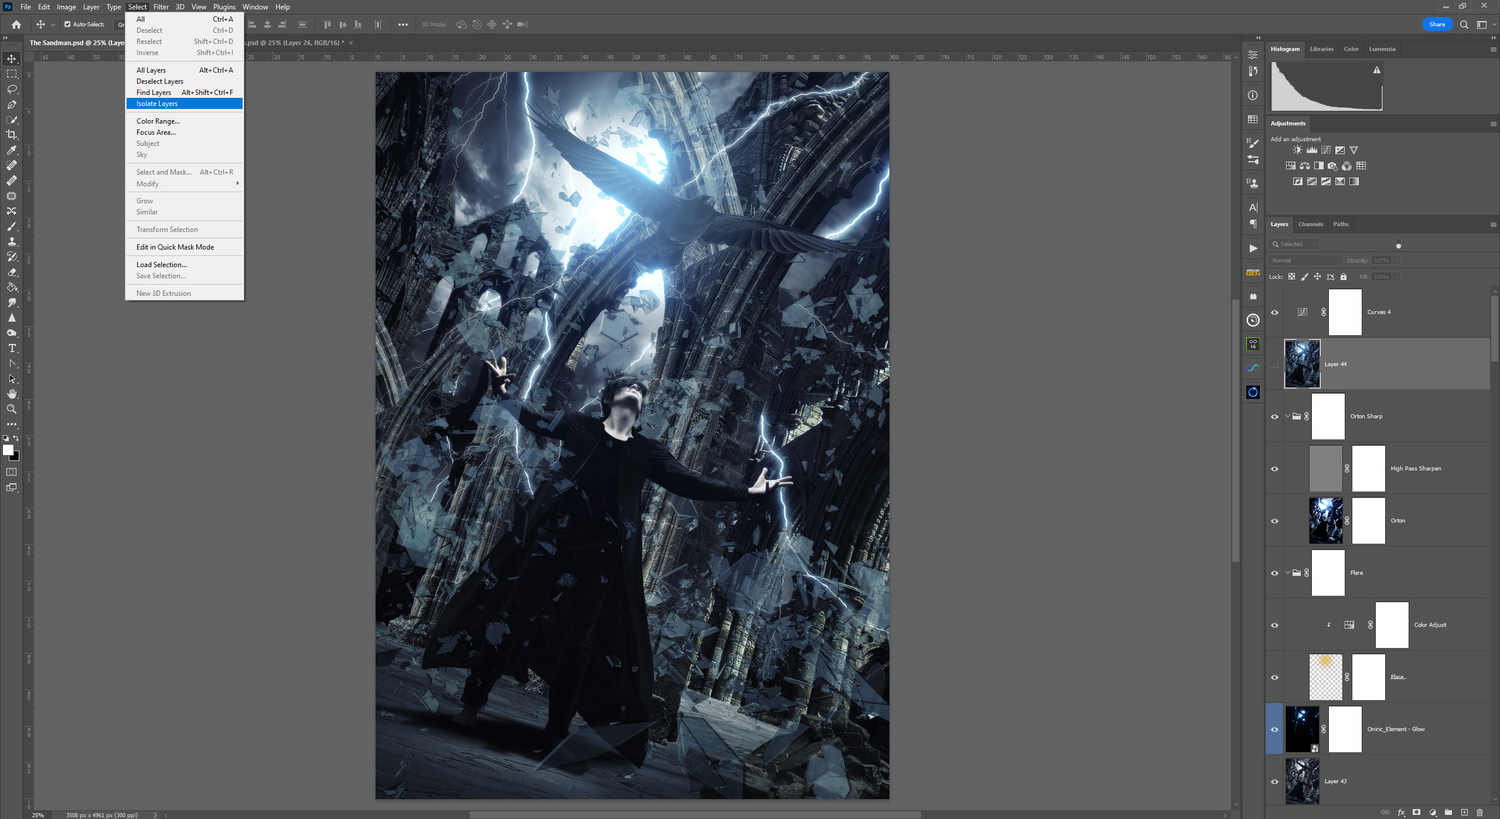
 If you select a group, all the layers within that group will be displayed. Make your adjustments from here and then go to Select > Isolate layers again in the menu and uncheck the tab. Alternatively, you can click the light switch on the layers panel to reveal all of your hidden layers.
Method 2
A shortcut for quick navigation through your layers is a right-click on your image. This will display in a hierarchical system and some of the layers below the current layer you are on. By selecting any one of the named layers in the drop-down, photoshop will automatically navigate to that layer. Right-clicking again on the image will show the layers below the one you have currently selected. You can of course simply use the scroll bar to the right of the layers panel, but if you have accumulated a lot of layers in your edit, this will speed up your workflow.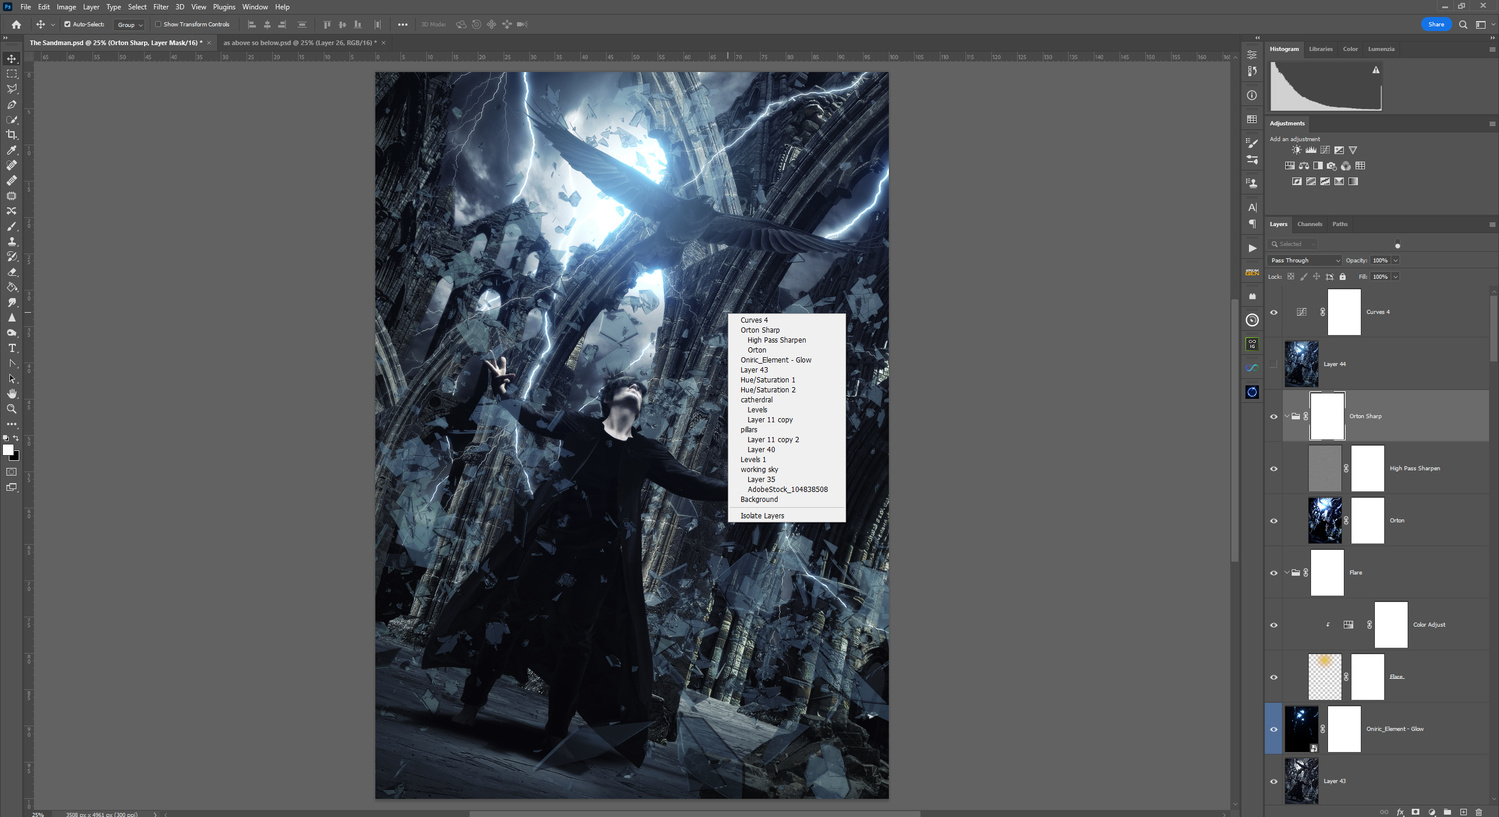
Method 3
Above the layers panel is a selection function, the default for this is Kind. Select this drop-down menu and select an option from here. For the example below I chose Name and in the input field typed curves, which resulted in the curves layers being displayed. From here I could edit the curves layers throughout my document and see the results on the entire image.
Other options are available depending on how you have named your layers or the edits you have applied and it's a very useful feature to start getting to grips with if you don't already use it. I've included some of the other selection methods below to let you see how versatile and time-saving this method can be. Again your selection can be turned off via the red light switch button.
Conclusion
I hope you have found this quick tutorial helpful as it can really speed up your workflow and not just with multilayered documents. It saves time and scrolling even with 10-12 layers. Give it a try if you don't already use it and remember to get into the practice of naming your layers if you do use it as trying to remember what layers 12 or 22 are can just be as annoying using this method or not.