In his video, Benny takes us through his super simple method of adding glow to an image in just five minutes. I like the straightforward and concise way this tutorial is delivered, although in trying to fit all the information into under 5 minutes, some steps might need to be expanded on for anyone new to Photoshop, I hope this article helps.
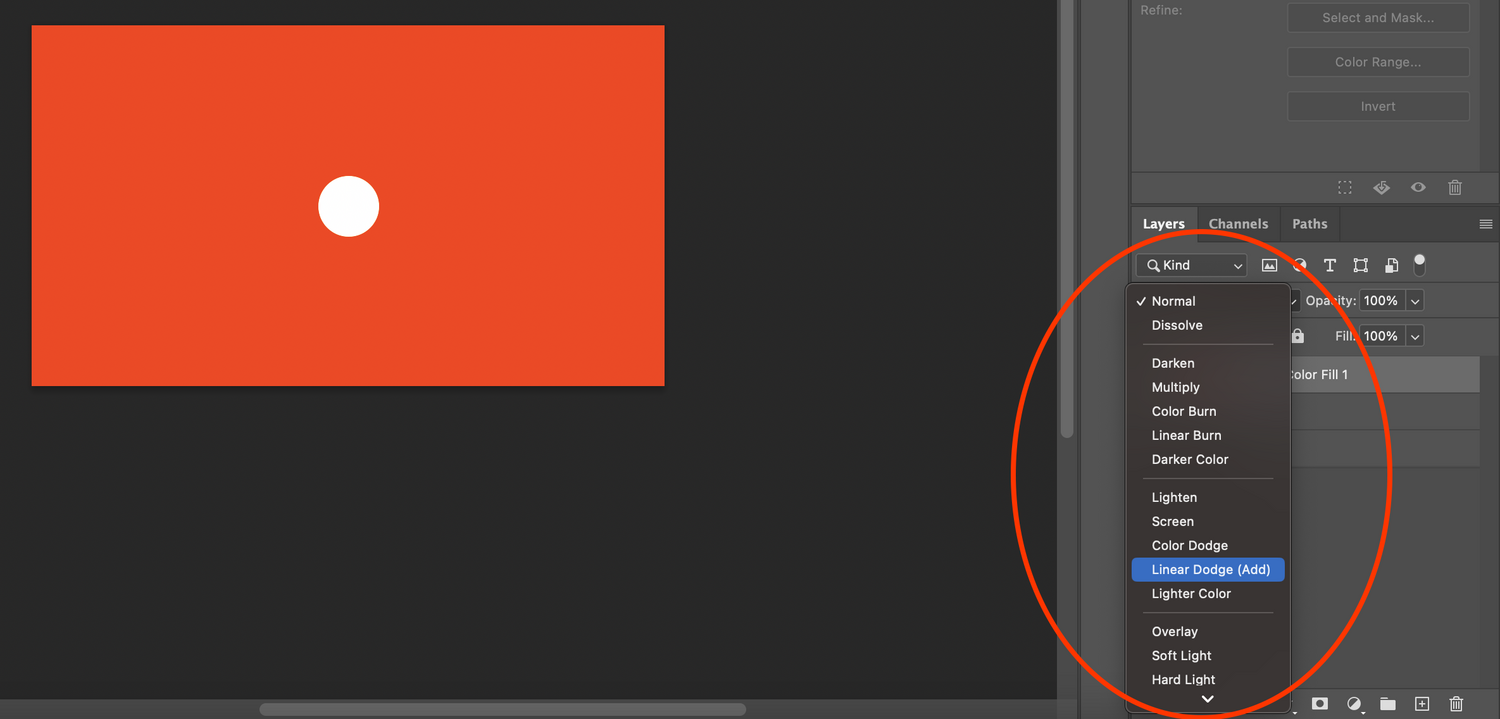
Starting with the image you'd like to add a glow to, then insert a solid color, and choose a color to suit the object we're trying to add glow to. Here I've added an ellipse on a black background, then added a solid color using a deep red-orange for my primary glow color. Clicking on the duo-toned circle under the layers panel will bring up a list of Fill/Adjustment layers that you can add to your project.

Once you have your solid color, change the blend mode to Linear Dodge (add) from the blend modes dropdown in the layers panel. Next, invert the layer mask by hitting Ctrl+i (Cmd+i on Mac) on your keyboard with the mask selected. Make sure the mask is selected before inverting it, you can select the mask by clicking on it in the color fill layer of your layers panel.

Next, select a soft brush that's a little larger than the object we want to add the glow to. Take your brush flow down to 1% or 2% then paint in white to reveal the glow color. By using a low flow we can add the glow in a very subtle manner.

When using masks remember; white reveals, black conceals
Paint to reveal the glow color as desired. You can then gradually make your brush larger to make the color closer to the glowing object brighter. By gradually increasing their size you will be painting over the previous areas, increasing the glow in those areas and keeping the color very faint as you get further from the light source.

Next duplicate the glow layer and make the mask on the new layer completely dark again. You can clear the mask by pressing Alt+Backspace (Cmd+Backspace on Mac). Then change your solid color to a lighter shade of the glow color, and paint close to your glowing object using a low flow brush to reveal more of the lighter color.

To increase the glow even further, you can duplicate the most recent layer again.

There you have it, super simple, super quick glow to add a little pop to your images.
In the video, Benny demonstrates using this effect on neon lights, and around the eye in a portrait. Where might you use this glow technique in your images? Do you have any other ways to easily add glow to an image in Photoshop? Do you have any tips on using layer masks and blend modes? Let me know in the comments.


