
Woodland photography works best during foggy days. It helps to simplify the often chaotic forest environment. Soft sunlight early in the morning or late in the evening can also create a beautiful mood for your woodland photos. But what if you have neither fog nor the right light conditions? You can create those yourself, as I show in this article.
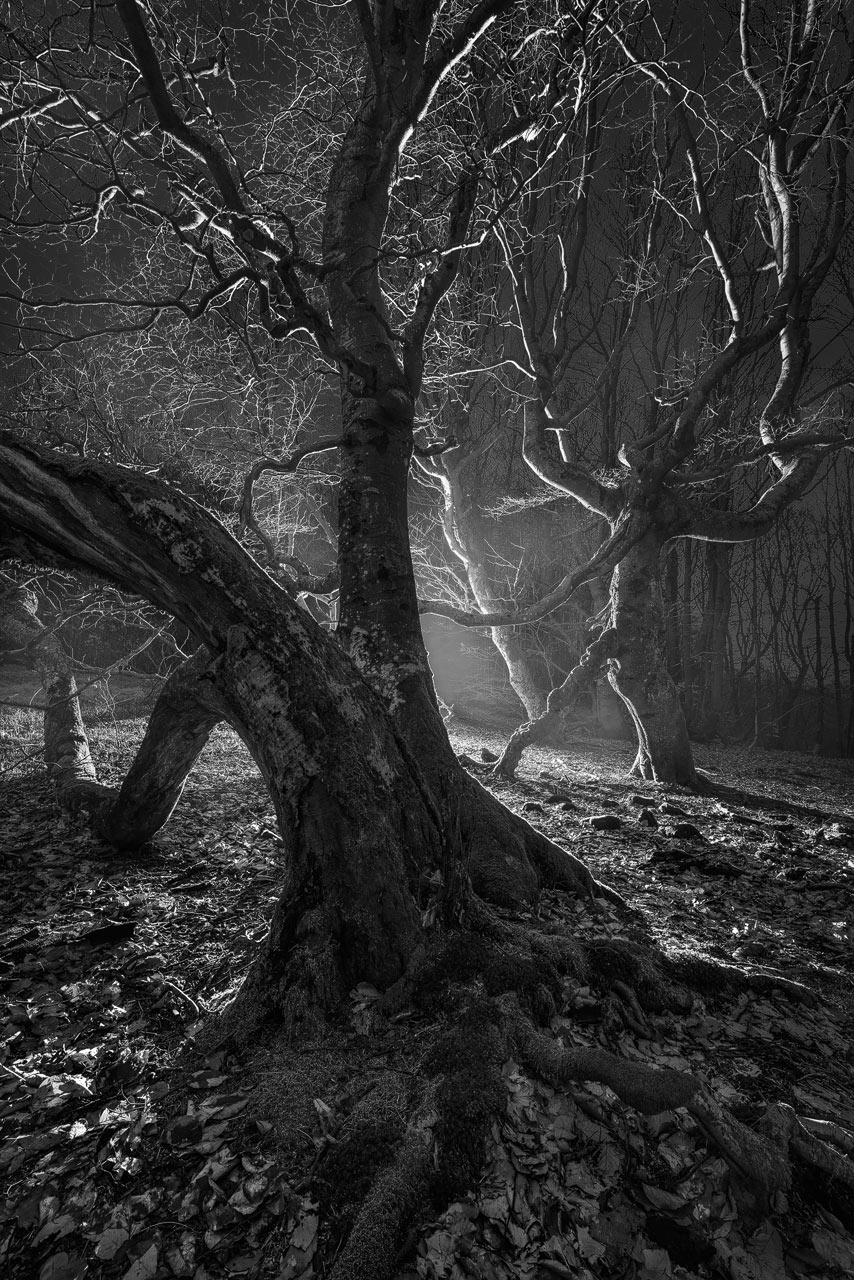
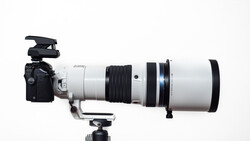
For the technique below, it has to be dark enough. You want the ambient light to reveal just a few details in the forest as a foundation for your photos. The end of blue hour in the evening or the beginning of blue hour in the morning is perfect. Then, you can produce compelling atmospheres by using a strong enough light setup. I used the Colbor CL60R combined with the Moman Power 99 battery for the photo below.
In the Field
Scouting is crucial for night photography. So, I selected a forest I knew very well for this experiment. I also arrived long before sunset to find a good composition and started planning where I wanted to set up my light later.
If you arrive early, take photos of the final scene while it's still bright enough. Although I didn't need those for the image above because the Colbor CL60R provided enough light, I wanted to play it safe. If the light is flat, it's easy to darken those photos to later blend them with the night images where more detail is required using a technique called time blending.
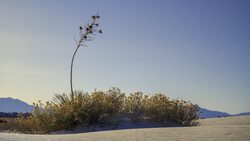
Once you have arrived at a composition you like and taken your first photos, it's time to plan the location of the light. I didn't know what would look best when I began this experiment. But I found that having the light hidden behind a tree in the center of the frame results in the most dramatic atmosphere. Lighting the scene from the side causes too much chaos, and having the light source visible in the image can be distracting.
That's why you should try to find a composition with the main subject in the center of the frame. Then you can set up the light directly behind it to create a beautiful rim light. It draws further attention to the shape of your subject, with shadows radiating out from behind.
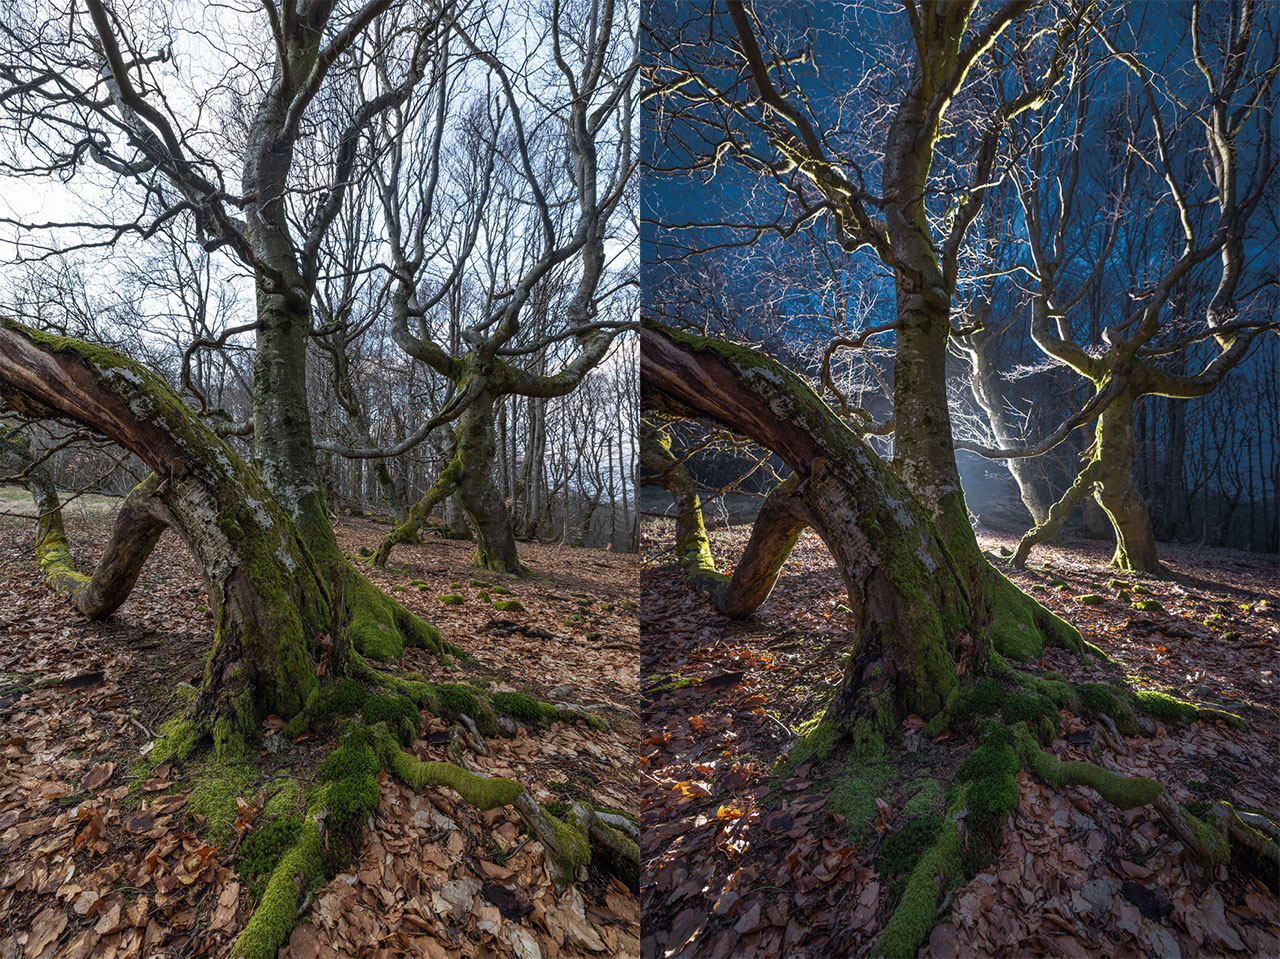
Below is a comparison of the scene before sunset and during blue hour. You see how I turned ordinary light conditions into something magical.
All that was missing now to create the moody title photo was some post-processing.
Photo Editing
Looking through the photos from that evening for the first time, I knew I wanted to try a black-and-white conversion. Although the dark blue sky contrasted nicely with the red and orange leaves on the forest floor, the colors didn't contribute to the atmosphere I was aiming for.
I wanted to show a scene that looked as if it was taken during the witching hour, with the trees dancing around the ethereal glow in the background.
As a first step, I did my usual raw conversion in Lightroom, mostly bringing up the shadows to reveal all detail my Canon EOS R5 had captured. The result is a relatively flat image, perfect for further editing in Photoshop.
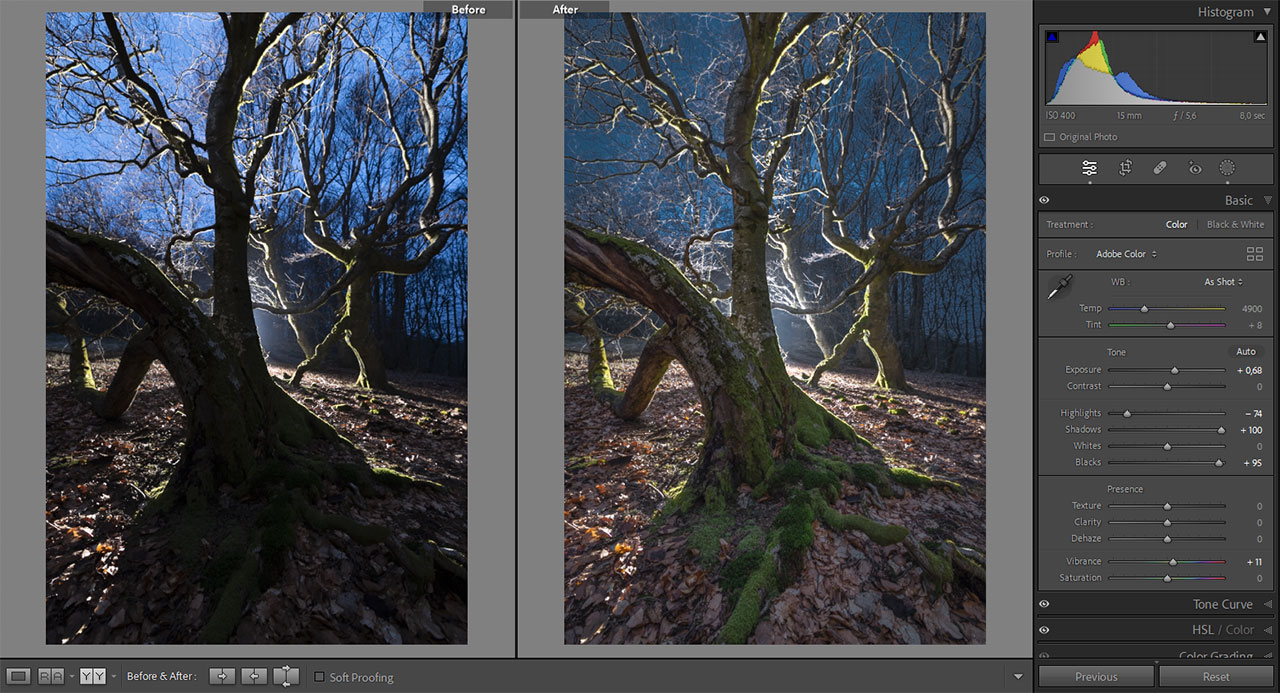
After making the adjustments, I synchronized them to a few more photos I had taken for focus stacking. I then opened all photos as layers in Photoshop and performed the stacking through manual masking. If you want to learn more about my workflow, I recommend this article I wrote last year. I show different techniques, including manual stacking in Photoshop and automatic stacking in Helicon Focus.
After the stacking, there were two more steps. First, I performed the black-and-white conversion using a combination of a Gradient Map and Black and White adjustment layer. I show how I combined the two in the feature video. Alternatively, you can use plugins like Nik Silver Efex, which can yield great results.
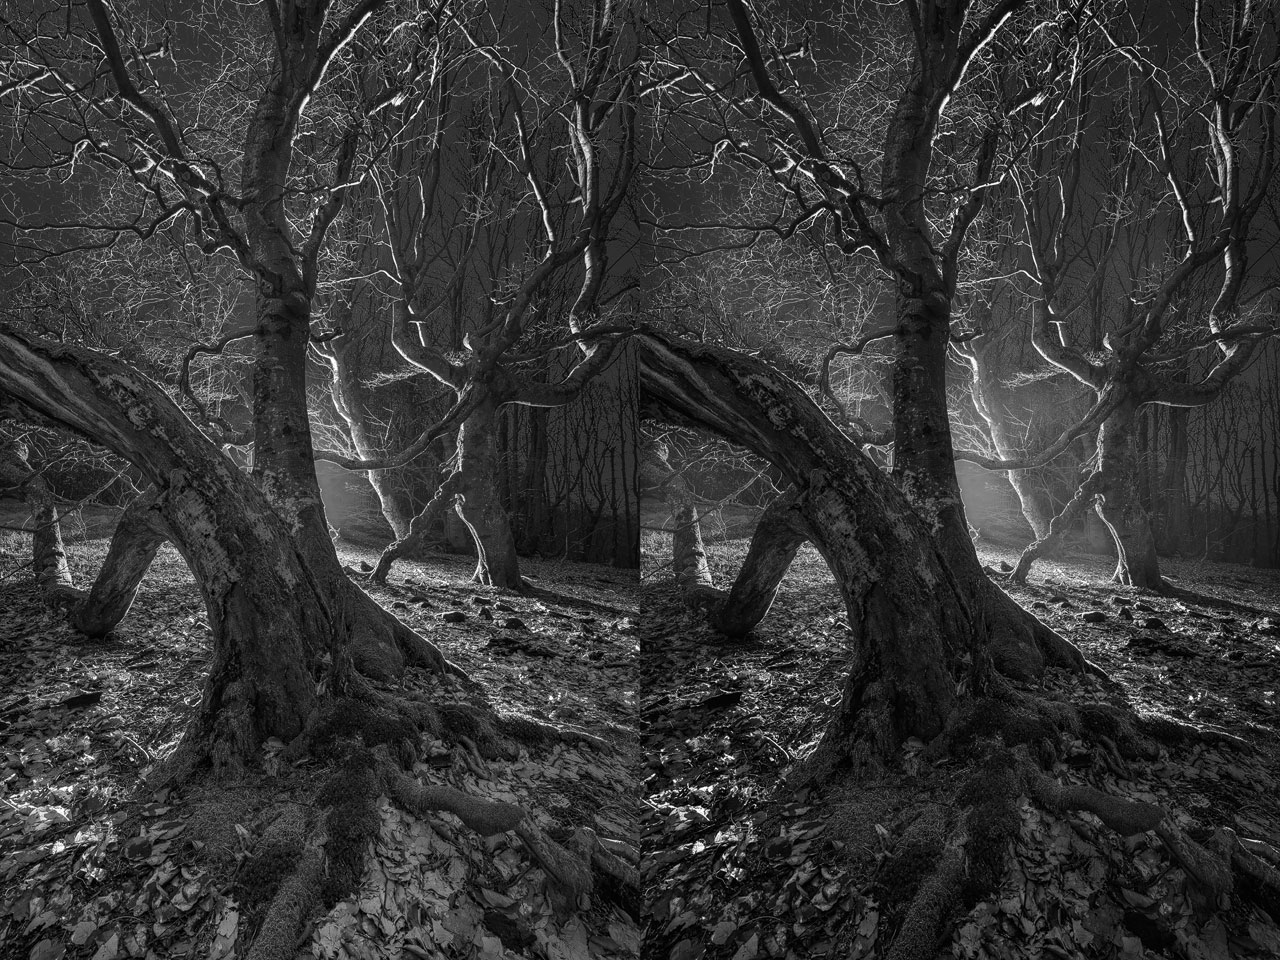
Above, you can see that the black-and-white conversion alone wasn't enough. The image on the left still looks pretty flat and lacks atmosphere. I could add further interest to the photo with a combination of "Curves," a dodge and burn layer, and a blank layer, which I painted with different white textured brushes.
The image on the right pulls the viewer into the center of the frame. Drawing on the blank layer, I created a mist-like atmosphere around the dancing trees, making the scene look even more mystic.
Conclusion
While you can also use a torch to light-paint such a scene, using a static light allows you to produce predictable results. Mounting it on a tripod lets you create precise lighting by fine-tuning how your scene is lit. It's similar to using a tripod for your camera, where you can make fine adjustments to your composition.
And by using a battery like the Moman Power 99, you also don't have to rush. It was only 5 °C outside during my shoot, and I used the light for close to 30 minutes at intensities between 60 and 70%. When I packed up, the battery still had close to 80% of its capacity. I could have continued with my night photography for at least another hour.
It was definitely not my last time taking night photos with a studio light. Before that evening in the woods, I hadn't taken many photos this year yet. The conditions so far weren't inspiring after a year of traveling the world and the sensory overload this had created. But experimenting with the light helped ignite my creativity again.


Join the Fstoppers community for free
-
Post comments and join in the discussions
-
Browse the site ad-free
-
Share your work and get featured in the community
-
Compete in the photo contests for fun and prizes
1 Comment
Great idea! Thanks!