Knowing how to quickly achieve professional results without sacrificing quality is crucial when editing portraits, especially when you have limited time. Here's how to do it.
Coming to you from Saurav Sinha, this practical video walks through straightforward steps to edit portraits using Lightroom, Photoshop, and Nik Collection 7. Sinha emphasizes two foundational elements: getting the exposure and colors correct and refining skin tones and details for a polished outcome. He highlights that initial edits are global—impacting the entire image—and advises always prioritizing your subject over the background. A key tip shared is to consistently aim for accurate skin tones when adjusting white balance, as this foundation significantly impacts any further color grading.
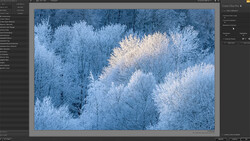
The video provides useful insights into Sinha’s workflow. He begins his process in Lightroom for basic adjustments, then transitions to Photoshop, utilizing Nik Collection as a plugin. The primary advantage here, he explains, is working with separate layers, which offers flexibility in making adjustments without permanently affecting the original edits. Particularly valuable is the use of Color Efex Pro’s HSL filter for selective color editing. Unlike Lightroom’s broader adjustments, Color Efex allows precise targeting using control points—advanced, mask-like tools sensitive to color, brightness, and texture. This enables targeted skin tone adjustments without unintentionally altering the rest of the image.
Further, Sinha details two skin retouching techniques that strike a balance between efficiency and quality. The first technique involves Photoshop's Neural Filters, specifically skin smoothing. He recommends using a subtle touch by adjusting opacity through masking, which retains natural skin texture and avoids an overly artificial look. While effective, he admits this method lacks some precision. To address this, Sinha introduces the Dynamic Skin Softener within Nik Collection. With adjustable sliders for details of varying sizes, it offers refined control and again incorporates control points to localize effects precisely.
Another standout aspect of the video is how Sinha achieves his signature dreamy look. He utilizes the Classical Soft Focus filter from Nik Collection, which mimics a mist filter’s effects. Importantly, this filter’s strength and application areas can be carefully controlled through the same powerful control points used previously. Additionally, he covers the Pro Contrast filter, highlighting its unique ability to dynamically adjust contrast across the image without losing highlight or shadow details—a process that typically requires more time-consuming manual adjustments.
Overall, Sinha’s methods simplify portrait editing significantly. His structured approach using Lightroom for basics, Photoshop for detailed work, and Nik Collection for precision, allows quick yet professional edits that enhance portraits noticeably. Check out the video above for the full rundown from Sinha.


Join the Fstoppers community for free
-
Post comments and join in the discussions
-
Browse the site ad-free
-
Share your work and get featured in the community
-
Compete in the photo contests for fun and prizes
2 Comments
Actually you can accomplish about 90% of the task in 10 seconds instead of 10 minutes. Granted, smoothing skin texture and selective editing can get complicated and time consuming, but the 90% that I'm referring to is the major issue regarding color balance. Getting the color balance right in the skin tones can often fix the entire picture.
In many cases, and particularly the example here that he shows in his video, the skin tones of the original on the left are cold and muddy. The color is too blue. The quick fix can simply be made in Photoshop Levels Adjustments. Overall, moving the RGB highlight slider (assuming it's on the righthand side of your graph) to the left to about 215 brightens the picture. Moving the red channel (R) middle slider to the left (1.10) eliminates the bluish color cast, and moving the blue channel (B) middle slider to the right (0.95) adds yellow, giving warmth to the skin and reduces the sunburned look. If you'd rather have the slightly pale look of his version (the one in the middle here), simply lower the saturation.
If you get your lighting and white balance right than there is usually only minimal editing required. Also, Nik Collection plugins older version, yet still very powerful, is available here for free - https://www.techspot.com/downloads/6809-google-nik-collection.html
For this wifes maternity portrait sesion I only edited the whole lot in Photolab 8 with very minimal adjustments and no local adjustments at all - https://www.facebook.com/share/p/1MEUN1yYiN/