Guest writer Josh LeClair is a commercial photographer based out of Marquette, MI. After seeing the stunning work done by Ian Ruhter with wet plate photography, he decided to try it for himself. LeClair does it on on a much smaller scale using a holga camera.
Things you'll need:
The chemicals I used are in the Complete Wet Plate Collodion Set for 4x5' from Bostick & Sullivan. The package comes with a guide for mixing the chemicals that makes it pretty easy.
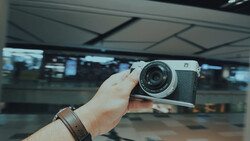
I found a old Graflex Crown Graphic 4x5 camera to shoot with, but you can use pretty much any film camera you can get a plate into (see Ian Ruhter's film where he uses a Holga)
Mask: you must have a mask to protect you from breathing in the chemicals! I bought this mask from Bostick & Sullivan and it worked great. If you try to just use a mask from your local hardware store, it won't work. As you can see in the video, I tried using one of those and had a nasty cough soon after.
 Gloves: I got a box of black nitrile gloves - you'll want to wear gloves and some junk clothes - if you get the silver on your skin it will leave a brown stain for a few days.
Darkroom: I was lucky enough to use an actual darkroom. If you don't have access to a darkroom just make sure whatever you use is well ventilated. The chemicals have a strong odor and will stink up more than just the room you do the process in.
Step 1: Clean the plate. I poured the collodion on a piece of 4x5 tin plate (There are a couple of different ways to do this but I found that pouring quite a bit in the center of the plate and then moving it to each corner works the best).
Step 2: Silver Nitrate bath. After the collodion is on, it goes into the silver nitrate bath where the plate sits for 3 minutes and becomes light sensitive. At this time the lights in the darkroom go off except for the safelights which are either red or amber and at a very low power. Wet plate collodion has a film speed (ISO) of approximately 5, so this means that it takes quite a bit of light to affect the plate.
Step 3: Take it to the camera, shoot the photo! Put the plate in an old film holder so that it's light tight. Now you’re ready to take the image.
Step 4: Developing. Back into the darkroom, take the plate out, and cover the plate in developer. Rock it gently back and forth for about 10-15 seconds until you start to see your image appear. Then a gentle water wash until the plate washes off the developer. Put it into the fixer and develop.
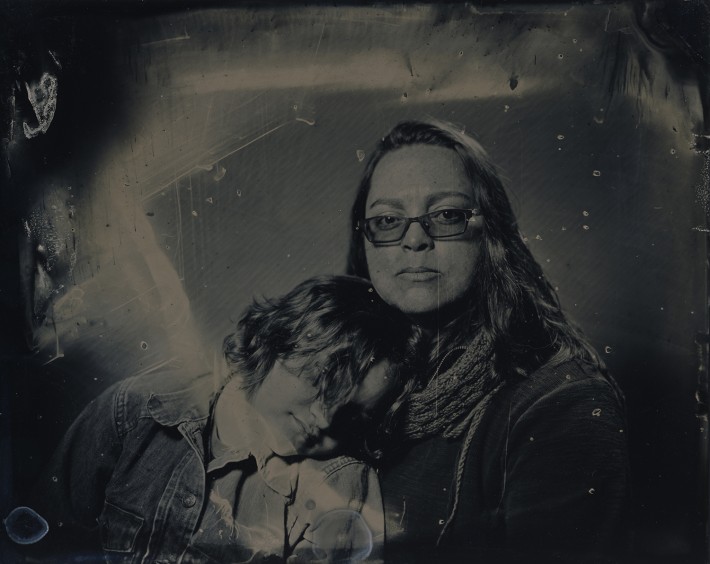


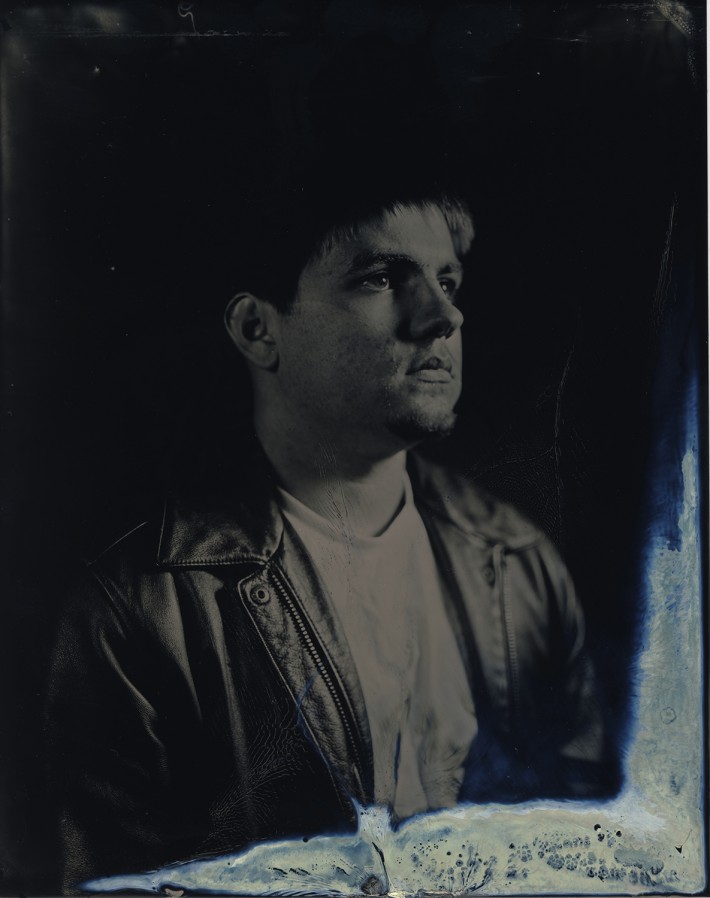
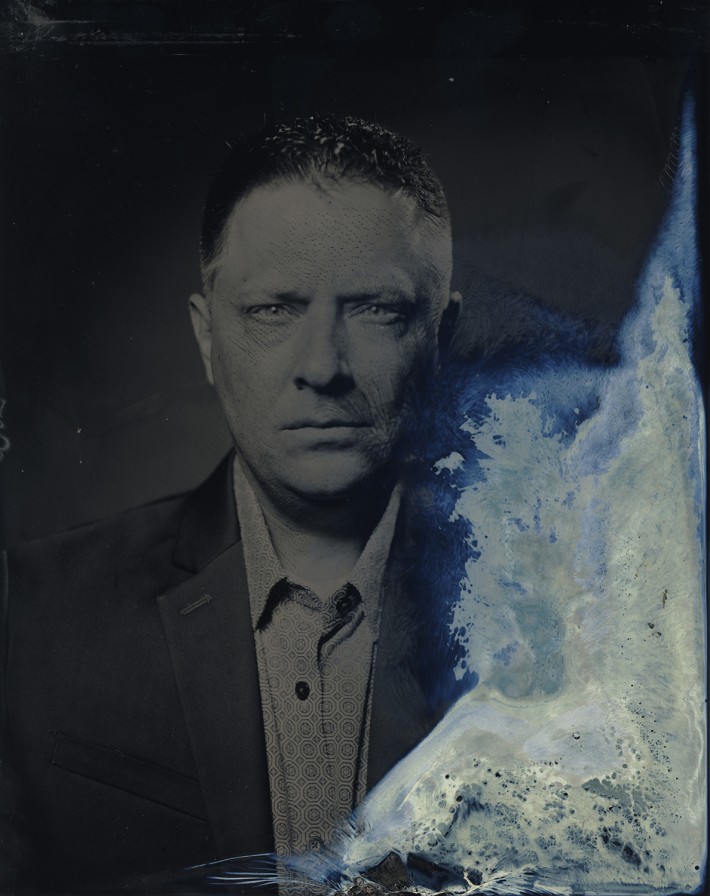
The image below (shot on the tin plate) is actually inverted from what the plate really looks like. When you do wet plate photography, you're technically doing a negative - that's why some people shoot on glass, so they can print from the negative. Other people photograph on something dark, like black aluminum, so their finished plate actually looks like a positive.

To see more from Josh, visit his website or send him an e-mail with any questions you may have.


Join the Fstoppers community for free
-
Post comments and join in the discussions
-
Browse the site ad-free
-
Share your work and get featured in the community
-
Compete in the photo contests for fun and prizes
24 Comments
All of the tintype processes I have worked with have resulted in a direct positive- is there something about the Bostick kit that results in the negative? Would be interested to learn how you ended up at the negative, or if you have any experience with making positives from the Bostick kit or any other method.
Wet plate collodion images are just very thin negatives that when backed
with something black it appears to be positive image...if he was to
shoot on clear glass it would look like a negative but if he backed it
with something black it would become a positive. Real wet plate
collodion negatives that you can print from (more dense negatives)
require a longer exposure in camera and diluted developer.
I have done a few glass emulsions and those have been positives that I backed with black or whatever else - and understand that. But I've never made a negative on metal. It's always been a positive...so I am just not sure how he is getting a negative on metal and would like to know if it's the Bostick kit's combination or chemicals or something else in the process that I missed.
If you were to shoot the same wet plate collodion images on clear glass and not back it with anything black you will have a NEGATIVE. Try it!!...it's just a very thin negative you can't print from. Now if you take that same clear glass image and back it with black it will turn into a positive.
It's not the Bostick and Sullivan kit that gives you negatives...it's what you do with the image after it's shot. If you shoot on black glass it will only be a postive, if you shoot on clear glass you will get a negative UNTIL you put something black behind it then it turns into a postive, and since tin is reflective (no black) you will just see a negative because there is no possible way to put something black behind it to fool you into thinking it's a positive.
Ah - so it is a matter of him shooting on regular tin/metal that is uncoated (sans the collodion, obviously), while I am using a black-coated metal...
Yes! If you are using black metal you will always get a positive. Try shooting on clear glass when you get a chance. Ace hardware is where I buy glass and have them cut it down for me. I find it to be cheaper then buying black tin/metal
Just did a Wet Plate (TinType) workshop this week at Gold Street Studios just out of Melbourne (Australia), was just awesome. Ended up shooting 11 5x4 plates, and it was one of the best photographic experiences I've had in my career. If anyone in Australia is interested on doing a hands on workshop with wet plate or any other traditional photographic process then I highly recommend you contact Ellie at Gold Street Studios. http://www.goldstreetstudios.com.au/
Eric, thanks for the help with the comments - you are spot on :) One of my first attempts was that one on tin because I didn't have black glass or metal and was just seeing if I could get something to show up. I knew from the beginning I wanted to shoot on something dark so that when the photo was done and varnished I could have a photo on glass or metal to give to people, rather than a print on paper.
Is there a recommended source for the tin sheets, especially black?
You can actually order those from Bostick & Sullivan as well, and they're at a good price!
http://www.bostick-sullivan.com/cart/product.php?productid=1289&cat=323…
Hi Josh,
How are you putting the plates into the darkslides? Does the emulsion not scrape off
as you insert it?
Thanks,
R
Hey! I custom made a darkslide so that it wouldn't scrap against the plate - if you're patient you could make one as well, or you can buy specific ones that are made for this purpose - they're a little pricey but if I were to do it again I'd definitely spring for the ones made for it :)
I just started doing my wetplate a few weeks ago. It really is a lot of fun and challenging (that's why its so much fun). I converted an old 4x5 sheet film holder to hold glass plates and shoot with a toyo view camera. Some days are better than others. http://blackvestphoto.com/wet-plate-collodion-2/
Awesome! I loved that there were always some form of surprises that would happen with the photo, or the subject for that matter - completely different than with digital. Nice work!
Thanks, Josh. I have been watching your stuff since your Kickstarter got funded. I tried the kickstarter thing, but it didn't work out so well. Your stuff is really cool to watch. I agree that watching the image come through is really remarkable. I still find myself surprised by the images.
Bummer! I'd give it a shot again if I were you with kickstarter - basically I knew that I just needed enough to pay for the chemicals since I had access to everything else, and then when I got enough I decided I could get a 4x5 camera. Let me know if you do another kickstarter!
you seem to be having some chem issues From the vid, your putting the plate straight into the silver without letting it dry to a sticky solution (it should hold a finger print on the drain corner) If you dont do this you will ruin the silver.... check out http://www.facebook.com/groups/collodionbastards/?fref=ts Where a friendly bunch and will guide you along.... Best wishes
Thanks Jonathan, I'll be sure to check out the group - awesome photos! This GoPro video was early on, actually one of the first successful plates I did, so by the last ones I made I was making sure to let the collodion dry more :)
It sure gets addictive once you get started Look forward to seeing the newer plates....
I've been interested in this process for a while, but I'm having a bit of a tricky time finding it in Canada...Everywhere I've found it is in the US but they won't ship across the border. Any suggestions?
I'd reach out directly to Bostick & Sullivan - if they can't get it to you, I would imagine they could help you find some resources!
...classically unique xx
I was wondering... in order to make a positive from a glass plate, you would mount something black behind it. I understand this principle. However, could you then spray paint the glass (on the emulsion side) and then view the positive "through" the glass?
do the plates actually have to remain 'wet' in order to function? How long does that limit you between the silver nitrate bath, taking the picture and developing it?