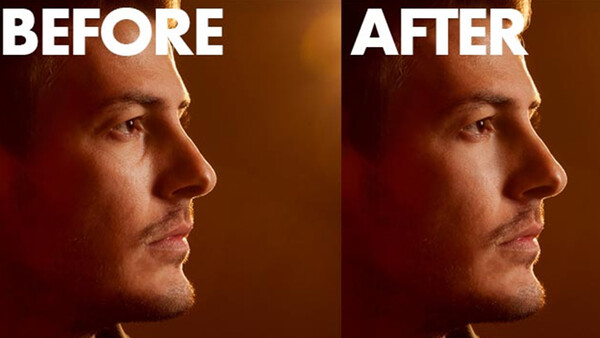
The good people over at PHLEARN are at it again, this time with a great little tutorial on creating skin texture from scratch. I find that healing (or whichever method you use) under the eyes in particular tends to destroy the most texture, so this is a great way to put some back in.
The technique, overall, is pretty simple to follow. After the initial clean up (by way of the brush tool), we lose a decent amount of the pores. So a 50% gray later is created, and noise is applied. The noise layer is converted to a smart object and the blending mode is set to soft light, and a clipping mask is applied. Aft
Related Articles


Join the Fstoppers community for free
-
Post comments and join in the discussions
-
Browse the site ad-free
-
Share your work and get featured in the community
-
Compete in the photo contests for fun and prizes
7 Comments
I think in the end it's about the same amount of work if you use the more classical approach with healing tools and content aware feature turned on.
in this case, yes. i think its more of an example of what you can do with creating your own texture. There is a Phlearn PRO where he has an arm growing out of a couch, to create the folds and stretch marks in the fabric, he paints them from scratch and uses this technique to give it the right texture.
http://phlearn.com/pro/pro-photoshop-tutorial-light
thats my picture!! whoop whoop!!
I assume you could do the same thing very easily with Frequency Separation as well. Copying texture from another part of the face on the texture layer.
But this is still pretty cool tutorial. :)
We could all just accept that human beings have flaws (as if a an eye crease is really a flaw) and represent people how they actually are..
I feel like if you're losing skin texture, you might be doing it wrong:
http://blog.patdavid.net/2011/12/getting-around-in-gimp-skin-retouching…