I have been teaching retouching and photography for a couple of years, and I found that even my advanced students often didn't know some basic tools or techniques. Those gaps in knowledge are to be expected among self-taught photographers and retouchers, of course. However, I have just returned from my trip to Italy where the amazing Italian Photoshop guru and Wacom evangelist Marianna Santoni organized a series of educational events, in which I taught Beauty photography and retouching. We had over 200 attendees overall, and I have to tell you that the level of Photoshop skills of our Italian fellow-photographers left me open-mouthed. The fact that most common gray areas in the Photoshop education were not new to our attendees made me think that we have to up our game, guys!
Let's patch it up and fill in those gaps! And we should start at the beginning of the digital imaging process: getting the best details out of your raw files.
I seem to always have at least two solid ways to tackle any retouching task. And exporting the best image data from raw is no different - I always use one of my two techniques depending on the task at hand. From my teaching experience I've learned that usually photographers know about either one of them, neither of them, but almost never both. I believe, though, that it will save you a lot of time and energy to utilize these both techniques in your retouching workflow.
I'm Sure You Shoot In Raw
At this point in time, there's no need to even go into the raw vs. JPEG discussion, right? We all know that if you are serious about your photography and retouching, you will only shoot in raw because of the amount of recorded data and flexibility this format offers.
I am a huge believer in getting things right in camera, but there are always circumstances that get in the way. And, no matter how experienced we are with our lighting, the dynamic range in the images we shot sometimes isn't as wide as we would like. That's usually not a problem if your photo files are in raw format and your exposure is correct, or close to being correct, to begin with.
So, before we take our photo into Photoshop for detailed editing, our goal is to export the image with all parts well-exposed. We don't want any shadows so dark that we can't see any details in them, or any highlights blown out. Unless, of course, that's the look you're trying to achieve.
Houston, We've Got a Problem
But what if when we adjust the exposure to dial down the highlights our shadows fall into complete darkness? Or when we pull out the details from the shadows our Highlights Clipping Warning starts screaming with red pixels all over the place?
You can sure compromise, find the exposure with the least damage to both highlights and shadows, and then correct the rest in Photoshop. But that way you are sacrificing the quality of you image, and start by leaving a lot of color and detail information behind. The information that you could actually pull out from your raw file, because it's there.
That's when these techniques come into place.
So, just like I said, I use two main techniques for getting the details that I need from my raw files. Sometimes, I export a few exposure variations to correct my own lighting mistakes, but sometimes I do it to expand the dynamic range of a photo, just because I can. It never hurts to get as much pixel information out of my raw file as possible.
Method Number One
My number one method will work in most situations, including the complex dynamic range corrections when you need to extract many parts of the image with different exposure and other settings.
Simply focus on one part of the image at a time, for example the hair, or the face, or the outfit - adjust exposure, highlights, shadows, etc. and export a PSD naming it accordingly, for example "Details in hair" or "Bright face" or anything that helps you identify your exports when you combine them in Photoshop.
For example, in this photo I have some dark areas in the hair, where details are not visible even though there are no Shadow Clipping warnings.

I'd like to see more details in the hair (especially in the shadows) and in the further side of the hat. So, I export my original as a base PSD and name it "base". If the original requires some global exposure and color corrections, I would perform them before exporting my "base" PSD.
Then I adjust exposure, highlights, colors, etc. and brighten just the hair and the hat. Then export another PSD, adding "hair" or "bright" to the name of the file. I am only looking at the hair and the hat while adjusting exposure for this export - it doesn't matter if other parts of the image get overexposed or lose contrast.

Then I focus on the face and skin and make another exposure variation, in which I only care to prepare the skin for further retouching. I make sure there are no overexposed highlights on the skin and the shadows are not too dark. I don't need too much contrast in the skin texture at this point, so it is easier to retouch it later in Photoshop. After my skin exposure variation is ready, I export another PSD and add "face" or "skin" to the file name.

After all well-exposed parts are exported, I go to Photoshop > File > Scripts > Load File Into Stack and find my exported PSDs in the dialog window.

This function makes it super easy and quick to put all my exports into one PSD file as layers.

I then place the Base layer at the bottom of the stack and the brightest layer at the top of the stack in the Layers panel. Cover all top layers (not the Base) with Layer masks and invert them (CTRL or COMMAND + I).
Needless to say, you don't need to keep the exported PSD files on your hard drive, just keep the master-file, in which those exports are combined.
UPDATE (suggested by Tomas Ramoska)
Like my Australian teachers used to say: "There are always dozens of ways to get from point A to point B in photography and digital image editing". I personally have been using the method I've described above for a few years now, but Tomas has just made a suggestion in the comments, I tested it and it looks like a very good alternative to my method.
Instead of exporting PSD files you can create a Virtual Copy of each exposure variation (right click on the file with the exposure adjustments applied and select Create Virtual Copy). Then adjust your exposure for another part of the image and create another Virtual Copy.
Once all your exposure variations are created, select all Virtual Copies and right click and select Edit In > Open As Layers in Photoshop...
The master-file that is created this way is identical in size to the master-file that is created via my method described above. The only thing that will be missing if you do it this way is the names of your PSDs, which help you to organize your layers in the master-file quicker, especially when you have many exports. But that's something we can definitely work around.
Then I carefully paint with a white brush (soft or hard - depending on how hard the edges of what I am uncovering are) and reveal the best parts of each layer.

The difference with the original may be not so striking in my example, but the principle is there and this technique will work especially great when you accidentally overexpose or underexpose some parts of your image. Normally, if the image is ruined we just leave it alone, but I have a few favorite photos in my own portfolio that were actually rescued thanks to this technique.
I also use this method when I need drastic color changes for parts of the image, for example, lipstick or nail polish color or the outfit color.
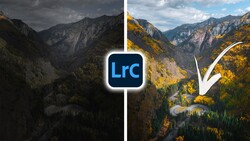
Method Number Two: Lightroom Adjustment Brushes
This is an alternative to my main method and I use it when I need just a few local exposure or color corrections before I export my image and get down to retouching it in Photoshop.
As simple as it sounds, I correct all such parts with the Adjustment brushes in Lightroom and export just one PSD.

If you haven't used the Lightroom Adjustment Brushes before, the following two sources will help you get familiar with them.
This video tutorial by my colleague, Fstoppers writer Trevor Dayley:
And the Adobe TV video tutorial: Adjustment Brush: The Basics

Hope you find this helpful and if you wish to learn more about retouching and Photoshop from working professionals, make sure to visit our new project Retouching Academy. We're a team of passionate artists, and, even though, our project is very young we are constantly adding new articles that are helping photographers and retouchers all over the world to become better at their craft.
Start from our Free Educational Materials page and connect with us on Facebook - Retouching Academy - to stay tuned for our news and offline events in 2014!

Join the Fstoppers community for free
-
Post comments and join in the discussions
-
Browse the site ad-free
-
Share your work and get featured in the community
-
Compete in the photo contests for fun and prizes
86 Comments
Why in the world would you import more psd files? That's what layers are for.
Paul, I think you should re-read that part of my article.
I did. It doesn't make any sense why you would use a psd for each part of the face. You can do it more efficiently with layers. It seems like you are just duplicating effort (and drive space) with that workflow.
I still don't think we understand each other.
Create an adjustment layer and underexpose. Create another one and overexpose. Create layer masks for both. Paint in as required. Bam.
That's kind of the whole point of this article - get the best out of the RAW file.
I really don't think you understand what you are trying to teach then. But you won't admit to it since you'd have to do a rewrite. Your exporting of psd files isn't 'RAW' either.
Oh no, I will admit if I'm wrong if you can prove your method is right.
I am exporting PSDs, but those PSDs do contain the details I pulled out from the darkest and brightest areas of the RAW files. Once you've exported a PSD, you can't pull out the details from the darks, which your Raw file can still allow you. Period.
I now see what you mean, and I will never agree with what you're suggesting.
If you use Adjustment layers to do that, you will end up with a lot of noise and still no details.
'a lot of noise' is simply not true. I think you are exaggerating here. If your portrait has that much dynamic range difference where you would be creating noise from bringing out shadows, you've taken a poor photo.
Also, a common technique during retouching is actually ADDING a small amount of noise to the face to bring back some detail.
Paul, whilst your argument has a tiny amount of merit - but not as much as you think it does - your snide tone is way out of place, Julia and Zach have both been totally respectful towards you.
The white knighting that happens anytime someone disagrees with her is mind boggling. The initial tone wasn't all that respectful. Interestingly enough when someone else suggests the same thing, it's taken well.
What did I say that doesn't have merit?
It's not white knighting, it's my annoyance with people in general who have to act like a disagreement means you should talk to the other person like they're stupid.
Where did I say that what you said doesn't have merit?
"tiny amount of merit" what have I said doesn't deserve full merit?
I'm not talking to them like they are stupid. Completely discounting what I said as not being valid *is* stupid. Suggesting that it isn't a valid way of doing the exact same thing (and more efficient) just because it contradicts your article isn't really ethical either.
Ethical? Seriously? Honestly, it's stuff like that - what's the point of making that leap, you're just flapping your arms in the air saying "look at me!"
I think they both acknowledged your way works, and said in their opinion it introduces more color noise into the photo. You disagree. Awesome. Apply as a guest writer for fstoppers and post an article about it.
I said not as much merit as you think it does, because clearly you're convinced your way is the best way. I have no idea which way is the best way because I've never done either, but I would suggest you don't ask people why your idea doesn't deserve full credit when you're refusing to give someone else with a similar idea the same full credit.
"I strongly disagree. And that's why I put together this article."
I'm not trying to argue or say look at me. I was initially just confused why she didn't just use layers. She couldn't give me an answer except for what basically amounts to 'because'. When I'd suggest one way, she'd move the target onto something else. *shrug*
People seem to think that everything you do in camera raw doesn't introduce color noise. Pretty much the only thing that won't is white balance. Increase shadows will introduce some amount of noise. The benefit is that you have more detail (because of increase dynamic range) that is visible. You end up in the same place with a 16bit TIFF. Edit white balance (non-destructive in raw) with camera raw. Do the rest in a more powerful tool.
Also. Noise isn't the devil. People become obsessed with not having it.
Paul, this is why I say your comments deserve merit, you make some excellent points! Noise certainly isn't the devil, and I agree that people get obsessed with not having it.
Clearly you know what you're talking about - I think your tone could be a little more gentle and you'd probably get a softer reaction. But maybe I'm only saying that because now I'm your white knight too. ;)
*hug* haha.
I think tone gets misunderstood a lot when you just have text unfortunately. It's not how I intended it to come across.
Tis a good point, that's why my last 3 relationships failed, haha. Cheers mate!
The Adjustment brushes are also available in the latest version of Adobe Camera Raw for Photoshop, what means you dont need Lightroom for it.
This isnt rocket science, if you want proof - open your raw file, drag the exposure down -2EV, look at the detail in the highlights. Now do the same with an exported TIFF of that same RAW that you have not adjusted in ACR/LR, now use photoshops exposure adjustment and drop the exposure until they look about the same (-2EV) now look at the detail in the highlights. The one you adjusted in raw will be better, nuff said, case closed.
A PSD doesn't contain the same amount of data as a RAW file does. By doing selective adjustments in Camera Raw (Or in this case, Camera Raw thru Lightroom) you're able to pull out more detail on different aspects of the image and combine them later in post.
You are editing a (probably 16 bit) tiff. It will contain just as much information. What I've described is basically the industry standard for doing exactly what she is trying to do.
Paul, I edit my master files in PSD format, the native Photoshop format. TIFFs are the format in which I submit files to my clients for print.
Neither of them will allow you to get as much details from your photo as you can pull out from underexposed or overexposed areas of your Raw files.
That's simply not true. The TIFF holds the same information. The difference is that RAW isn't destructive with those edits. To pull out that information initially you aren't being destructive enough to make any real difference.
So you're suggesting people should work in destructive workflow over nondestructive?
In some situations? Yes.
A TIFF does not hold the same information as a RAW file so anything else you say on the subject holds no merit. It is highly recommended that you make exposure based adjustments from the RAW file, not the exported TIFF or PSD and this is something I hear from countless experts on the subject on a regular basis.
I said it holds everything. It holds enough that after minor exposure adjustments it's not going to make a difference. If not... You took a bad photo. Considering this is what I make my income on... I'd consider myself an 'expert'. Sorry that I don't make my money on putting on workshops . I enjoy doing. Not teaching.
Not true.
The biggest difference would be the color space. A Camera Raw file will be among syCC color space, which is much larger than AdobeRGB or sRGB. But converting it to TIFF you're losing colors.
The other advantage is true white balance and exposure adjustments. You simply cannot do that correctly on a tiff file. For evidence of this, open a CR2 (or NEF) file into photoshop and open a TIFF converted file. If you play with the Camera Raw dialog between the two, you'll find that the RAW file yields better results.
While the differences might not be substantial, why would you cut corners for quality, especially when Julia's technique only takes a few seconds longer?
You should be making the white balance adjustments in color raw. Also any major global adjustments. That's not the scope of this article.
That is the scope of this article. She is making exposure adjustments to the image, on a nonglobal scope to get the most of her images and detail.
Thank you Zach!
Do you mean what Tomas has just posted above? "Don't export PSD files for each adjustment just create virtual copies and open as layers in Photoshop."?
If so, I will try that. Live and learn each day!
For the most part. I'd say you don't need to create virtual copies though. You just need adjustment layers.
I strongly disagree. And that's why I put together this article.
Paul... while adjustment layers are great, you loose a whole of a lot data oftentimes. Here's a decent writeup on adjustment layers vs. working with original raws: http://phlearn.com/maximize-image-quality-8-easy-steps
Thank you Alex! That's a perfect closure to this debate :)
Longest. Reply. Thread. Ever. Conflict, drama, bromance - it had everything! BTW great article.
Lol, yes, we got it all here!
Thank you David!
Seriously, Julia's posts have been absolutely amazing.
Thank you Jon! :)
Don't export PSD files for each adjustment just create virtual copies and open as layers in Photoshop.
I will try that Tomas, thank you!
Tomas, do you have any leads to a good tutorial on that? I am a Photoshop person, not as much Lightroom, if I can test what you are saying, I'd be happy to actually insert it into the article. I'm all up for sharing the most efficient techniques!
Simply right click on image in Lr select > Create Virtual Copies for each adjustment and when you done select all three images right click select > Edit In > Open as layers in Photoshop.
Thank you! That's a good one! The PSD with layers made with your suggested method is almost exactly the size of the PSD that is made with mine, but I yours is definitely a time-saver! I'll update my article. Do you mind if I mention your name?
No problem ;)
DONE! Thank you, I really like this :)
I really like that you've got it where I can use ACR or Lightroom to pull this off. I thought I remembered seeing something like this some time ago, but never put it into practice. I will now! Thanks Julia and Tomas!
Julia thanks for the mention :)