Color manipulation can make or break your image editing process. The ability to target specific colors in particular areas of your image provides creative control that basic sliders simply can't match.
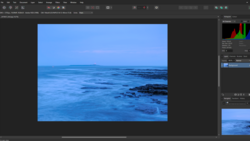
Coming to you from Matt Kloskowski, this practical video explores the progression of color adjustment techniques in Lightroom Classic, which also apply to Lightroom and Adobe Camera Raw. Kloskowski walks through a hierarchy of color editing approaches, starting with the most basic global adjustments like Vibrance and Saturation. These tools affect the entire image equally, which sometimes works but often proves too heavy-handed. He then moves to the Color Mixer panel, which allows you to target specific color ranges throughout the image. While more refined than global adjustments, the Color Mixer still affects every instance of a color throughout your photo. For instance, adjusting blue in the sky will also affect any blue elements elsewhere in the frame, whether you want that or not. The Point Color tool offers another level of precision by allowing you to click on a specific shade and adjust just that particular color range, but again, this affects all instances of that shade throughout the image.
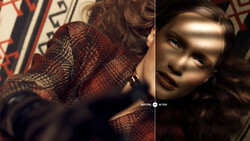
The game-changing approach Kloskowski recommends involves combining masking with color adjustments. By creating a mask of just the area you want to affect first—whether using the Sky Selection tool, Object Selection tool, or manual brushing—you can then apply color adjustments only to that region. This technique becomes even more powerful when you use the Color Range selection tool within masking, which essentially gives you the equivalent of the Color Mixer panel but with precise spatial control. For example, you could select just the reds in a specific balloon without affecting red elements elsewhere in your photo. You can then refine this selection further by adjusting the range slider to make the selection more or less strict, and even subtract areas using the brush tool if needed. Once your mask is complete, you have access to Hue and Saturation controls that work just like the Color Mixer, but only within your masked area.
This masking-first approach fundamentally changes how you think about color editing. Instead of applying adjustments and hoping they don't cause problems elsewhere in your image, you first isolate exactly where you want those adjustments to take effect. Kloskowski's method gives you freedom to push color adjustments much further than you could with global tools, since you're limiting their impact to precisely the areas that need them. Check out the video above for the full rundown from Kloskowski.


Join the Fstoppers community for free
-
Post comments and join in the discussions
-
Browse the site ad-free
-
Share your work and get featured in the community
-
Compete in the photo contests for fun and prizes
No comments yet