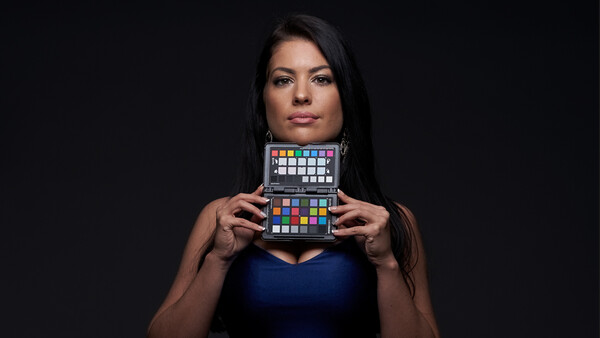
if you are looking for a step-by-step tutorial that shows you how to use the X-Rite ColorChecker Passport with Capture One software, then you will have to check this out.
X-Rite has recently released a beta version of their software that is compatible with Capture One, unfortunately the video tutorial they created lacks a few important details. In this video and article I will walk you through step-by-step how to create an ICC profile you can use in Capture One.
The first step is to make sure you download the correct version of the software, Color Checker Camera Calibration ICC v1.2.0 at the time of this article. Once you have the software installed on your computer you will need to take a shot of the ColorChecker Passport in the lighting environment you intend to create a profile for.
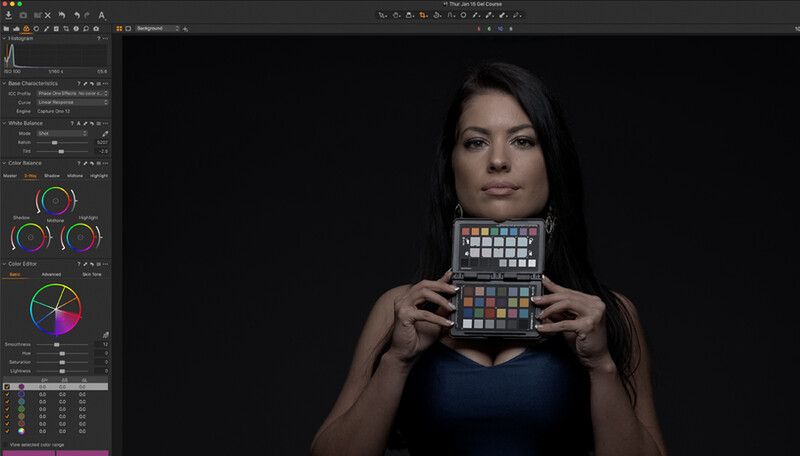
Once you have an image of the X-Rite ColorChecker Passport imported into Capture One choose, ICC profile: no color correction and for curve choose: linear response.
Then export the image with the following settings. Tiff 16 bit, ICC embedded camera profile and resolution 300 px/in.
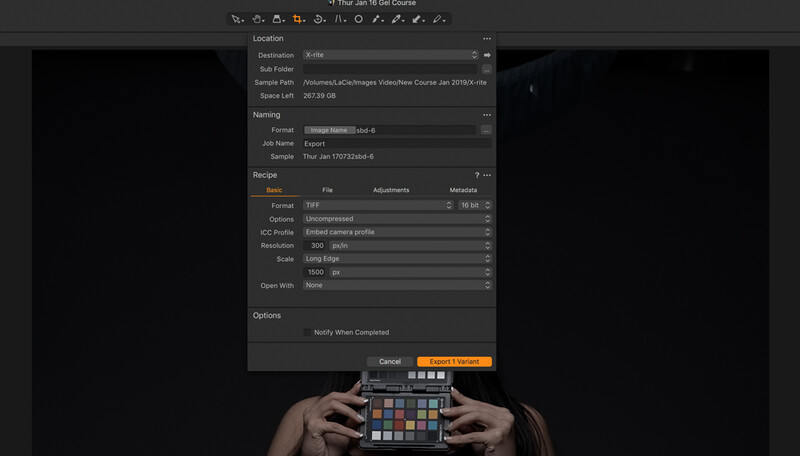
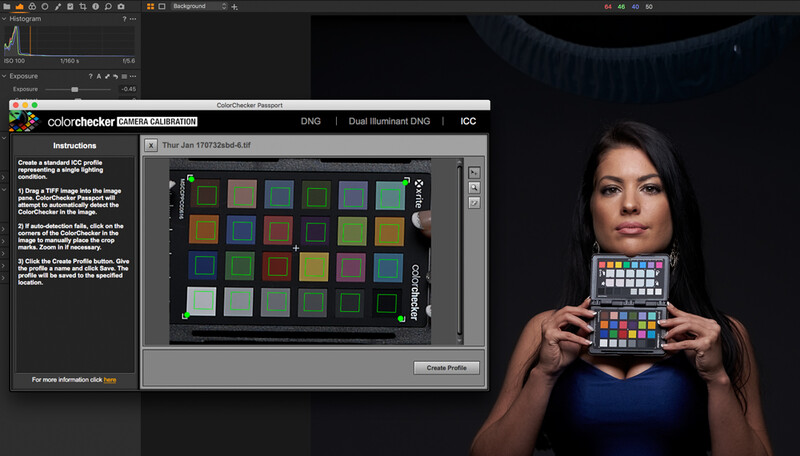
You can then drag and drop the exported tiff file into the X-Rite color calibration software and create an ICC profile you can use in Capture One. Before you export the tiff file make sure you name it something that makes sense and that you will remember.
The next step is to close Capture One and the re-open the software so you can access the new color profile. Look under ICC profile: (other) for the new custom profile you just named.
Choose the new ICC profile and experiment with the curve setting and the other adjustments, you may also want to compare the custom profile with the generic profile Capture One creates and see which one you prefer.
You may find that you prefer the out of the box Capture One profile over the X-Rite custom color profile. Try both and let me know what you prefer in the comment box below.


Join the Fstoppers community for free
-
Post comments and join in the discussions
-
Browse the site ad-free
-
Share your work and get featured in the community
-
Compete in the photo contests for fun and prizes
12 Comments
There's one thing I'm not clear on, Craig. Is this a process that I would do once for every photo session where I wanted to use the X Rite for color correction?...meaning that over time, I'd end up with dozens of ICC profiles?
yes. I used to use passport software during my time with Lightroom and the ICC profiles would really clutter up the process. I wish Phase1 and Xrite would team up so this process is one-click. Especially since the trouble you go through yields slightly better/worse results.
Please get Usmen Dawod to follow up with "Why Can't X-Rite Just Give Us a Flip-Out ColorChecker?" article that's pinned to the home page for the next 760 ICC profiles.
This honestly seems like a real pain in the ass, with all the variations you could have with different lighting setups and things. I'll stick to my boring Lastolite card...
I have done it a few times this on art reproductions, but most of the time the ICC profile in C1P are so good that i don't see any different.
Lightroom has more reason to use it since adobe profiles are always flat and needs tweaking
I just tested this on my X-T3 and saw no difference between Capture One and the ColorChecker profile. I'll have to test my Canon 5DMKIV but thinking I'll get a similar result. Capture one profiles are really good!
Unfortunately there are several reports on export issues in the current v 12 for when exporting this and some other formats and it would be great if Phase One would put some effort into sorting this out rather then plugging this function when it does not work on all OS. https://forum.phaseone.com/En/viewtopic.php?f=75&t=29570
I've tried using the color checker multiple times, especially in color-sensitive work such as commercial clothing shoots. I'd shoot the color-checker once my lighting was setup in the studio, and then create a custom color profile and apply it to every image from that shoot.
I gotta be honest though, I have noticed minimal difference between the color checker appraoch vs. just a plain old gray card. There was a slight hue difference in the reds, but it was so small, it might as well have been negligible. I have since given up on trying to use that approach. I have found that the stock camera calibration in sRGB and a gray card will give you very accurate results.
I can see this being useful in a process where color is controlled from the photography, to post production, and all the way to printing. I just don't see many industries using this method. Most retouching is outsourced, and so is printing. I'm having a hard time believing anyone maintains custom color profiles throughout the whole pipeline.
I'm having the same thoughts about the monitor calibrators. I've had them, used them, but in the end found the stock settings to be just fine.
Both of those products are good at marketing though, so I'll give them that :-)
I have used the colorchecker (xrite not datacolor) and I have achieved much better profiles then the canned ones ( I had to export the tiff from v11). There is of course a specific usage of this but when control of the color rendering is of importance this can be critical, I am mainly working in food and there I have found this a substantial aid in getting better color. this is an area where control is important but I am surprised that you find canned profiles better for display. If done correctly it is a world off difference but it is important to do this to right settings and with color critical equipment.
I use it (Passport Photo) and like many I find the modern cameras do a very good job on their own. BUT, I pass on a lot of my work to other producers and art curators of major galleries. I deliver those ColorChecker frames and 10 second clips along with the images and video footage. That way they have an industry recognized reference if there's ever an issue now or later, actual or perceived. They can ignore it or expect it.
Even if I am satisfied with doing a gray card for my own work most of the time, the full color reference is there if it's needed. It's another value-add when I'm trying to gain the trust of new promising clients.
Edit: Getting usable results if I use Linear response curve on images that I use the calibrated icc profile and creating my own custom luma curve. If I use auto, film, ect curves the results are pretty bad.
Same here. More accurate colours and better skin tones. It's the Linear Response Curve that's the key. It's a faff but for some things definitely worth doing.