Dialing in the right wedding camera settings decides whether editing feels controlled or chaotic. You need consistency under pressure, not guesswork while the aisle moment slips away.
Coming to you from Luke Cleland, this practical video walks through the exact settings Cleland uses at weddings and the ones he avoids. He starts with white balance and takes a firm stance against auto. If you rely on auto white balance while shooting raw, the camera keeps shifting color throughout the day, which turns editing into a patchwork fix. Cleland sets a fixed Kelvin value instead and leaves it there, often using a daylight balance even indoors. That approach keeps color consistent from frame to frame, so batch editing stays tight instead of turning into rescue work.
There is one catch he points out. Heavy candlelight can push strong orange tones that are harder to fully correct later if your Kelvin setting is too cool. In those cases, you need to check and adjust before continuing. That small pause beats trying to repair uneven skin tones across 400 images. The difference shows up when you copy and paste edits across a full sequence and they actually match.
Cleland then moves to image quality and draws a clear line: shoot raw, not JPEG. JPEG locks in the camera’s interpretation of color and contrast. Raw keeps the full data, which lets you recover highlights, lift shadows, and shift white balance without degrading files. He admits you should not rely on "fix it later" as a habit, but he also shares that some frames look off on the back of the camera on purpose. He may expose for highlights or shadows knowing exactly how far he can push the file in post. That confidence comes from testing, not hope.
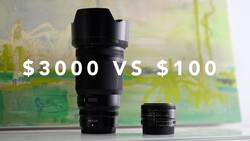
Aperture is where style and technique meet. Early in his career, Cleland felt pressure to avoid very wide apertures like f/1.8 or f/1.2 because sharpness was treated as the only goal. With modern mirrorless systems such as the Nikon Z6 II paired with a fast lens like the Nikon NIKKOR Z 50mm f/1.2 S, his keeper rate at wide apertures improved dramatically compared to older DSLRs. That opens the door to more shallow depth of field during couple portraits. Still, he adjusts based on context. During a processional, he may move to f/2.2 to gain margin for movement. For group photos, he often goes to f/4 to keep multiple faces sharp rather than chasing blur.
ISO gets a reality check. Older cameras struggled past ISO 2,000. Current bodies handle 2,000 or even 5,000 with usable results. Cleland sets simple benchmarks: ISO 400 in bright sun, around 1,000 indoors, and up to 5,000 on a dark dance floor. He suggests testing 400, 1,000, 2,000, 5,000, and 10,000 ahead of time, exporting the files, and viewing them at 100 percent. Not in Lightroom alone, but as finished images. That is how you learn what your camera actually delivers.
He finishes with shutter speed and a shift in mindset. Instead of chasing maximum sharpness at all times, he uses shutter speed creatively. Around 1/125 s offers subtle motion that feels less clinical. At 1/15, you can introduce deliberate blur for energy on the dance floor. He also keeps a safety rule in mind: do not handhold below the reciprocal of your focal length, so a 35mm lens stays at or above 1/35 s. Check out the video above for the full rundown from Cleland.
Join the Fstoppers community for free
-
Post comments and join in the discussions
-
Browse the site ad-free
-
Share your work and get featured in the community
-
Compete in the photo contests for fun and prizes
No comments yet