Soft wings. Sharp background. One usable frame out of a 30-shot burst. Bird in flight photography exposes every weak link in your setup, and small changes can double or triple your keeper rate.
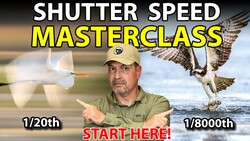
Coming to you from Steve Perry, this practical video updates his long-standing bird in flight advice for modern mirrorless cameras. Perry starts with shutter speed, and he doesn’t hedge. Use 1/3,200 s as a default. Many soft images are not missed focus but motion blur, and that distinction changes how you set up. He suggests staying between 1/1,600 s and 1/4,000 s for most situations, pushing faster for small birds flying toward you and backing off for large, distant, or slow subjects. He also points out something most people ignore: your panning skill affects how slow you can go. If you can hold the bird steady in the frame, you gain flexibility. Until that skill is consistent, keep the shutter speed high and give yourself margin.
Aperture and background come next, and this is where many images fall apart. Perry typically works between f/4 and f/8, occasionally f/11. Depth of field can save a slightly missed focus, especially if tracking is not perfect. At the same time, aperture shapes the background. Wide open against trees can smooth the scene and separate the bird. Stop down too much and the background starts competing for attention. He also notes that distance changes everything. A faraway bird lets you shoot wide open and still hold detail across the body. A close kingfisher may demand f/7.1 or f/8 just to keep the head and wings acceptably sharp. This balancing act between subject sharpness and background control is where your judgment develops.
Exposure mode is handled with equal clarity. Perry often uses manual exposure with Auto ISO so shutter speed and aperture stay locked while ISO floats. When light is stable and backgrounds vary wildly, full manual gives consistent results frame to frame. He discusses matrix metering for Nikon, evaluative for Canon, and multi-pattern for Sony, along with the option of highlight-weighted metering to protect bright feathers. If your camera offers zebra warnings, use them. Overexposed whites on an egret will not recover cleanly. He also leans on high frame rates, often 20 to 30 frames per second or more, arguing that peak wing position is a fraction-of-a-second event. More frames mean more chances, but you need discipline when culling.
Autofocus strategy reflects how much mirrorless systems have changed. Continuous AF is nonnegotiable. With subject detection enabled and set to bird when available, wider AF areas such as auto area on Nikon and Canon or wide and zone on Sony give the system room to work. Smaller points can cause the camera to jump to the background if detection drops out. Perry explains how fallback behavior works and why slightly larger areas can help the system re-acquire focus. He also recommends prefocusing slightly closer than the expected subject distance so the camera searches forward rather than past the bird.
Field craft rounds out the advice. Birds take off and land into the wind, so position yourself with the wind at your back for head-on approaches. Watch for pre-takeoff signals like turning into the wind or subtle body shifts. Keep your eye in the viewfinder when you sense action building. Pre-capture can help, but short durations such as 0.3 seconds reduce buffer strain. Use a lens focus limiter when possible, and consider stabilization modes like VR Sport on Nikon or Mode 2 on Sony and Canon if you want a steadier viewfinder at high shutter speeds. Check out the video above for the full rundown from Perry.




Join the Fstoppers community for free
-
Post comments and join in the discussions
-
Browse the site ad-free
-
Share your work and get featured in the community
-
Compete in the photo contests for fun and prizes
No comments yet