

Sharpening to enhance detail is a critical process to finishing any image, especially when preparing images for print. As a photographer who specializes in creating large wall portraits of dogs, I routinely apply a strong degree of sharpening prior to printing. There is one specific technique that I use for sharpening that is especially effective when editing portraits of dogs and other furry subjects. Here is my best tip for enhancing detail in fur and hair while maintaining a soft appearance.
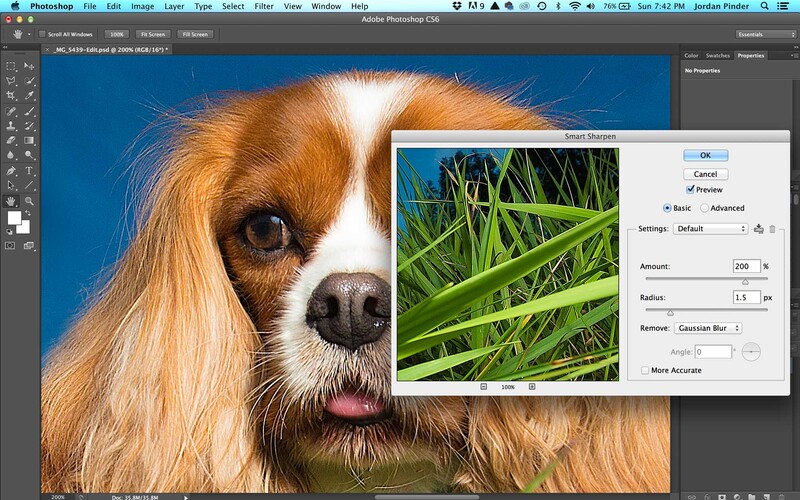
There are countless techniques to sharpen an image in Photoshop. When sharpening fur, an unwanted side effect that often occurs is the brightening of highlights, reducing the soft appearance of the fur. This effect is produced with virtually any global sharpening technique. For example, in this image of a spaniel I have applied a Smart Sharpen filter set to an Amount of 200% and Radius of 1.5 px. Notice the impact of the sharpening on the furry regions of the dog's face, especially around its nose. The highlights are much more pronounced, making the fur appear coarse.
Use the Darken Blend Mode
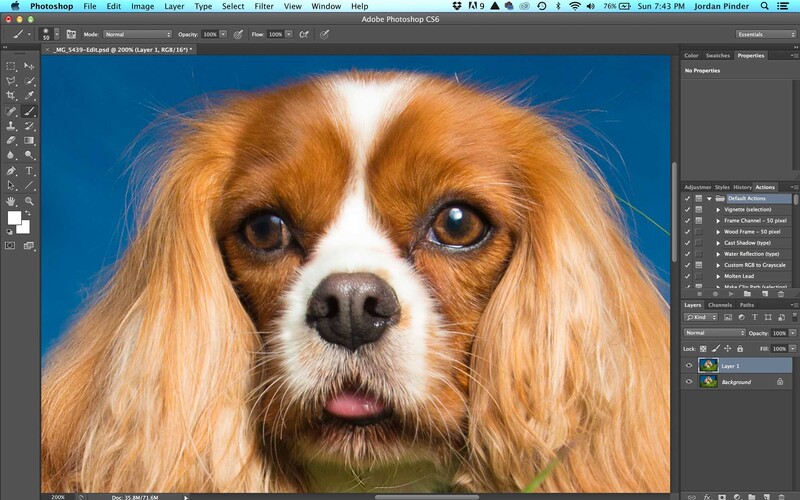
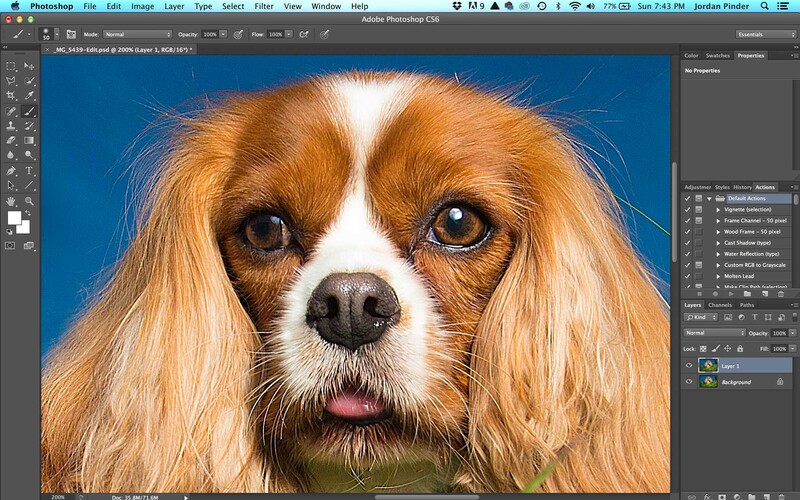
To prevent highlights in the fur from being brightened when sharpening is applied, I apply sharpening to a duplicated layer and set the blend mode to “Darken”. This step will enhance detail in the fur, without the unwanted consequence of brightening the highlights. You can see that the white fur around the dog’s nose looks much more natural when the Darken blend mode is utilized.

Understanding various methods of sharpening an image and when to apply each one is an important skill for any photographer to master. This particular technique is especially relevant to wildlife and pet photographers who shoot furry and hairy subjects on a routine basis.


Join the Fstoppers community for free
-
Post comments and join in the discussions
-
Browse the site ad-free
-
Share your work and get featured in the community
-
Compete in the photo contests for fun and prizes
4 Comments
Jordan: Great tip. However, I still prefer the "softer look" for all my "furry" portraits.
Love the "Darken" tip. I'll have to try that in other situations as well.
This is similar to a method I've been using for a while that I picked up from Lee Varis using the unsharp mask filter. In a nutshell you create a dup layer, apply unsharp mask to the top layer with the amount at 500%, 0 threshold, and adjust the radius just past the point of too much (usually around .7px). Then go to edit > Fade Unsharp Mask and set blending mode to luminosity. Set the layer to darken. Duplicate that layer and set it to lighten. Decrease the opacity of each layer to taste. then group and adjust overall opacity to taste.
Obviously the smart sharpen method is less involved but I like the control I get from Lee Varis' method.
Never thought of doing it that way before. Must try it thanks.
Peter