
Want to walk through your own night photo while remaining invisible? It'd be a great superpower for light painting. It turns out night photographers do it all the time. And it’s not Photoshop magic. It’s a simple trick for light painting that works with long exposure night photography that will take your night photography to the next level.
The Superpower of Invisibility

You don't have to be a mutant to become invisible. You don't need an X-gene. None of that. Through the magic of long exposure night photography, you can walk in front of your camera while your camera's shutter is open and never appear in the photo! How is this even possible?

The Science-y Explanation (Without the Headache)
1. Movement Creates Invisibility
Your camera sensor "builds" your image over time. It's collecting light, after all. If you don't stand still in one place long enough, or aren't lit well enough to register, you never "exist" to the camera. Cool, huh?
Here's an example. If you were to photograph someone standing to the side shooting a gun at a target during the day, you wouldn't expect the bullet to show up in your photo, would you? Of course not. It's traveling too fast. And so it is with long exposure night photos.
If you're creating a night photo, it's by nature a long exposure. It's dark, after all! It takes a while for that dim light to register—maybe 15 seconds, 30 seconds, or even several minutes or hours, depending on your shot. So in that same way that you're not going to photograph a bullet during the day, you're also not going to capture a bird flying or yourself walking at night. You're moving too fast. And there's not enough light anyway.
Generally, you must stand in one place for at least ten percent of the total exposure time for you to begin showing up in the photo. And even then, you'll begin showing up as a faint dark smudge, barely noticeable in the photo. For a full moon photo with a two-minute exposure, ten percent is a full 12 seconds. And even for a "quick" 15-second photo, that's still 1.5 seconds! Just keep moving!
2.) You’re Just Not Bright Enough (and That’s a Good Thing!)
You are undoubtedly a beautiful, radiant being. Perhaps you've been told that your chakras glow bright and strong. But most likely, you still don't glow enough to show up easily if you are walking through the scene in your long exposure night photo.
In fact, if you're doing light painting with your night photography, you're undoubtedly dressed in dark clothes.
Regardless, you're moving, never standing still.
You're in Ghost Mode.

How Light Painters Use This to Their Advantage
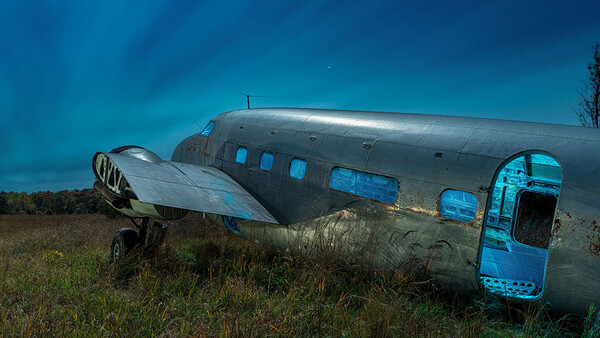
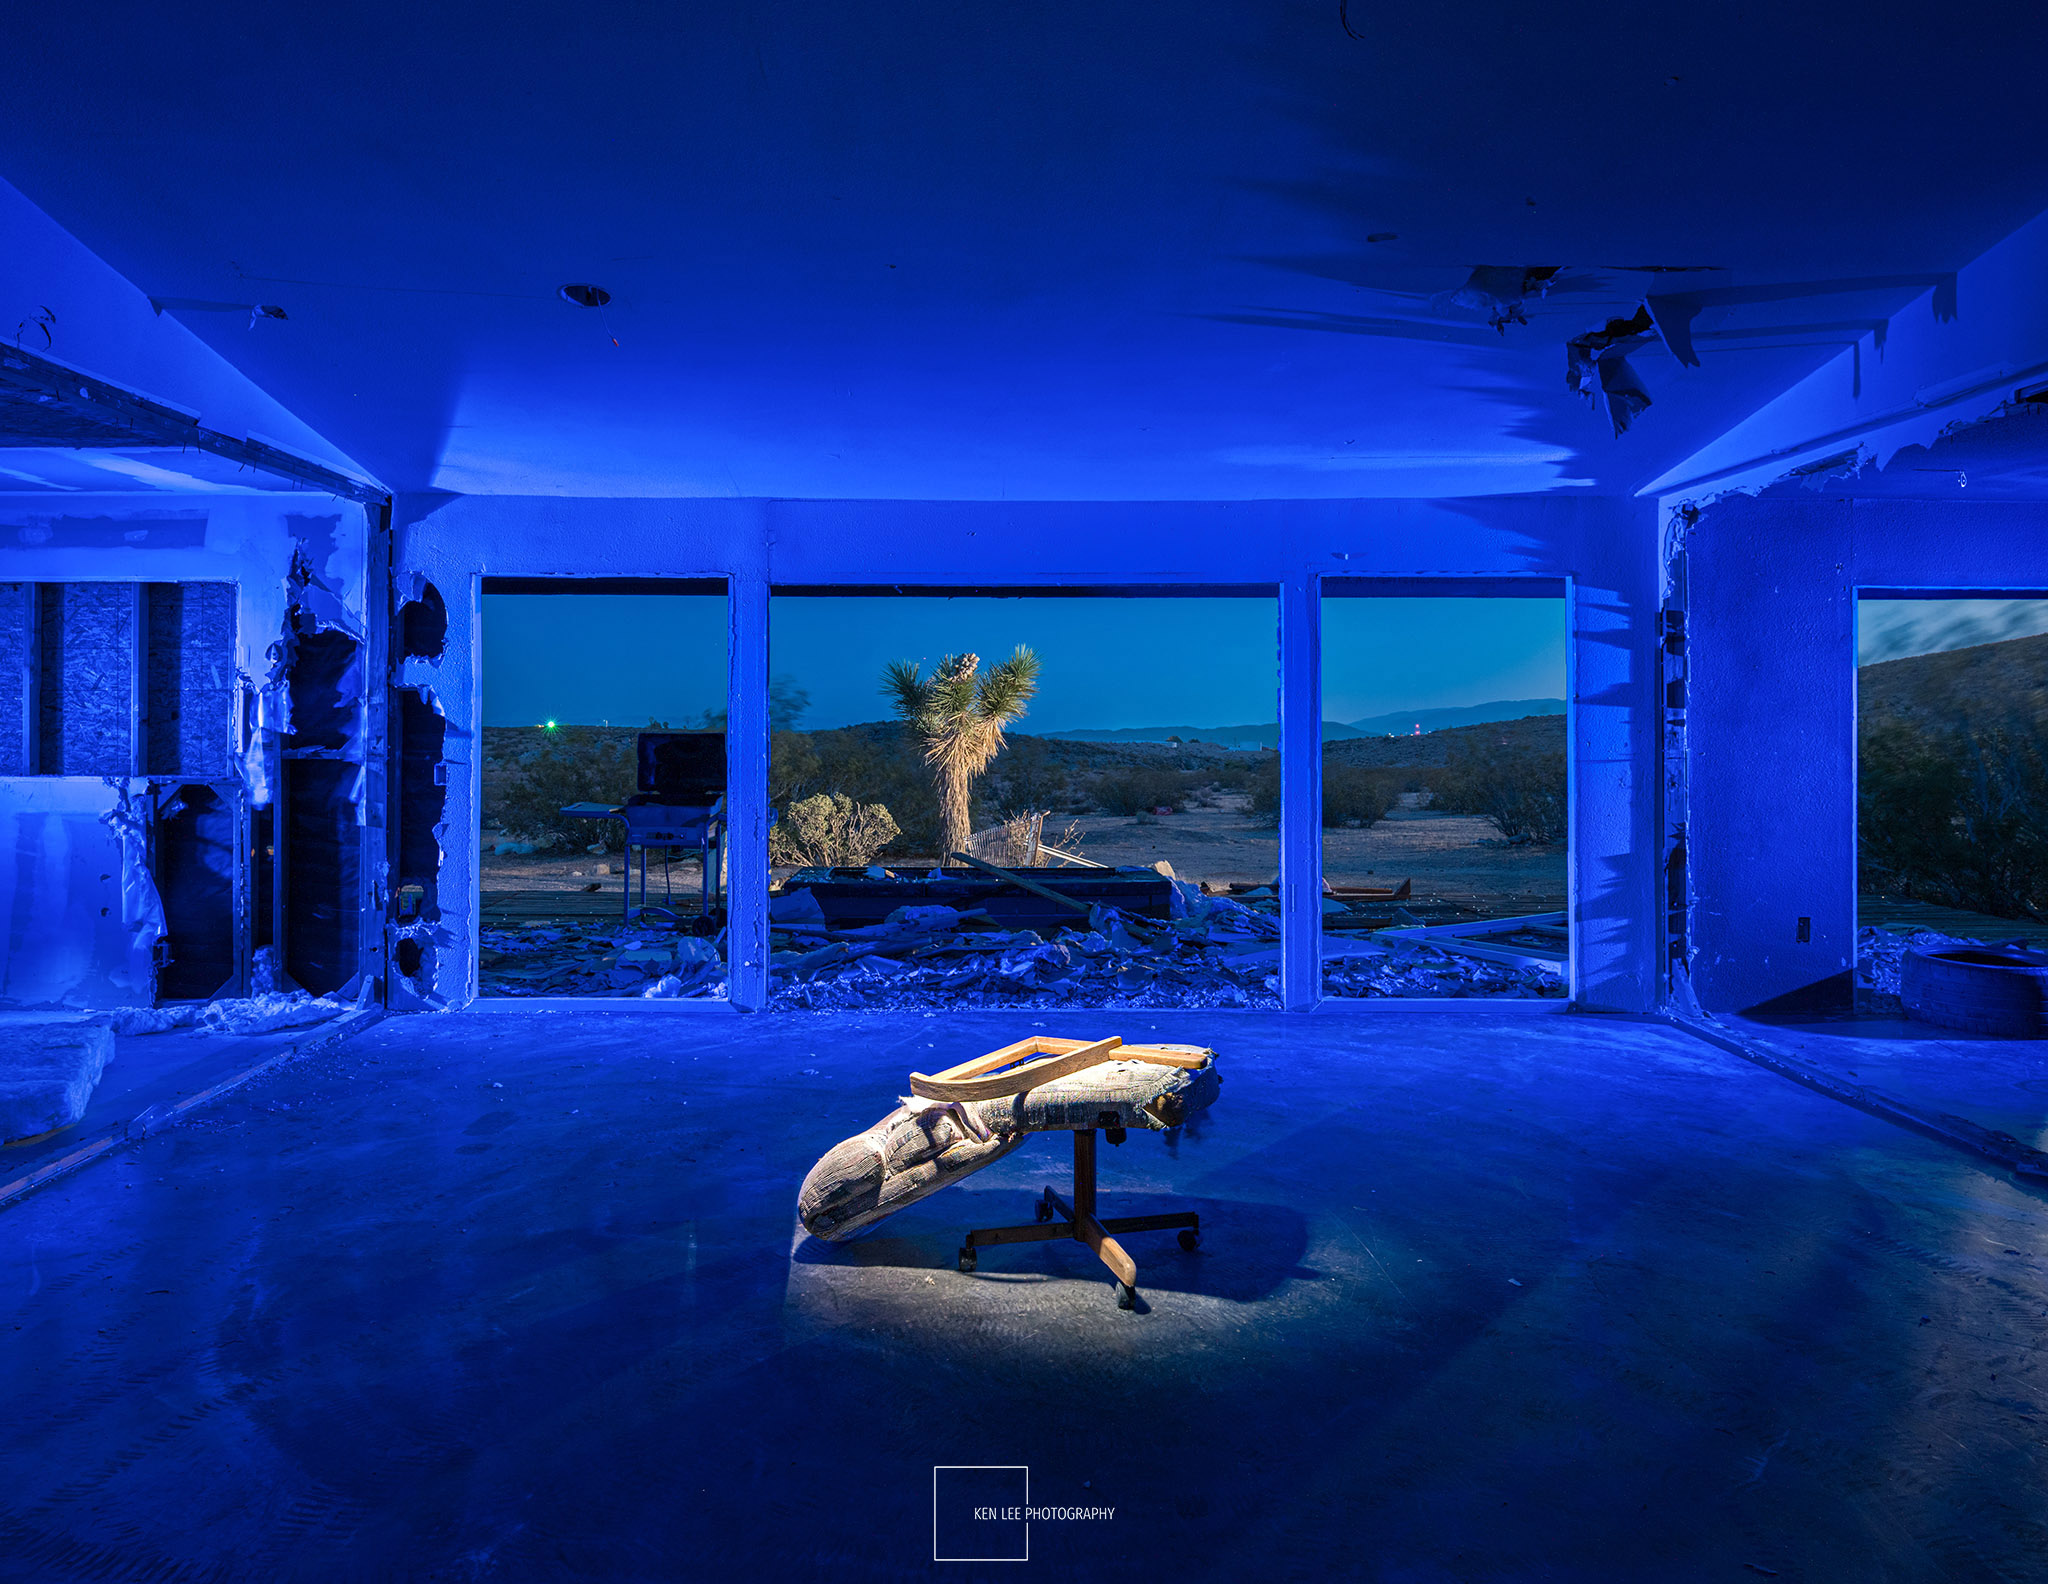
This is one of the best perks of light painting subjects: you can physically walk through your shot without being in your shot. Want to light the far wall of an abandoned barn? No problem. Just walk through the frame while the shutter’s open. As long as you don’t stand still in a beam of light for too long or shine your flashlight on yourself, you’ll remain invisible.
This means you can "paint" from multiple angles during one exposure—side lighting, backlighting, even adding a pop of color gel—without needing to clone yourself out in Photoshop later. Think of all the lighting possibilities...
By the way, I almost always light paint the photo during a single exposure. It's more fun that way. And I also like to get as close to what I want as possible out in the field. That way, my post-processing is mostly about aesthetics, such as denoising, color correction, sharpening, contrast, and other typical processes—almost all the same kinds of adjustments photographers have been making in their darkrooms for decades.
When You Might Begin Appearing in your Photo
Your superpower of invisibility may disappear if you do the following when taking your photo:
-
Wear light or reflective clothing
-
Shine a flashlight on yourself mistakenly
-
Stand still in one spot for more than ten percent of your photo
-
Get lit by another light source (like your own light, street lamps, or passing cars)
Even then, you're likely to "register" as a weird ghostly blob. Sometimes, night photographers do this on purpose to create a ghostly, otherworldly effect. They can purposely shine a flashlight on themselves or stand still for part of the long exposure, looking very spectral and eerie.
Final Thoughts
When light painting, dress dark. Some of the light drawing photographers dress almost like ninjas, covering their faces and hands so that their lights do not reflect off their skin so much. In fact, many of us who do light painting will take specific measures to make certain that the light doesn't reflect off our face or hands. And of course, we make sure we never shine the light directly into the camera (unless we want to, obviously).
The act of light painting subjects is a performance, a technique. Part of that performance is about constant movement, deliberate control of light, and selectively blocking or revealing parts of the scene to create your vision.

It's time you initiate Ghost Mode. Have that superpower of invisibility take your night photography to new heights.


Join the Fstoppers community for free
-
Post comments and join in the discussions
-
Browse the site ad-free
-
Share your work and get featured in the community
-
Compete in the photo contests for fun and prizes
20 Comments
Great info Ken, you're always an interesting read.
Thanks, I appreciate the comment. I am writing mostly about night photography to hopefully encourage more people to try it even though subjects like this tend to get less views.
Great article 👍
Thanks, greatly appreciated!
Very creative! I love the usage of extended timing to create almost any lighting effect!
Oh yeah, it's soooooo FUN! It's the most actively creative form of photography I can think of personally. And did I mention that it's FUN? Hours feel like minutes sometimes.
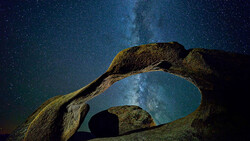
The other thing that's cool about it is that you can do your "base" foreground long exposure low-ISO shot using this technique, and then, keeping the camera in the same place, simply switch the camera to shorter-exposure, high-ISO settings so you can get stars as pinpoints, i.e., Milky Way photos or whatever, in case you don't want the stars to trail, which they will do when you are photographing for several minutes. Then you blend them together in post-processing.
The advantage of this is that you get enough time to do the light painting. The other advantage? It's a lower-ISO photo, so it's cleaner.
The disadvantage, of course, is that it requires you to blend that and the stars-as-pinpoints photo together, so it requires more post-processing, something I try to avoid whenever possible, haha! I can do it, but I'd much rather be out in the field creating.
An example of this sort of blending low-ISO longer-exposure photos for light painting with high-ISO shorter-exposure photos is the one above with the rusty Ford and the camper.
As you do not know the final result immediate, it's some kind of coming back to analogue photography where you need to wait some days for your images to be processed. And that makes it special!
It's true. Even though it's digital, there's a real magic in doing a long exposure photo with light painting, and then running back to go check out what you've done. I especially love the first part, when I might try some different lighting approaches to see how it looks and feels, and how it adds (or detracts) from the composition. I love that experimentation and process.
Also, I'm very consistent with my light painting, memorizing my spots, and often counting the amount of seconds in each spot, etc., and the light painting still always comes out a little different each time. So it's sort of like making handmade wooden furniture where it can look a bit different each time.
Great Info, thanks. But what hind of pamb do you use? A lightstick or lighttube, or is it more like a flashlight or point light?
I use handheld lights. My go-to light is a ProtoMachines LED2. However, the ProtoMachines products are currently not on the market, although many of us are hopeful that they will release new product. Fingers crossed. www.protomachines.com.
I sometimes use a Wurkkos FC11 light, which has a nice, warm light (4000K) and a CRI of 91, I think it was. The bonus about this is that it's less than $30. The ProtoMachines is very expensive.
Occasionally, I will wrap Cinefoil around an RGB LED panel, such as a Lume Cube RGB Pro 2.0 so that the light can be directed slightly more, and I'll handhold that and light paint using that. This is great for large surfaces.
But I would say about 95% of the time, it's the ProtoMachines.
Thanks for the question!! Hopefully this helps you and others.
Hi Ken, thanks for your awnser.
Sure, my pleasure. By the way, I think Wurkkos may have replaced the FC11 light with FC11C. Should still work since it has the warm white 4000K light, if that's important to you. It is to me.
Very refreshing reading about How To and not AI and presets
Thanks, Rene. I am trying to write about night photography, including what gear to use, how to do certain things (I have articles on how to do star trails, light paint, and that kind of thing).
Basically, what I am hoping to do is ENCOURAGE people to try night photography, and all the things that go along with it.
I'll write about AI occasionally, but it's more of a philosophical approach to it, I think, not so much how to use it.
And I probably won't write about presets very often either, mostly because there's not much I can say about them other than that they can offer a good starting point for tweaking, and save me some time clicking a few boxes and adjusting a few sliders that I am going to do anyway, haha!
Excellent work, Ken. Thank you for sharing your art and processes. To Rene's point, this is RI (Real Intelligence) as you blend in real-time to your liking.
Thanks, Marius. I just hope it inspires people to do this. That's what I really am hoping here.
My RI is decent, I suppose. Unless I am trying to fix my car. Then it suddenly fails me. But at least it's not artificial, haha!
By the way, I'm not really BLENDING anything (unless I blend a stars-as-pinpoints sky as mentioned in the above comments). These are all single exposures except for the rusty Ford and camper and "The End", where I blended myself into the photo (but the rest of it, including the light painting, was all done in a single exposure). That's what's cool about it. It's also a lot quicker than setting up panels, and infinitely more creative and flexible in terms of angles and much more.
Hopefully this helps get people more into night photography. If it brings half as much joy to others as it does to me, then I say great!!
It is indeed inspiring, thank you. Btw the ref to the blending was not post process blending but what you do actively and in real time when painting with light as you decide where and how much.
Oh, I see, thanks. Yes, there is soooo much control and creative possibilities by doing this.
Thanks for inspiration! Just ordered a multicolored flashlight to try nightphotos on these.
Sure thing! I hope it goes well!! Those look like great subjects to light paint too.