
Almost nothing is more fundamental and important than shutter speed. Here's everything you need to know about it.
Shutter speed controls how long the camera's sensor collects light during a single exposure. On cameras with a mechanical shutter, a physical mechanism opens to let light reach the sensor, stays open for a measured duration, and then closes. On cameras using an electronic shutter, the sensor is activated and read out electronically without any moving parts, but the principle is the same: the sensor collects light for a specific duration. That duration is the shutter speed. A shutter speed of 1/500 s means the sensor was exposed for one five-hundredth of a second. A shutter speed of 1/30 s means it was exposed for one-thirtieth of a second, roughly 17 times longer.
The relationship between shutter speed and photography is straightforward in principle and endlessly nuanced in practice. A faster shutter speed reduces the light reaching the sensor but stops motion in its tracks. A slower shutter speed lets in more light but allows motion to blur. Every photograph you take involves a decision, conscious or automatic, about how much time the sensor spends collecting light, and that decision determines whether a moving subject appears frozen, softly blurred, or streaked across the frame.

The challenge for beginners is that the "right" shutter speed depends entirely on what you are photographing. A shutter speed that freezes a portrait subject perfectly will turn a waterfall into an ice sculpture. A shutter speed that gives a waterfall its silky flow will turn a portrait subject into a ghost. There is no single correct shutter speed for all situations, but there are reliable starting points for the subjects most photographers encounter, and understanding those starting points is one of the fastest ways to take control of your images.
Two Kinds of Blur
Before choosing a shutter speed, you need to understand the difference between the two types of blur that shutter speed controls, because they are caused by different things and solved in different ways.
- Motion blur is caused by the subject moving during the exposure. If a child runs across the frame while the shutter is open for 1/30 s, the child's image smears across the sensor because they changed position during the time the sensor was recording. The background stays sharp because it did not move. Motion blur is a property of the subject's speed relative to the camera, and the only way to eliminate it is to use a faster shutter speed (or to move the camera with the subject, which is a technique called panning).
- Camera shake is caused by the photographer's hands moving during the exposure. Even the steadiest hands vibrate slightly, and at slow shutter speeds, that vibration registers as a uniform softness across the entire frame, affecting both the subject and the background equally. Camera shake is a property of the photographer's stability, not the subject's speed, and it can be reduced by using a faster shutter speed, bracing the camera against a solid surface, using a tripod, or relying on in-body or lens-based image stabilization.
The distinction matters because the solution to each problem is different. If the subject is sharp but the background shows directional streaking, the camera was moving during the exposure, typically because you were panning to track a moving subject. The subject stays sharp because the camera followed it; the background streaks because the camera rotated relative to everything else in the scene. If the entire frame, including both the subject and the background, shows a uniform softness without directional streaking, the problem is camera shake, and stabilization or a tripod may fix it without changing the shutter speed. If the background is sharp but the subject is blurred, the problem is motion blur, and only a faster shutter speed (or a speedlight, which effectively freezes motion with a very short burst of light) will fix it.
The Reciprocal Rule: Your Baseline for Camera Shake
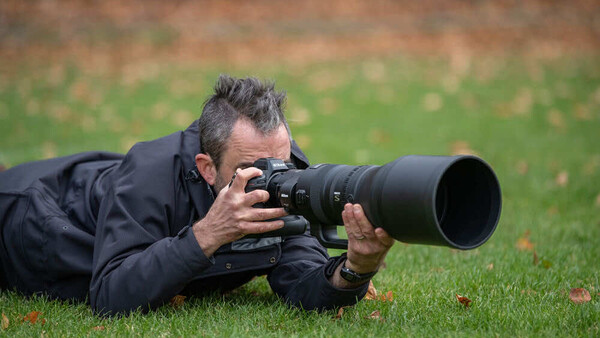
A useful starting point for the minimum handheld shutter speed is the reciprocal rule: set your shutter speed to at least 1 divided by the focal length of your lens. If you are shooting at 50mm, use at least 1/50 s. If you are shooting at 200mm, use at least 1/200 s. Longer focal lengths magnify not only the subject but also the vibration of your hands, so the minimum safe shutter speed increases as you zoom in.

On an APS-C camera, apply the crop factor first: a 50mm lens on a 1.5x crop sensor behaves like a 75mm lens, so the minimum shutter speed becomes 1/75 s (round up to 1/80 s). On Micro Four Thirds with a 2x crop, a 50mm lens behaves like 100mm, so use at least 1/100 s.
This rule assumes no stabilization and a still subject. If your camera has IBIS (in-body image stabilization) or your lens has optical stabilization, you can typically shoot 2 to 4 stops slower than the reciprocal rule suggests, depending on the stabilization system. A 5-stop IBIS system on a 50mm lens theoretically lets you shoot handheld at shutter speeds well below 1 second, though real-world results vary with technique and individual steadiness. Stabilization helps with camera shake but does nothing for subject motion. A stabilized camera at 1/2 s will produce a sharp background and a blurred child.
Shutter Speed by Subject
The most practical way to think about shutter speed is by the subject you are photographing. Each type of subject moves at a different speed, and each has a shutter speed range that reliably produces the result most photographers want.
Still Subjects: Landscapes, Architecture, Products
When nothing in the frame is moving, the only blur risk is camera shake. This means the shutter speed floor is determined by the reciprocal rule (or lower, if you are using stabilization or a tripod), and the only constraint is gathering enough light for a correct exposure. Landscape photographers routinely shoot at 1/15 s, 1/8 s, or even multiple seconds on a tripod with a remote shutter release, because nothing in the scene is moving and the tripod eliminates camera shake entirely. Product photographers in a studio shoot at whatever shutter speed the lighting dictates, often 1/125 s with flash or 1/4 s with continuous light, because the product is stationary.
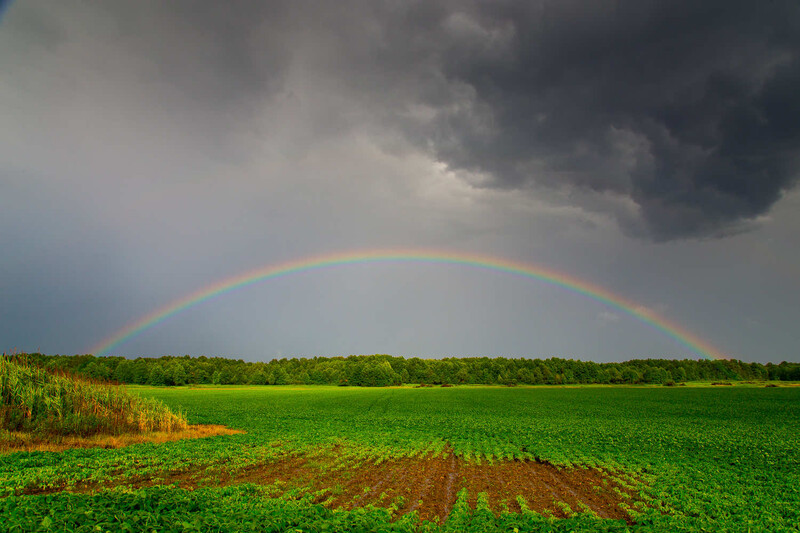
The exception is landscapes with moving elements: trees in wind, waves, clouds, flowing water. In those cases, you are making a creative decision about how much motion blur you want in the moving element while the rest of the frame stays sharp. That decision is covered in the water section below.
Walking People: Street, Travel, Casual Portraits
A person walking at a normal pace moves slowly enough that 1/125 s freezes them cleanly in most situations. This is the reliable default for street photography, travel photography, and any candid shot where the subject is moving at walking speed. If the person is walking directly toward or away from the camera (minimal lateral movement across the frame), you can sometimes get away with 1/60 s. If they are walking across the frame (maximum lateral movement), 1/125 s is safer, and 1/250 s provides a comfortable margin.
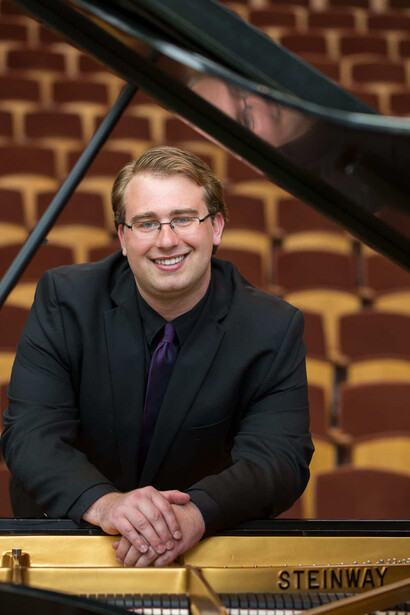
For posed portraits where the subject is standing still, the shutter speed floor drops to whatever the reciprocal rule allows, since the subject is not moving. At 85mm on a full frame body with a lens like an 85mm f/1.8 prime, 1/100 s is sufficient for a still subject. At 50mm, 1/50 s works. With stabilization, you can go lower, but watch for the subject shifting their weight, blinking, or making small gestures that introduce subtle motion blur in the hands or face.
Running Children and Pets
This is the category where beginners most consistently underestimate the shutter speed they need. Children and pets move unpredictably, change direction without warning, and accelerate from standing to sprinting in a fraction of a second. A shutter speed that works when the child is walking will produce a blurred mess the instant they start running.
Use 1/500 s as the starting point for children and pets in active play. If they are running at full speed, jumping, or playing a sport, push to 1/1,000 s. If they are sitting or moving slowly, 1/250 s is usually enough. The cost of using a faster shutter speed than necessary is a slightly higher ISO (and therefore slightly more noise), which on any modern camera is a trivial tradeoff compared to the cost of missing the shot because the subject was blurred.
Set your camera to continuous autofocus (AF-C or Servo) with subject tracking enabled, and use a fast enough shutter speed that you can fire freely without worrying about motion blur. The combination of tracking AF and a shutter speed at or above 1/500 s will produce dramatically more keepers than any other single adjustment a beginner can make for this type of subject.
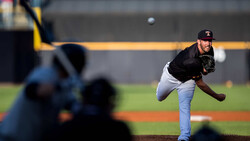
Sports and Fast Action
Organized sports, martial arts, dance, skateboarding, cycling, and any other fast-action subject require 1/1,000 s as the minimum starting point. For most outdoor sports in good light, 1/2,000 s is a comfortable default that freezes the majority of action cleanly, though extremely fast elements like a bat swing, a tennis racket, or a kicked ball may still show slight motion blur even at this speed.
Indoor sports are harder because the light is dimmer, which forces a tradeoff between shutter speed and ISO. High school gymnasium lighting is notoriously poor, and maintaining 1/1,000 s in a dim gym may require ISO 6,400 or higher. This is where fast lenses matter: a Sigma 50-100mm f/1.8 DC HSM Art on APS-C, a Tamron 70-180mm f/2.8 Di III VXD G2 on full frame, or a fast prime like the Canon RF 85mm f/1.2 L USM gathers enough light to keep the shutter speed high without pushing ISO to destructive levels. For photographers shooting sports regularly in difficult light, the lens aperture is often the limiting factor on shutter speed, not the camera body.
The direction of motion matters. A subject moving across the frame (perpendicular to the camera) requires a faster shutter speed to freeze than a subject moving toward or away from the camera (parallel to the lens axis). A cyclist riding straight at you can be frozen at 1/500 s. The same cyclist passing across the frame at the same speed needs 1/2,000 s or faster. When in doubt, err toward the faster shutter speed.
Water: Freezing vs. Flowing
Water is the subject where shutter speed becomes a creative choice rather than a technical requirement, because both frozen and flowing water can look compelling, and the photographer decides which look they want.
To freeze water droplets, splashes, and individual waves, use 1/1,000 s or faster. Each droplet becomes a sharp, suspended sphere. Crashing waves show individual spray particles. Rain appears as discrete streaks. This look is dramatic and high-energy.
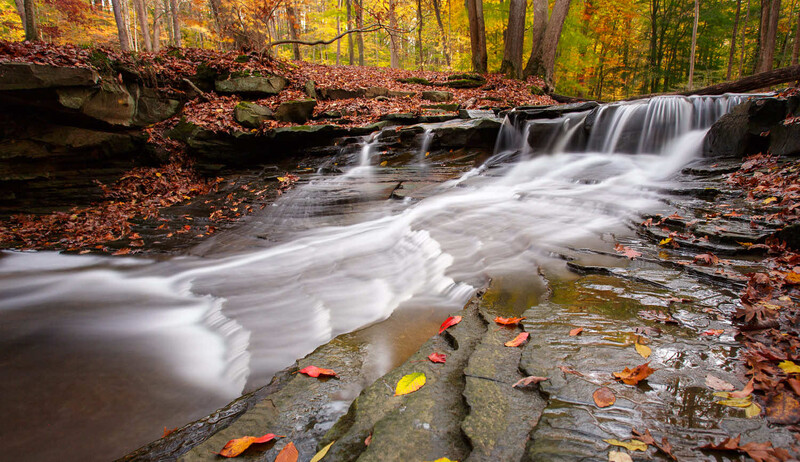
To create the smooth, silky flow effect that is popular in waterfall and river photography, use 1/4 s or slower. At 1/4 s, moving water begins to show motion streaks while rocks and surrounding landscape stay sharp. At 1 to 2 seconds, waterfalls develop the classic cotton-candy flow. At 10 to 30 seconds, ocean waves become a flat, misty surface and rivers turn into glass.
Achieving exposures of several seconds in daylight requires a neutral density (ND) filter, which is essentially sunglasses for the lens. A 6-stop ND filter turns a 1/60 s exposure into a 1-second exposure. A 10-stop ND filter turns it into a 16-second exposure. A variable ND filter lets you dial in the exact amount of light reduction without swapping filters. For any photographer interested in long-exposure water effects, an ND filter is the essential accessory, and a sturdy tripod is the essential support, because no amount of stabilization will hold a camera steady for a 10-second exposure.
Between the frozen and the flowing extremes, there is a middle range (1/15 s to 1/60 s) where water shows some motion blur but retains visible texture and shape. This range often looks more natural than either extreme, and it is worth experimenting with if the fully frozen or fully silky look does not suit the scene.
Vehicles and Traffic
A car on a highway moves fast enough that freezing it requires the same shutter speeds as fast sports: 1/1,000 s or above. A car in city traffic at 25 to 30 mph can often be frozen at 1/500 s. The same directional principle applies: a vehicle moving across the frame needs a faster shutter speed than one moving toward or away from the camera.
The more interesting creative option with vehicles is panning: tracking the vehicle with the camera during a slow exposure so the vehicle stays relatively sharp while the background blurs into horizontal streaks. Panning produces images that convey speed and energy in a way that a perfectly frozen frame does not. The technique requires a shutter speed slow enough to blur the background (typically 1/30 s to 1/60 s for cars, 1/15 s to 1/30 s for slower subjects like bicycles) and a smooth, deliberate rotation of the camera to follow the subject's path. Panning takes practice, and the keeper rate is low at first, but the results when it works are among the most dynamic images in photography.
How to Set Shutter Speed in Practice
The simplest way to control shutter speed as a beginner is to use shutter priority mode (S on Nikon, Sony, and Fujifilm; Tv on Canon). You dial in the shutter speed, and the camera selects the aperture needed to keep the exposure correct. This lets you focus entirely on choosing the right shutter speed for the subject without worrying about the aperture math.
The limitation of shutter priority is that it can push the aperture to its widest or narrowest extreme in difficult light. If you set 1/2,000 s in a dim indoor environment, the camera may open the aperture to its maximum (f/3.5 on a kit lens) and still not gather enough light, resulting in an underexposed image. In that case, raising the ISO is the solution: each doubling of ISO compensates for one stop of shutter speed, so jumping from ISO 400 to ISO 1,600 lets you use a shutter speed two stops faster while maintaining the same exposure.
For photographers comfortable with manual mode, the "set two, adjust one" approach works well: choose the aperture for the depth of field you want, choose the shutter speed for the motion you want, and let ISO float to maintain correct exposure (auto ISO handles this on most modern cameras). This gives you full creative control over both depth of field and motion rendering while letting the camera handle the exposure math.
The Bottom Line
Shutter speed is the control that determines whether motion appears frozen or blurred in your photographs. For still subjects, it barely matters as long as you are above the camera-shake threshold. For moving subjects, it matters more than any other setting on the camera. The reliable defaults (1/125 s for walking people, 1/500 s for children and pets, 1/1,000 s or faster for sports, 1/4 s or slower for silky water) will produce clean results in the vast majority of situations. Learn those numbers, apply them as starting points, and adjust based on what you see on the screen.
If you are building your understanding of how shutter speed, aperture, and ISO work together as a system, the Fstoppers Photography 101 tutorial covers the full exposure triangle and its creative applications in depth. And if landscape photography is where shutter speed choices matter most to you, particularly the long-exposure water techniques covered above, the Photographing the World series walks through the complete shooting and post-processing workflow for the kind of images where shutter speed is the primary creative decision.


Join the Fstoppers community for free
-
Post comments and join in the discussions
-
Browse the site ad-free
-
Share your work and get featured in the community
-
Compete in the photo contests for fun and prizes
No comments yet