
Take a few minutes and look up Photographer Joel Grimes. His portraits infuse a unique and identifiable lighting style that is edgy, dramatic, and often shot in studio with fairly simple lighting setups. Even more interesting is the fact that most of his shots are taken with the intent of compositing them into different backgrounds.
Having followed his work for the last year, I was inspired by a recent interview he shot at B&H last November showcasing the magic of using one light. Citing example after example of what I consider to be amazing portraiture, he delves into complex topics such as light ratios, light-to-subject distance, and using different sized modifiers with explanations that simplify the process. After watching a few of his other behind the scenes videos on YouTube, I decided to shoot my own composite portrait using a small setup in my home.
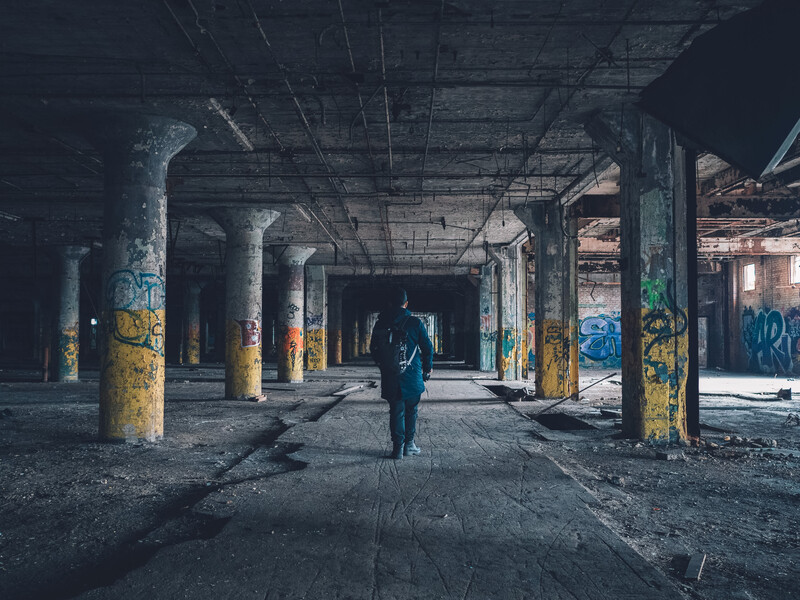
The first step was coming up with an overall theme for the image. What did I want the style of my image to appear as: dramatic or upbeat, low or high key, fashion oriented or more street styled? During a shoot last week using smoke grenades, I came up short trying to locate an abandoned warehouse around the Austin, Texas area, so I decided to find a stock image of an abandoned warehouse that would satisfy my urge. A quick search on Pexels uncovered several potential options, so I downloaded a few to try out once the work in Photoshop began. In general, each of the images were pretty dark and edgy, so that laid the foundation for my overall style of the shoot going forward. More importantly, I wanted to be sure the lighting of those images would closely resemble that of my portrait.
Next was finding a model. I’m not incredibly picky when looking for models, especially if the shoot is trade for print only. In most cases, I’ll put out a feeler on Instagram or I will create a casting call on Model Mayhem, which generally has good results. In this case, I had success using Model Mayhem with a female model named Anastasia Miller. Her look reminded me of Kristen Stewart from Twlight which, at least in my mind, was an example of the exact look I was going for. She was readily available and easy to work with as she herself is a hair and makeup artist and was able to come prepared.
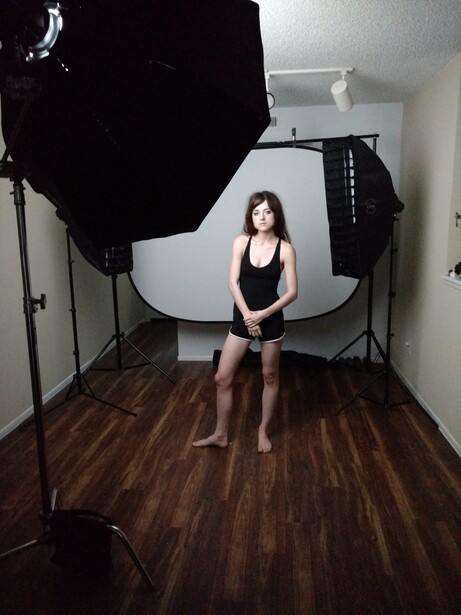
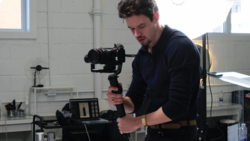
The last piece of the puzzle was creating a lighting setup. Let me start by saying that in hindsight, using a single light would have probably been preferable in my case. My small studio, aka my two bedroom apartment, has a fairly long and open dining and living room, but is relatively narrow, making it difficult to position any lighting too far left or right. Instead, I got overly ambitious and went with a three-light setup with two gridded strip banks on either side slightly behind the model and a 46” octobox maybe 15 degrees camera left. The strip banks were lit using Yongnuo 560IV speedlights set to slave mode and the octobox with an Xplor600 HSS battery-powered strobe set to manual mode. The seamless white background I ordered came damaged and had to be returned, so unfortunately all I had to work with was a 5’ X 7’ Impact collapsible backdrop hung from an Impact background stand kit. This proved to be somewhat problematic as the background, while ideal for headshots, did not provide the coverage I needed for a mid shot, waist up. Not a deal-breaker at all, but something to consider for future at home shoots. Here is my setup:
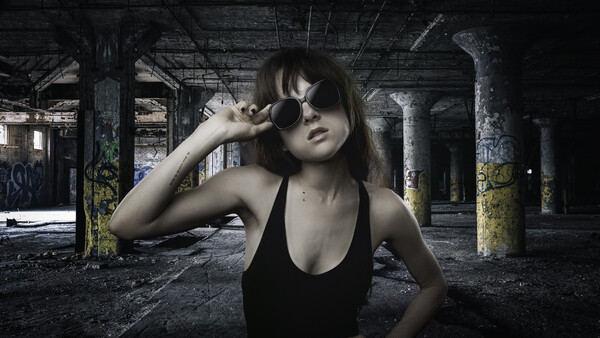
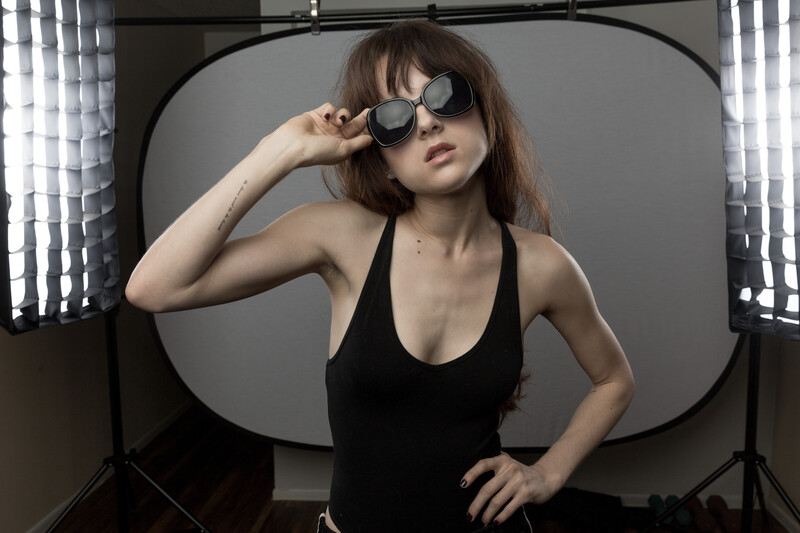
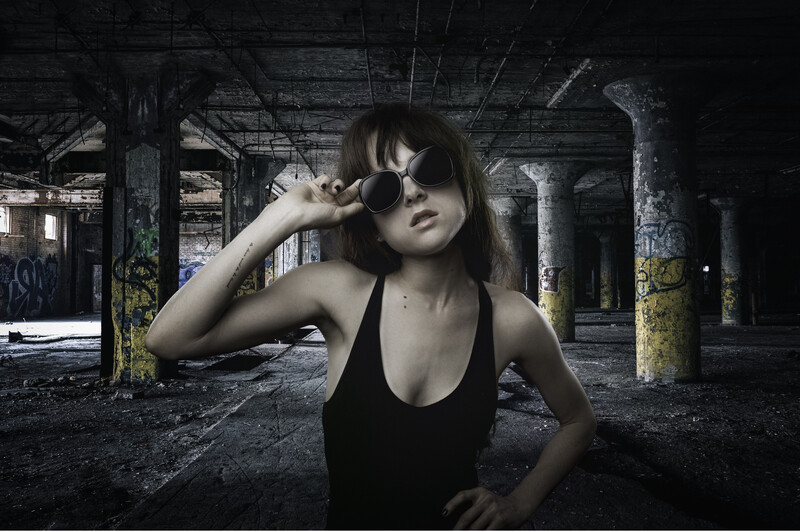
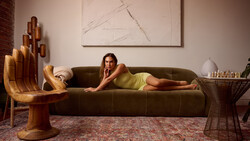
I asked my model to bring a variety of dark, simple, un-patterned clothing to choose from, and ultimately, we decided on a black zip-up dress for the first setup and a black strapped top for the second. I set my lights up before she arrived so as not to waste time, and after a quick introduction, we started shooting. I took about hundred and fifty shots over the course of an hour, which frankly isn’t much, but it felt like all I needed. Of those shots, I had about ten top picks. Here is the final image I chose for this particular composite:
With the shooting done, it was time for editing, which I anticipated to be a pain given my small backrground. I started in Lightroom where I slightly desaturated the image and adjusted the exposure, highlights, and shadows to taste. Then, I opened the adjusted image in Photoshop where I started the tedious process of creating the selection of my model. For this, I used the Quick Selection tool first to get a rough outline of the model and then the legacy Refine Edge tool for the finer parts of hair. I find the legacy tool works better than Adobe’s new Select and Mask feature. To utilize the legacy tool, simply go to Select in your menu and hold down shift as you click Select and Mask. Please note, you need to have the latest edition of Photoshop installed for this to work.
Once the selection was made, I loaded my background in and resized it accordingly. I then added some contrast to the background only using Pro Contrast in Google Nik Color Efex Pro. The contrast more closely matched the lighting on the model and gave the overall image a bit more drama. Next, I removed the octobox reflection from her sunglasses by creating a layer filled with black and painted a mask over just the glasses. Then, I added a white-to-black gradient on a new layer and with the same mask I used to remove the reflection, I situated the gradient so that it appeared as a new refection on either side.
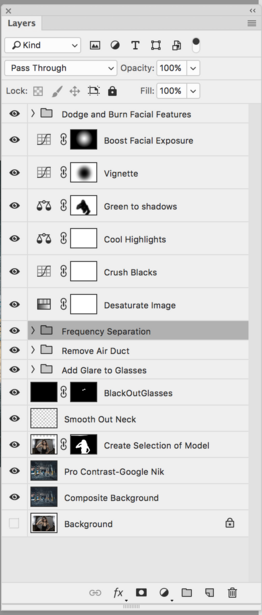
I finished the edit by adding some frequency separation to her skin, desaturated the image further for a muted look, crushed the blacks a bit using a curves layer for a more cinematic feel, added a touch of blue to the highlights with color balance, dodged and burned the appropriate areas of her face, and ended with a vignette. Here is a screen shot of my layers panel for a more in-depth look.
And there you have it, a quick and easy at home composite that follows the style of Joel Grimes. The most difficult part is getting motivated and coming up with a lighting scheme that matches your background. After that, with a little patience in Photoshop, you can come up with something amazing.


Join the Fstoppers community for free
-
Post comments and join in the discussions
-
Browse the site ad-free
-
Share your work and get featured in the community
-
Compete in the photo contests for fun and prizes
18 Comments
Very interesting concept!!!
Thanks Christopher! It was a fun shoot and pretty easy
You are so welcome Mark. It is always nice to see innovation in photography. Just when you think you 've seen it all... along comes a Mark Bowers!
Thanks for the article Mark! I think you did a great job showing the steps. Valuable to anyone like me just getting into compositing. Showing your editing steps in Photoshop also shows the simplicity and once again i think is very valuable to people like myself who tend to over complicate things at times. Look forward to seeing more from you. Cheers!!
Hey Carl, that is great to hear! I have always wished that other photogs would show their Photoshop workflow as well but rarely do they. Most consider it a hard kept secret and I get that to a certain extent but in today's world, I find it more beneficial to share. Im glad it helped! Please share with others and spread the word
I agree with you. I think most give the public enough info so they know the photographer is skilled but leave out specific details in order to feel like they are not spilling the secret sauce. But really the true secret sauce comes from relentless passion, trial and error. Not to mention the communication between the artist and the model/client. Already sent the link to several friends I thought would benefit from it. Thanks again!
Joel is fantastic. I went to one of his workshops once (which is big for me, I don't typically like workshops) and he really killed it. His Creative Live training is super in-depth and definitely want the money. Don't think he's just a composite guy either, the dude knows how to light and how to edit.
His BTS videos are awesome, I should seriously consider some of this creative live training. Everything I've seen from him is relatively straightforward and the results amazing. His color grading workflow is something in particular I would like to learn more about. Does he share that on Creative Live? And you are right, he does far more than composites, I should have stated that more broadly. Thx Andrew
If I'm remembering correctly he does. I did the Concept Driven Commercial Photography one and it was extensive and in-depth. Fun fact (in case you didn't know): Joel is colorblind, so his editing approach is obviously somewhat different from someone who sees color "normally" meaning he tends to see tone and contrast and edit for that rather than strict color. Pretty cool stuff.
I remember him saying that in one of the videos I watched for free. I'll definitely consider purchasing one of the paid tutorials now that you've fired me up!
BTW, we aren't too far from each other! I grew up in Spring just north of Houston but live in Austin now. If you're ever in town let me know and we can get together for a drink or photo shoot.
Hell yeah man, same if you're ever in Houston. I'm in Austin infrequently, but will definitely let you know next time I'm there.
I know there are a million ways to do one thing in PS, but the layer structure is maddening to me. Like putting retouch layers(D&B) above adjustment layers. Anyways, nice work and good article.
Fun fact: that's not an abandoned warehouse. That's the Fisher Body Plant 21, in Detroit. Check out one of my shots from that (exact) location. https://www.flickr.com/photos/hadak/28283965154/in/datetaken/
Haha no way! That is awesome man, I had no idea. The image was free online and I like the feel of it. Crazy
Cheers for that, gonna give it a go this weekend.
Do it! Share the results in the post, id like to see them
very interesting, thanks for sharing your exp with us :)