
Adding a little set design to your studio photography can add huge value for your clients and really set your work apart. Today, I’m sharing three DIY sets you can create with simple materials from the hardware store—no power tools required.
At its core, a photo set is just a backdrop plus a posing element. In photography, set design (sometimes called set styling) is the process of creating and arranging the physical environment for your shoot. It’s all about crafting a visual space that supports the concept, mood, and story of your images.
Key Components of Set Design
-
Backdrops and Walls: Painted, textured, or printed backgrounds
-
Furniture and Props: Chairs, tables, lamps, rugs, plants, or any object that supports your concept
-
Lighting: While technically separate, lighting shapes how the set is perceived. Shadows, reflections, and highlights are all part of the design
-
Color Scheme and Materials: Colors and textures evoke emotion and create aesthetic cohesion
For example, photographing a musician for an album cover might involve choosing a backdrop that fits their style, strategically placing props like a chair or instrument, and adding textures or objects that tell a story about their music.
We usually build sets with plywood, power tools, and paint, but this time we wanted to challenge ourselves. What if we built three photo sets with no tools at all, using only materials from the hardware store?
We decided each set should be inspired by a different aisle in the store, giving each one a unique theme and concept. To make it even more exciting, we gave ourselves just one day: three sets, three shoots, back-to-back, with no safety net and no time to overthink.
Here’s what we came up with:
Set #1: The Painter’s Drop Cloth
We started in the paint aisle, where a neutral tan painter’s drop cloth caught our eye. For a posing element, David grabbed a paint bucket to act as a makeshift apple box.
Since color is such a huge part of our work, we wanted to add some. Painting the cloth would take too long, so instead we used a spotlight with colored gels. The result? Two completely different looks from the same setup:
-
Look 1: Bold and funky with colored light
-
Look 2: Neutral and rugged with white light
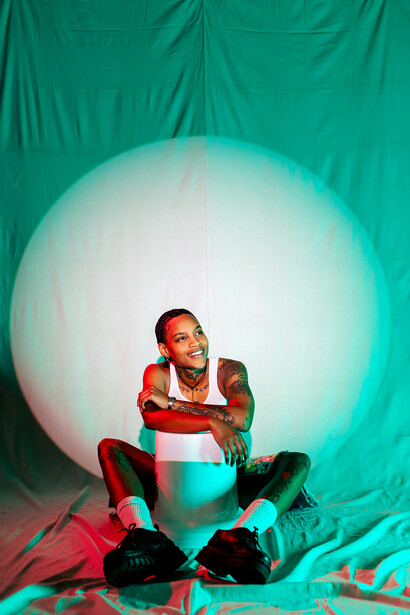
The texture of the drop cloth was a total win—simple, versatile, and more effective than we expected. This was definitely the cheapest set of all three, but the photos looked surprisingly high-end.
Set #2: The Cowboy and the Hay Bale
Next, we wandered into the landscaping section and found a straw blanket and a hay bale. The straw blanket became the backdrop, and the hay bale served as the posing element.
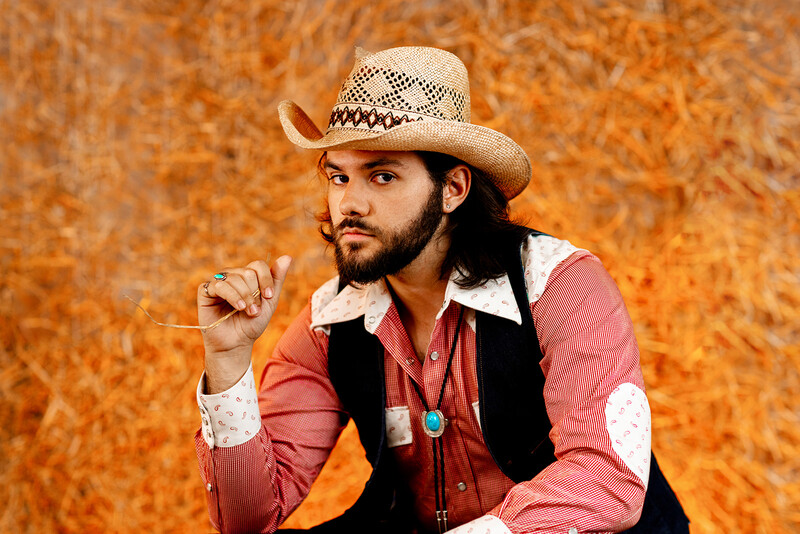
It didn’t go perfectly. The blanket was much thinner than expected, so we had to get creative with how we set it up. But it all came together just in time for our model Justin, who arrived in a denim-on-denim cowboy outfit.
We lit the scene with warm tones to mimic a hot, dusty sun and combined seated and standing poses. It felt like it was straight out of a country music video.
Set #3: The Corrugated Plastic Box
For the last set, we hit the plastics aisle and picked up corrugated plastic sheets. With nothing but tape and a utility knife, we built a giant DIY box.
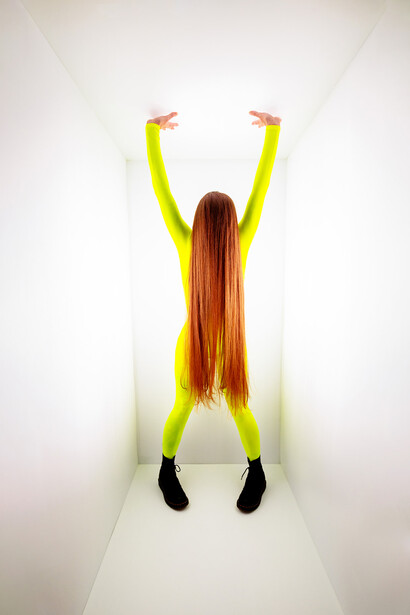
This was the most immersive set. Our model could stand inside, lightly press on the walls, and interact with the space. Then we blasted light through the plastic, creating glowing, diffused walls that transformed the set.
The result? Surreal, otherworldly portraits that felt closest to our usual style—wild, glowing, and futuristic.
Each set had its own challenges, but that’s what made the day so exciting. Some came together quickly, some took more problem-solving, but all three produced something unique and unexpected.
You can watch the full behind-the-scenes video above to see exactly how we built each set (and what each one cost). Which set is your favorite? Drop it in the comments!


Join the Fstoppers community for free
-
Post comments and join in the discussions
-
Browse the site ad-free
-
Share your work and get featured in the community
-
Compete in the photo contests for fun and prizes
No comments yet