
When I first started in filmmaking, I didn't want anyone in the world to know how I made my first video because I knew filmmakers usually have expensive tools and expensive software. At that time I didn't have either but I made that video anyway. Today I'm going to share the details with you.
I have my personal principles. One of them is to not go in debt when buying gear. For that reason, I buy the gear I can pay for with my own money. When I first started in photography I actually wanted to do video but I didn't have the money to invest in that. As time went on, I learned how I could do many things with less gear and started to appreciate the creativity and ideas more than the gear I had. Yes, I like to use expensive tools when I can and I know why they cost that much. However, there were moments in the past when I could not afford them. The camera I bought years after starting my career as a professional photographer was a Canon 7D. I planned to use it for my first videos. I still wanted my videos to look good regardless of the gear I used.
I knew the limitations of this camera regarding video quality and dynamic range. I knew what tools I needed to pull off a technically good video with less efforts. At that moment I was all by myself and was impatient to do something I could share with the world, and decided to make a video of myself doing something quite mundane: cooking a simple meal.
What I've got for this video was a good looking knife, the products for the meal, one video light, one desktop lamp, a photography tripod, Adobe Photoshop CS6, a Canon 7D, and, of course, my amazing cooking skills.
Why These Tools
Before I start investing in tools, first I want to make sure I can scratch the surface using the means I currently have. If that's impossible, then I buy gear, but if it doable I'll give it a try and focus on the the lessons I would learn, not on the tools. Having a hands-on experience with less perfect tools teaches me what features I need in a more perfect ones I would buy in the future.
For that project I didn't have any experience in filming but I knew the theory behind it all. Now that I have been soaking myself in filmmaking for several years, it was time to squeeze some of that juice on this brilliant and rather extraordinary first idea I had for a project.
Camera Motion
Making a video of myself means I can't have camera motion when I am in front of the lens unless I have a motorized slider or a similar toy. I tried panning in the beginning and at the end, and that was the best I could do with the tripod I had. Using the excellent lens breathing capabilities of my stills lenses I could use focus racking to my advantage. It would look as if I did both focusing and zooming. You can see that at the final seconds of the video (from 1:58 on).
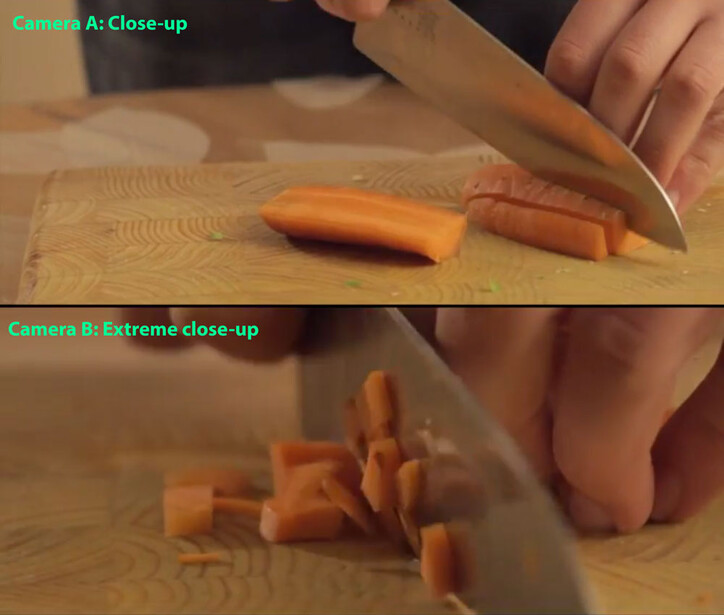
Multiple Cameras
To make the video more interesting I wanted to somehow show different points of view, and the only way I could do that was with cuts to another camera position. I had just one camera and simulating multiple cameras meant I had to shoot the same thing from a different perspective. To better understand that, let me say it this way: when you are filming chopping onions from one perspective, you cry once. When you don't like the take you cry a second time, not only because of the bad attempt, but because of the other onion you have to chop. Then you move your camera position and continue crying. Multiple-view perspectives with one camera showing onion chopping means lots of tears.
Cooking tip: breathe through your mouth when chopping onions and you won't cry. I wish I knew that before.
Lighting
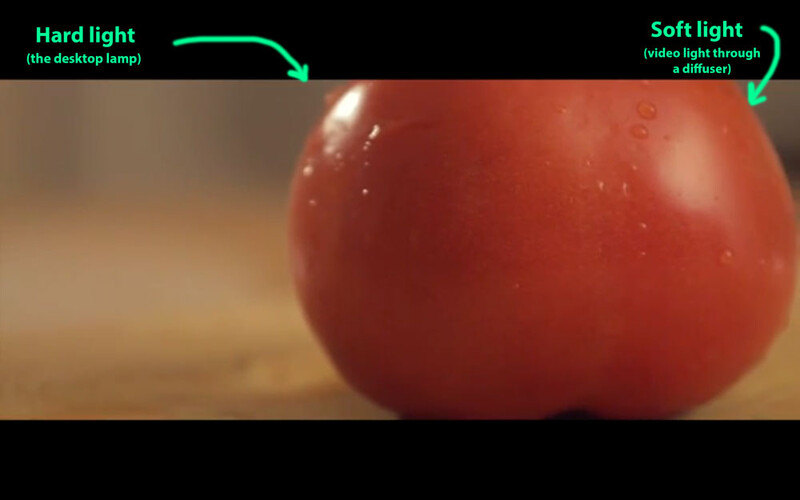
As I said above, I had only one professional video light. I added one rim light, and because I didn't have another option, I used a desktop lamp. The professional light was a 1K through a circular diffuser attached on a stand. The desktop lamp was with a regular 60-watt light bulb. The diffuser was cutting about two stops of light and in order to make a pleasant looking lights ratio I put the desktop lamp quite close to my hands. The ratio between the key light and the rim light was about 1:1 or 1:1.5. As I was shooting with a DSLR, which had a very limited dynamic range when recording video, I kept the contrast of the scenes within the three-stop limit. The ratio between the lights and shadows was about 1:2. This means I should not have extreme contrast sets and as long as I keep it this way, the exposure will look good throughout the whole video without overblown areas or areas with no detail.
Tripod
Using a dedicated video tripod with a DSLR matters only if you move your camera. If all your compositions are locked, using a stills tripod won't make any difference. In this video the only camera movement I used was panning, and I tried to limit it as much as I could because it wasn't looking that good. My stills tripod was not meant to be used for video, the movement looked jumpy.
Voiceover and Descriptions
I didn't want any voiceover or text in the video except for the caption. Using the universal language of visuals I wanted to make it international as best as I could, foreseeing myself winning an international film festival award or at least a nomination for short of the week.
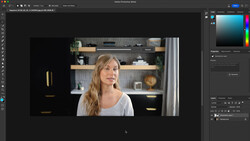
Software
I already wrote an article that I didn't like Adobe's subscription model. I wasn't sure if I wanted to buy the expensive filmmaking software of theirs or use another application. I knew how to make a simple video in Photoshop because I have used it for some of my BTS videos. As a first project I decided to use it because I would only need a few cuts and a music track. I shot with a Cinestyle camera picture profile and I barely did any corrections in post other than contrast and saturation.
The Workflow of Shooting the Scenes
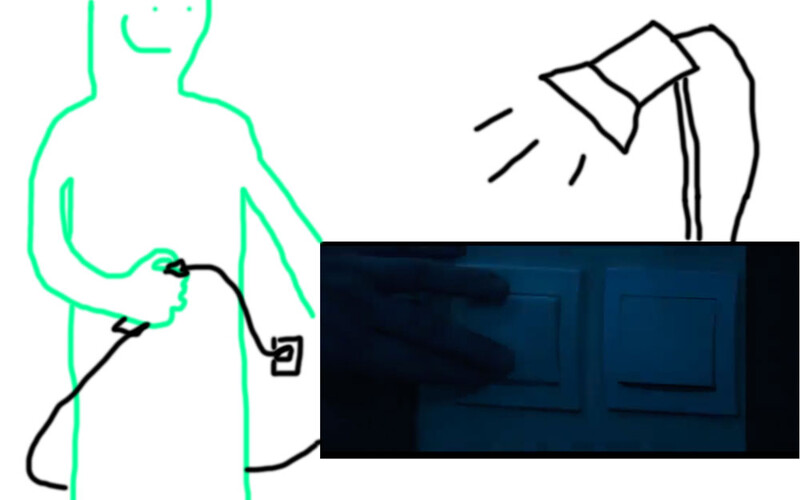
The video starts with a blue lit scene resembling moon light. This was the desktop lamp with a blue filter. When I flipped the switch on I actually turned the other video light on at the same time (took me several takes). As it was set at a higher output it overpowered the blue-gelled lamp.
For smoother panning I used the camera strap to pull it sideways. Using my hands on the camera was not smooth enough.
For almost all of the scenes I tried to have two camera positions. Every take was like the following:
- Focus on an object where my hands will be.
- Press record.
- Run in front of the camera and start doing what it had to be done.
- Go back to the camera and stop recording.
- Review and evaluate the take. If it wasn't good, go to point 1 and repeat.
When working with exhaustible materials you have to have spare quantities of them because of the unsuccessful takes.
Conclusion
Although today I'm using other tools to do my films, I use the same principles for lighting, composition, and editing. Tools can make your work easier but they should not stop you from bringing your ideas to life. This was the best potato stew I've ever made. That was probably because I was so hungry waiting for six hours to cook and film it before being able to taste it.


4 Comments
Great stuff, I attempted to use photoshop to make just a simple gif and it was frustrating, ah video is such another world to me.
I did a second one too and then I decided I've had enough of using Photoshop for videos :)
wow!
I guess that's for my cooking skills. Thanks!