
If you’re reading this, the likelihood is that you’re looking for better software to treat your images. The quest to find the best photo editing software is not necessarily an easy one, but it is a necessary one. While you may change camera bodies, lenses, lights, locations, and styles, the one constant that touches all your images is the software used to develop them.
Capture One is a multifaceted image processing and asset management software. As a raw processor, it is considered the gold standard, supporting over 500+ cameras, and with it comes a uniquely powerful toolset for developing, color grading, and tethering. But that is just the tip of the technological iceberg that is Capture One. With a focus on user experience, its mountains of capability and complexity are hidden under a veneer of simplicity to make working with your images fast, focused, and easy. This article outlines some of the top features Capture One offers, with a bonus to boot.
Experiencing the software for yourself brings a whole other depth, and If you don’t have Capture One, this may be the perfect time to try it, and you can click here for a 30-day full trial of Capture One Pro so you can follow along.
Local Adjustment Layers
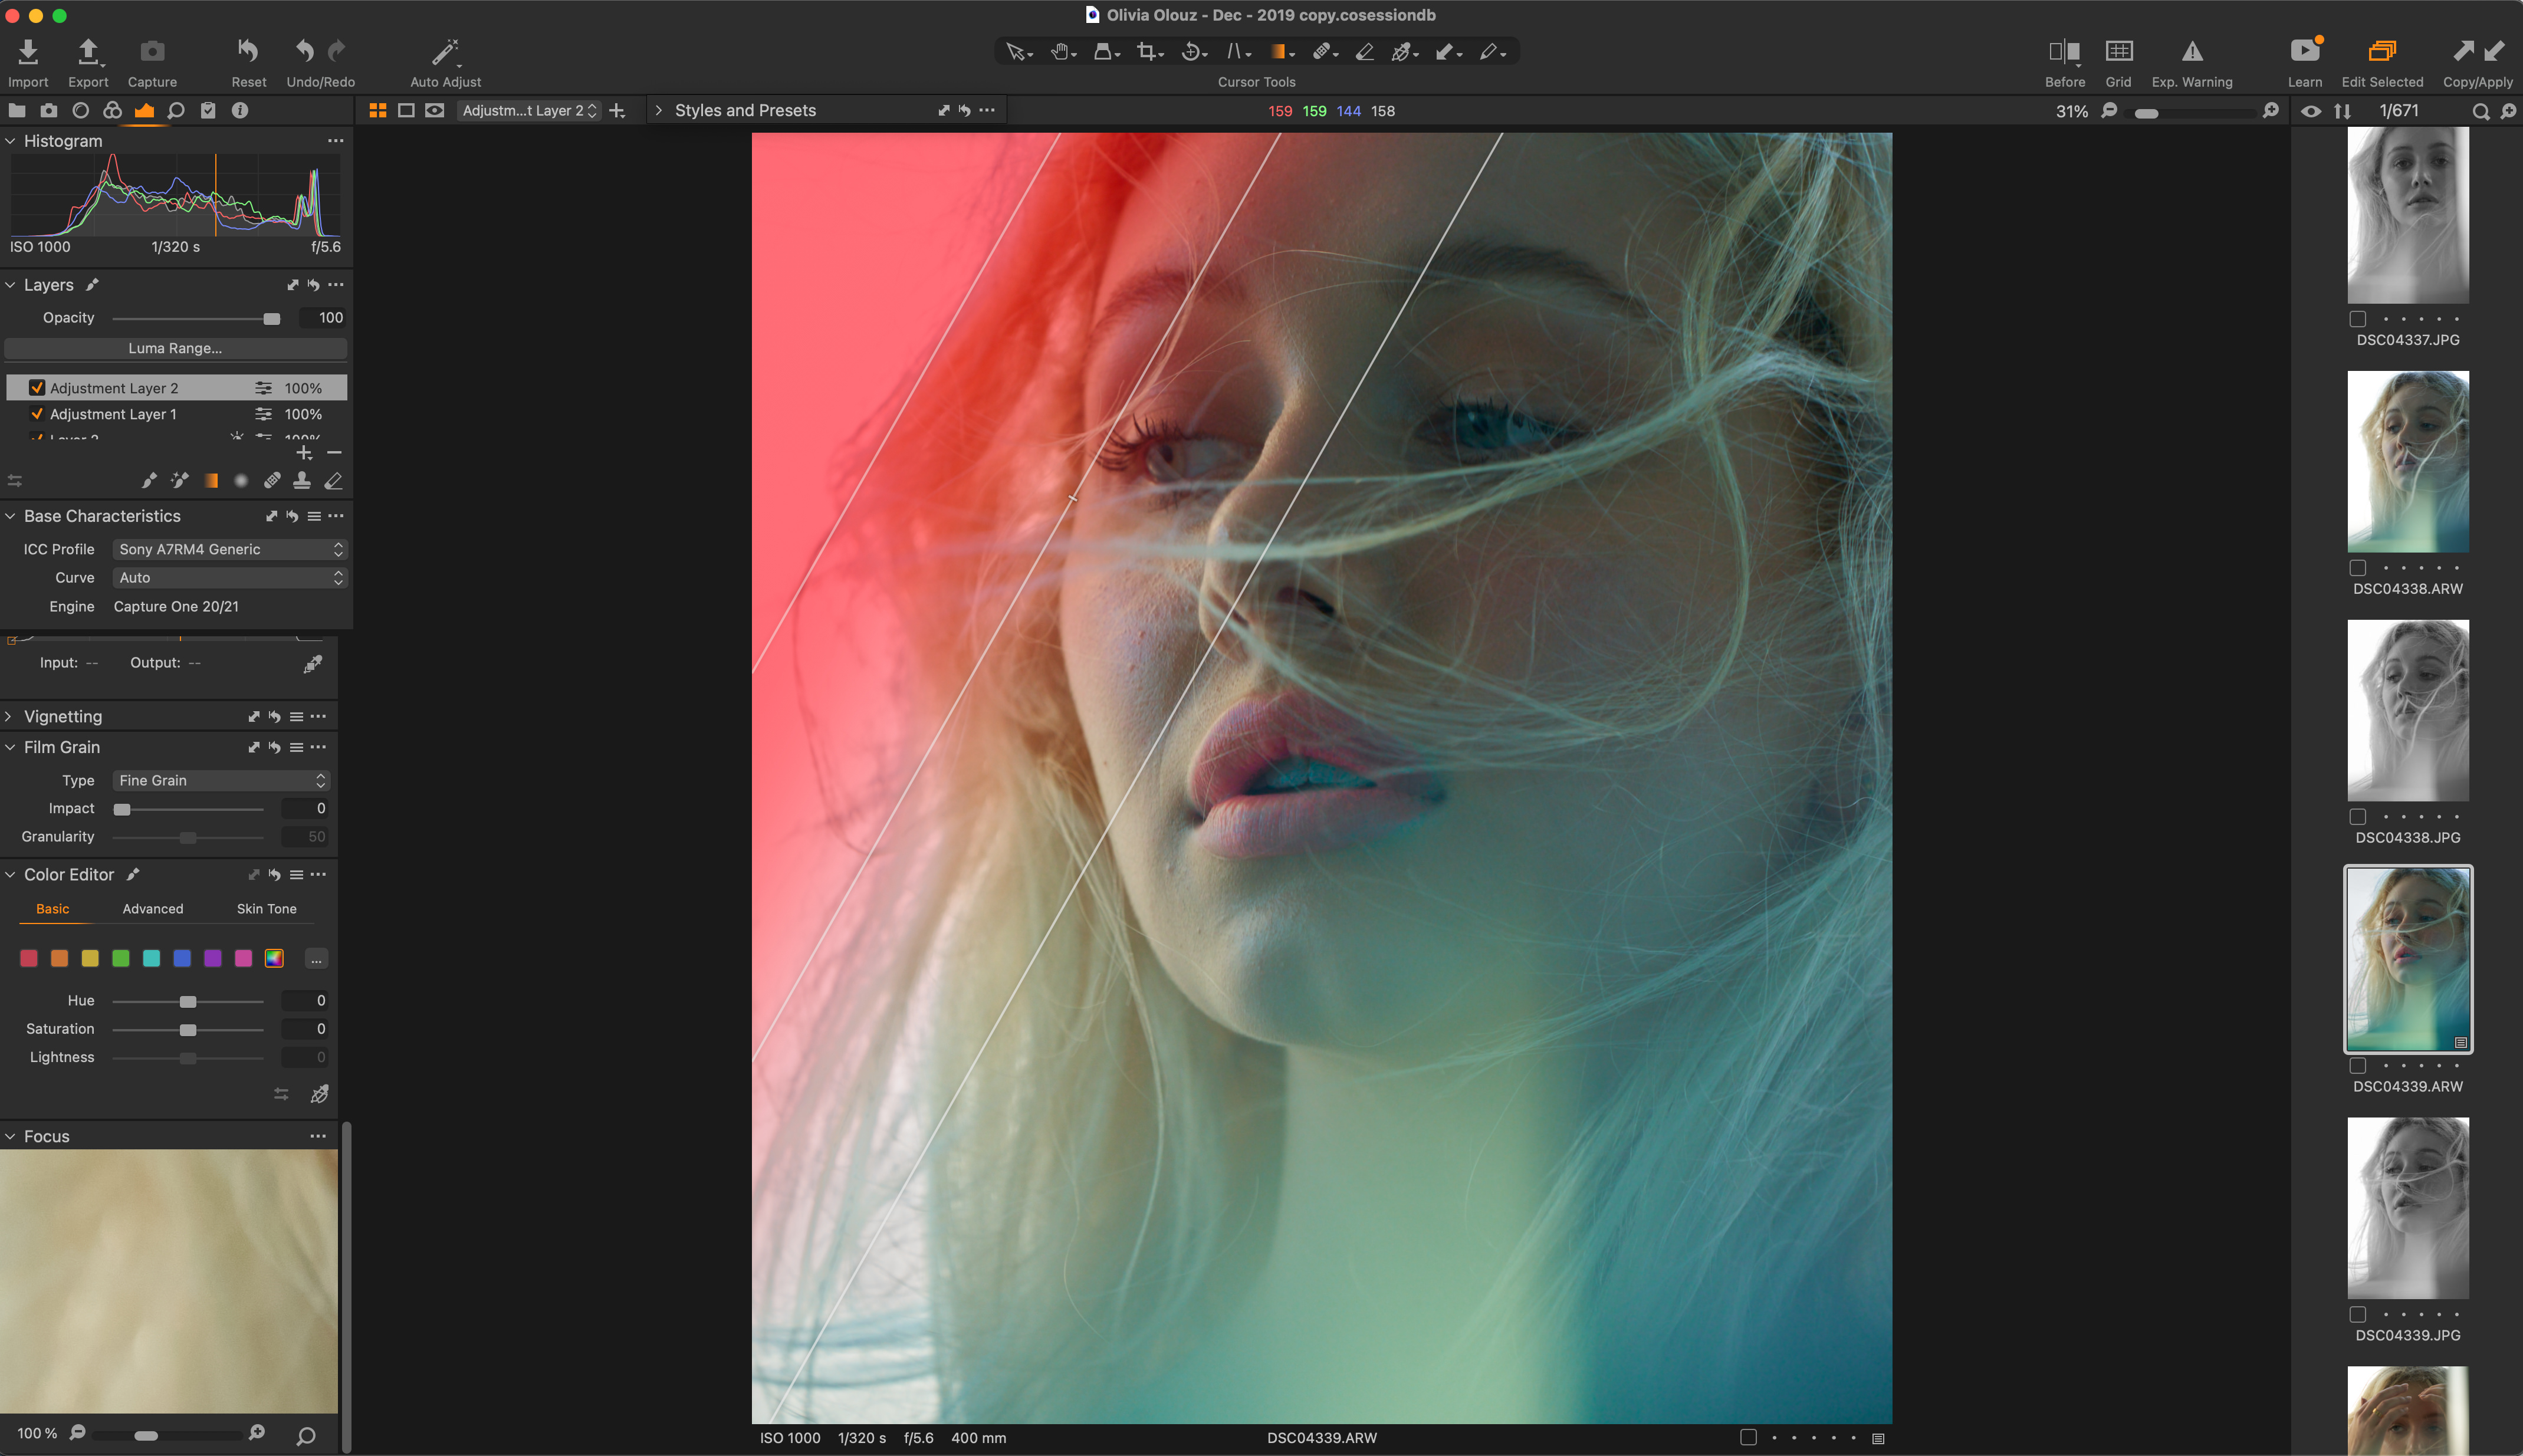
There is no way to overstate just how powerful layers in Capture One are, as they can be a game-changer when it comes to power and flexibility. From high-quality healing and cloning to fine-masking, using multiple layers, and layer opacity control, Capture One boasts a broad range of local adjustments, powerful layers, and layer masking tools that allow you to maximize the flexibility of your raw files. Loosely translated, this means you can get the most out of each shot and do more with a raw processor than previously possible, allowing you to easily create more complicated masks for compensating for lighting in interiors, skin-tone editing, portrait retouching, landscape color separation, and more.
Each file in Capture One can have layer upon layer of local and global adjustments, which gives users the ability to make local adjustment masks from Color Editor selections. Furthermore, with the addition of The Magic Brush, users can now easily and quickly create more complicated masks, which can be especially helpful when editing any and everything from landscapes to skin.
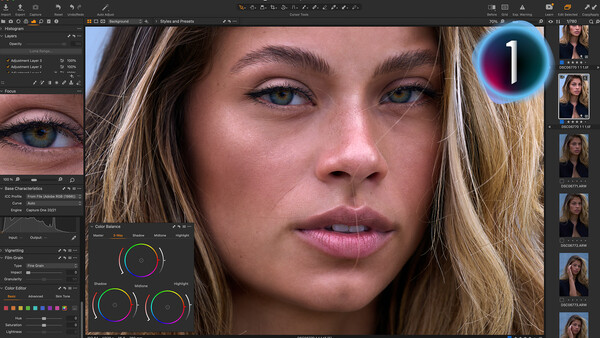
The Color Editor
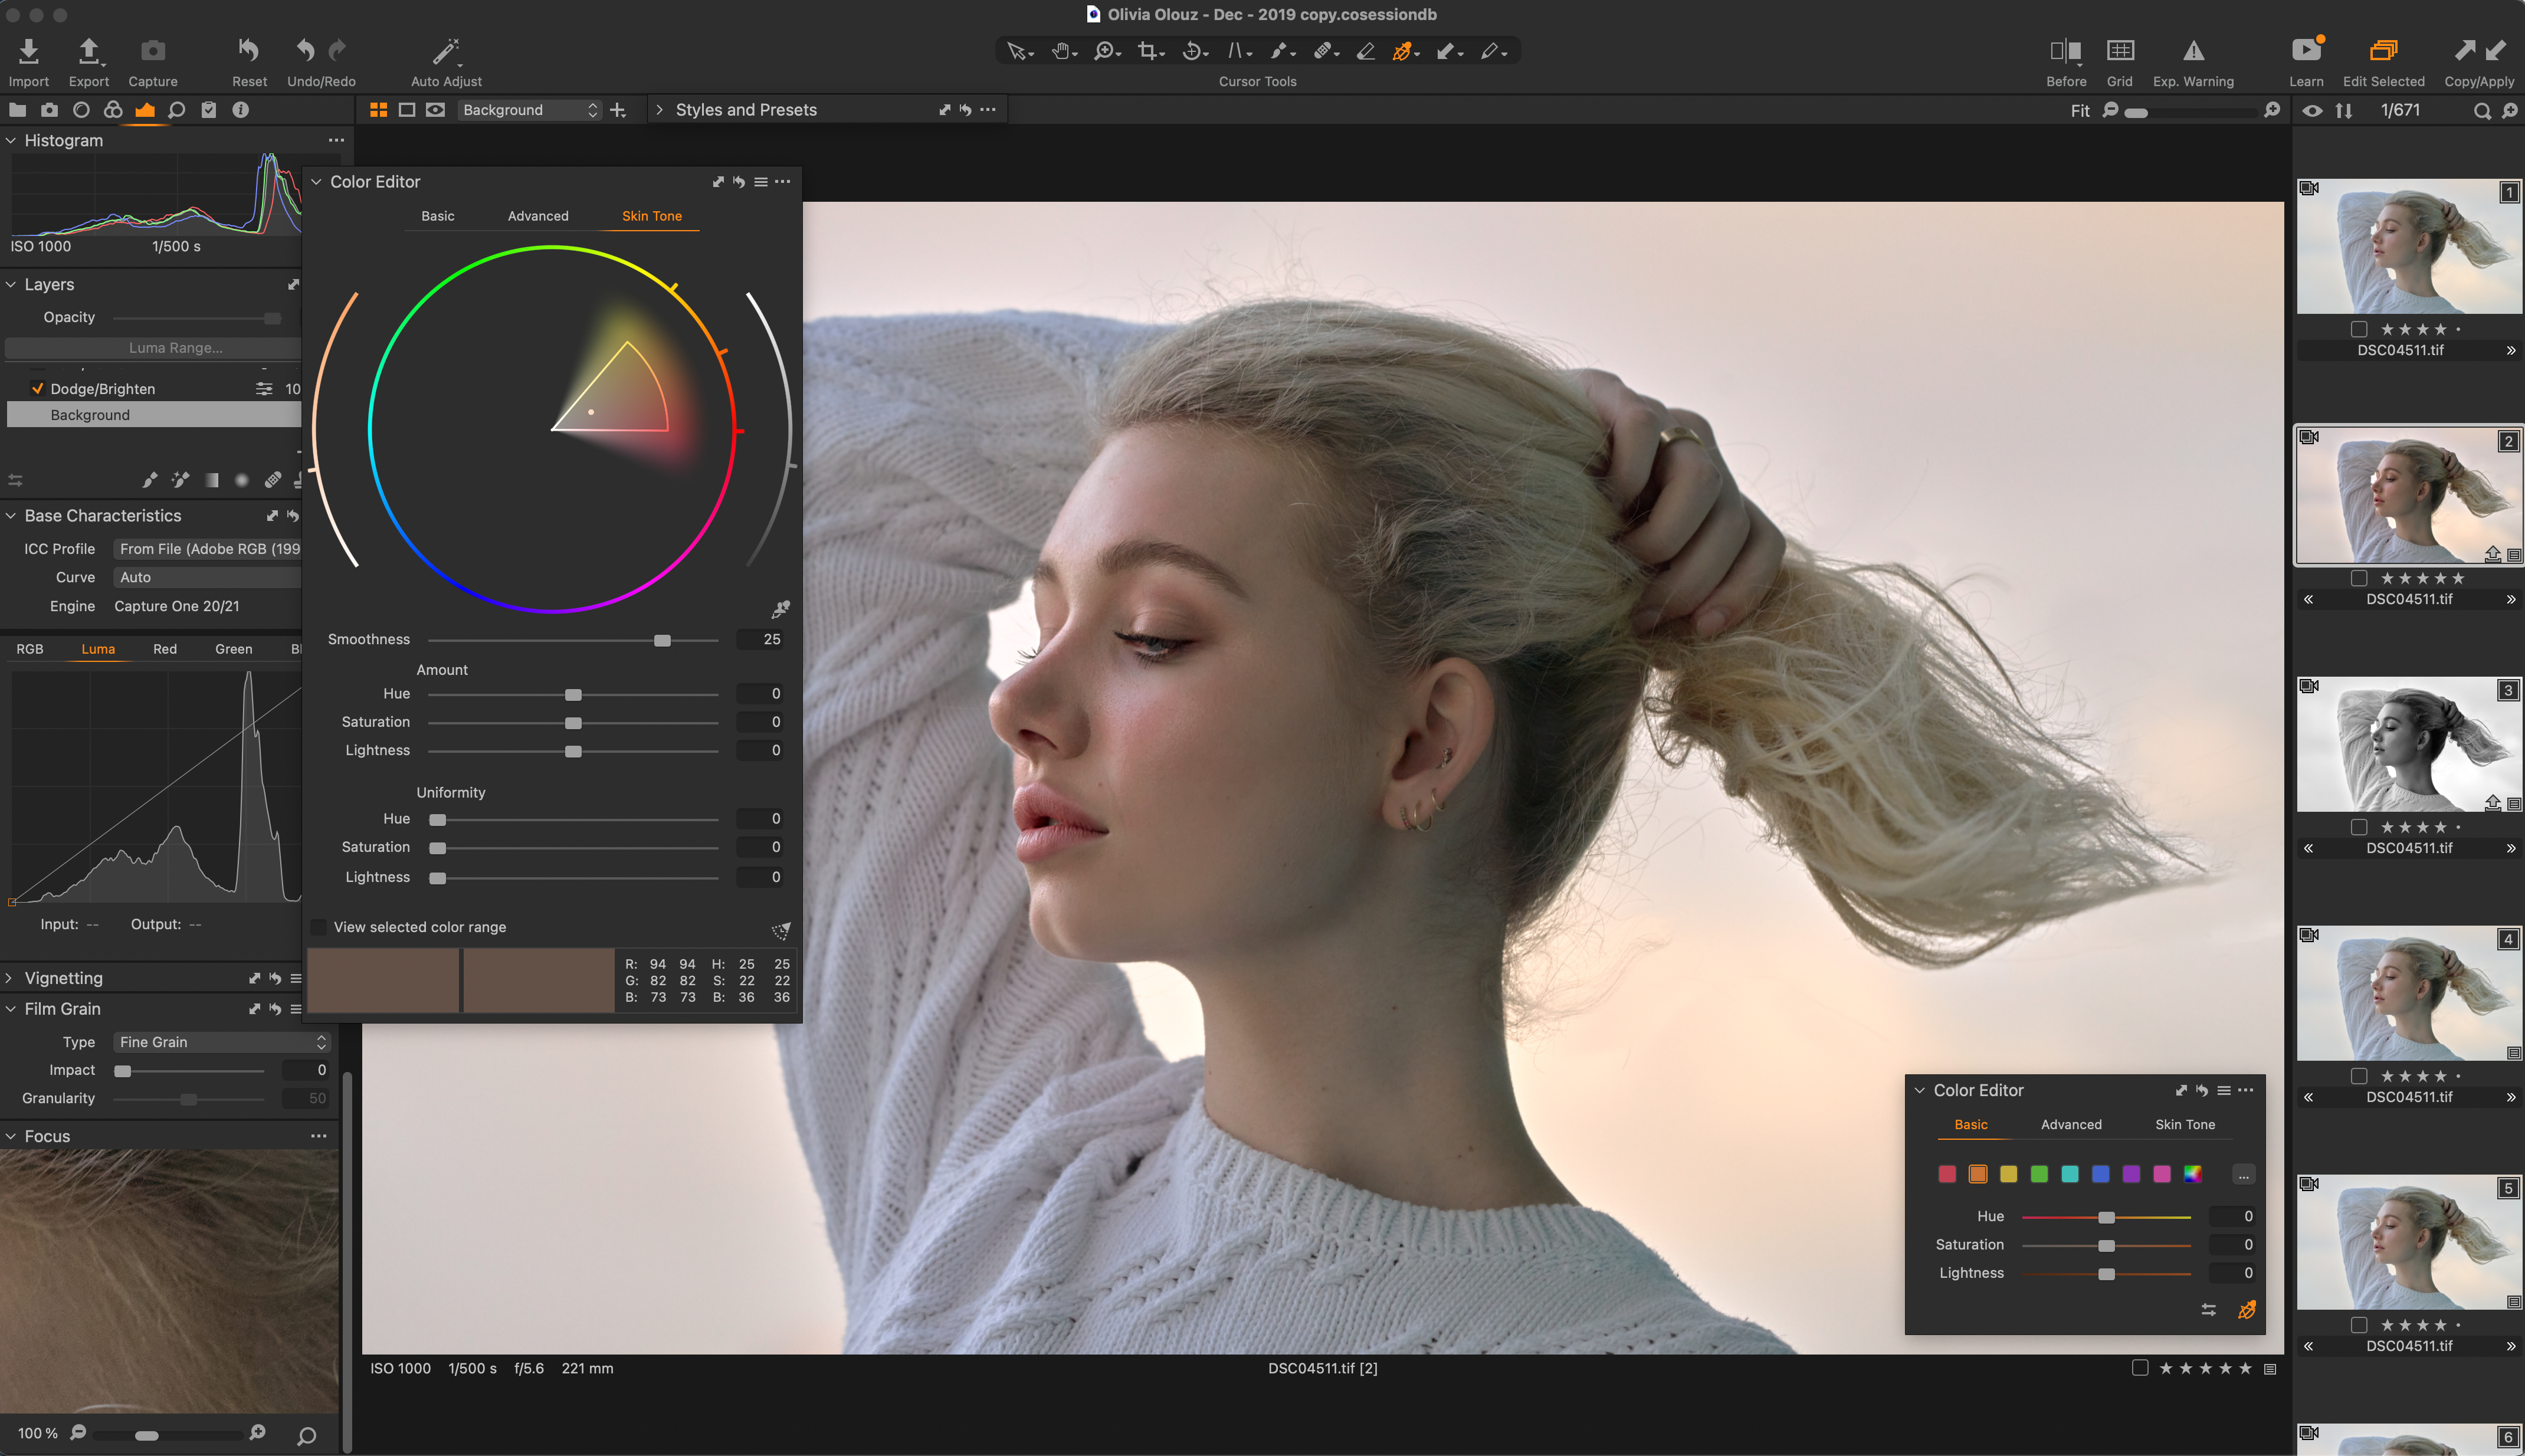
In many ways, this is the tool that users flock to and rely on because it offers color control unlike anything else. The Color Editor essentially defines the precise Color tones you select and then allows you to adjust them completely in a way you just can't with something like Lightroom.
To put it simply, you can precisely modify any specific color in a raw image that you see. Even better, the Color Editor plays well with the Skin Tone Tool for portraits; can be used to adjust selections either local or global, and the selections themselves can be turned into local adjustment masks. Overall, it gives you complete control of colors and tones to bend them to your will.
Style Brushes
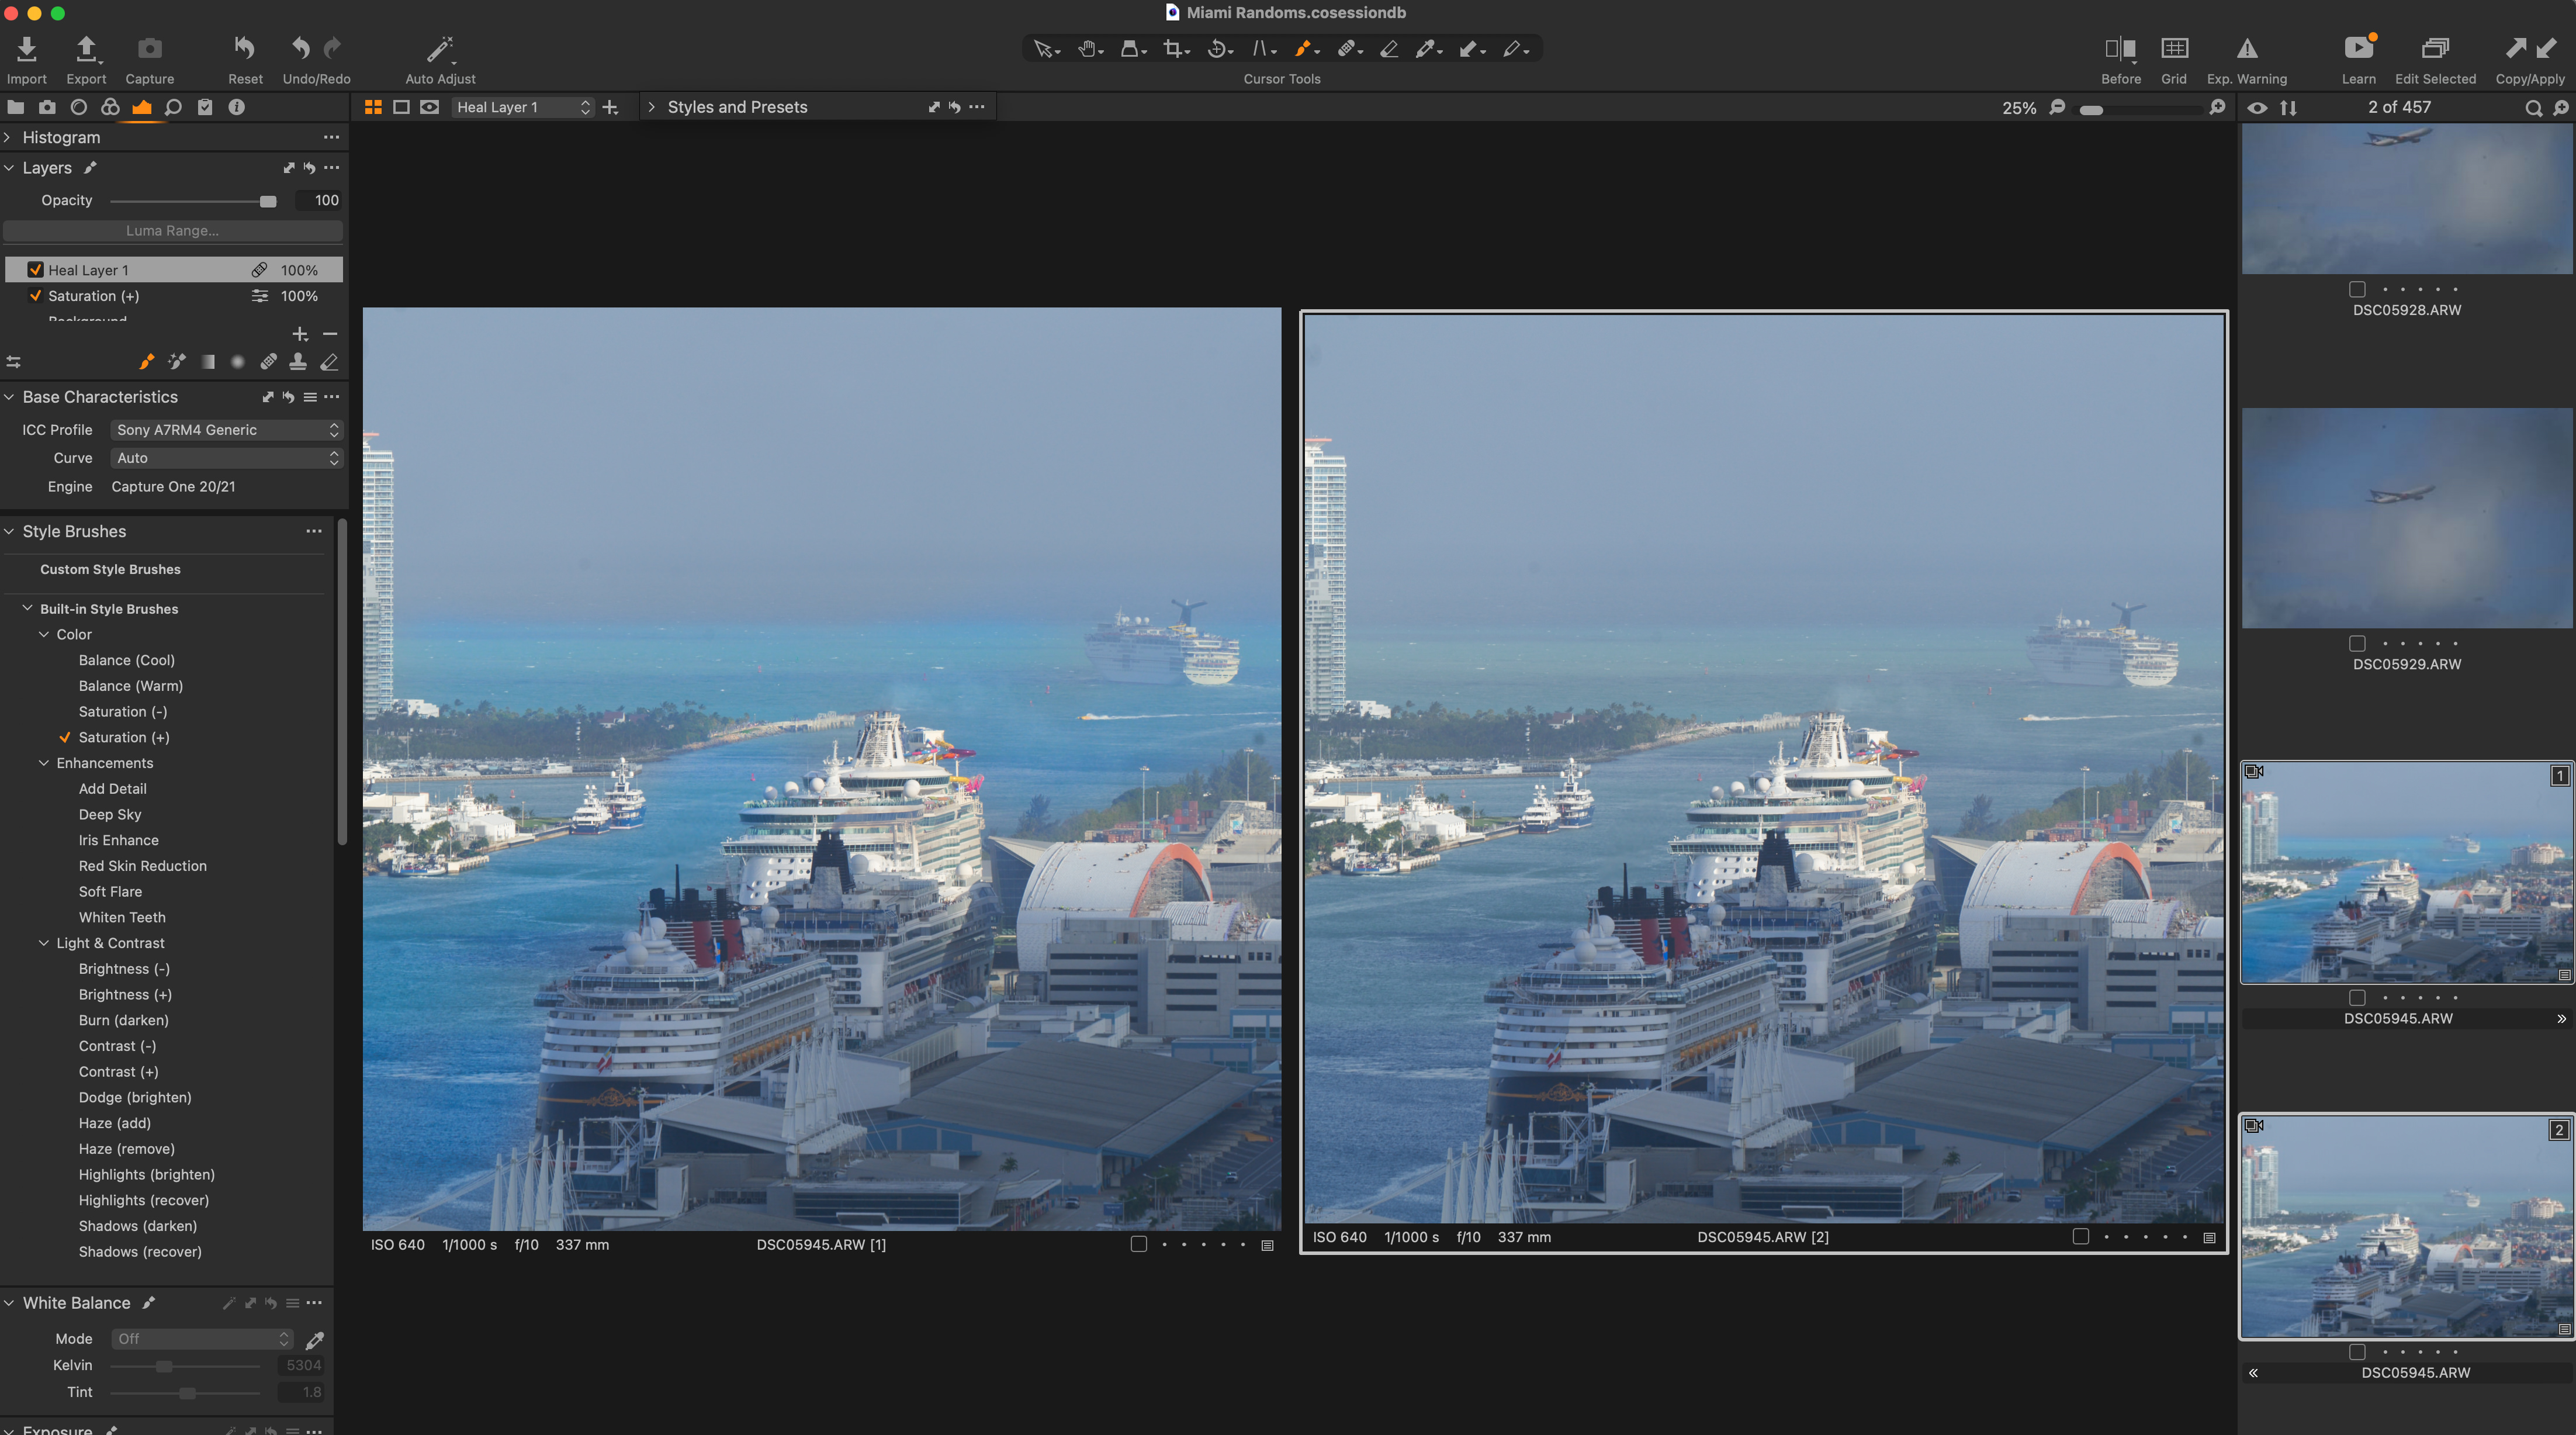
The quickest and smoothest way to add the specific local adjustments you want exactly where you want them applied. That’s what Style Brushes are and what they allow you to do. Style Brushes are a new way to work with brushes and layers, and once you see it in action, you’ll appreciate what a time saver it can be.
Essentially, Style Brushes are a way to create a new layer with parameters already set, and also load brush settings at the same time. It means that you can apply local adjustments with one click, instead of the several steps it would have previously taken to complete the same task. Think of Style Brushes as Image Adjustments + Brush Settings + Layers in one click. And since it applies to a new layer, you can access all the controls of a dedicated layer like opacity. Capture One comes with a bevy of pre-made Style Brushes, but it’s also quick and easy to make your own. See it in action below:
Luma Curve Channels
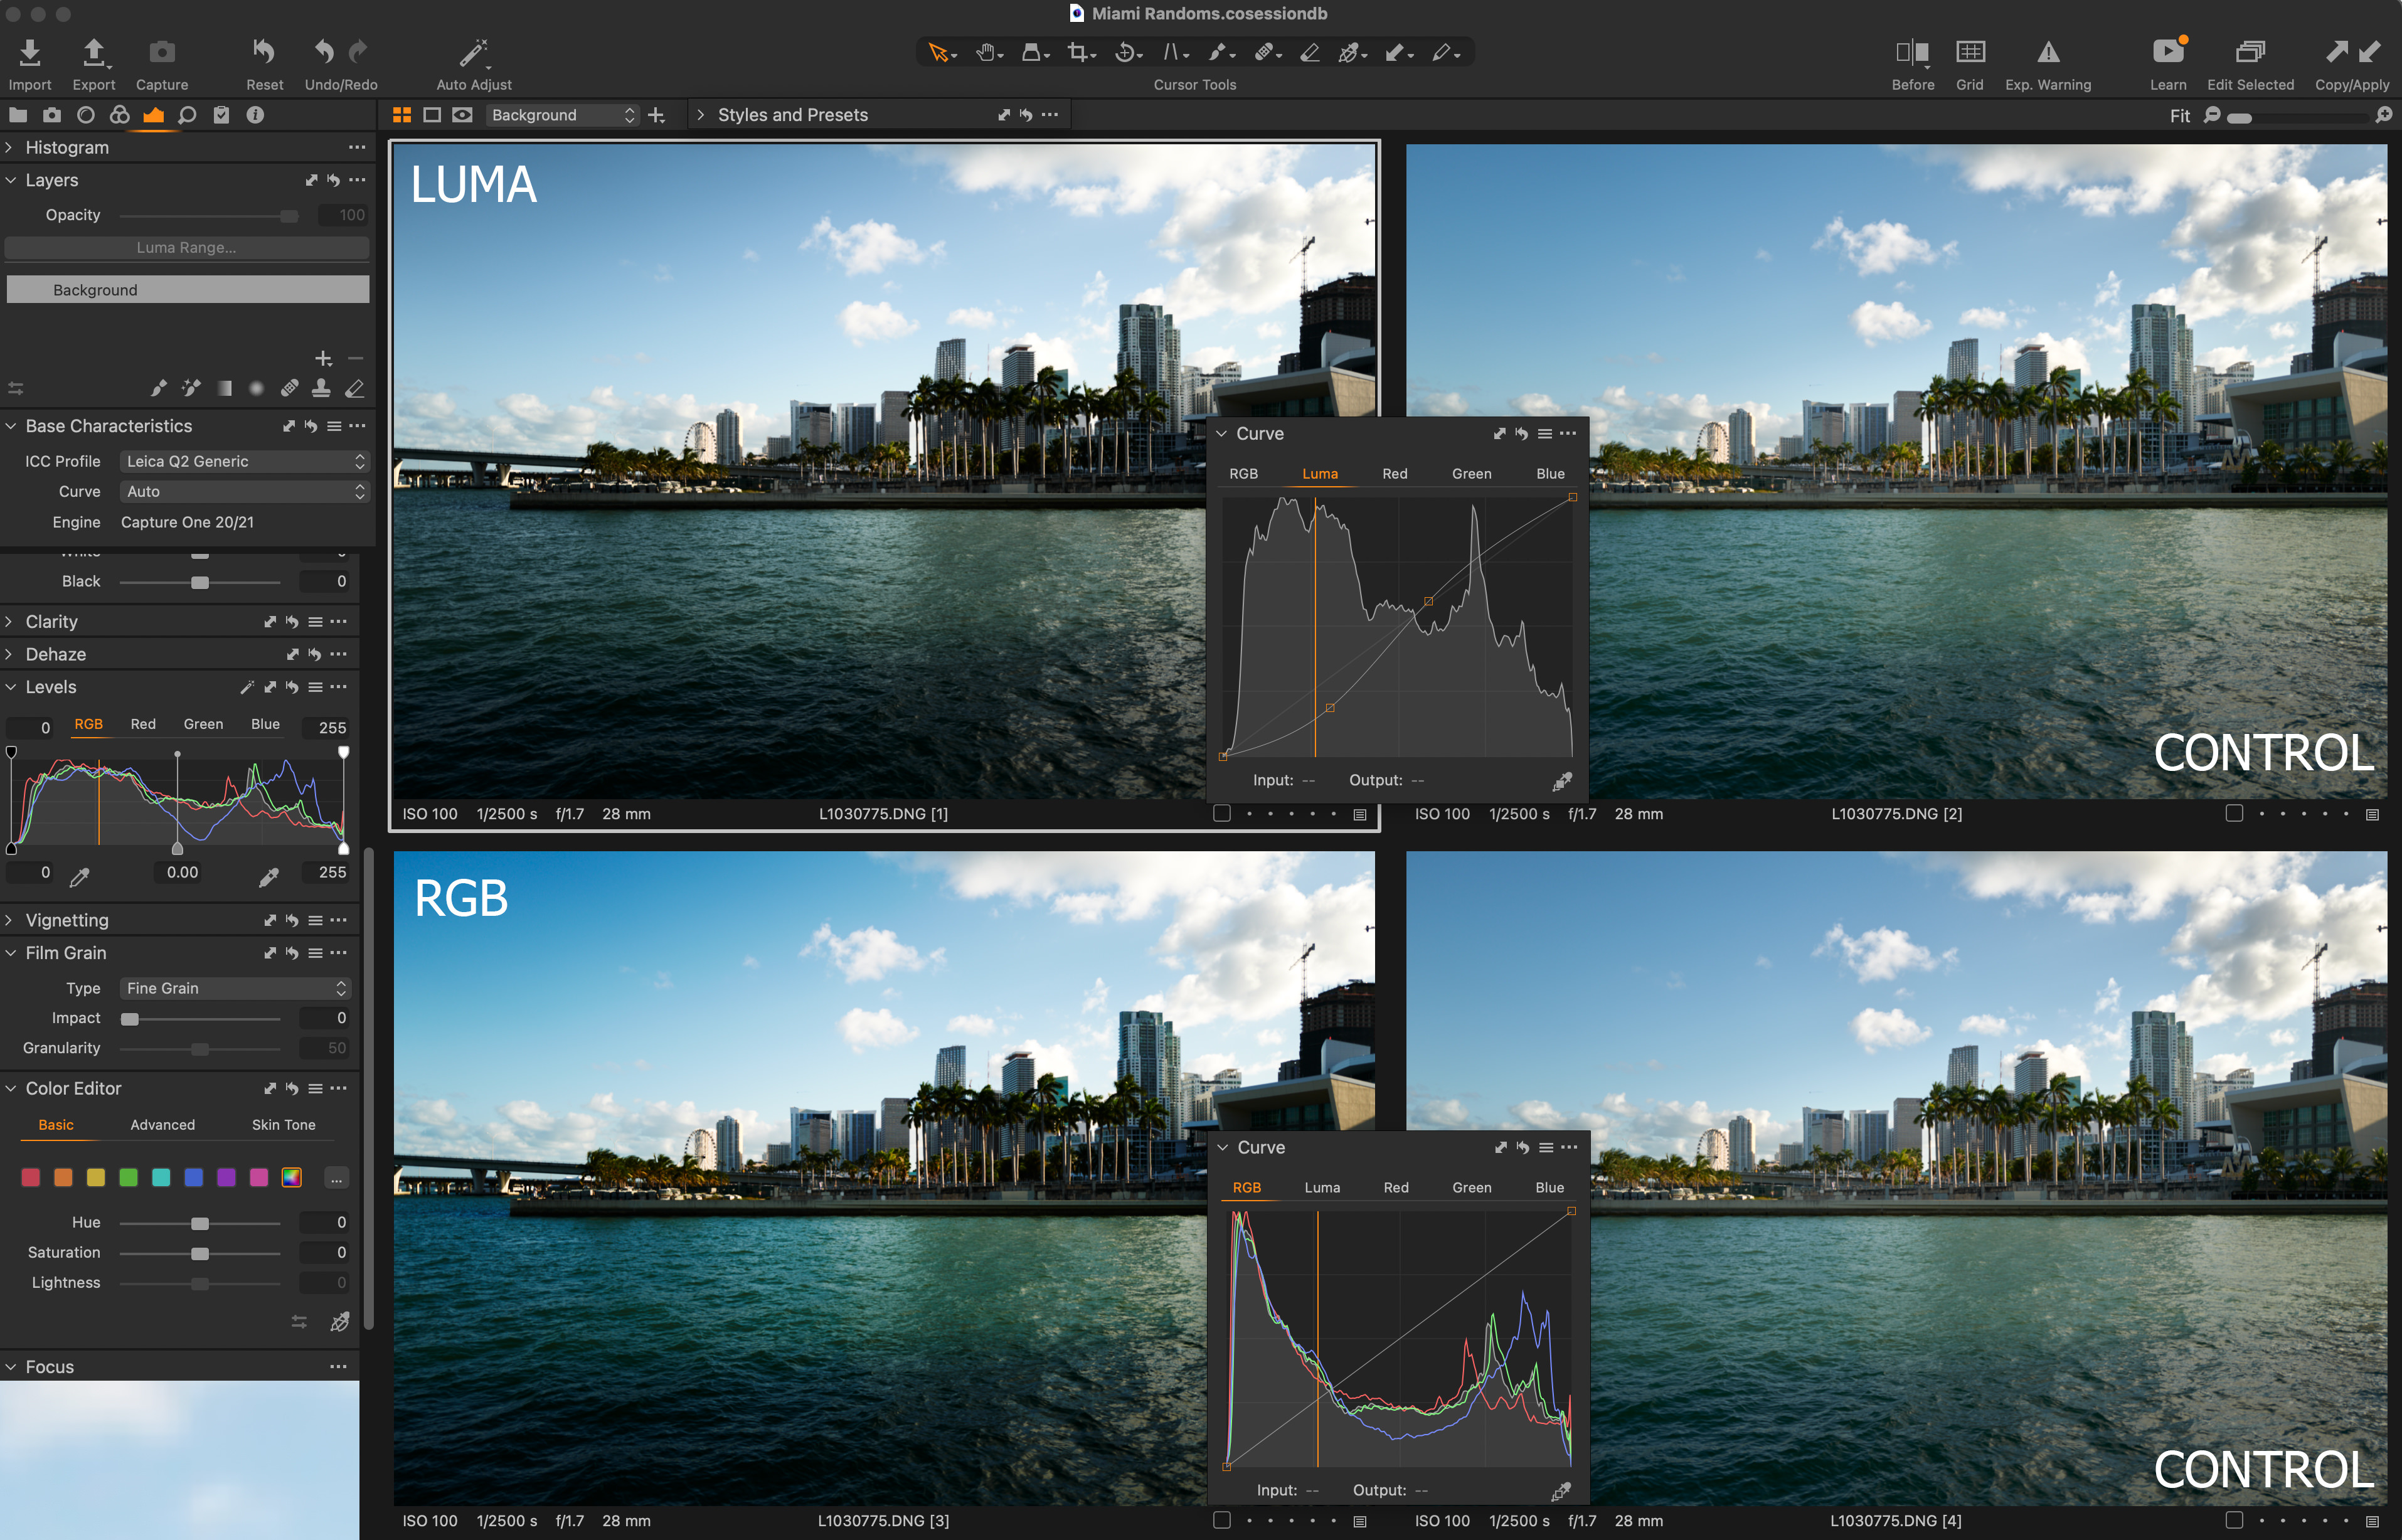
The Luma Curves Channel is a channel in the curves tool for Luminance, and luminance only. The Luma Curve adjusts exposure and contrast differently than the RGB channel. In RGB, when contrast is introduced, there is a shift in color, both in saturation and hue. Using Luma allows you to make the same curve adjustments but without those shifts. If you’ve ever used Photoshop layers and selected Luminosity blending mode, you’ll have a better idea of what this is, but here you’re doing it on a raw file.
Additionally, users can perform all available curve adjustments on local adjustment layers for even more precise fine-tuning. Having this option on local layers is a huge precision plus. This is one feature you didn’t know you couldn’t live without until you use it.
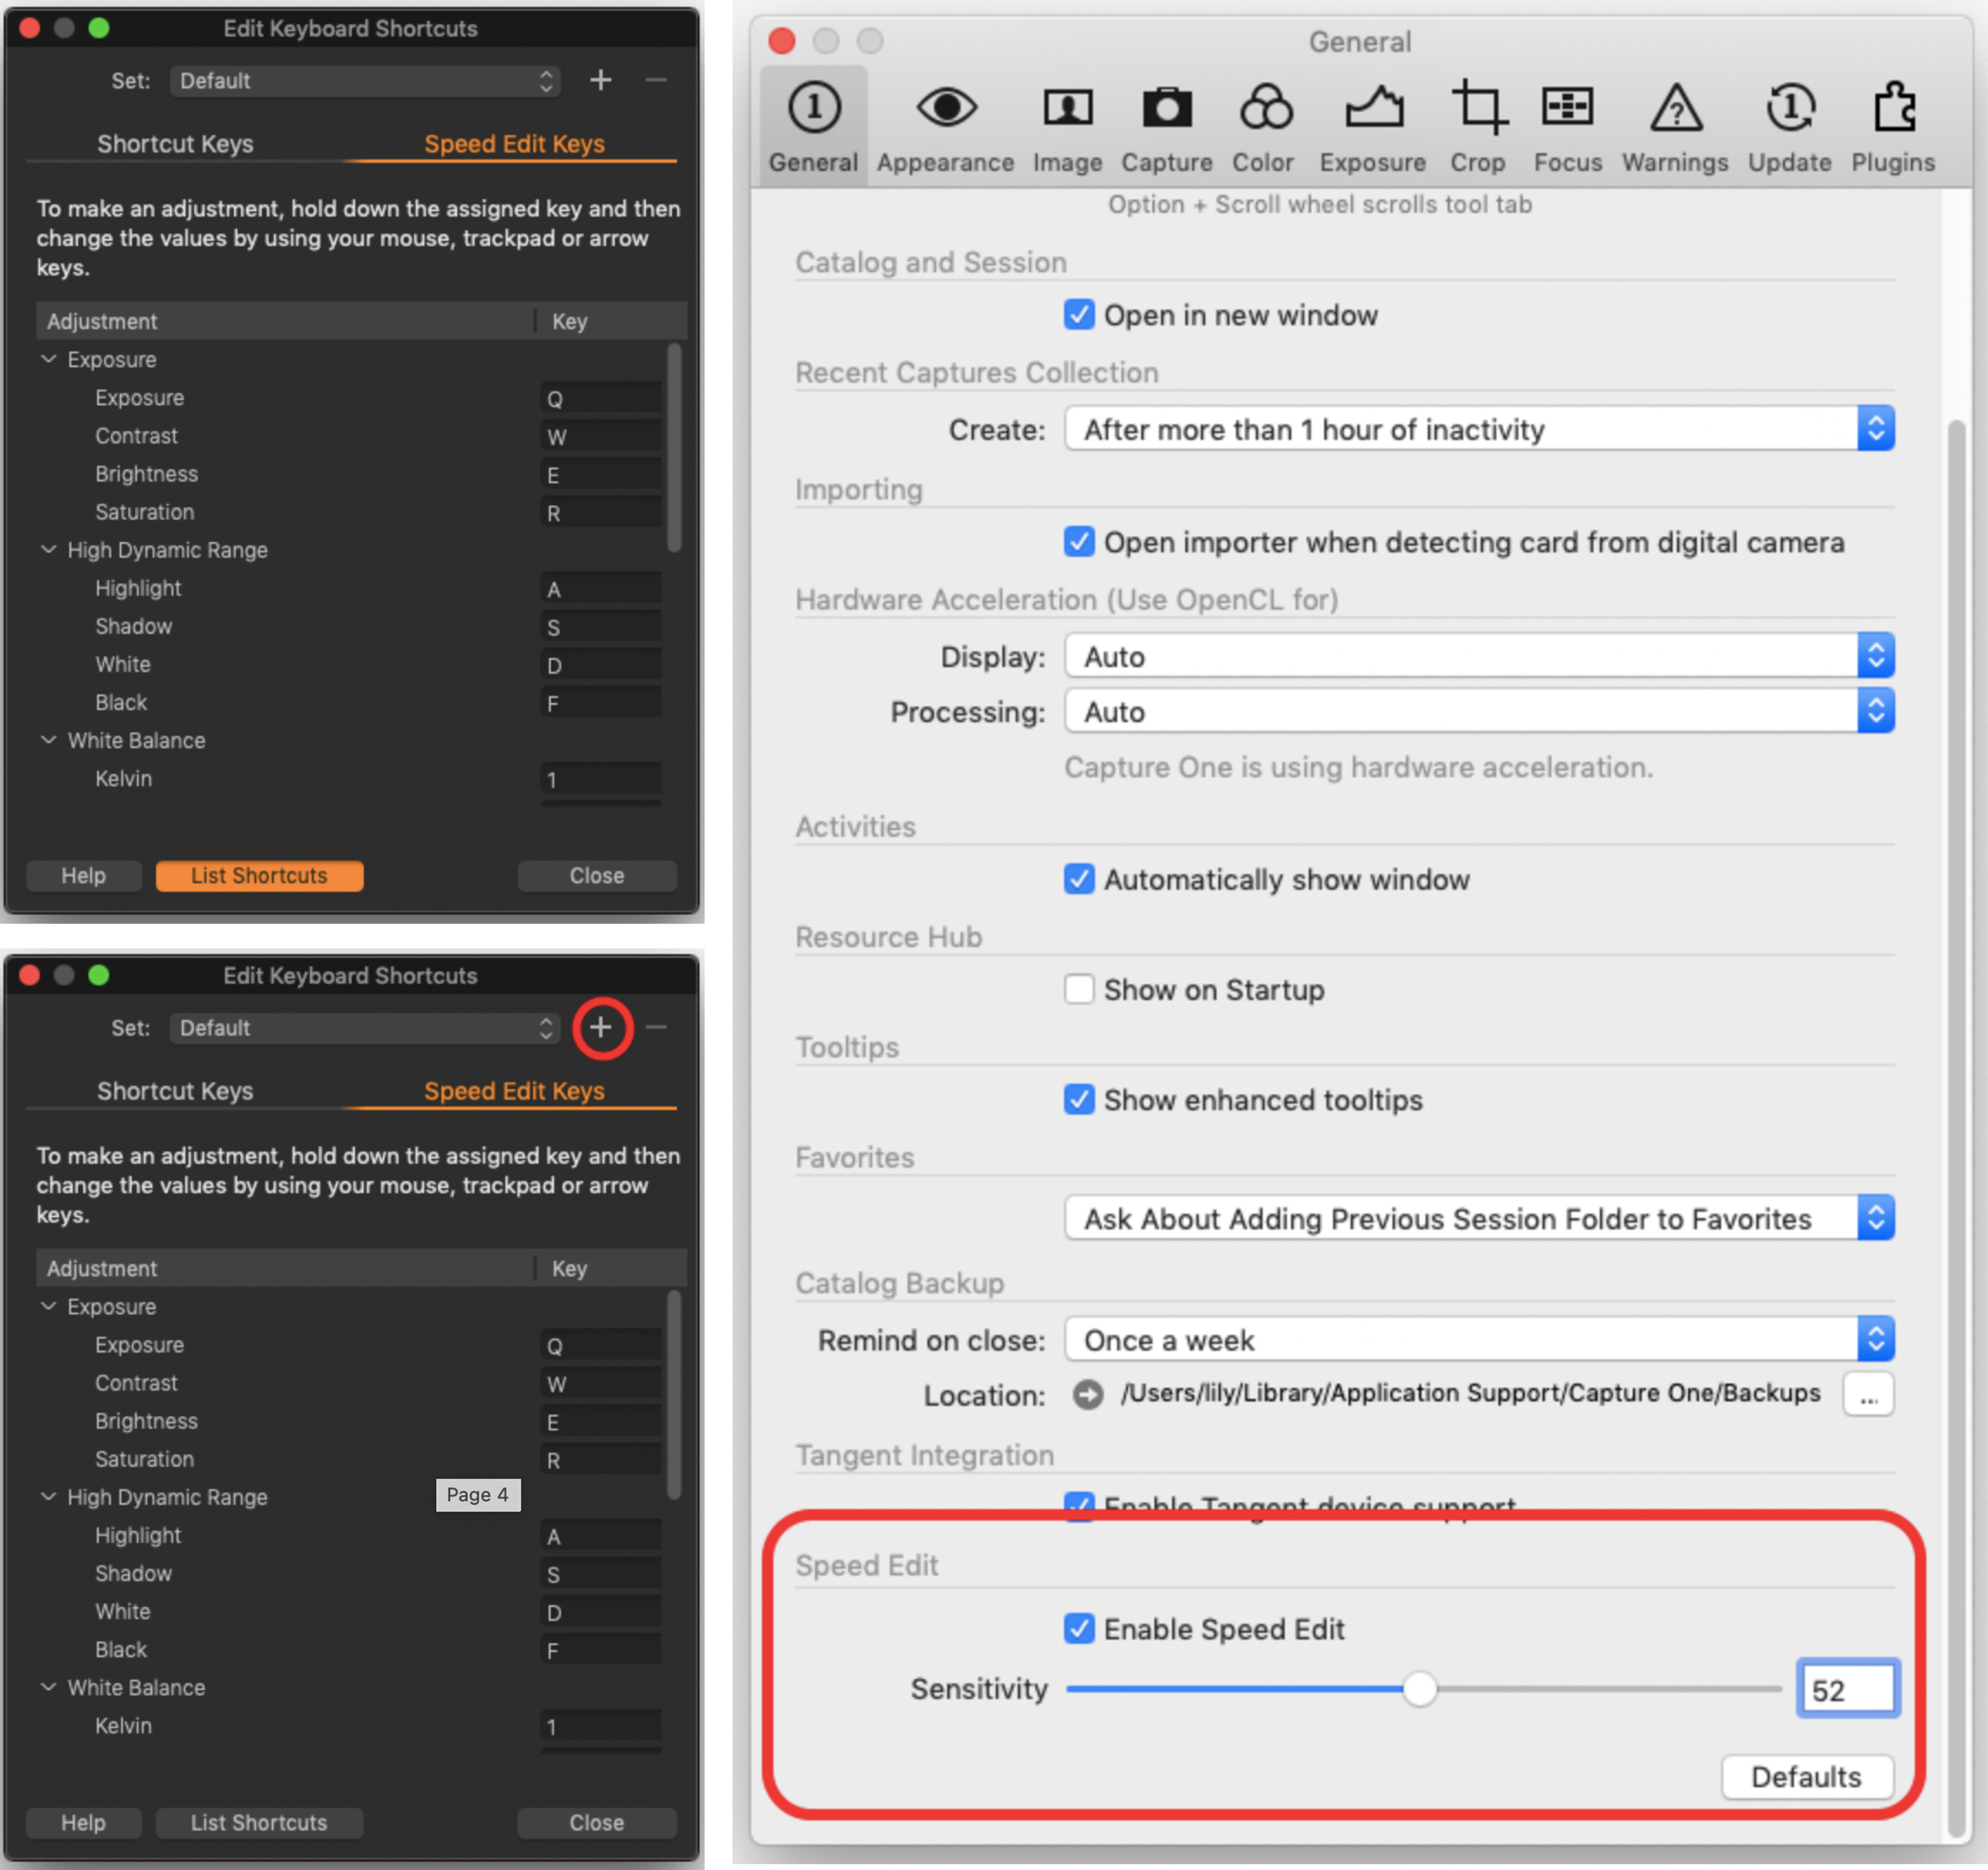
Speed Edit
This is something you’ll wonder why every other software isn’t doing some version of it because it’s so fluid. At the core, it mixes shortcut keys with your mouse or trackpad to make adjustments to the image without having to use the actual interface. But what it means is you never have to take your eyes off the screen to look at a slider, so you are immersed and can work incredibly fast. In order to achieve this kind of fluidity prior to Speed Edit (and for other software) external hardware pieces that map hard controls to features were the go-to. Speed Edit can supplant these. See it in action below:
Bonus: Image Quality
Before you start to even process an image in Capture One, you’ll notice that your raw images simply look better in Capture One than they do in Lightroom. Raw images opened in Capture One show excellent Color, contrast, and fine detail with nearly any combination of camera or lens. Even decade-old images from long discontinued cameras take on new life when opened in Capture One.
For those who may be curious why there’s a difference at all, understand that raw formats are interpreted differently by various converters, somewhat akin to how different cooks following a recipe may produce different iterations of a dish. Capture One, it is largely agreed (though subjective), gives truer skin tones and overall balance.
Conclusion
Of course, there is a lot more to Capture One than mentioned in this article, but hopefully, this overview has piqued your interest. Over the next few weeks, we are going to teach you how to use Capture One from the ground up, right to the edge of the envelope, so check back often.
And if you want to begin learning immediately, there is already a bevy of tutorials on Capture One’s YouTube channel, and you can download Capture One here with a 30-day free trial.
If you're looking for a fast and effective way to learn Capture One, check out "The Complete Capture One Editing Guide", a five-hour video tutorial taught by Capture One brand Ambassador, Quentin Décaillet.


Join the Fstoppers community for free
-
Post comments and join in the discussions
-
Browse the site ad-free
-
Share your work and get featured in the community
-
Compete in the photo contests for fun and prizes
2 Comments
As a convert to Capture One I have enjoyed using it far more than anything produced by Adobe. After an arduous removal process to rid my computer of the bloatware that is Adobe, I found C1 to be a pleasure to use. That's not to say that things couldn't be improved. But, nitpicking is all the rage these days so I'll confine my comments to three matters. First, the clone and healing tool could be a bit better in order to be at the level of Adobe's version. Second, and until we see them in use, C1 needs to get its HDR and panorama stitching tools perfect. A sub-par performance in these areas (soon to be released) will be real disappointment. Finally, C1 should - if at all possible - strike deals with makers of plugins such as DXO. The lack of diversity with plugins is a shame. Most likely the lack of plugins is a contractual and propriety issue with Adobe's ability hogtie third-party software makers to Adobe products exclusively. Hopefully, C1 can do better.
Glad to see that two of 'my features' (as product owner) made it on your list. :)