
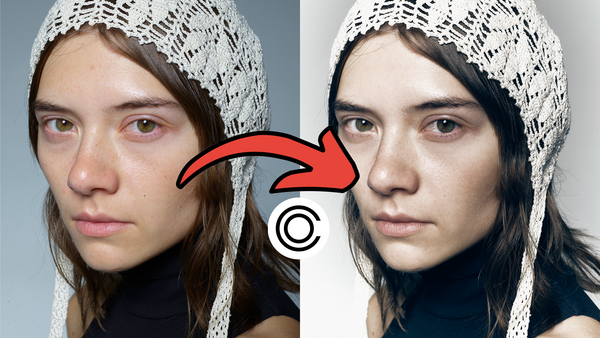
Capture One recently came out with a pretty significant update, making retouching as well as organizing your digital assets a lot easier. With the new update, you can make pretty impressive adjustments to people’s faces without ever having to open Photoshop. But just how impressive are they? I tested it on my own images.
Capture One Has Always Been Great – But Not for Retouching
Capture One has historically been great software for editing images, not retouching them. I’ve loved and used Capture One since the day I realized I had to tether—which was quite some time ago in the grand scheme of things. It has always been a great tool for editing. In my opinion, it was superior to Lightroom in how it interpreted camera colors and tones. I could never get the same edits out of any other software, no matter how hard I tried. Capture One also seemed to listen to its user base more than Lightroom did. This is why I was hesitant to review this feature when it just came out, as I was curious where it could go next, as it was missing quite a lot. It seemed not quite finished upon release. Fortunately, it is now.
Why I Use Capture One
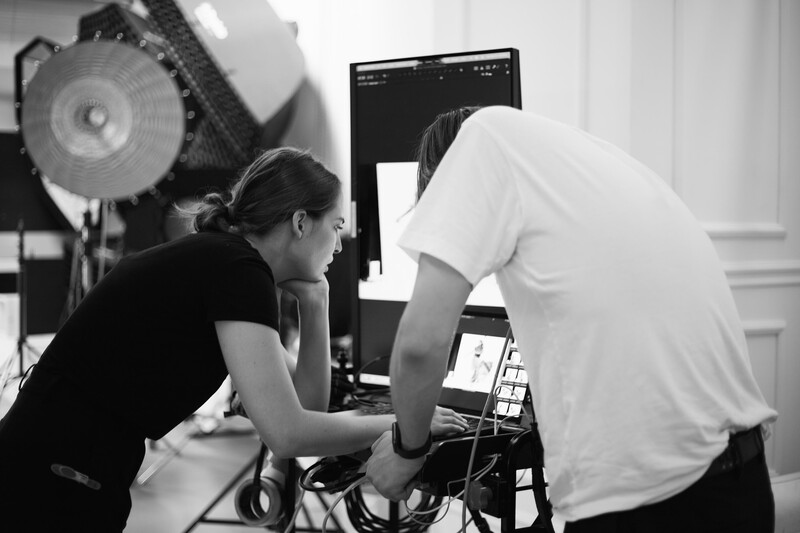
I chose Capture One because I work in the fashion scene. Everyone was using it, so I started using it too. Of course, I began with Lightroom, but that was mostly for event pictures and landscapes. Lightroom was great for that—also because I didn’t know any better at the time. Could I use Lightroom for my work now? Sure, I know how it works on a basic level. But would I switch? Unlikely. Capture One has also been a great and simple tool for organizing images.
At the same time, I was using other apps like Photoshop to make fine adjustments and retouch images. Although I’m no professional retoucher, I know the basics and can easily jump in and fix bits that my retoucher might’ve missed.
Capture One and Retouching
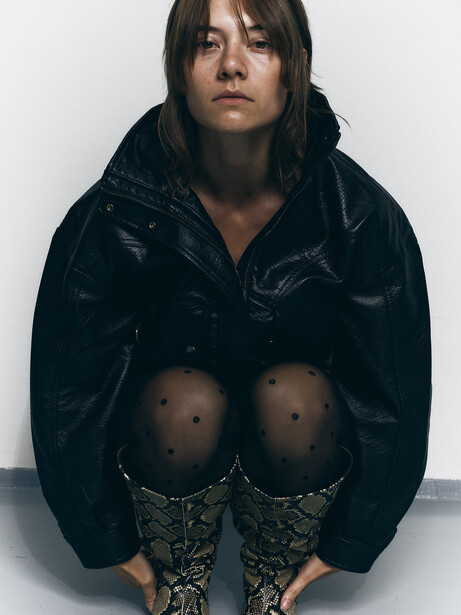
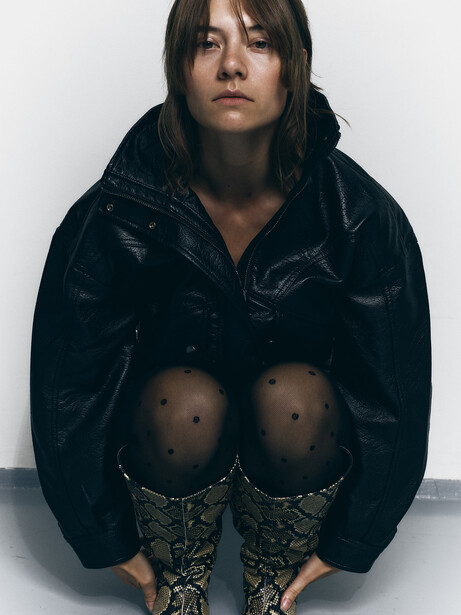
Capture One is no stranger to retouching. A while back, they added a feature where you could smooth out skin tones using color adjustments. Earlier this year, they introduced retouching as a smart standalone feature that works not just with tones, but also with textures. While not perfect for more significant changes, it was decent for small fixes. I actually used that tool many times on set for skin adjustments.
The in-app retouching in Capture One became quite impressive earlier this year, but it felt like it was missing something. Upon release, you could only retouch the face, which was fine if you weren’t concerned about the neck areas and so on. Just go on most influencers’ pages and you will see what I am on about—the faces look perfect, while the neck suffers. This is a greater issue—many people skip the neck when doing skincare on their face.
There are several features that make the retouching so useful for me: blemish removal, dark circles, even skin, contouring, retouch teeth, and impact.
Features
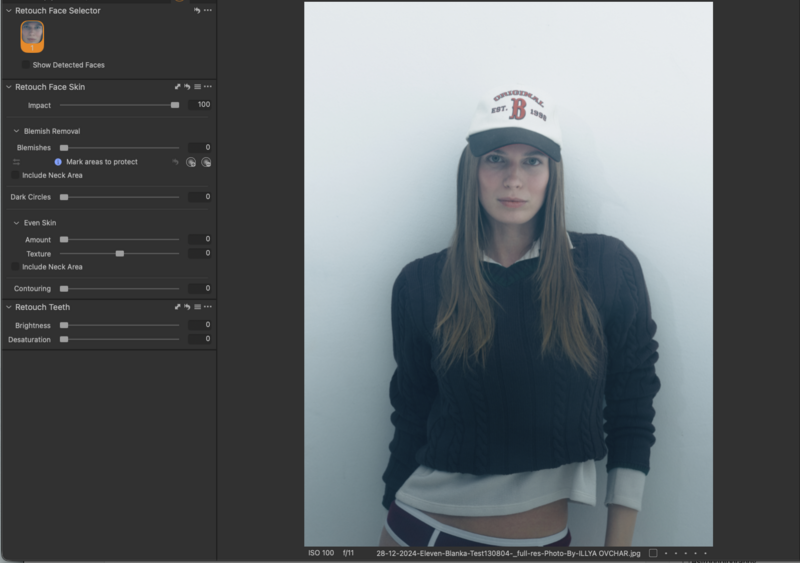
Blemish removal is packed with a slider and a checkbox for the neck area, which is crucial in retouching. You can also mark areas to protect, which makes keeping birthmarks and other imperfections easy. You can, likewise, highlight extra areas to fix. Capture One does a really good job of selecting the right area, so you rarely need to use that tool.
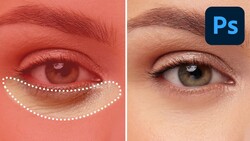
Dark circles is a feature for all of us who love to lose sleep before a shoot day. While you as a photographer won’t find yourself in front of the camera, your subject will most definitely find this feature useful. I love this feature because it lets me save so much manual retouching effort. It works really well, and I can’t say anything bad about it.
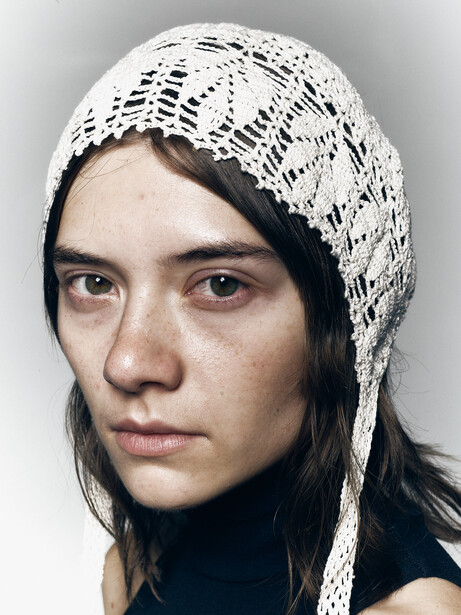
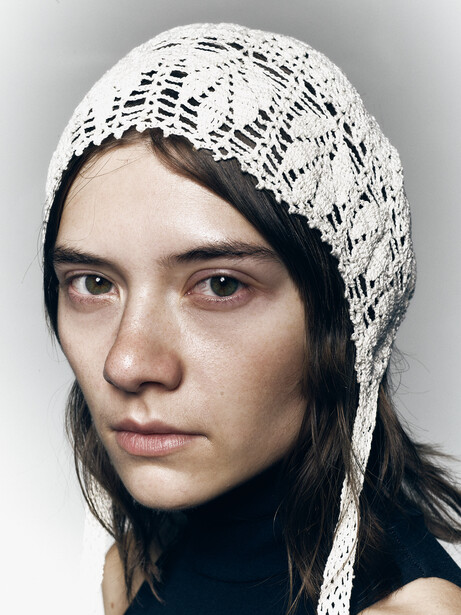
Even skin is yet another something we will be familiar with. It has two sliders, amount and texture. Once again, you can include the neck area, which is super useful. I rarely use the slider on maximum settings just because it’s so easy to overdo this tool. It’s interesting how Capture One made the sliders: amount and texture. When you adjust the amount slider, the skin texture becomes quite even, but only from a tone perspective. When you start pushing the texture slider, the skin texture gets adjusted as well. I found that pushing both to about 50 to be a good starting point in this case.
Contouring is especially useful if you’re not super proficient with light. If you are, and have all the tools in your box, you might not need it as much. But features like blemish removal and skin evening are much more universally helpful. They become essential if you’re working without a professional makeup artist on set—which, depending on your field, might be the norm.
Retouching teeth is yet another important feature that I like using. While most people do have good dental hygiene, it does help to brighten up those pearly whites, especially in pictures where they appear to be yellow. Unfortunately, Colgate ads made us think that the normal color for teeth is white, so whitening teeth is an important feature that adds to the quality of your pictures. That said, I don’t really use this, as generally I don’t tend to have people smiling or showing teeth in my work. At the same time, if you shoot quite a lot of headshots, you would’ve most definitely come across someone who doesn’t quite brush their teeth as much as they should.
Last but not least, impact is like a general opacity slider in Photoshop. After you’ve made your adjustments, you can always make them stronger or weaker. I tend to put mine at around 70, so I can always add more and take out. Generally, I take it out.
The retouching panel is quite good, especially for high-volume shoots. For example, headshot photographers will benefit from this quite a lot, as now you are able to edit a ton of headshots in minutes. Even better, you are able to use it on set, so when your subject checks the screen, they see a final result already. This helps boost confidence and strengthen client relationships. Another use case for this is e-commerce productions, where there is simply no time or budget to retouch. Although makeup does fix quite a lot of imperfections, you can go a step further and retouch the images in Capture One, which will increase the quality of the deliverable. Once again, a huge benefit.
Overall, the retouch feature is quite helpful for quick adjustments. It uses some AI behind the scenes, which makes it more precise. I’m quite satisfied with how it works overall. To be safe, I tend to underdo the retouching—but that’s just my preference.
The Second Game-Changer: Better Session Organization
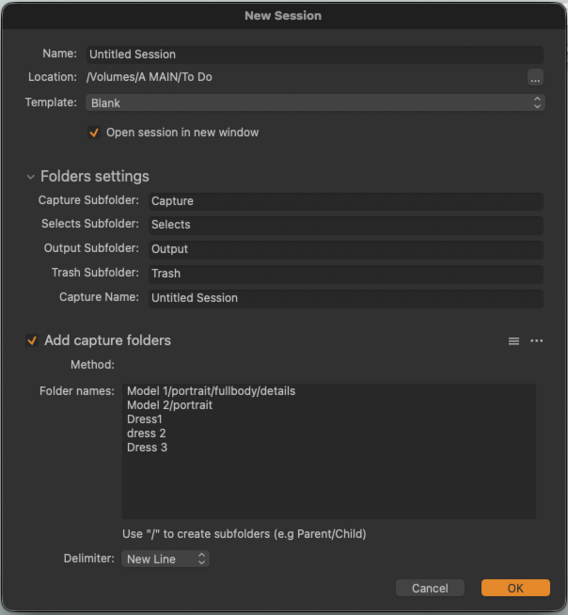
A much more objective and overdue improvement is the second big feature: session improvements for better organization.
I work on many projects that span several days. I also often need to group images by look, for example, when doing e-commerce or editorials with 15 different outfits plus extras. Previously, I had to group these manually and figure out how to stay organized. There was no consistency, and I’d often lose track.
It got even worse when I had to organize by subject. Let’s say you’re shooting several models and want Kate Moss’s photos tagged accordingly. You can now set up this file structure at the beginning and just drag the respective images into the folders. Capture One will organize them for you.
This is incredibly useful for anyone using Capture One.
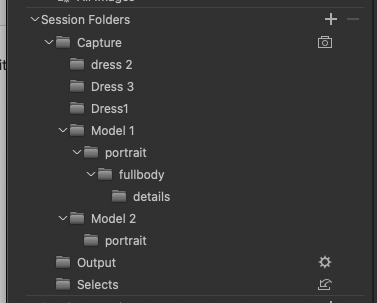
Imagine you’re a headshot photographer shooting 50 people a day. There’s no way you’ll remember who was John Doe, who was Lorraine Ipsum, and who was Tim Apple. Now, you can have each person type their name, which will automatically create a folder inside your Capture folder. It sounds complicated, but once you try it, it’s irreplaceable.
One more thing: I bet John Doe doesn’t want to see photos of Lorraine Ipsum. John and Lorraine might rate their images differently in Capture One Live. Now you can create separate links for each subject. They’ll never see each other’s images, while you can monitor all selections from one central session. This changes the way photographers use Capture One Live, allowing them to auto-generate galleries for as many clients as needed.
Capture One Studio users can take it further with tokens to automate session folders. If you’re running an e-commerce production and tagging images with barcodes, you can now automatically create a folder for each item you photograph.
This makes organization significantly better. Trust me, manually sorting 70 items by barcode is no fun.
Closing Thoughts
These are the two biggest updates in the new Capture One.
I’m quite content with the retouch feature, and I’m a huge fan of the automated folders feature. It’s so good that I’d consider switching to a Studio Plan if I shot more e-commerce in my studio. Since I don’t, I’ll continue to input things manually for now.
Overall, well done to Capture One.


Join the Fstoppers community for free
-
Post comments and join in the discussions
-
Browse the site ad-free
-
Share your work and get featured in the community
-
Compete in the photo contests for fun and prizes
10 Comments
I'd resubscribe if they ported C1 to linux. Other than that C1 is great. Even if the new Retouching tools aren't the best Affinity photo is also better at retouching than Photoshop. When it comes down to it they all can do the job but some of them have less friction during the retouching process than others.
Affinity Photo 2 and 3 is very much inferior to the current version of Photoshop, when it comes to retouching. Even the latest version of Affinity is riddled with bugs, even more, so, since I switched to version 3. The tools within it especially including masking are hopeless in comparison. Affinity is incapable of masking fine detail, especially on hair strands accurately compared to Photoshop.
Not in my experience. I much prefer it to Photoshop. Every tool I use in affinity just works much better than in Photoshop. Especially the polygonal lasso tool. It's been bugged in Photoshop for around a decade where you can't pan the work area or back space a selection point unless you restart the selection over and over and over until it finally works the way it was designed too. That's super basic and Photoshop can't even get that right. Photoshop has degraded like a rusty spoon over the years.
This is very nice if you're shooting models who maybe have one too many freckles. If you're shooting real people, you're going to want the firepower of Evoto—Real people have double chins, zits, weird noses, and asymmetrical eyes!
The opening photo is a clear case of how Photoshop won’t help some people. I’ve got the same problem with my face — once you look like a ugly ghoul, you’ll look like a ugly ghoul even with ten beauty filters :D
You registered here just to share those intimate details about your perception of yourself?
You may be ugly. She is surely not.
.
Rather than just dismissing the previous comment out of hand spend a bit of time standing back and just look at the image in question. I would agree with Martin that it’s arguably not a great image from the get go which is no reflection on the young lady. The photographer on the other hand, one had to wonder what the aim was… a tired depressed unhappy look? If so success. The cleaned up image just emphasizes those haunted eyes as the contrast between the smooth unreal skin has been amplified. The viewers eye passes over that now smooth corpse like skin to rest on those haunted eyes. The problem you have is the majority of people are experts at assessing faces as we as humans have been hardwired to do this very thing. Knowing how others in our group feel just by looking at their faces is crucial. It’s what makes portraiture so challenging. Th fact that we have 43 facial muscles to control expressions says everything you need to know. Expressions vary enormously and we as humans can pick up on the slightest change in expression. That’s why the image that was picked to front this article broadcasts to some parts of the world negative almost distressed emotions. As I said if that was the goal, fine but if you are unable to see that then you may have a problem reading expression or it may be a function of the culture you were raised in as expression and their interpretation can vary from culture to culture. Once more a problem for photographers which stresses the importance of knowing how to direct not just how a model stands and holds themselves but how to control model expression. Going back to what Martin says you might just wish to take his comment on board rather than dismissing it out of hand. However that’s just my opinion for what it’s worth.
Oof brother me too. There's a reason I stay BEHEIND the camera lol. I don't want to crack any lenses XD
To address the initial question: is Capture One a replacement for Photoshop? In my opinion due to the wide variety of uses and Photoshop is put to along with its massive user base trying to answer your question referencing one very small aspect such as re-touching is a tad ridiculous and does nothing to really address the question. I’ve been using Photoshop for well over 25 years in all its various incarnations as have many others. While Capture One may well entice new users it would have to offer something quite incredible to make long term users who have built a wealth of knowledge and expertise over years to switch. And that’s aside from what could be a lifetimes library of work done using Photoshop. As a result the answer to your question is a resounding No. Could it attract new users then the answers given the Adobe pay per month/ year policy may well be yes. For new users it does look more attractive from a pricing point of view especially for the solo user. Corporate users I’m not so sure. The problem Capture One has is overturning Photoshops huge professional user base. Recent data shows that over 90% of professional photographers and creatives use Photoshop. That is a fact if you care to examine the data. In the short to medium term Capture One may well grow its user base among new/ casual users and switchers who have not invested a great deal of time and effort into learning the software. Though as you suggest if Capture One is very good for one specific task some people may buy it in for such specific uses. As for replacing Photoshop then the answer has to be, for the short/ medium term a No. For the future who can tell.