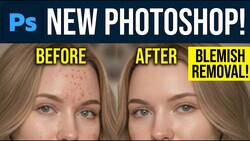
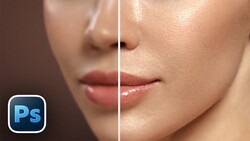
Photoshop's newest blemish tool doesn't just erase spots. It removes them while keeping the skin texture underneath exactly as it was, which is the part that has tripped up automatic retouching for years.
Unmesh Dinda of PiXimperfect walks through the feature, which lives in Camera Raw 18.5 and above in the standard release of Photoshop. You reach it a few different ways. Open a raw file and it drops you straight into Camera Raw, where the Remove section holds the blemishes control. Working with a JPEG instead? Copy the background layer, convert it for smart filters so you can adjust later, then run Filter, Camera Raw Filter, and the same blemishes option sits under Remove. Check apply, wait a moment, and the spots clear while the pores and fine detail stay put.
The two sliders are where most people get confused, and Dinda spends real time untangling them. The amount slider isn't opacity. It controls which blemishes vanish and which remain. Push it left and every mark shows. Raise it gradually and the most distracting blemishes go first, with the smaller ones hanging on until you hit 100 percent. The fade slider handles a different category entirely: permanent marks like moles and birthmarks. Photoshop sorts temporary spots from permanent ones on its own, so the top slider clears the stuff that would fade in a few weeks with good skincare, and the second slider decides how much of the permanent features you keep. Dinda's suggested rename, temporary marks and permanent marks, is far clearer than what Adobe shipped.
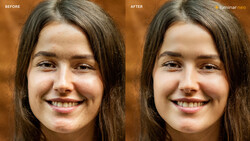
Control goes deeper than two sliders. There's a show overlay on hover checkbox that marks every spot the tool touched, so you can see its decisions before trusting them. Refine lets you paint to remove more or restore what you want back, brush size and all. The feature also reads multiple faces in one frame and treats each person separately, which Dinda demonstrates on a photo of his parents. Select one face and the amount and fade apply only to that person, so you can strip more from one subject while preserving the marks that make someone recognizably themselves.
The sorting of temporary versus permanent marks is the quiet shift worth paying attention to. For most of retouching history, a healing tool saw a dark spot and erased it, full stop. It couldn't tell a stress breakout from a lifelong beauty mark. Deciding what to remove was entirely on you, brushstroke by brushstroke. Handing that judgment to the software changes how you approach a portrait edit. Instead of masking and rebuilding, you're steering two sliders and correcting a handful of the tool's guesses. That fits high-volume work well, headshots, events, family sessions, where you want clean skin fast without flattening someone's face into plastic. It fits less cleanly on heavy beauty and editorial retouching, where the texture demands and the client's expectations still call for frequency separation and dodging and burning by hand. Knowing which lane you're in tells you when to lean on this and when to reach for the manual tools.
Dinda is honest about the limits. The blemish removal applies its result baked in rather than on separate layers, unlike Photoshop's reflection removal, which can output the cleaned image and the reflections on their own layers straight from Edit. Play the video above to watch Dinda run each slider through real portraits and see exactly where the texture holds and where it breaks.
Join the Fstoppers community for free
-
Post comments and join in the discussions
-
Browse the site ad-free
-
Share your work and get featured in the community
-
Compete in the photo contests for fun and prizes
3 Comments
Surprisingly, it does a pretty decent job for something just being released. It may be something to use with other higher end retouching, however, I had to go over multiple areas that had more flaky texture for it to erase it. That said, if someone doesn't have too much of problematic skin, it might work really well for a simple fix.
I Iike the original photo, because it looks like a real person. How strange it keeps the skin texture, as to signal it stil looks a bit real?
The tool I am really waiting for is the duckface tool though, as it seems to be a favorable look for so many women 😬
I remember the film days when I ran a large studio practice. We paid literally tens of thousands of dollars to negative retouchers - and it was worth it BTW - and then print retouchers to clean up detail the negative retouchers couldn't. This would have been such a boon and time saver. What a marvelous time to do portrait work.