
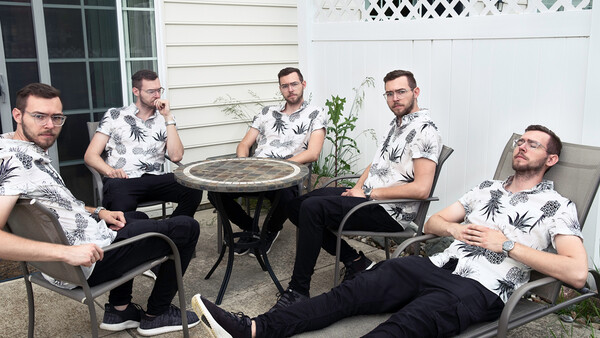
In various forms of photography, being able to composite several photos into one final image is an important skill set. In the world of portraiture, composites are often used to create group shots in which the lighting situation is difficult or not every subject of the photo is available at one given time. Here I’ll show my process for blending several shots of people into a final image.
Tripod
The only real thing that is absolutely necessary for these sort of shots is a tripod. While I chose to use a strobe to light my scene and subject(s), they aren’t a must. The tripod will allow to ensure that the camera stays in the same exact spot for each frame that you take. This way, there is no perspective distortion or issues with objects not lining up properly while putting the image together in postproduction.
The Process
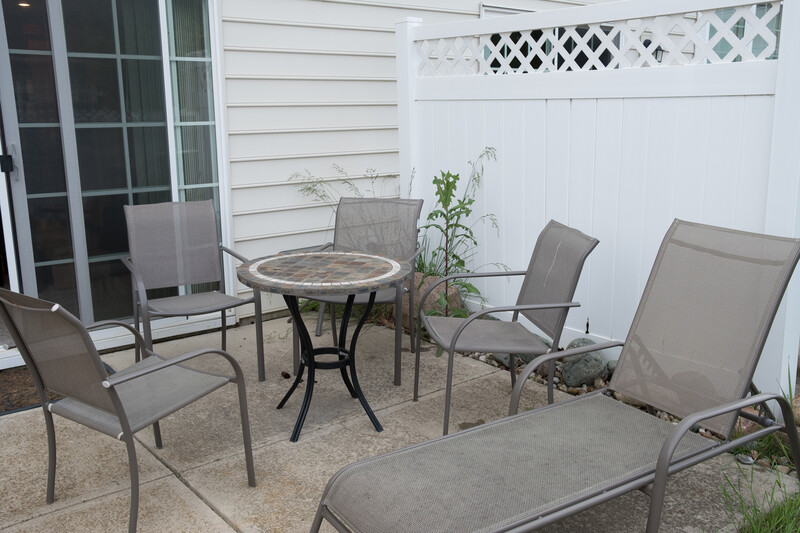
The first step is to compose the image. Because all of the subjects are sitting, I chose a slightly higher perspective. After leveling the tripod and locking everything down tight, the next step was to pick my exposure. It’s critical to stay in manual mode while doing this so that the exposure doesn’t change from shot to shot. I metered my ambient light and flash, took a few test shots to nail the balance of ambient and flash, and then took the plate. A plate is an image in a composite of the scene, but with no subjects. The importance of this is to be able to have an unaltered version of the scene to help cut things in and out of while putting the image together.
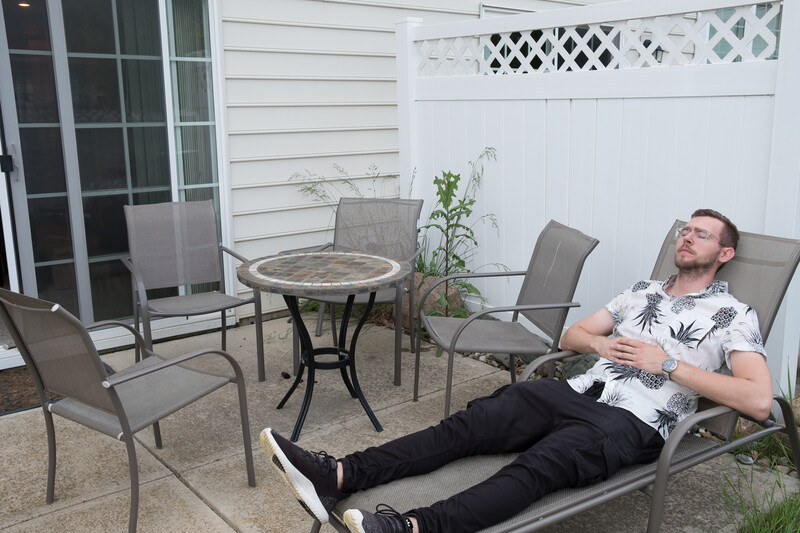
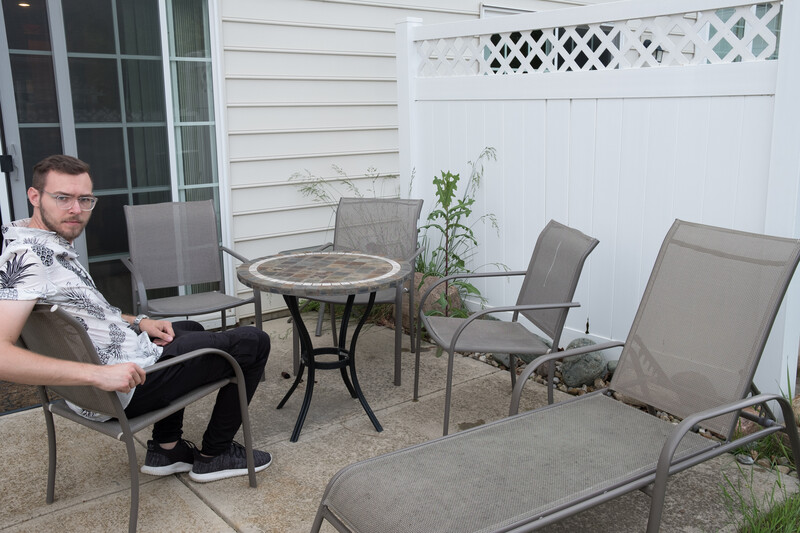
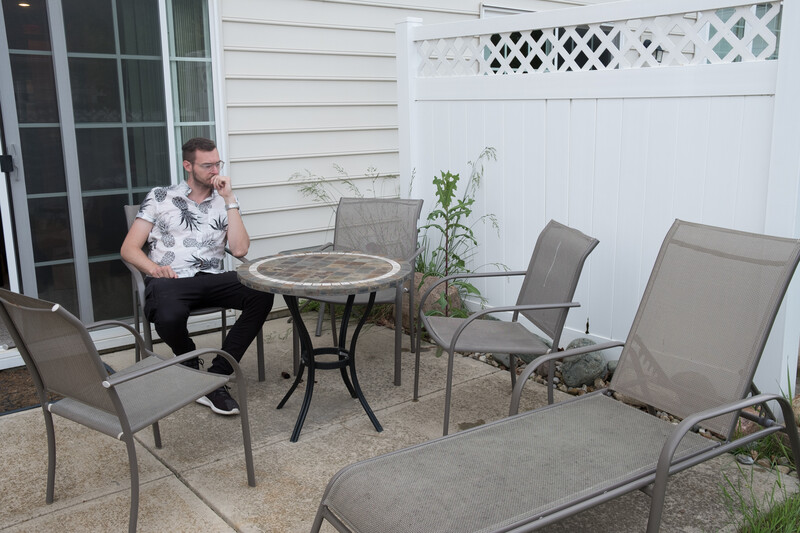
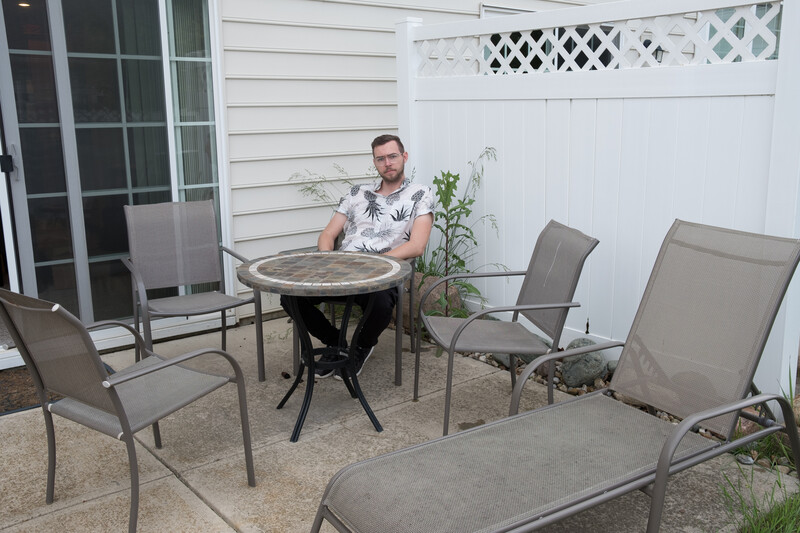
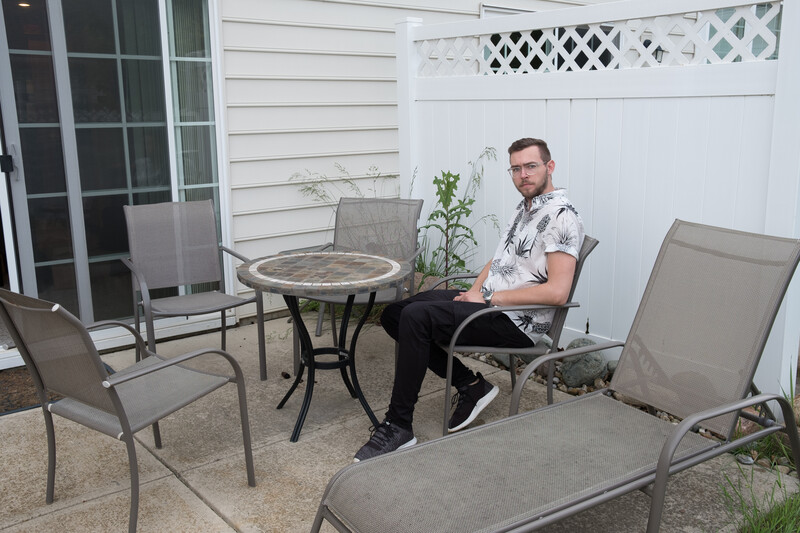
From there, I placed myself around the scene in the various chairs which were arranged so that my face would be visible in each frame. I set the camera on a 10 second timer, ran to each chair, posed, then went back to the camera to review the frame. I would check how the strobe fell on my face, the positioning of the furniture to make sure I hadn’t moved it, and then took the next shot. I repeated this process five times until I had all of my images.
The Edit
This is where the entire image comes together. The first step for me was to open the images in Lightroom. Here I can edit one image, then apply the same edits to every image. I did some minimal corrections, namely some sharpening, exposure increase, and adding a little warmth to the image. I added the contrast and did all of the real editing within Photoshop, so I didn’t worry about it here. Once I had the one image finished, I used the sync feature in the develop module by selecting my edited image, then selecting the other five images and pressing sync. From here, with all of the images selected, I used the Edit In option under the right-click menu to open the six frames in Photoshop.
To ease confusion, I always choose to paint each frame into the plate one at a time. I started by adding the photos of myself in which I’m closest to the camera into the plate document as a layer. By adding a layer mask, I can paint the image in. For the first image you paint into the composite a white layer mask is fine. For the second and subsequent images, I recommend using a black layer mask. I’ll explain why. In this image, and in many composites, some of the objects or people can overlap. The advantage to adding a black layer mask to the second image, I can paint (with a white brush) around the first image of me that I added in in order to make the overlap look flawless. Using a hard brush, I can paint along the edge precisely so that it looks like I’m actually sitting behind myself. Personally it’s easier for me to paint the subjects in with the closest to the camera first, ending with the subject farthest from the camera, but everyone is different. I often have to clean up each layer by using the brush tool to get the edge perfect. This isn’t exactly difficult, but it is time consuming, so find a good playlist. Repeat the process with each frame and then you have the final image.
There are some other things that may need done, however. For this image, I needed to make sure the cast shadows were accurate. Because of the fact that I cast a shadow when I sat on the left side of the frame, I needed to make sure that that shadow was evident on the me to the right. This requires some light dodging and burning (and in some cases I didn’t need to at all) but because the natural light was so soft and even, it didn’t need much to look natural. Using a strobe can add a layer of complexity to these composites because of how consistent the light has to be. You may see some people recommend you move the light for each frame as you move the subject or subjects around, but I find this to be an inaccurate and more difficult way to light these composites as the shadows and highlights can change too much around the image. That’s why I chose to keep my light in the same place for every shot so that the light on the plate was the same for each frame I took with a subject in it.
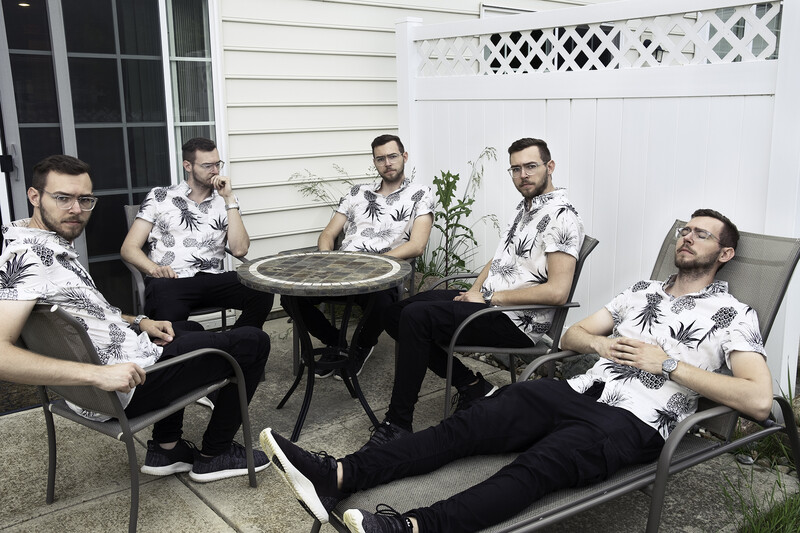
I used myself as a subject for this image because it was a lighting test for a shoot I have upcoming and I needed to make sure I had everything in order when creating that image. Like anything in photography, it takes some trial and error. By using myself for the image, it was actually helpful for the test to make sure I could make the layering and shadows look natural if I only had one subject in the frame at a time. Even if you don’t care to make composites professionally, it’s still great Photoshop practice and forces you to envision your shot before you can really see it come together.


Join the Fstoppers community for free
-
Post comments and join in the discussions
-
Browse the site ad-free
-
Share your work and get featured in the community
-
Compete in the photo contests for fun and prizes
5 Comments
Another home run for you!
I am going to try this with my cats, also in lawn chairs
Great tips for creating a composite. I really admire all of the time photographers invest in doing cool things in post.
I like this trick a lot and here I mixed it with the levitation trick.The guitars in the air are the same as the ones on the floor.
It's my friend Peppe who makes metal artwork, and adds the same style to the guitars. And I saw him floating around why the guitars, in my head, so I had to make it happen =)
Still working on it but I shot this over the weekend. Client concept: Harriet Tubman, Underground Railroad.
"sempre em boa companhia" - Always in good company. Portuguese pub,the person in the photo is the owner of the pub.