
It's easy as a photographer to get caught up in having dozens of strobes and spending hours trying to get an image perfect in camera. It doesn't always have to be that hard, though, and in today's photography tutorial, I work through a mock advertisement campaign shot with just one strobe light.
Hopefully, everyone is doing well and staying safe as we all battle this crazy pandemic called coronavirus. Like many of you, I have been asking myself what sort of things I can still be photographing while quarantined in my home and having no access to people or beautiful environments. One genre of photography that you might want to consider exploring is product photography.
Being able to produce slick and creative product photos is something I believe every full-time photographer should know how to do. On the one hand, this genre is fun because you don't need a huge studio, and you can work alone at your own pace to create your final images. On the other hand, learning how to light products in a way that brings out the best features can be extremely difficult and frustrating.
In this tutorial, I wanted to attempt a mock advertising campaign for one of my favorite brands of all time: Fender guitars. I've been playing guitar since I was 16 years old and instantly fell in love not only with the guitar's ability to make music but also the sexy aesthetic of the instrument itself. In my opinion, no other instrument can compare to the guitar as a simple display of fine art and craftsmanship.
This particular guitar, Fender's top of the line Tele Plus Series from the late 90s, is in great shape, but not perfect. Therefore, I'm going to have to use some clever lighting techniques and Photoshop tricks to capture it perfectly (trust me, I'd prefer to be photographing a beat up 1959 Stratocaster, but that's not realistic). In order to bring out all the unique qualities of this guitar, I'm going to be using the brand new Westcott FJ400 strobe as my main key light. However, instead of building a complicated lighting setup with multiple lights, my goal for this shoot is to keep everything simple by only using one light but blending together multiple frames that accentuate each element of the guitar.
There are some general concepts I usually follow when shooting products like this. First, I almost always set my camera so that the ambient light in the room doesn't affect my exposure at all. This means I'm going to shoot with a fast shutter without exceeding my flash sync speed (1/200th in this case), and I'm going to set my ISO as low as possible so I have the cleanest image possible (ISO 100). Finally, I'm going to stop the aperture of my lens down to f/8 so that I can get a good amount of sharpness and depth of field. For some product shots, you might want to blur the background or soften up the edges of the product by shooting with a larger aperture, but in this case, I'm looking to create a sharp image that I can cut out from the pure white background. The lens used for this photoshoot was the Tamron 24-70mm f/2.8 set to around 30-34mm.
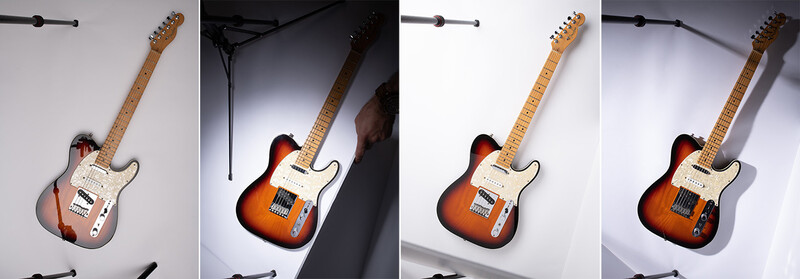
As you can see from some of the images above, I simply moved the position of my Westcott FJ400 flash in many directions so I could capture different effects on the guitar. When I point the strobe directly at the guitar, I often get brighter colors and stronger highlights and shadows, but consequently, I also get a lot of glare and reflections. By firing the FJ400 directly into my studio's white ceiling, I'm able to get soft, even lighting that flattens out the guitar, but this technique allows me to fill in all the metal hardware, giving it a nice glowing effect. There isn't a single correct or incorrect approach here. As you can see, each one of these frames has elements of it that are desirable and others that are not so desirable.
The final step is to combine all of these photographs into one single image that shows off all the features of the guitar in the best way possible. For this particular example, I wound up creating a final composite image that shows everything clean, bright, and almost surgical. Of course, you can also composite everything together with more hard shadows and narrow beams of light to create something much more moody and stylized. What makes this technique so powerful is you can easily create multiple edits that look completely different while still being able to go back to make adjustments later.
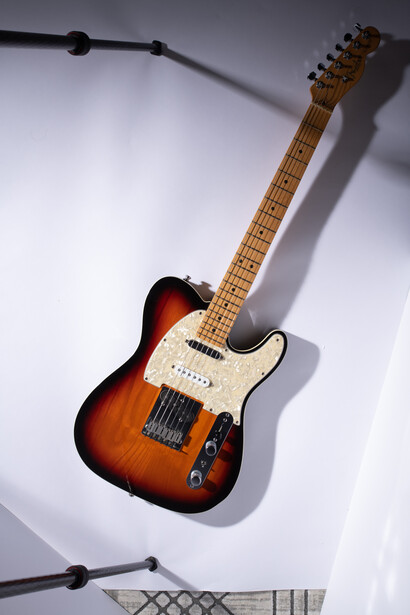
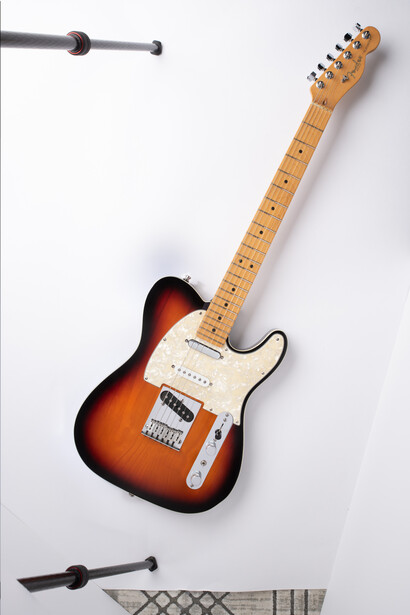
Once I created the final composite in Photoshop, I could have just left the guitar on pure white for a standard "e-commerce" style image. This is probably how many product photographers would deliver their final images so a brand could use them however they saw fit, but I wanted to take it one step further. I don't spend a lot of my time building up complete advertisements, but I wanted to take a stab at one and see if I could produce something that looked like a completed campaign. Since I'm locked up in Puerto Rico and not able to venture out to my favorite music hall or borrow some of the other items I might need to photograph, I decided to buy a few images off iStockPhoto and composite them into my final mock advertisement.
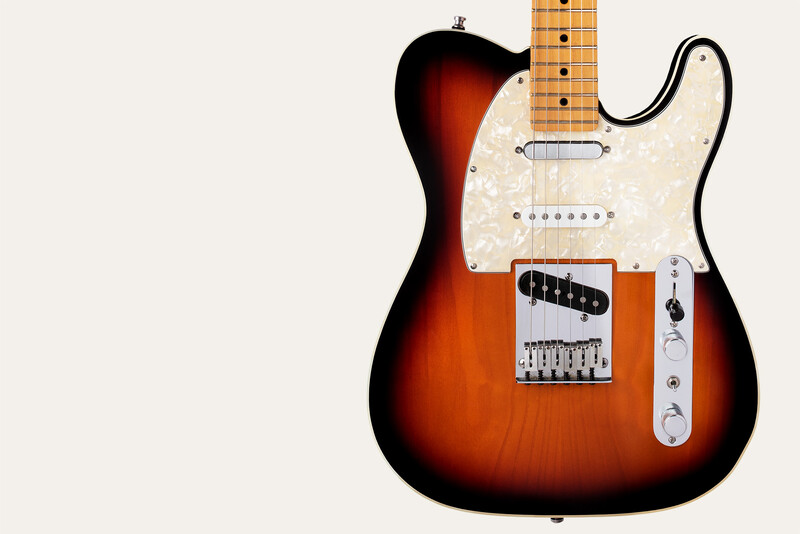
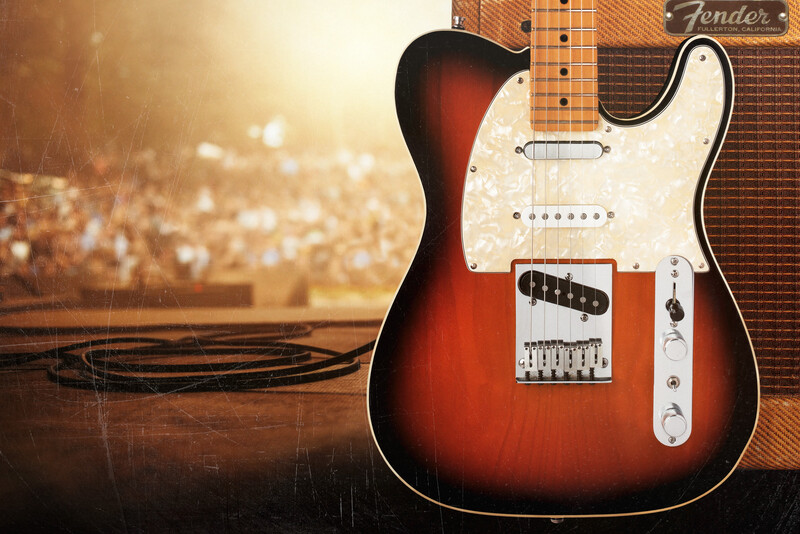
You can see both the product shot on pure white and the more editorial style advertisement above. If you want to see how I blended the product shot with the two background plate images, definitely watch the post-production section of the video at the top of this article.
Most of these techniques are pretty common masking and lighting techniques that many of you have probably already used before. However, if you really want to dive deep into this type of photography, especially while you might not have access to the normal types of jobs you were shooting before this pandemic hit, I highly encourage you to check out the work of product photographer Brian Rodgers Jr and his full tutorial Fstoppers produced with him called "The Hero Shot". Brian has a ton of practical advice, as well as some techniques that you might only find used in the product photography genre. Even if you never plan to become a full-time product photographer, I think it's always helpful to understand how these techniques can be applied to any genre of photography you find yourself working in.


Join the Fstoppers community for free
-
Post comments and join in the discussions
-
Browse the site ad-free
-
Share your work and get featured in the community
-
Compete in the photo contests for fun and prizes
2 Comments
There is something to be said when keying in a hero to match the intent of the ambient lighting (direction, quality, shadowing, burning/dodging, etc). Your guitar photo turned out good, extremely polished for an on white catalog shot, but the final has the cheap Chinese Amazon ad look, pathed and slapped on a stock image.
The way you present the process is to hide scratches that may or may not detract from the value of the guitar, certainly not an honest presentation of a product for sale.