
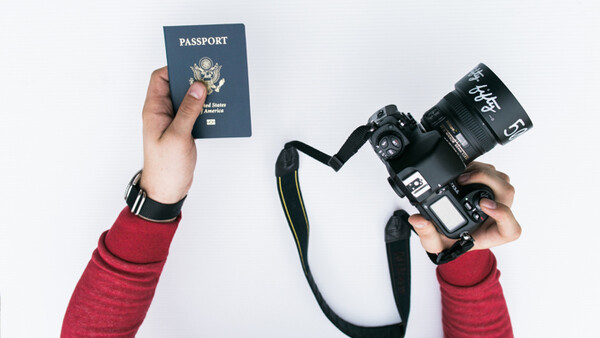
If you're anything like me then you feel pretty strongly that your face belongs behind a camera, not in front of it. I absolutely hate getting my picture taken, and I'm never more displeased than when I get my photo IDs made. From garish drug store / post office lighting to a poorly executed smile there's always a reason to dread whipping out my driver's license or ID. While I can't really help you with your DMV escapades, passports are unique in that you can actually provide your own image for the document — something I recently took advantage of and you can too. So here it is, The Photographer's Guide to Taking a Passport Photo You Won't Want to Destroy with Fire. All in 10 minutes or less.
With the 2015 Fstoppers Workshops in the Bahamas right around the corner, it occurred to me it was time to re-up my passport. Rather than brave the lines and put up with the ugly photo by the passport guy at the post office I decided to take matters into my own hands and take my own picture. The entire process took around ten minutes and was a lot more pleasant than having it taken elsewhere.
[Disclaimer] This guide is based upon the current rules governing the passport application process. Before you give this a try make sure to check with the current passport photo requirements and regulations.
- Background. Your picture needs to be shot on white or off-white. There are several ways to go about it, some easier than others. If you have a white wall in your house or office that's your best bet. You can set up shop against it easily. If, like me, you don't have the luxury of a perfect backdrop wall you can break out the white seamless paper or a sheet of white foam core or matte board and support it with some light stands.
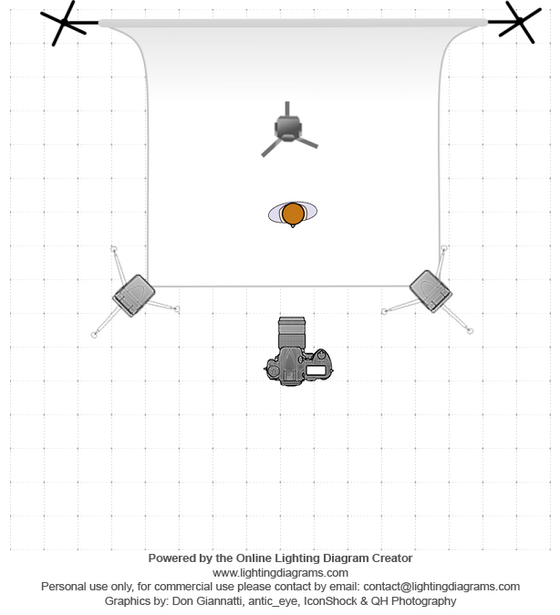
- Light. With the background managed you can now move on to the lighting. To perfectly emulate the post-office lighting you'll need to buy some nicely patinaed 1980s florescent bulbs and use the flash on a mid-2000s point-and-shoot. Or, if you'd rather, you can go all Art-of-The-Headshot and set up a couple strobes that won't make your picture look like a mugshot. Since I set up shop in my office without much natural light I opted to put up two strobes at about head-height at about 45 degrees from my face and one behind me lighting up the background (see diagram below), this'll meet the requirement for lighting flatly, without any shadowy areas.
- Camera and Lens. You're going to want to break out a mid-tele or tele-zoom for this one. An 85mm or a 70-200 is your best bet. This'll give a nice, flattering, compression without the distortion you'd see with a shorter lens. Obviously this is no time for a super-short-DOF portrait. Stop down your lens to between f/4 and f/8 for optimal, edge-to-edge sharpness. Set ISO and shutter speed to match.
- Composition. If you're photographing yourself you will want to get a stand-in to help you set your focus and composition. Given the absolutely tiny final image you need (a mere 600 by 600px) it's best to give yourself more room than you need when cropping your image down. I'd recommend framing the shot starting at mid-chest and ending a decent amount above the head to be safe. If you have someone else photographing for you taking a picture of them with the crop you want is immensely helpful in getting what you need conveyed to them.
- Post Production. Your post should be rather easy, apply an adjusted white balance, pull up shadows and down highlights as needed, add sharpening to taste. Crop to a square and you're done. It should be noted that there are very specific rules prohibiting digital retouching that alters the appearance of the photo. "It is acceptable to use the red-eye reduction option on your digital camera when you are taking the photo. However, you cannot use any photo editing tool to digitally remove the red-eye from your photo. In general, you are not allowed to digitally enhance or alter the photo to change your appearance in any way." [US Passports FAQ]
- Exporting. The image needs to be printed 2x2" at 300dpi. Depending on who or where you'll be printing you may want to resize the image then put format it for 4x6" (either centered or in a grid of 6).
- Printing. If you have a half-decent inkjet with photo paper at home or your office you can run off a copy and call it a day. If not, you can run up to your corner pharmacy, photo lab, or grocery store (in this case make sure the file is ready for 4x6" printing). No need to worry too much over printer settings / profiles / calibration. As long as the skin tones look good and the white is white you're in the clear. I agonized over the color in the image I submitted only to have the one printed in the passport come back way too warm.
- Done. Go plan your trip.
Below is the simple setup I used:
Join the Fstoppers community for free
-
Post comments and join in the discussions
-
Browse the site ad-free
-
Share your work and get featured in the community
-
Compete in the photo contests for fun and prizes
7 Comments
This is something I wouldn't wanna mess with. It takes time and money to get the passport done. I'd rather look less than okay with a passport than looking a bit mediocre without one.
Sorry, I'm not quite sure I follow — you'd be worried that by taking your own picture it wouldn't be accepted? If that's the case I'm positive you're *way* more competent than the twenty-something guy at the post office who operates the point n' shoot. :)
While the picture you get out of this still won't have the best lighting in the world (super duper flat) you can at least cull out the images you don't like in terms of expression, ect.
What expression?
You can't have nay on a passport photo (at least in Canada). Stoic is the norm.
I don't see anyone ossing time over this... unles your local lab charges 40$ for it....
I did my passport photo last year. The office didn't even look twice when accepting it. Best decision i ever made. Now i have a James Bond worthy passport.
I did my own passport photo and it was fine. :)
Guess I'll do it myself in 9 years.
Great post! I totally agree that we are more competent than the guy at the post office or Walgreens. Plus I'd rather save some of that money for my trip :) I just made a video and blog post on DIY Passport Photos only using your phone. The YouTube video is at https://youtu.be/7Pv8EkGO8xU and the blog post is at http://memyshadowandi.com/2016/12/16/how-to-take-your-own-passport-phot…
Leave a comment there and let me know if it helped you! Thanks!