
Most of my food photography is lit with only one light source and after a few years of taking a special interest in shooting food and drink, I know exactly where I want the light to be and why.
However, when I first started shooting food, finding the right light position was a bit hit and miss. I remember finding it useful to see how different ways of lighting the same subject got different results, so here is a bit of a food photography lighting walkthrough.
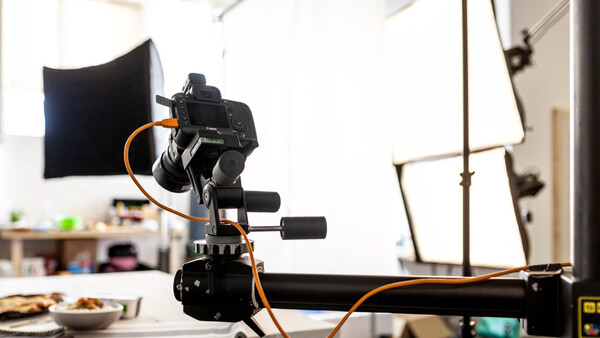
For this test, the camera has been left on a studio stand in the same spot (for those who are interested, I am using a Canon 5D and a Sigma 50mm Art lens). For lighting purposes, I have a Broncolor pulso 4 head, and a large softbox. This is pretty similar to my set up for all commercial food work. The reason I go for rectangular modifiers is both for the catchlights and also to make the lighting look as natural as possible. Here’s the reason; most of us probably eat our dinner by a large window, so we expect the catchlights on our tomatoes to be of a rectangle shape rather than octagonal or circular. Hence if you shoot with a circular modifier the catchlights look artificial – unless you’re used to eating your Caprese in a lighthouse with porthole windows. So, the best modifiers for this type of lighting are large indirect rectangular light sources. Here are eight ways to light with a single light source with soft light
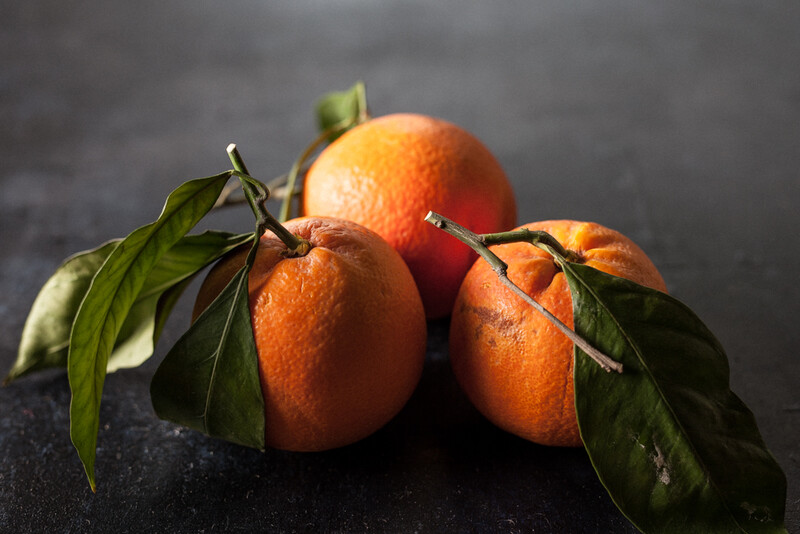
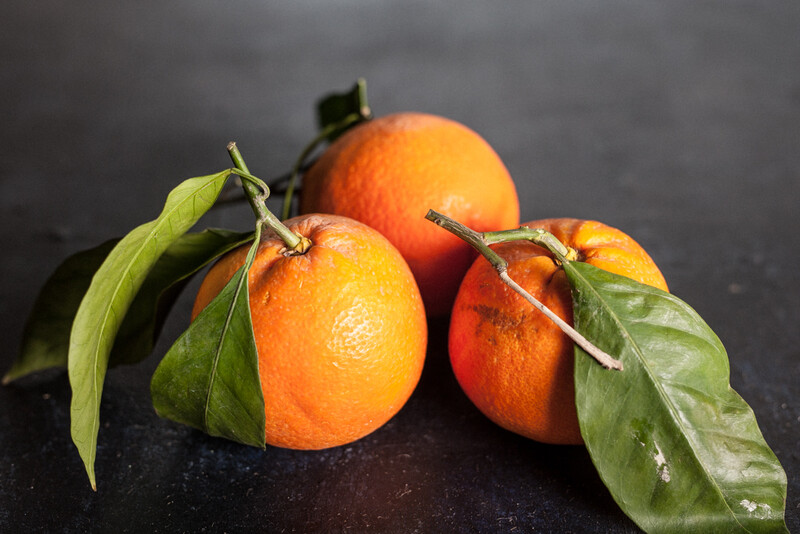
Light to the Left
This is probably the most popular position. Because most of us read left to right, it makes "reading" the image feel more natural. This gives the impression of natural window light and is probably the most vanilla way to create pleasing food photography.
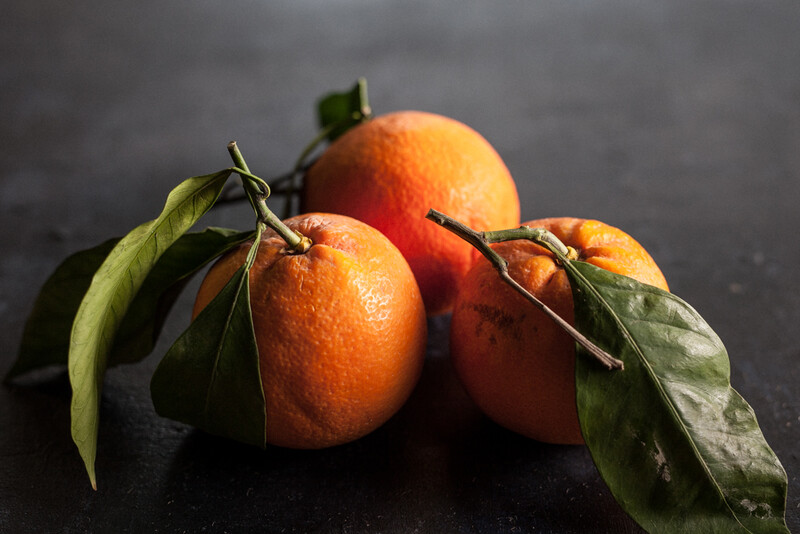
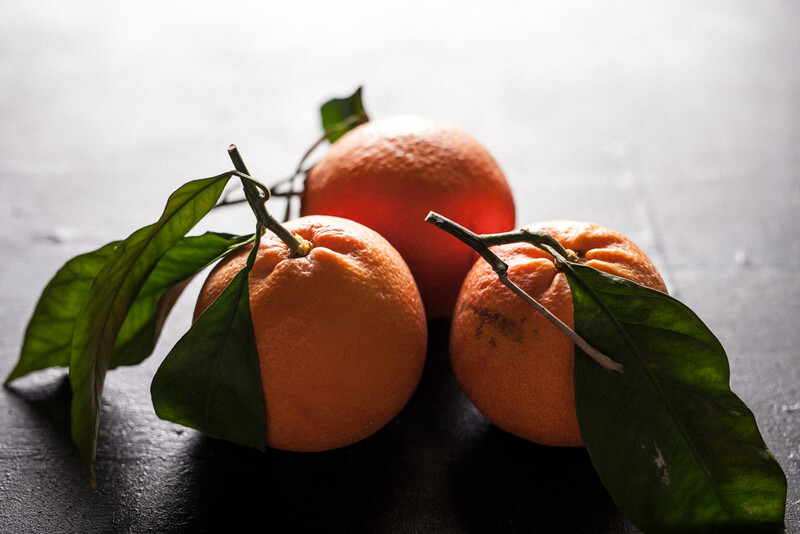
Light to Right
As with lighting from the left, this gives a beautifully soft and diffused quality of light. However, it means the image is lit in a contradictory way to before. This adds a feeling of imbalance and a slight uneasiness to the viewer. It is still well used when the only option.
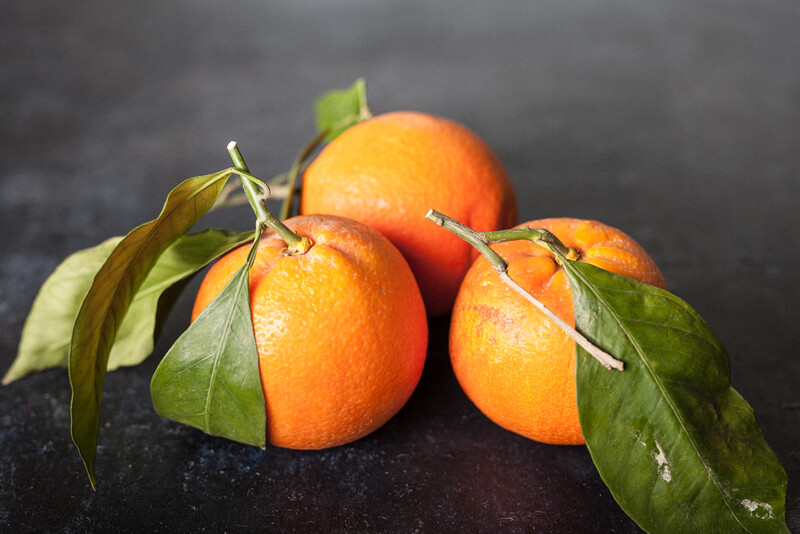
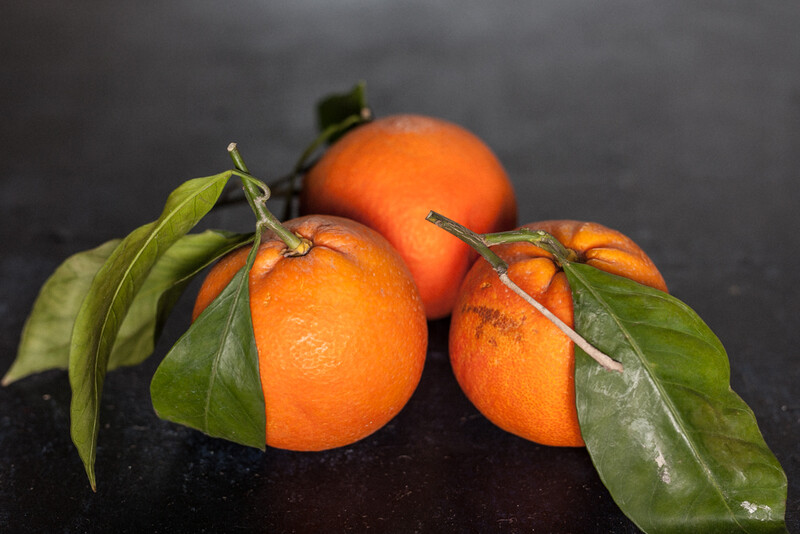
45 Degrees to the Left (Front)
This is a lunchtime light for me. The sun is high in the sky and shining through the window. I often remove the middle baffle to create more of a hotspot through the window (ie/ my softbox). Lighting from the left keeps the natural flow for the person reading the image, but it allows for shorter shadows and a more punchy look.
45 Degrees to the Right (Front)
Again, this offers the same quality of light as from the left, but a slightly less easy view. I personally would say that this is more viewer friendly than the straight to the right lighting, but still a bit edgy for a lot of commercial food photography use.
Lit From the Back (45 Degrees)
If you are shooting clear items, this can look really cool. If not, a couple of reflectors near the camera lens will be your friend. Lighting from the back creates a moody look that can have some real impact. It doesn’t suit all foods, but it can create a contemporary, social media friendly look. A few years ago I used this to make it look like a person was eating food on a patio facing out to sea with the sun in the background lit.
From the Front
Something I wouldn’t usually do, but for the sake of this exercise, I thought it worth giving it a go. I think that this can be used in certain styles if the context is right, but it doesn't work here.
What is your preferred method of lighting for food photography? Do you have any tips you would like to share?

Join the Fstoppers community for free
-
Post comments and join in the discussions
-
Browse the site ad-free
-
Share your work and get featured in the community
-
Compete in the photo contests for fun and prizes
15 Comments
Thanks for the tips Scott. Lighting from image left to right makes sense now you mention it.
The backgrounds you use in your food work look great as well, nice and clean but with some interest/texture..
I would light up what you want to emphasize but try to stay away from lighting that looks like you are using direct flash mounted on your camera (not bouncing it).
I don't necessarily agree with Light to the Left "Because most of us read left to right, it makes "reading" the image feel more natural." I wouldn't worry about how we "read" when lighting our subjects. Our eyes usually goes to color and highlights right in the beginning when looking at an image.
Now, if we can select items, and position them so that lines and shapes take our eyes from the top left of the image towards the right (the way we read) then many times this makes it a stronger image IMO.
I appreciate the comment about using a square/rectangle softbox to mimic windows. That's something I haven't thought about in the past. Thanks for sharing that :)
It's a pretty rare gig where one gets called to do food.
Most of us find these images being made sitting right in the seat given inside a place to eat. Your best friend is a large window, and it's kissing cousin is a table napkin for some diffused even light. I can't imagine people actually telling me "Ya, we're going to pay you to take food photos".
#BoringBucketList
I shoot in restaurants all the time - when I'm eating. It's almost never the ideal lighting - not necessarily seated by the window at lunch, it's too dark, or the overhead lights causes hot spots. So I use a pocket camera with a small pop up bendable flash and small 12-inch collapsible reflector. I create my own light. Almost all the images on my food Instagram are shot this way -
https://www.instagram.com/beautifulcuisine/
Nice pics! What is a pop-up bendable flash?
Difficult question I guess ...
There are TONS of photographers that specialize in just food photography lol.
I am Product and Architectural Photographer in Hong Kong and one of the product photography we specialise in is food advertising photography. This is just from my experience, and from what I have read so far everyone is making sense but I thought I would share some of my thoughts.
There are two types of food photography from my point of view. One that makes a good picture in general and one that specifically tells the story like your client wants it to (like most advertising shots). The first can be done by simple one light setup or even John was saying, through a big diffused window. However, I like to use lights and at least three of them. For me, if you shoot several dishes, natural light will change from time to time. I cannot guarantee constant output for my clients if I shoot natural light for one reason. Another reason is while for me while using one big light source can definitely give you a good picture, it's hard to isolate your hero/subject. You will see in many Instagram food shots while the photo looks stunning but the food itself doesn't really pop and sometimes its difficult to see the actually ingredients or all of the styling that went into the dish.
While setting up the general mood of the photo is important, lighting correctly is even more important. Ex. Lighting a burger. Shooting a burger while it isn't the hardest thing in the world but most newbies in food photography make the same mistakes where the ingredients of the burger is either hidden in dark shadows or that it's nuked (borrowed term from Mike Kelley) so that everything in between the burger buns look flat (apart from light how the burger is styled and positioned makes a significant difference as well).
I think this article is indeed quite helpful in the sense that it teaches us when we approach a subject (food for example) we need to look at what we are shooting. Something matte in texture will be different from something glossy. The shape and size of the food will also effect how you light it. Try back lighting a steak with a one light setup on a white table cloth white plate setup. Some things just don't work with a particular formula. So try to explore a bit. Remember what doesn't work and what does. That's how you get better at everything actually. When I first started, I did a lot of one light setup because it was easy and most of the time it worked well, but the more I shot for different food clients the more I realised that the photos were missing some punch. That's when you start bringing in the second and third or fourth light. It's true when it comes to lighting, you should keep it simple, but if you know you need an extra light, you need an extra light.
https://www.paperfishphoto.com/3rd-gallery
I think what you are saying is very correct Joseph Kwan.
The minute we allow “rules” dictate what we are doing we are destined to only work on a route that will make the work obvious and thereby boring and following that will bring nothing back to you as satisfaction or satisfying the client.
For more then ten years now I have worked mainly with food and if there is on lesson I have learnt is that there is no rules and that everyone situation is unique and if you start applying the “rules” or routine solution the work will be less interesting and very unimaginative.
Some time ago before I started the work on my latest cookbook someone told me that ringflash was a absolute no go for food photography so the little teenager in me decided that I was going to shoot everything (i.e. the food images) in the book with the profoto ringflash and hard gridded narrow lights from behind, and yes the images had very strange catchlights but the book sold out before christmas and had to be reprinted again before christmas so we did something right.
I have used basically every kind of lights for my work from diffused daylight to 9 hard studio flash strobes with grids and spots and including leds, tungstens speedlights and even candles.
My only rule is that you use what works for the image you want to have and if you lean back on routine it all gets very visually lazy.
Is the size of the softbox important? What do you suggest?
Yes and no Evelyn. Remember size also depends on how far your subject or hero is from the light source. Some photographers emphasise that you need to buy the biggest soft box you can find like a 150x200 or something, but I would suggest go with something big and something you can transport easily. I live in a city where most photographers don't have a car so transportability is very important. If you are shooting food, I think 60cmx90cm is a good size to own. I wouldn't buy anything larger unless you own a studio and shoot mainly in studio. Sometimes if you have a white wall, trying bouncing it off of a white wall.
Yay right up my alley. Food photographer here. In terms of using flash, a scrim is your best friend, soft box alone lacks the control for me, but adding a scrim in front gives me a lot more flexibility in the quality of light, not just softness vs hardness, but falloff as well to get the soft but hard light, which is more about a nice smooth falloff.
www.kevinli.com.au
I once witnessed a food shoot ( a long time ago) and was amazed that most of the food that was shot, wasn't food at all. Whipped cream was actually shaving foam (it seems to look better) and practically nothing was real food.
That was a long time ago, I wonder if it still is that way.
Because of the changes in style and the messier editorial approach, it's almost all real food now. However, it is also often not any good to eat. A chicken will be raw on the inside etc.
Well anyway, the impression I got was that is was really, really hard to get the shots right. The time I watched this was just before digital was getting main stream and a film camera was used. If I had to guess it would have been some 14-18 years ago. I am not sure. They used film and a drum scanner and afterwards they used a computer to tune the pictures. I remember that at that time, it was an incredibly high-end computer.
The thing which got me really wondering was the amount of time it all took. It must have been really expensive to get all this right. I was there for a couple of hours but they said it took an entire day for a handful of shots. Amazing.