
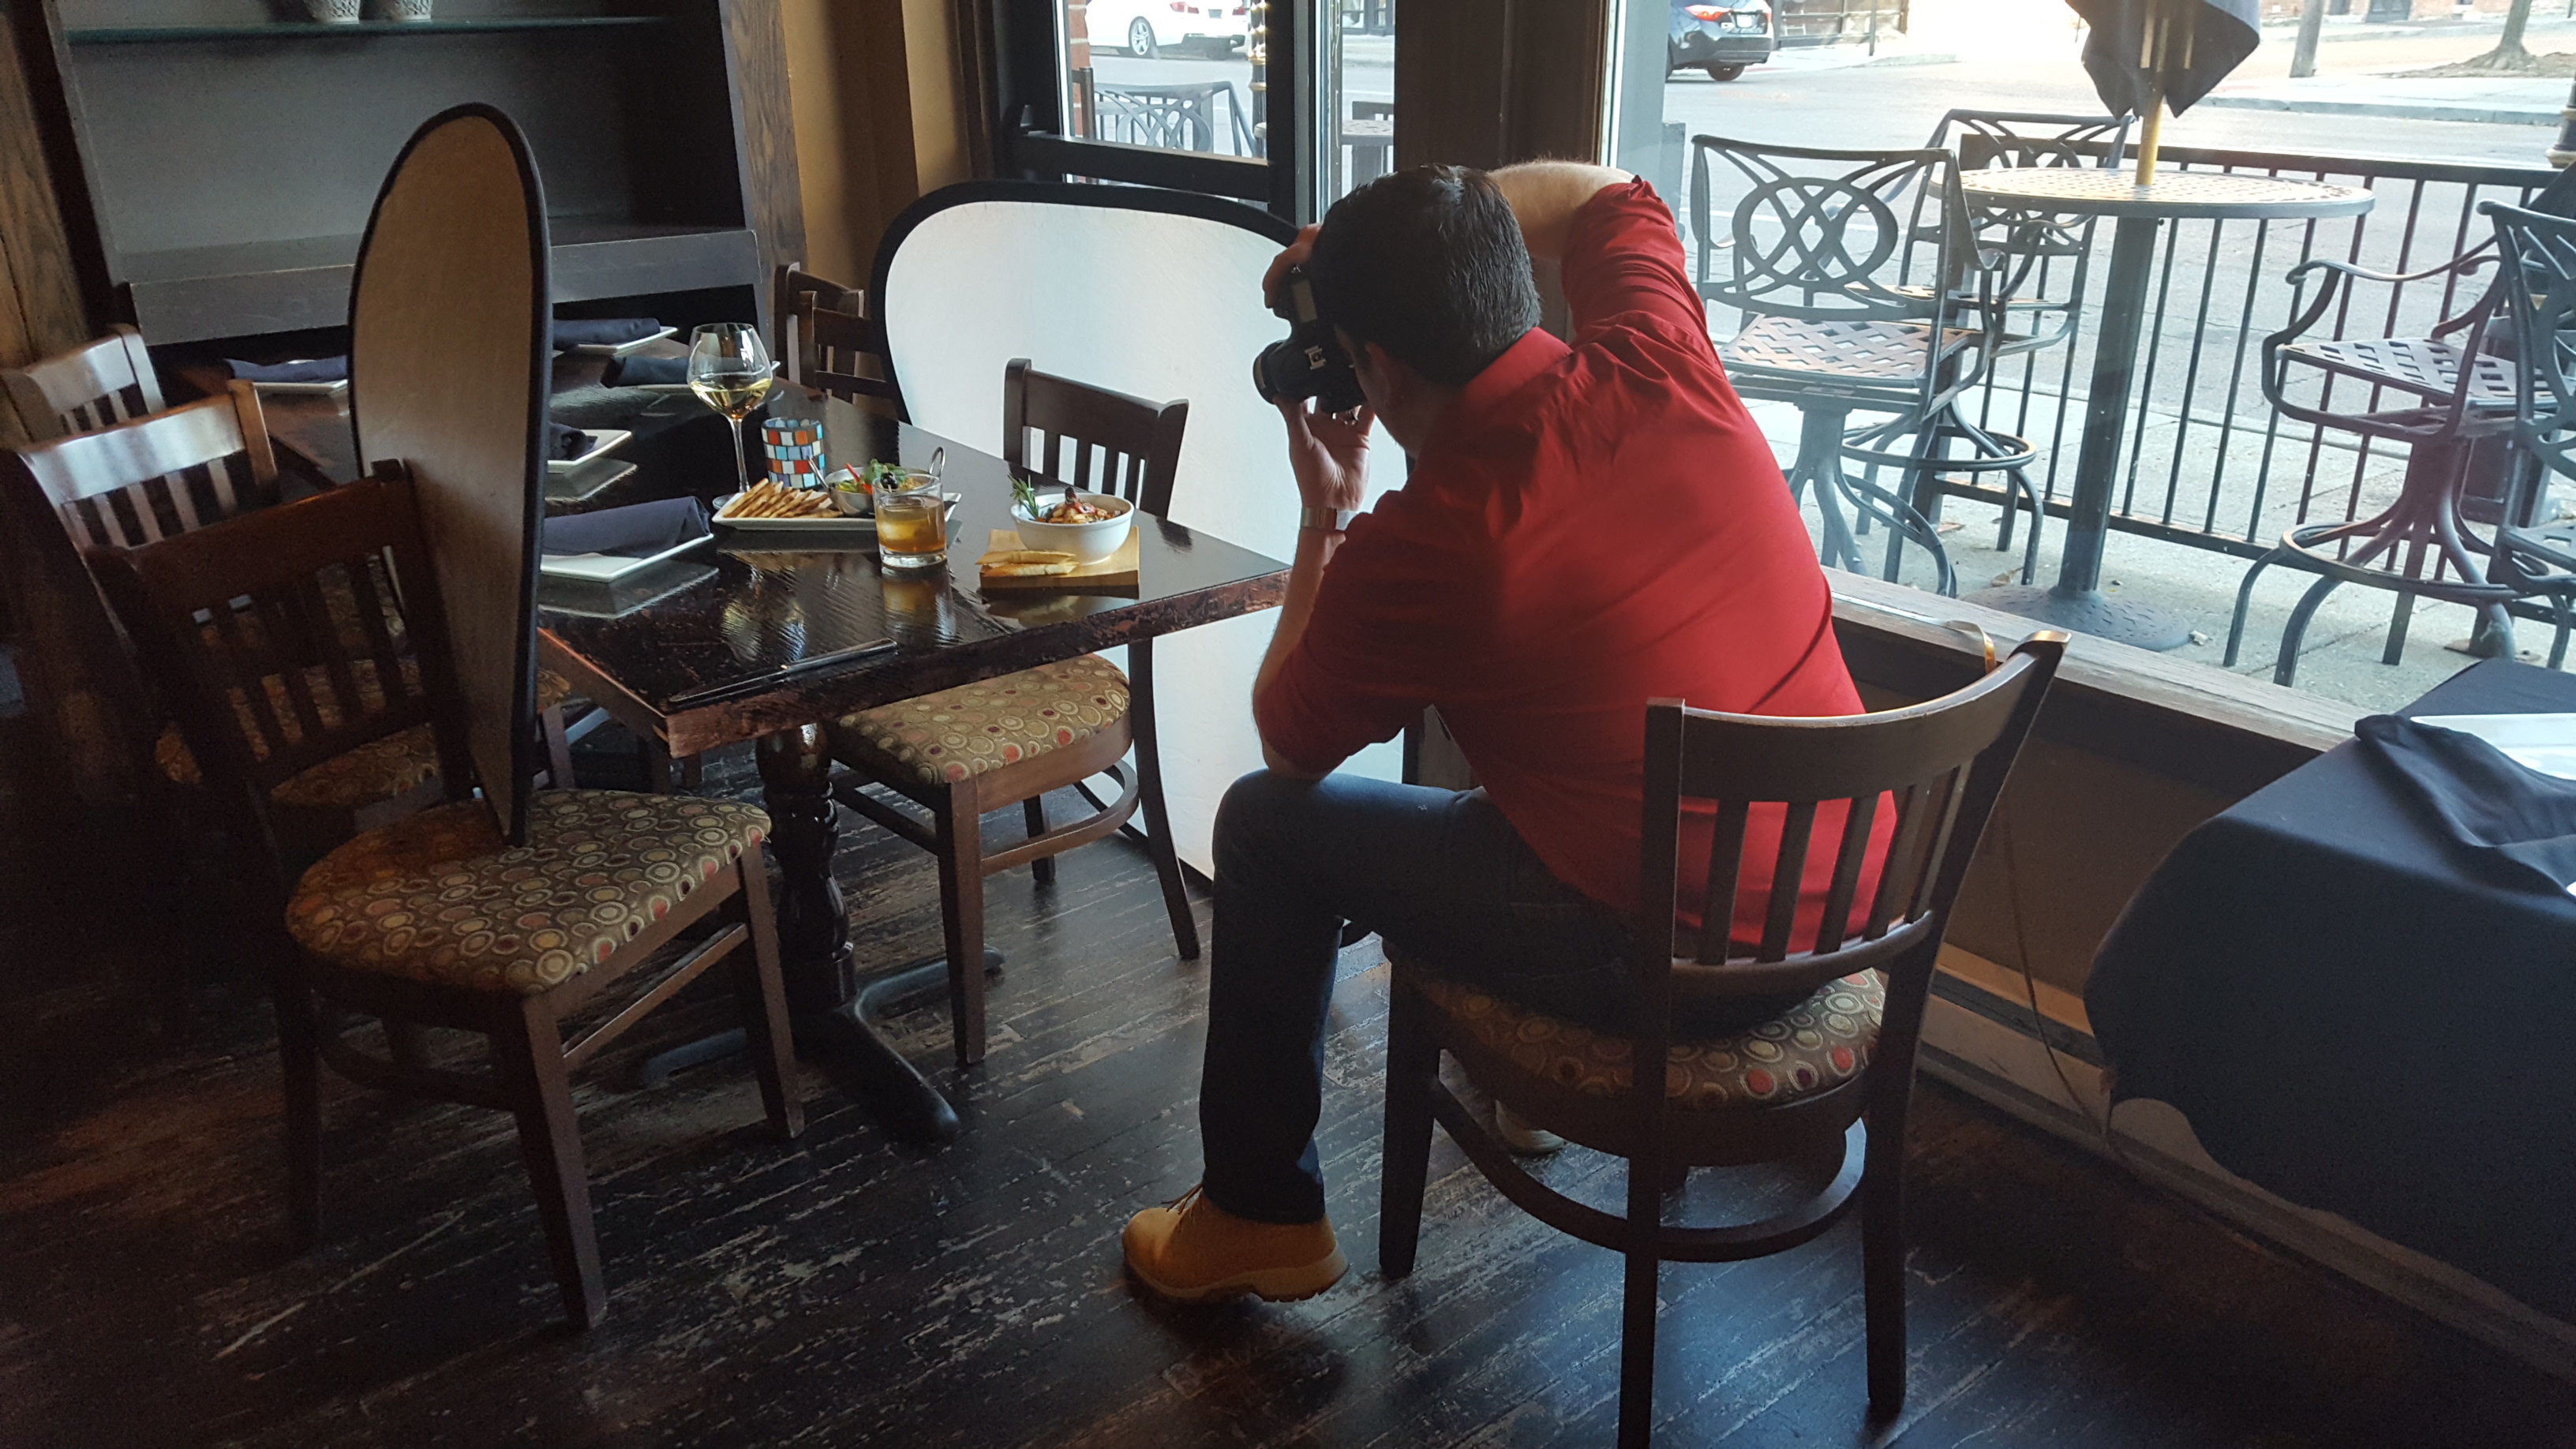
For over a year now, I've been the lead freelance photographer for Stock and Barrel Magazine, a food and beverage publication here in Columbus, Ohio. Often, assignments get thrown my way with not a lot of time to get them done before deadlines hit. That means I get to shoot a lot of places in a very short amount of time. Oh the joys of the print world! In this article, I'm going to share with you how I shoot food on location quickly. No assistants, minimal gear, during business hours, and without pissing off the chef. Let's get started.
Pack Light
When I say minimal gear, I mean it. When working on location at a restaurant, the last thing I want to do is disrupt their day-to-day operations. So I pack light. How light? Like really light. Here's my go-to kit when shooting jobs like this:
- Nikon D800
- Nikon Nikkor 55mm f/3.5
- Manfrotto tripod
- 5-in-1 reflector
- Wescott Diffuser from an old set that I lost the reflector side to years ago.
That's it. Really, I don't have a need for much else.
What about speedlights and modifiers, you ask? I've got plenty of those. Sure, I could use them, but the fastest way to annoy a paying customer is with the constant flashing of a speedlight while they're trying to enjoy their salmon en croûte. So I tend to leave them at the studio. Besides, taking in lights and setting them up and breaking them down takes time. Not a ton of time, but time nonetheless. If I do end up packing any lighting, 99.9 percent of the time it stays in the car, and then I wonder why the hell did I pack them at all in the first place.
I digress.
Find and Shape That Light
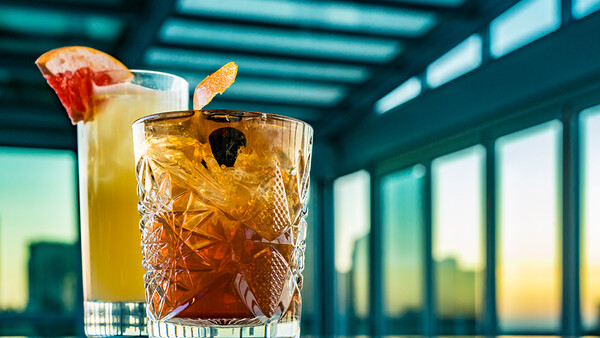
The reason I pack so light is because it's so easy to find enough decent light for a plate of food at a restaurant. Find a window and you've got some light. Don't have a window? Take the dish outside. No place outside? I've shot food in the back of my SUV by opening up the aperture, blurring the background, and shooting tight. Remember, I often don't have a ton of time to get these shots done, so staging an elaborate scene isn't a luxury I get to enjoy on shoots like this. Find the light, arrange as necessary, and if all else fails, crop in tight in camera to really focus on the food.
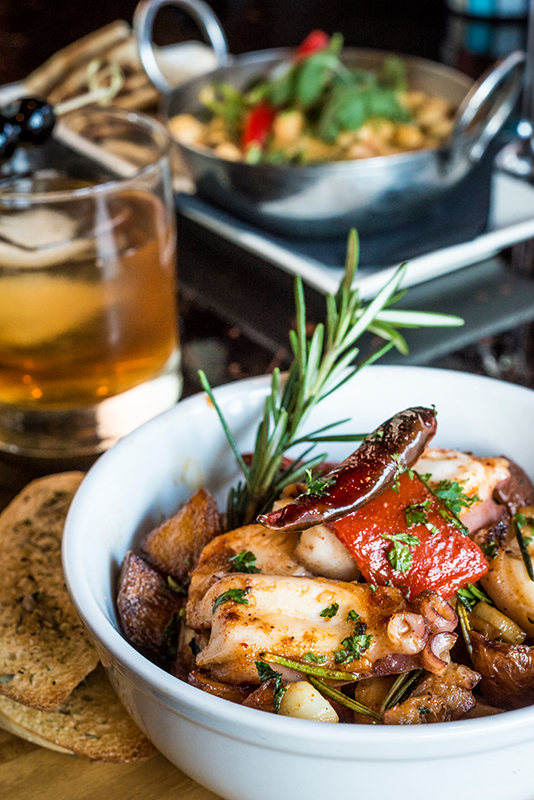
Once you find the light, it's time to shape it. Food likes hard light, but not by itself and not from the front. You're going to want the light to come from the side, almost behind the plate. Then, use a fill card or bounce to fill in the shadows. For my fill cards, I use the lowest tech and cheapest piece of equipment I carry: a sheet of white paper. Take that sheet of paper, fold it in half, and boom, you have a perfectly-sized fill card that will stand on its own. If you forgot your trusty sheet of paper, no worries. Take one of the menus at the restaurant and prop it up with a glass of water. Sometimes, I'll use a larger reflector as a overall fill for the scene, and the sheet of paper up close to the food to draw out the shadows.
Lens Choice
The majority of my food shots are with an older Nikon Nikkor 55mm f/3.5. I absolutely love this little guy. He's an all-manual lens with 1:2 magnification. I like using this 55mm over my 105mm f/2.8 macro because I can get in super tight and have more of the scene in the background than I do with the 105mm. The best part about this lens is that I picked it up at a camera swap for a mere $35. My ROI on this thing is ridiculous.
There is a newer Nikon Micro-NIKKOR 55mm f/2.8 you can pick up at B&H, but the faster glass wouldn't do me much good since I don't like to shoot food at that shallow of a depth of field. I like to shoot around f/5.6–f/16 when shooting food up close and personal. Too shallow you just don't get enough texture out of the food. Too much depth of field, and then you really got to start to worry about more elements in the scene. Which takes us to styling...
Styling
I know all too well the importance of a food stylist. The problem here is that there's no time, and really, no budget to have a stylist come along. So you're at the mercy of however the chef plates the dish.
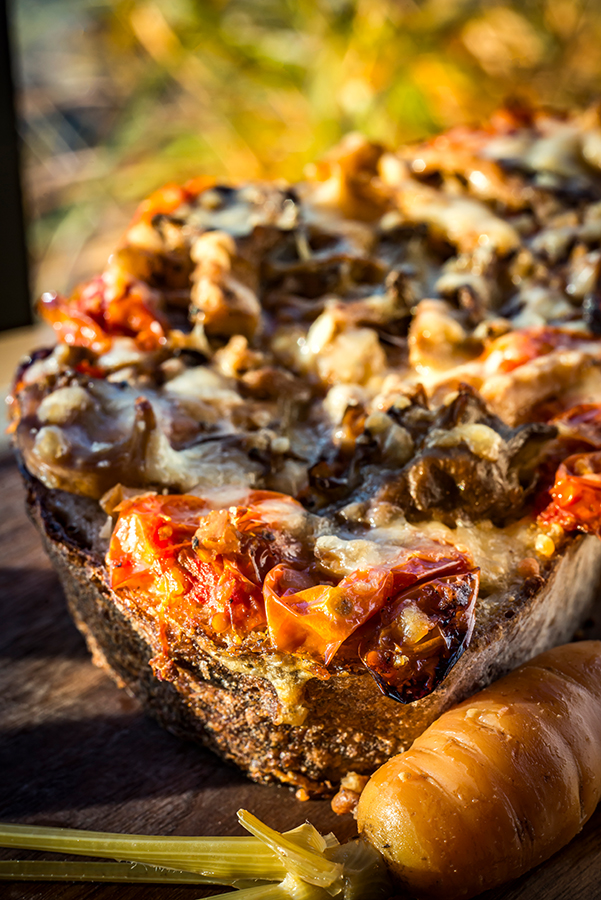
Now, I'm going to let you in on a little secret: plating food for your eyes to eat is a lot different than plating food for the camera. It's not the chef's fault; he or she wasn't trained to plate for the camera. The camera sees the dish from a different vantage point and magnification than your eyes do. This is why I shoot tight with a macro. Out of four sides to a dish, I can find at least one that looks fantastic and exploit the crap out of it. Shooting tight and with a shallow enough (not wide open) depth of field means that I don't have to worry too much about the rest of the dish. As long as the camera-facing side looks good, the rest of the dish will follow.
Not Pissing Off the Chef or the Waitstaff
Do not, under any circumstance, try to shoot this type of thing during lunch or dinner service. You want the plate to look the best possible, and you're not going to get that while the kitchen is in the weeds. Trust me, the whole restaurant will automatically think you're the bomb just by coming in between lunch and dinner service. The last and best thing I do when on assignments like these is to thank the chef and the waitstaff before I leave, and always always, always put my shooting area back in order the best I can. Little things like that will go a long way the next time you visit.
How about you? What tips can you share about shooting food on location?

Join the Fstoppers community for free
-
Post comments and join in the discussions
-
Browse the site ad-free
-
Share your work and get featured in the community
-
Compete in the photo contests for fun and prizes
18 Comments
I have a similar approach to shooting food on location and your approach to keeping lighting natural and very simple with a focus on the food and composition is a total win. Tinfoil is an easy to find cheap and moldable reflector. I would add to always think about where you want the viewer to focus in the photo, and use this as your focus point.
Great tip! Foil is a great on the fly reflector in a pinch. Doesn't have to be expensive so long as it gets the job done.
I take a similar set up when I do these shoots, but one thing I've found invaluable are those little fold up steps for toddlers, the little plastic ones that fold flat and are around the size of an A4 sheet of paper when folded up in some magical origami like pattern. I find LOTS if not all of my clients will want at least one 'top down' shot these days – and it's nothing but rude to get up on a restaurant's chair to get that top down angle. Those steps are fantastic, they don't give a massive amount of extra height BUT the are better than standing on tip toes and shooting loads of frames hoping one works out right.
Yea, stepping on restaurant chairs is frowned upon, a foldable stool is a great tip, thanks Jonathan!
I wish articles like this would include basics in regards to billing structure. I dont care about what you charge, just interested if if this is a per assignment rate (i'm assuming), IE crank it out fast as possible to meet clients expectations to make more profit per hour on your end. Only way I can really see a benefit to stripping a kit down this light unless you are shooting yourself in the foot.
The benefit is speed, as indicated in the post title. Different shoots call for different kits - this isn't the only way I photograph food on location, but it is the fastest. And when you're under a tight deadline, speed matters.
So this is getting billed as a flat rate then?
Every magazine or media shoot I have done is flat rate. You get an offer with a budget and you accept or decline. Occasionally you may be able to negotiate a travel fee if there are on a tight deadline or your skills are unique to your area, but usually no. If you are shooting for magazines, delivery apps, or other travel media you will need to keep you kit light to execute the shoot without taking over the restaurant and interfering with their business. On the upside full light kits for me do not add much vs sunlight. Its only when shooting for the restaurant itself, a catering company, or a culinary school that a more complicated kit is even an option, and I price those shoots as a regular commercial shoot based on the actual hours involved.
Agreed
Phenomenal article! Kudos to you Tommy and thank you.
Thanks, more to come! =]
This is very similar to the way I work. I'm on a full time contract with a large hospitality company to shoot everything they need for 40+ venues. I'm often shooting 3/4 menus/cocktails/hotels etc a week.
Generally when I go to shoot food I have 15+ dishes come out, as well as hungry restaurant staff waiting to try them once I'm done. I tend to set up one light, as very rarely do I have decent natural light (not just because I work in Scotland), and a table set up for a couple of settings. I'll quickly shoot a few angles of each dish and then swap it out for the next one. It's not perfect, but it gets the job done quickly!
I usually travel by train/bus to the different locations so packing light is key. I've recently invested in a Roundflash diffuser, which means where I used to carry a large softbox, brackets etc, I can now strap a lightstand to my backpack and pop in the roundflash and have 1 easy to carry bag. Albeit quite heavy.
My setup is similar as well. I usually need a speed light though as there is often not enough window light to play with or its already dark out (in winter months). Traveling light and working fast in a small area is key for sure. As far as plating food I have the chef do it the way he/she likes and do ask if there is a side he/she prefers. But move it as needed. Funny story. I asked a chef once if he liked how I was shooting a plate and he said it didn't matter that is won't look like that next time he did it. He then added, "my work all turns to shit anyway," as he smiled.
Lolololol
I can't stop thinking about what Chef said to you! Totally sounds like what a chef would say!!!
BTW, did 4 shoots in a matter of 3 hours using the exact same kit. Deadlines...I'm tellin ya! Just got the shot list this morning.
Great article, thanks, Tommy. I love shooting with natural light too - doesn't frighten the horses !! So I really appreciate what you're sharing with us.
Only suggestion I can think of that might occasionally help, is using a PCE - the 50 or the 85. The choice is a question of personal preference/style, in my case I use the 85 (but to be truthful, I couldn't afford all three and wanted the 24 more than the 50). They can be very useful, using the tilt function, to get pretty well all of what's on a plate tack sharp, and blur the rest of the field of view. A bit like riding a bicycle - but once you get used to them, they aren't difficult.
Love tilt shift lenses, and I'd really like to get my hands on a used one eventually. If anyone out there has one they're interested in parting with, let me know!