
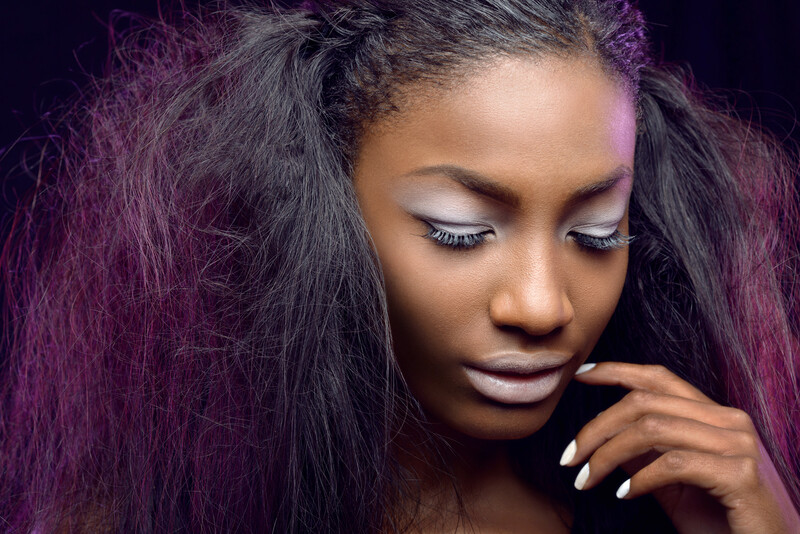
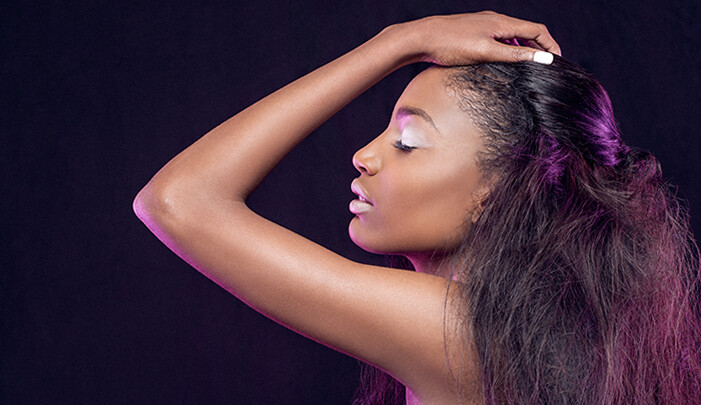
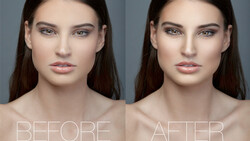
Having a process is one of the most essential keys to success in art, design, and photography. In this tutorial we will look at what to do after we have completed all of the major changes to our portrait retouch. In the beginning of our retouching we will commonly address larger issues like blemishes, distractions, tone smoothing, dodging and burning, and color corrections. But, after completing the major steps of our retouch, what are the finalizing steps in our process? Let's take a look at the five final steps you should follow before completing any portrait retouch.
1.) Color Toning
The first step in our five final steps is color toning. There is no one right way of color toning your image. I almost always use "Selective Color" when color toning in Adobe Photoshop, but other methods like Curves and Gradient Map can work just as well. Each has its own strengths and weaknesses. You are also not limited to only using one method. I would encourage you to even trying stacking multiple Gradient Maps with different blending modes or even a Gradient Map with a Selective Color layer. Using adjustment layers though is key. By working non-destructively, you have the option of trying multiple methods and adjusting the opacity of those effects without permanently affecting your image. In the video tutorial above I use a Selective Color adjustment layer and only work on the blacks channel. Generally though, I work on the whites, neutrals, and blacks. I should also add that Color Toning is not a completely necessary step, there are times where I skip this step all together. If you are shooting for a particular product that your model is wearing, the client may want colors to remain very natural so you might elect to skip this step.
2.) Value Adjustments
Step two is the final adjustment to the value information in the image. Most likely up to this point, you have used Levels and Curves on your image, but now that we are wrapping up our retouch, we want to take one last pass at our Value Adjustments to ensure the image is where we would like it. Often times during a retouch I will have the Levels adjusted to exactly where I want it, but as I continue to work and adjust other aspects of the image, the value and contrast of the image will also adjust with it. In this image and in most instances, I am using a Levels adjustment layer. I am also doing something I don't normally do: altering the mid-point in my levels adjustment. If you do decide to also adjust your mid-point slider, be very light handed. The reason I am adjusting the mid-point instead of the black point is that there is so much information already in the darker areas of my image.
3.) Sharpening
The third step is sharpening. In the video tutorial I mention that you can use other methods like Smart Sharpen and Unsharp Mask. Both of these options are great and can be found under Filters in the menu bar. Before sharpening your image, you will need to create a Stamp Visible layer. A Stamp Visible is simply a layer that represents everything visible in your file. (As a side note, if you have adjustment layers above your stamp visible layer, you need to turn them off while creating the stamp visible. If you don't then it will create the visible layer and then the above adjustment will be applied again.)
After creating the stamp visible, I use frequency separation to do my sharpening. This means creating two copies of the Stamp Visible layer, name one of them "Low" and the other "High." Really you can name them whatever you'd like, but naming them something you will remember makes your workflow a little bit easier. Now on the "Low" layers, apply a Gaussian Blur. Use less blur then you would normally use when sharpening. I used a Pixel Radius of 4 in this image. After blurring the low image, run your "apply image" to the high layer. You can follow these steps:
- Select the "High" Layer.
- Under "Image" in the menu bar, click on Apply Image.
- For Layer choose "Low." For Blending choose Add. Scale choose 2. Check "Invert."
After doing so you can delete the low layer and change the blending mode of the high layer to Linear Light. I would also recommend turning the opacity down on the high layer to sharpen to the specifications that you would like. You can also consider masking in the sharpening on the areas you want to sharpen. I also recommend you err on the side of less sharpening over too much sharpening. If you are doing a perfectly edited skin retouch then you may not need to sharpen very much, if at all.
4.) Adding Noise
Next I am going to add a slight bit of noise to my image. The reasoning behind this is that noise will help blend tones together. Where this is really helpful is when you have banding in your image. Oftentimes while editing and pushing the limitations of your image in post, you will encounter banding. By adding noise to your image, you can help diminish the banding, making for a stronger image and a much stronger print. The method I use for adding noise is creating another Stamp Visible layer and going to Filter > Noise > Add Noise. I usually only add the minimal amount I need to do the job, but if you are going for a particular type of effect or film grain type look, you can choose to add more noise.
5.) Step Away
The fifth and final step is not a Photoshop technique, it's to simply step away. What I mean is don't immediately export your work and ship it out into the world. Save your work, close your computer, and step away. If you are not under a deadline, then leave the image for at least a day and come back with fresh eyes. If you are under a deadline, try to at least build in an hour that you can afford to step away from your computer. Often after working on the same image for a number of hours, our perception can be a little bit skewed. Step away from your work and come back with fresh eyes to make any final adjustments.
In a previous article we looked at how we were able to recover texture into this retouch after it was incorrectly retouched, you can find that article and video here.


Join the Fstoppers community for free
-
Post comments and join in the discussions
-
Browse the site ad-free
-
Share your work and get featured in the community
-
Compete in the photo contests for fun and prizes
17 Comments
Why do you do all the work of frequency separation to sharpen rather than running a High Pass filter with either vivid light or linear light?
Hey Adam, thats a great question. They are both fairly similar and your right that high pass is less steps. Early on in retouching I did use High Pass, but I've found that I like the result from frequency separation just a little bit better. Definitely do what you think works best for you. Thanks for reading and for the question!
plus you can always make an action like I did for the frequency separation. then its one click. well two. press play then choose blur and your done
True but the problem I have with the method being used for sharpening is you lose control of what photoshop is doing. With Apply Image photoshop is selecting the radius at which the texture will be saved. With high pass you get to select the radius. You can get the same look from High Pass as the Freq Seperation by keeping your radius around 2 and then playing with the layer opacity for the preferred amount of sharpening.
apply image selects the radius based on how much blur you added to the low layer.
Also, before doing the high pass filter, you should duplicate the layer and reduce its contrast significantly, as the high pass doesn't get applied to regions close to the ends of the histogram (near-black and near-white areas). Thats one of the reasons for using frequency separation. I usually use unsharp mask on stamp visible layer, skin masked out, because its fast and gives good enough results.
He didnt use FS for blurring skin but for sharpening.
Guess what Wow is? 5 splits with different radiuses.
maybe not noise but gain?
Hey Igor are you referring to dot gain?
*film grain... i misspelled sorry
Ah yes, that makes sense.
Great video!
Super minor time-saving tip: pressing cmd+opt+shift+n creates a new layer with the default options so you don't have to press enter to dismiss the dialog. (If you're going to be changing any options, cmd+shift+n is of course your best bet.)
Thanks Adam. Glad you liked the article and thanks for reading and sharing!
Very good article. Thank you for your hard work and just being helpful.
Thanks Renard, glad you liked the article