
In a world saturated with photography, you have to find ways to stand out. If you are able to put in the extra skill and effort to make something that is unique, it can quickly gain attention. Backlighting is one technique I use to accomplish this. Initially, backlighting seemed like a difficult task. Extra equipment, more work, and setting up stands and lights all made it so intimidating as a new photographer. Now that I am years in, I can honestly say that my backlit shots have captured more attention and sold more jobs than any other one thing in my business. They stop foot traffic at my studio, catch your eye on social media, and constantly are a deciding factor for a lead when booking, because as I hear often, “I have to have a photo like that.”
As intimidating as it might seem if you are new to off-camera flash, a good backlit image isn’t hard to accomplish with some practice. Every situation is different, so I can’t give you an exact how-to for every single photo shoot. I can give you a simple starting point, though, and put you in position to let your creativity run from there!
Choose a Great Location
When I am backlighting an image, my main purpose is to properly expose and capture a stunning background, and then use the backlight to frame my subject and make them the focal point of the image. This makes choosing a worthy location extremely important. In my business, I primarily shoot weddings and engagement sessions. I am usually outdoors, so I am always looking out for the most beautiful landscape, or an interesting landmark of some kind that would make a photo unique. The look of the sky is important as well and always factors into my decision on what location to use. Ultimately, I want to find a scene that would be a beautiful photo on its own, without adding people into it.
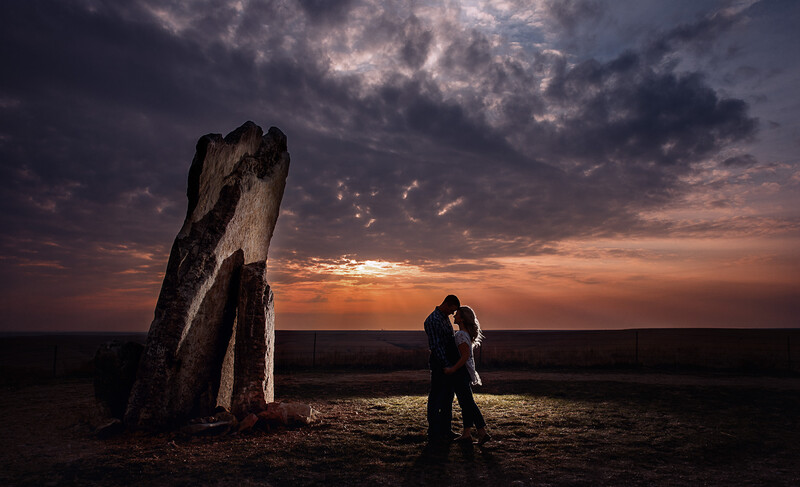
Another thing to keep in mind is the surrounding of your subject. I will often try to position them next to something that the spill of the light can catch. This helps highlight some main points of the scene and I use this method to frame my subjects as well. In the photo below, you can see how I aimed the backlight at the rock to help highlight that piece of the image and make it part of what stands out. Trees, leaves, or structures all can be used to catch some of the light and make the photo more interesting.
Position the Light
After choosing the location, I then place my subject and my light into the scene. First, I position my client exactly where I want them and then place the light directly on the other side of them. Generally, I want the light to be five to ten feet behind them. I either use an assistant or a light stand to hold the light, just below shoulder height. I don’t want the light to cause a distracting glow around their heads, nor do I want the light to come from too low of an angle and cause odd shadows. Positioning the light in a way to where it spills around them, without firing light directly into the camera is one of the keys to nailing this shot.
Start with the Correct Settings
From there it is the process of balancing your natural light with your flash. With so many variables, it is difficult to say where to start with the settings on your flash, but I know more often than not, I need a higher amount of light to make these shots really work. I generally start at a stop or two below full power on my 500-watt strobe. I then expose the scene in camera until it has the look I want. Usually, underexposing the image gives me the dark and dramatic photo that contrasts well with the backlight. If you are new to flash, keep in mind that the shutter speed typically needs to stay at under 1/200 of a second depending on the camera. Because of this, in most situations, I keep the shutter speed at 1/160, the ISO as low as possible, and I lower the aperture (higher number) to expose the scene properly. This is only a starting point, and from here I take a couple of test shots, adjusting my flash’s power up or down until I have the look I am going for.
Perfecting the Shot
This is my basic setup almost every time. With more experience, you will be able to judge quickly how to adjust your camera and light for each situation. From there you are ready to create! Here are a few details to keep in mind to perfect your backlit images:
- Dramatic lighting calls for a dramatic pose. I often will have the couple leaning passionately into each other for a kiss, or doing a dip of some kind to help match the mood of the image.
- One thing I learned quickly is that when shooting couples, leaving a gap between the couple’s bodies often allows the light to come through from between them and can be very distracting. Keep the bodies of the couple as close together as possible.
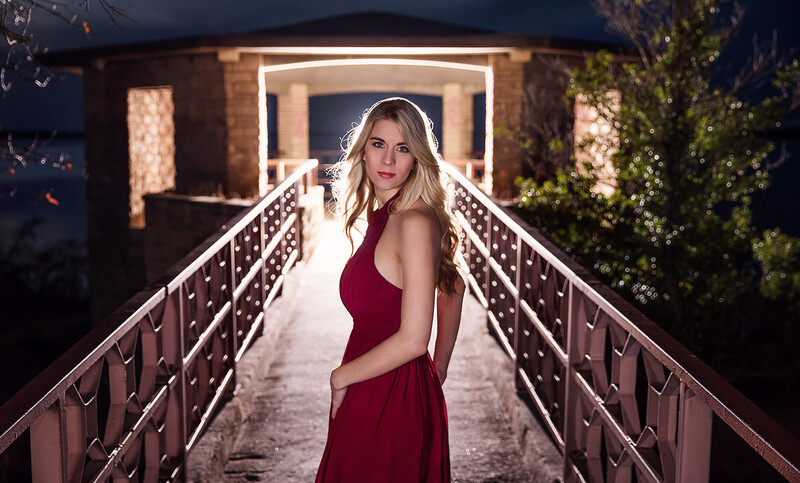
- I’m not overly concerned with the backlight blowing out parts of the photo, such as the subject’s hair. While that is a great rule for most photos, it isn’t as important to me on shots like this. Strong lighting is part of what separates this style from others, and as long as it isn’t overdone, having some blown out hair is part of what this shot entails. The photo above has some blown out hair, but the main details of the photo are still there. In this picture, I used the light to light up the gazebo at night, and then reflected the backlight down the path to frame my subject.
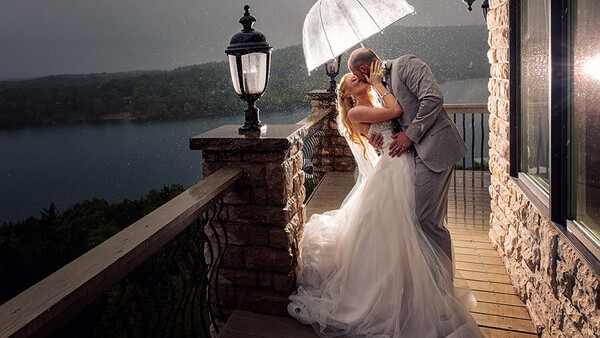
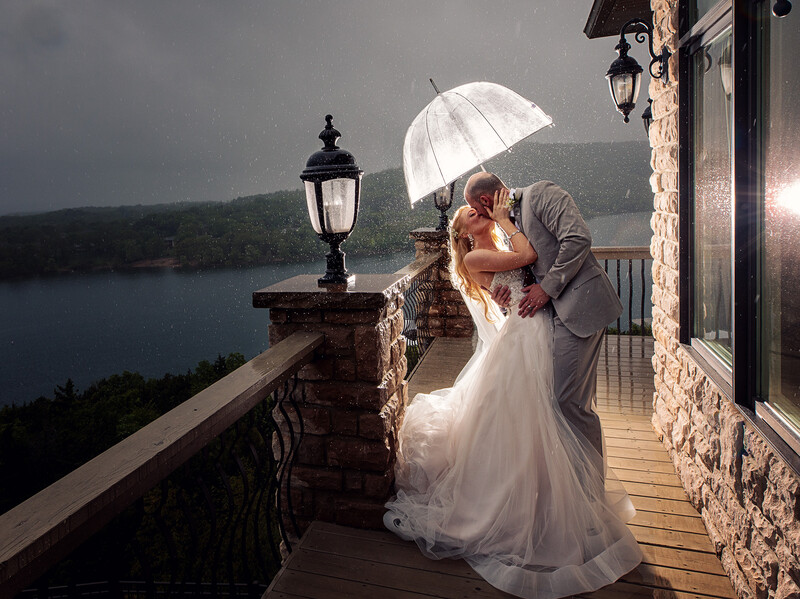
- This technique is great in bad weather. Backlighting is the perfect way to capture things like rain or to add drama on a dreary day. In the photo below, I had limited options for portraits on a cloudy, rainy day. I decided to take advantage of it. The backlight served several purposes here. I used it to be able to darken the background to make it more interesting. It also bounced off the wall, the rail, and the umbrella to frame my subject, and it reflected from the umbrella back on to the couple’s faces to help get them exposed properly in my underexposed shot.
Go Create!
Backlighting, with a little practice, is an easy way to expand your photography skills and to separate you from others. When I decided I wanted to learn how to do this, I first had to invest in a strobe, and there are a number of quality brands out there to choose from. I then made it a goal to make an attempt at backlighting an image at the end of each one of my sessions. Sometimes it worked and sometimes it didn’t. Soon enough, though, I was able to nail the shot consistently. Find the right scene, add a powerful light behind the subject, and you will have something unique for your clients and a stunning photo for your portfolio.


Join the Fstoppers community for free
-
Post comments and join in the discussions
-
Browse the site ad-free
-
Share your work and get featured in the community
-
Compete in the photo contests for fun and prizes
6 Comments
Backlighting is great fun and very easy to make dramatic images that stand out from the crowd. Great write up.
Here's one of mine.
Even when well executed (without extremely blown highlights) it looks fake and corny. It's become a played out wedding trope. IMO.
With this the errant light falloff on the ground between the light and the subject always ends any excitement I could have for these shots.
I think this is great! I agree, using a strong backlight (natural light or flash) can easily create dynamic light and depth in a photo. It is also generally loved by clients from my experience as well. Great examples!
Lovely, i've always wanted to try these shots and now you habe just given me the confidence I needed. Thank you!
But is it everytime I am going to need a very powerful strobe, won't a speedlite be enough sometimes?