
Lightroom offers us many powerful tools to adjust the brightness of some regions of a photograph. In this article, we will find out what the Basic Adjustments and the Tone Curve have in common – and what’s the difference between them.
Drawing With Light, Playing With Data
As most of us know and love to recite, photography in its Greek origins means "drawing with light." Our lens collects light and projects it onto film or a digital sensor. But the journey of light quickly comes to an end after we collected it. From the moment the curtains in front of your sensor close, a new story begins. The story of data.
Editing photographs can hence be described as playing with data. The word "editing" itself roots in French or Latin and originally described as “publishing something” or “giving something out.” Fits into our concept of tweaking the data a little bit before we export our "really_final_edit3_second_revision.jpg" and show it to others (i.e. publish it.) Especially our raw files which need to be cooked before we can proudly share them.
Everything we do between shooting and publishing is rewriting the data of our photograph until it suits us. When we touch a slider in Lightroom, it’ll change the information of a group of pixels in our photograph. Which pixels exactly will be affected is dependent on the tool we use.
Probably you have used the Basic adjustments in Lightroom many times. And maybe, every now and then, you also tried to add a little contrast by creating an S-shaped curve in your Tone Curve? Perfect, because these are probably the most powerful tools in Lightroom. But what is the difference between them?
Recovering Shadows: Basics or Curves?
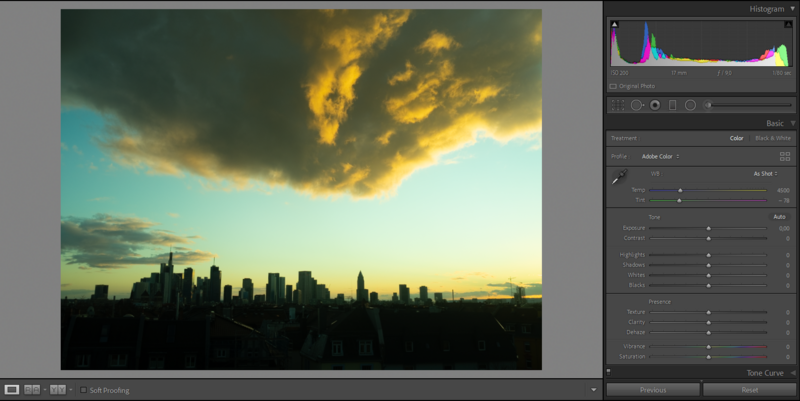
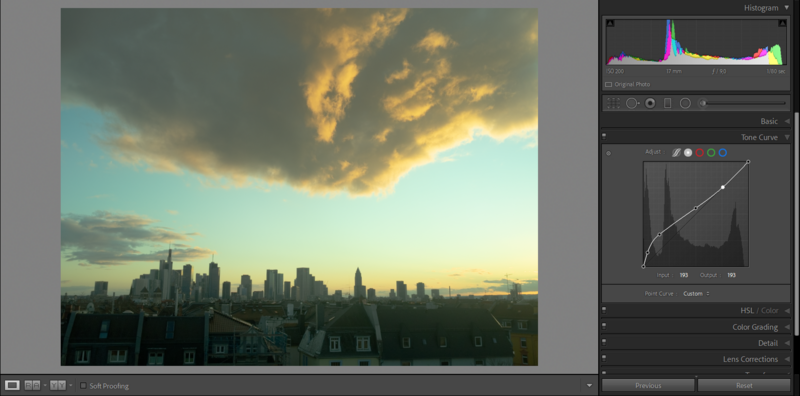
Both of these tools have one thing in common: The curves and the basic adjustments allow us to select certain parts of the photograph and make them brighter or darker. One of the most common adjustments is pushing the dark parts of your picture a little. It’ll make invisible details become visible. Take the image above for example: It’s a promising snapshot, but I couldn’t use a graduated ND-filter when I found the scenery open up in front of me. Hence, the contrast between city and sky is a little strong.
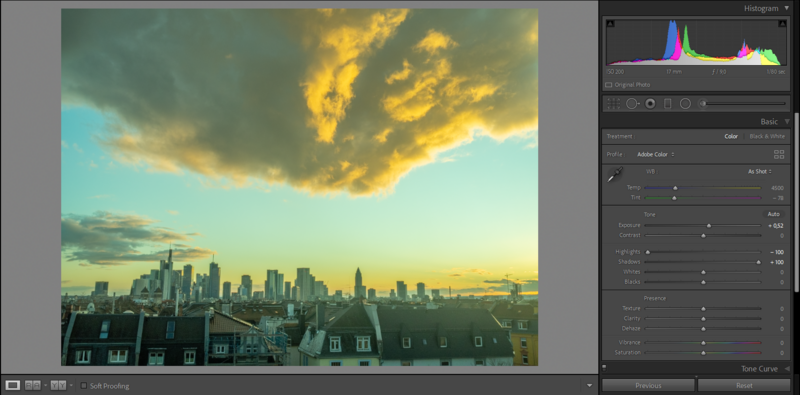
How can we recover it? For the sake of this example, we won’t use a gradient filter, even though it generally is the best choice in situations like this. Instead, we will continue with general adjustments. The Shadows slider of our Basic tab is our best friend in this case. Let’s push it to its limits! While we’re here, we can also get some detail in the sky by lowering the Highlights slider to its minimum.
Although the image still is improvable, the first step is done. Coming back to our initial question: Can we recreate these adjustments by using curves? In the Curves panel, we can find sliders for shadows, darks, lights, and highlights. Surprisingly, when we make the same adjustments here, the result is rather disappointing.
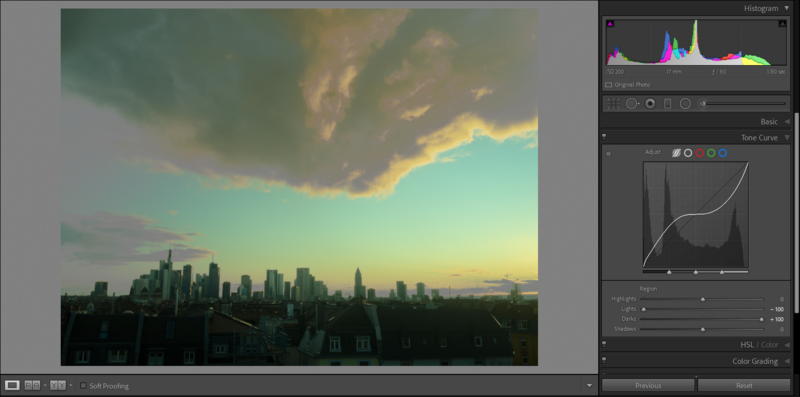
Yuck! Let’s try to fix it by manually adjusting the curves. It’s impossible. Even if we tried our best to push the shadows, the image won’t look as natural as it does when we tweak it with the Basic panel. I didn’t get it closer than below.
If both tools can make darker pixels brighter and brighter pixels darker, then why do the results look so different?
Shades of Gray: Curves and Basic Adjustments
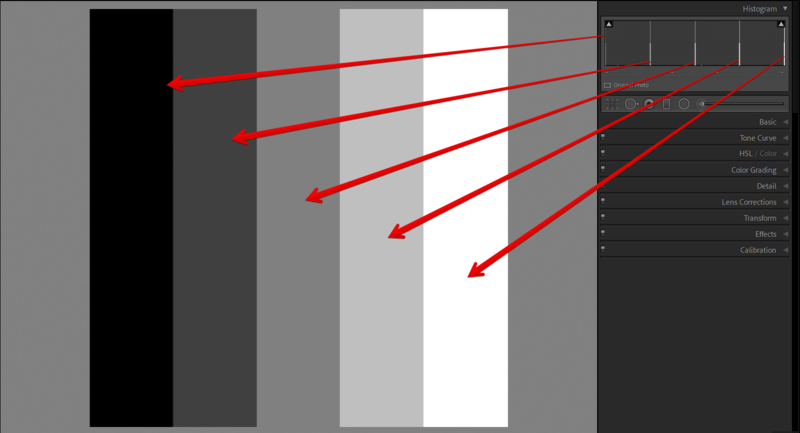
To demonstrate the effect of the sliders, it’s helpful to import a very limited picture without colors into Lightroom. Let’s simplify it to only five basic shades: black, dark gray, 50% gray, light gray, and white. It helps us understand what’s going on and we can easily read the histogram.
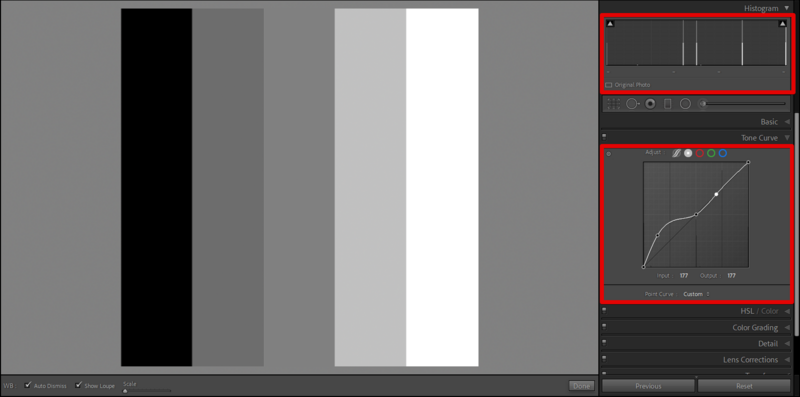
Each of these vertical stripes also appears in the histogram as a thin pillar of light. Now, let’s take a look at what happens when we adjust the curves. By pushing the area of the shadows in the curves diagram, we only affect the dark gray area. Make sure you set an anchor in the middle of the curves as well, otherwise your adjustments will affect the whole image. We can also see the effect in the histogram: The dark gray pillar moved towards the middle.
Before I learned about the differences between curves and basic adjustments, I always thought that the basic sliders do the same job as the curves do – just for lazy people. How wrong I was can be clearly demonstrated when we use our gray image and push the Shadows slider to its maximum. Well, that’s interesting.
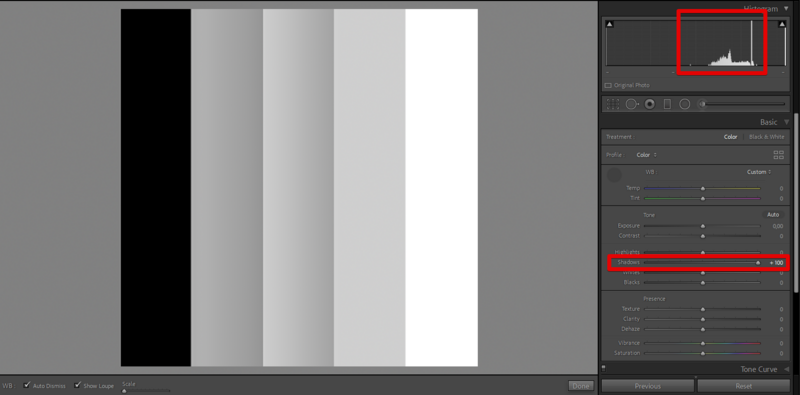
What happened here? The image looks quite different now. Two of the solid gray areas turned into gradients.
The magic behind the basic adjustments is called “local adaption.” Curves don’t care for the content. Curves don’t care about local contrast. They only care about every single pixel's information. If a pixel is dark gray, it will be altered. No matter the collateral damage.
The basic adjustment is smarter. It looks at local contrasts. Instead of changing the darker gray to 50% gray, Lightroom understood that there is a contrast between the dark gray and 50% gray that needs to be retained and emphasized. Hence, the overall brightness of the areas was increased, but not evenly. Some parts became light and some parts became lighter. this way, the transition between one area and the next is still emphasized. This is why the houses and skyscrapers above showed more detail when we recovered the shadows by using basic adjustments.
Basic Panel and Curves Panel: When to Use Each
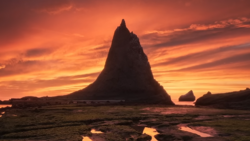
Are the rough adjustments of the Curves panel useless then? No way. Let's take another (again underexposed) photograph and give it a proper edit.
Here you can see some straightforward adjustments. When photographing the scenery, I didn’t want the white spray to end up in a white mess. There was no light on the rocks, so I had to underexpose them to retain detail in the bright parts. Well, no problem for our basic sliders, is it?

By using the basic adjustments, we can recover, darken, and brighten specific areas. Lightroom will take care that we don’t lose the detail within them. Curves, however, can give our photograph the finishing touch. This is the reason, why the curves are placed after the local adjustments.
A little content-unaware contrast can make a photograph look a little more punchy and vibrant. In this case, I also used a technique that is quite popular for photographs used in social media: By cutting off all the black parts of the image I added a film look to the whole photograph.
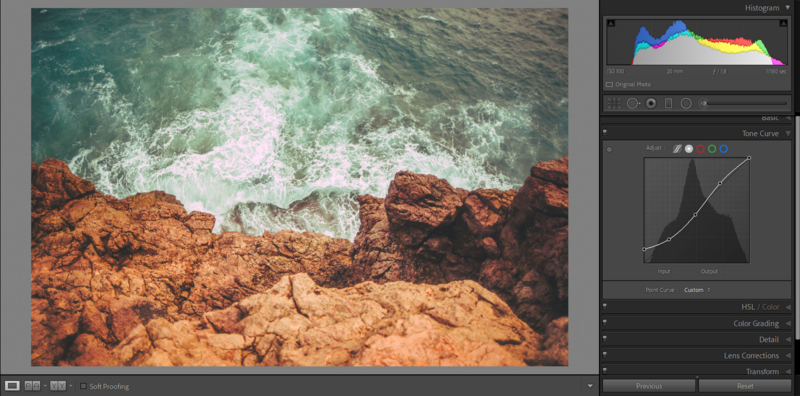
Try the Curves Tool More Often
As we have seen, every tool in Lightroom has its own pros and cons. Most of the time, we won’t get out of making basic adjustments to our raw files to make them look natural at least. Beyond the basics, we can also create supernatural effects and styles by playing around with the curves. They even help us change the colors of the image. By adjusting the curves of a certain color channel, you can even do a little color grading. I have added some green/aqua in the water and some yellow/orange on the rocks.
In the beginning, it’s all try and error, so have fun playing around!

Join the Fstoppers community for free
-
Post comments and join in the discussions
-
Browse the site ad-free
-
Share your work and get featured in the community
-
Compete in the photo contests for fun and prizes
4 Comments
It would be nice to see some articles like this using darktable and/or other free programs out there.
I use Nik Silver Efex Pro 2 (not sure what it is called nowadays or even if it is still available). It has several presets built in and you simply change the layer in Photoshop from Normal to Luminosity to get the color back. You also can adjust the opacity of the layer. The plug-in also has many controls that allow changes to be made to the presets before application.
"Before I learned about the differences between curves and basic adjustments, I always thought that the basic sliders do the same job as the curves do – just for lazy people."
Thank you for making me feel much less lazy today :D (From a person who always felt guilty for mostly using the basic sliders and not the curves because I thought I was being lazy!!!)
Those curves look too intimidating, don't they? Honestly, I usually still don't touch them unless it's a really promising photograph :D