Retouching skin is about detail and patience. It can be a real time consuming and can require a high level of precision to keep the natural aspect of an image. Each of us has a different style of editing and our tastes differ. However when giving retouching lessons many photographers ask me about skin texture and how to keep it looking as natural as possible.
This is not a simple answer as it is mostly a combination of elements. In this article I have combined the five things I see most photographers do wrong or too much when looking for a believable skin texture and look.
Lower Frequency to Clean Texture Problems
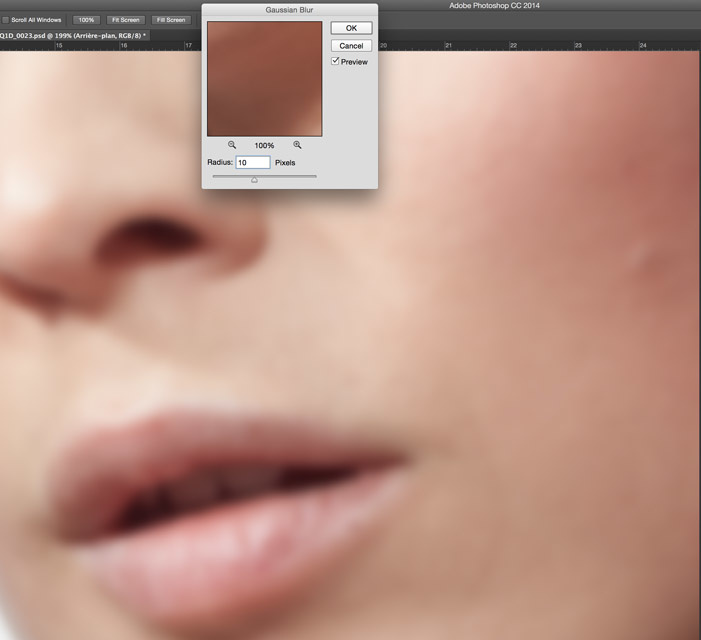
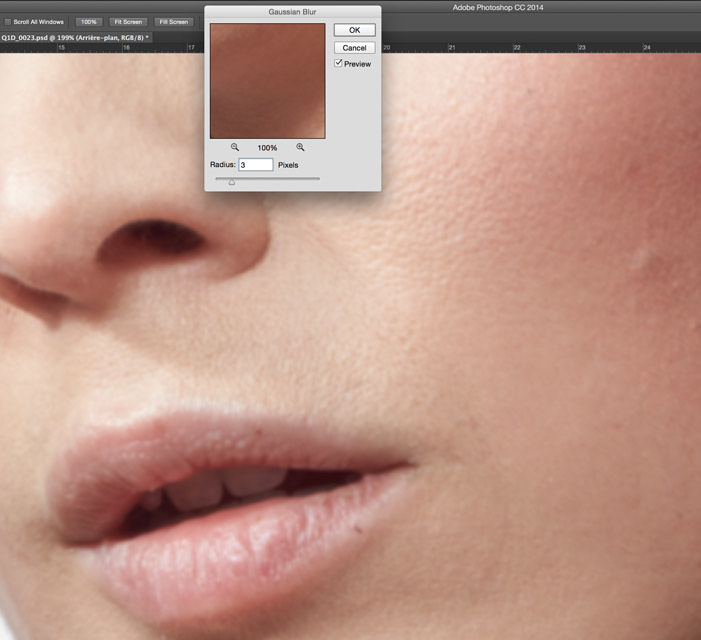
Using frequency separation to clean the skin has become something really popular in the last few years. It allows you to separate colors from the texture of an image in order to process them separately. If you haven’t heard of it before, take a few minutes to read Julia’s article about it. This technique can do wonders in very little time if used correctly. However many people will either setup too high of a radius when creating the blurred layer (color) or will try to cleaning everything and anything using only the lower frequency layer (color).
It is really important for the best result possible to use each frequency for its purpose. The texture – high – layer should not have any color for the area you intend to correct and the color – low – layer should retain as little details as possible. Some beginners might be tempted to use too low of a radius and then blur areas of the lower frequency to clean up the skin quickly. However this is only a time saver if you are not seeking a high level of quality or a natural looking skin. Choosing your radius properly is very important in order to keep only colors in the low frequency layer and then being able to work the texture separately.

Base image with no retouch

Correct radius

Radius too small
Dodge & Burn While Being Zoomed in Too Much
Dodging and burning is probably the standard amongst high end retouchers to clean up skin. It takes a lot of time and requires some practice to get good results. However, when mastered this technique allows you to keep the texture of your image while just shifting the luminosity of local areas (be careful though, it might shift colors as well which will then need correction too).
The problem with this technique is because it requires some degree of precision, photographers and retouchers tend to zoom way too much into the image to work. You are better off editing with the image zoomed out. Do most of your dodging and burning zoomed out and then zoom in only to work the small details that really need some fne work. Keep in mind, in most pictures a few remaining imperfections are what will keep your picture – and retouching – natural and believable. Smaller details that you cannot cleanup while working zoomed out might not be so troublesome in the end if you aim for a natural looking image.
Working this way will also make you clean only the areas that are really visible to most people and in turn will save you time. Who wouldn't want to save time in their workflow? Editing only what people really see is one quick solution to saving time in post and shooting more.

Too zoomed in

Correct view allowing to see the whole image
Heavy Handed Contouring
Contouring is a technique that has been used by makeup artists for a long time – learn more about contouring in my previous article. Most retouchers also use it nowadays. It allows you to reshape the face using shadows and highlights. Most likely you will be using dodging and burning to apply contouring to a portrait. So the tips described above will work for this too. However this is not all. When contouring, many photographers and retouchers tend to be really heavy handed. This might be a desired look for some, but if you want a more natural look, heavy contouring is definitely not the way to go!
To get great result when contouring, I would first advise you to work with a graphic tablet such as a Wacom Intuos Pro. This will let you mimic the gestures makeup artists do when using brushes. Also try using very low opacity and flow in order to build up the intensity. We do the same when doing makeup on a model. We apply a little bit of product and add more if needed. This gives a much better result than applying too much and then trying to remove it. When you think you are done with contouring, try lowering the opacity of your contouring layer(s) in order to check that you weren't too heavy handed. Too strong of a contouring will give a very “plastic” look to someone’s skin, especially if the picture is seen on a small screen – on smartphones for example.

Contouring too strong

Lighter contouring for a more believable look
Soft Clone Stamp Tool on High Frequency Layer
Getting back to frequency separation, let’s talk a bit about the high frequency layer otherwise known as the texture layer. It is great for cleaning up skin texture problems like small spots or irregular skin pore texture. The problem with the high frequency layer is most people do not adapt the clone stamp tool hardness depending on the depth of field of the image. Using too hard of a stamp on a zone that is out of focus will most likely result in a very bizarre looking skin texture. Same goes if using too soft of a stamp tool on a sharp zone. It is very important to adapt the hardness depending on the zone. Sometimes on out of focus areas what you think is a texture problem might actually be a color problem, so be sure to look at both frequencies before using the high frequency layer for no reason.
Another trick to keep in mind is that you can create different frequency separation for different zones. It is not rare for me to have a different separation for hair, than for the face or the body. These three areas will most likely have different amount of details and for that reason might require different level of separation.

Soft clone stamp tool

Hard clone stamp tool for "sharper" result
Not Using the Right Technique for the Job
There is no right or wrong in retouching as long as the result pleases your client, but there are better suited tools and techniques than others. When it comes down to skin retouching, if you master dodging and burning as well as frequency separation, you can most likely correct every problem that might appear on a picture. Each has its very own purpose and some issues will be easier to remove with one or the other.
It takes time to understand which technique is best suited for what situations. When this is crystal clear in your mind your retouching skills will sky rocket! This is the biggest issue I see beginners having, knowing what to use and when to use it. Once they get a grasp of dodging and burning basics, then understand what frequency separation can be useful for, their images become suddenly much better and their retouching time is cut in half – if not more.
Wrap Up
To get a natural but yet clean skin look, it is all about not going too far when retouching. Also keep in mind that a certain degree of imperfection is needed to maintain a natural look, because after all who really is perfect?


Thanks for this!
I'd like some clarification: for the first example, both examples show the use of a "correct radius"? Is there a benchmark to determine when you've slid the blur too far? Thanks, great article!
I normally blur till I cant see any texture at a 100% zoomed in. Hopefully, this helps.
Not my invention btw. Just cant remember who exactly I got that from.
Yeah, I was assuming that's a typo... the second one should be INcorrect... right?
My bad… like Joe said the second one is meant to be incorrect because the radius shown is way to small. We can clearly still see pores and lips texture. I just edited the typo ;)
Thanks everyone! And great article, Quentin!
This was a very well done article.
Excellent tips! I just started using frequency separation, and this helps a lot. I love seeing articles like this on fstoppers!
The link...take a few minutes to read "Julia’s article about it.", is dead. If your going to make a reference link within the article perhaps it would be more useful if it actually took you to the reference you considered important to put there.
The time you spent griping about this point you probably could've figured out that the link is just missing the : after the https. Took me 2 seconds to get to the correct link.
https://fstoppers.com/post-production/ultimate-guide-frequency-separatio...
For some reason the http:// had lost the ":" along the way. I just corrected it.
Please dont get me wrong... good article!
Great tips! Especially for newbies.
Agree with most of these..
Thank you
Finally, a great article about Retouching. I follow retoucher Bianca Carosio a lot. I feel she follows this kind of aesthetic, it really shows in her quality of work!