

Almost all portrait photographers will incorporate some degree of skin softening during their retouching workflow. Some of these techniques can involve hours of painstaking dodging and burning. For photographers that routinely shoot families, weddings, and newborns, a quick finishing step can generate rapid and pleasing results. Here I go over how to use my favorite free skin softening plugin.
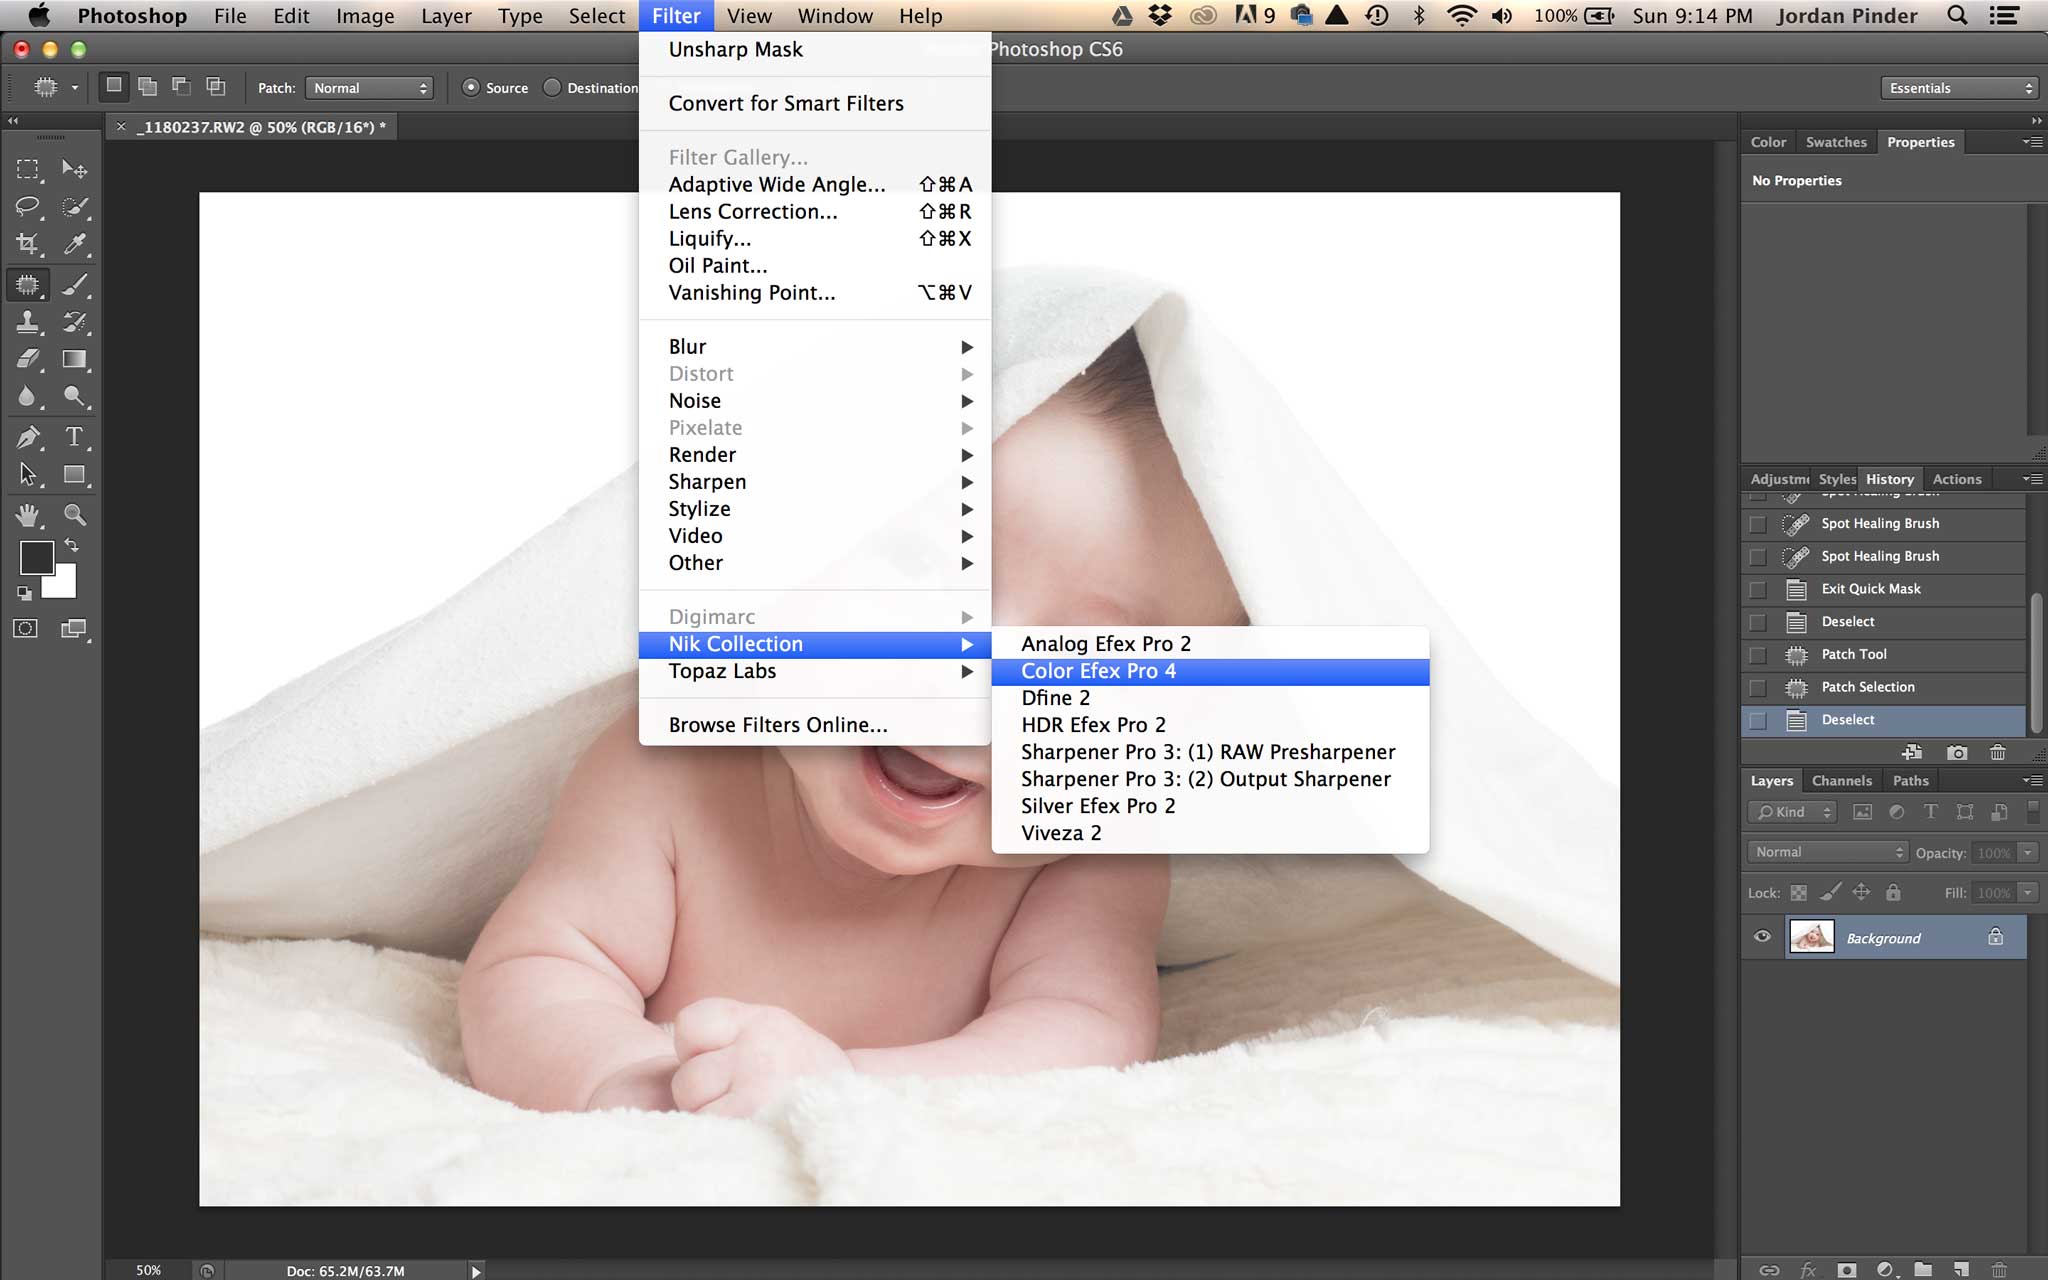
The skin softening filter is called the Dynamic Skin Softener, and is buried within the extensive list of filters of the Nik Color Efex Pro 4 editing software. The Nik Color Efex Pro 4 software was made available for free as part of the Nik Collection in 2016, and can be downloaded here. The software can be used as a standalone application, or as a plugin within Lightroom or Photoshop.
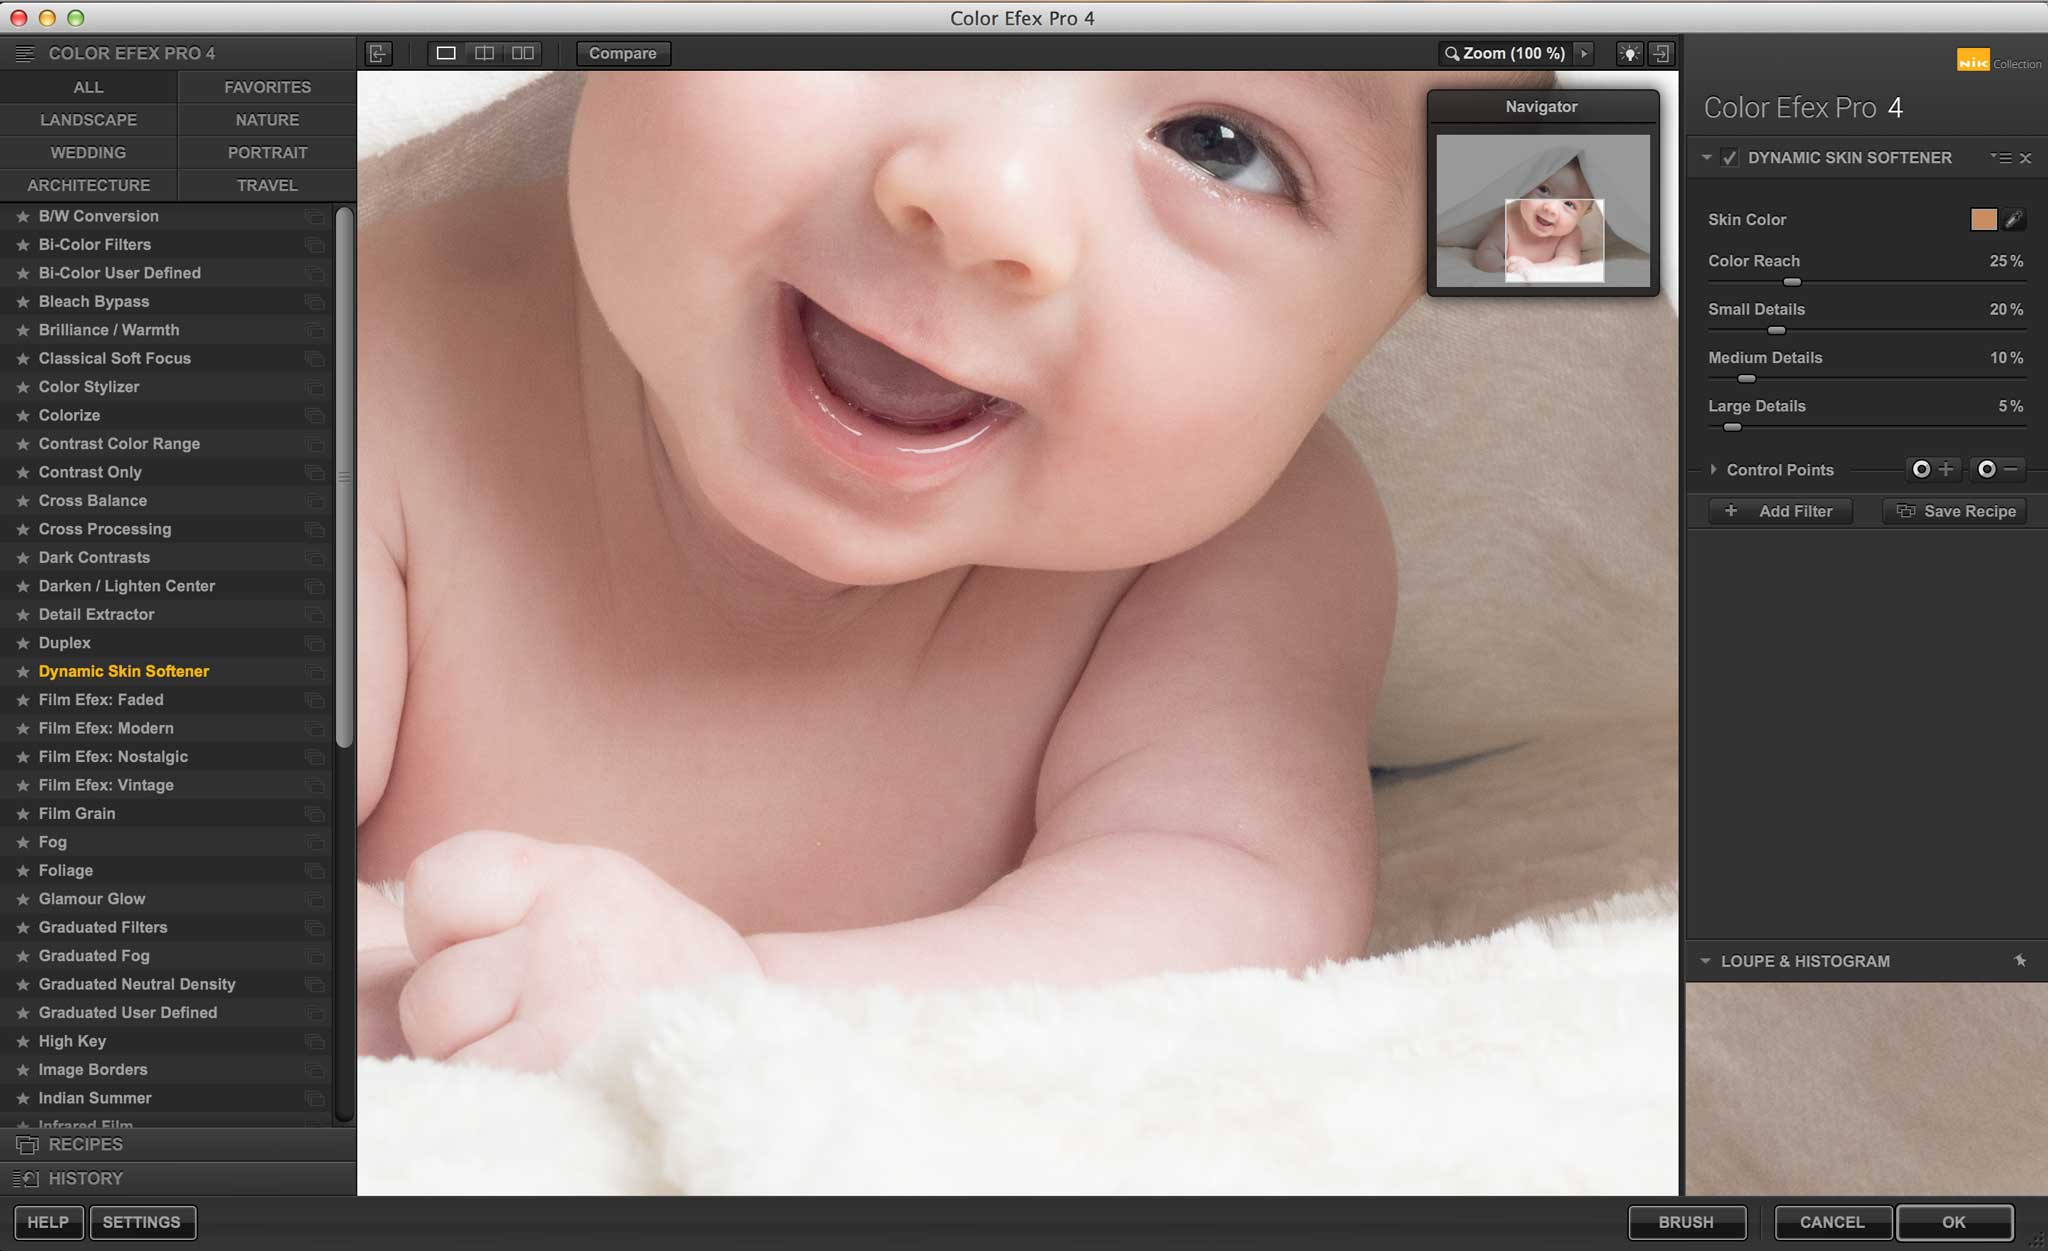
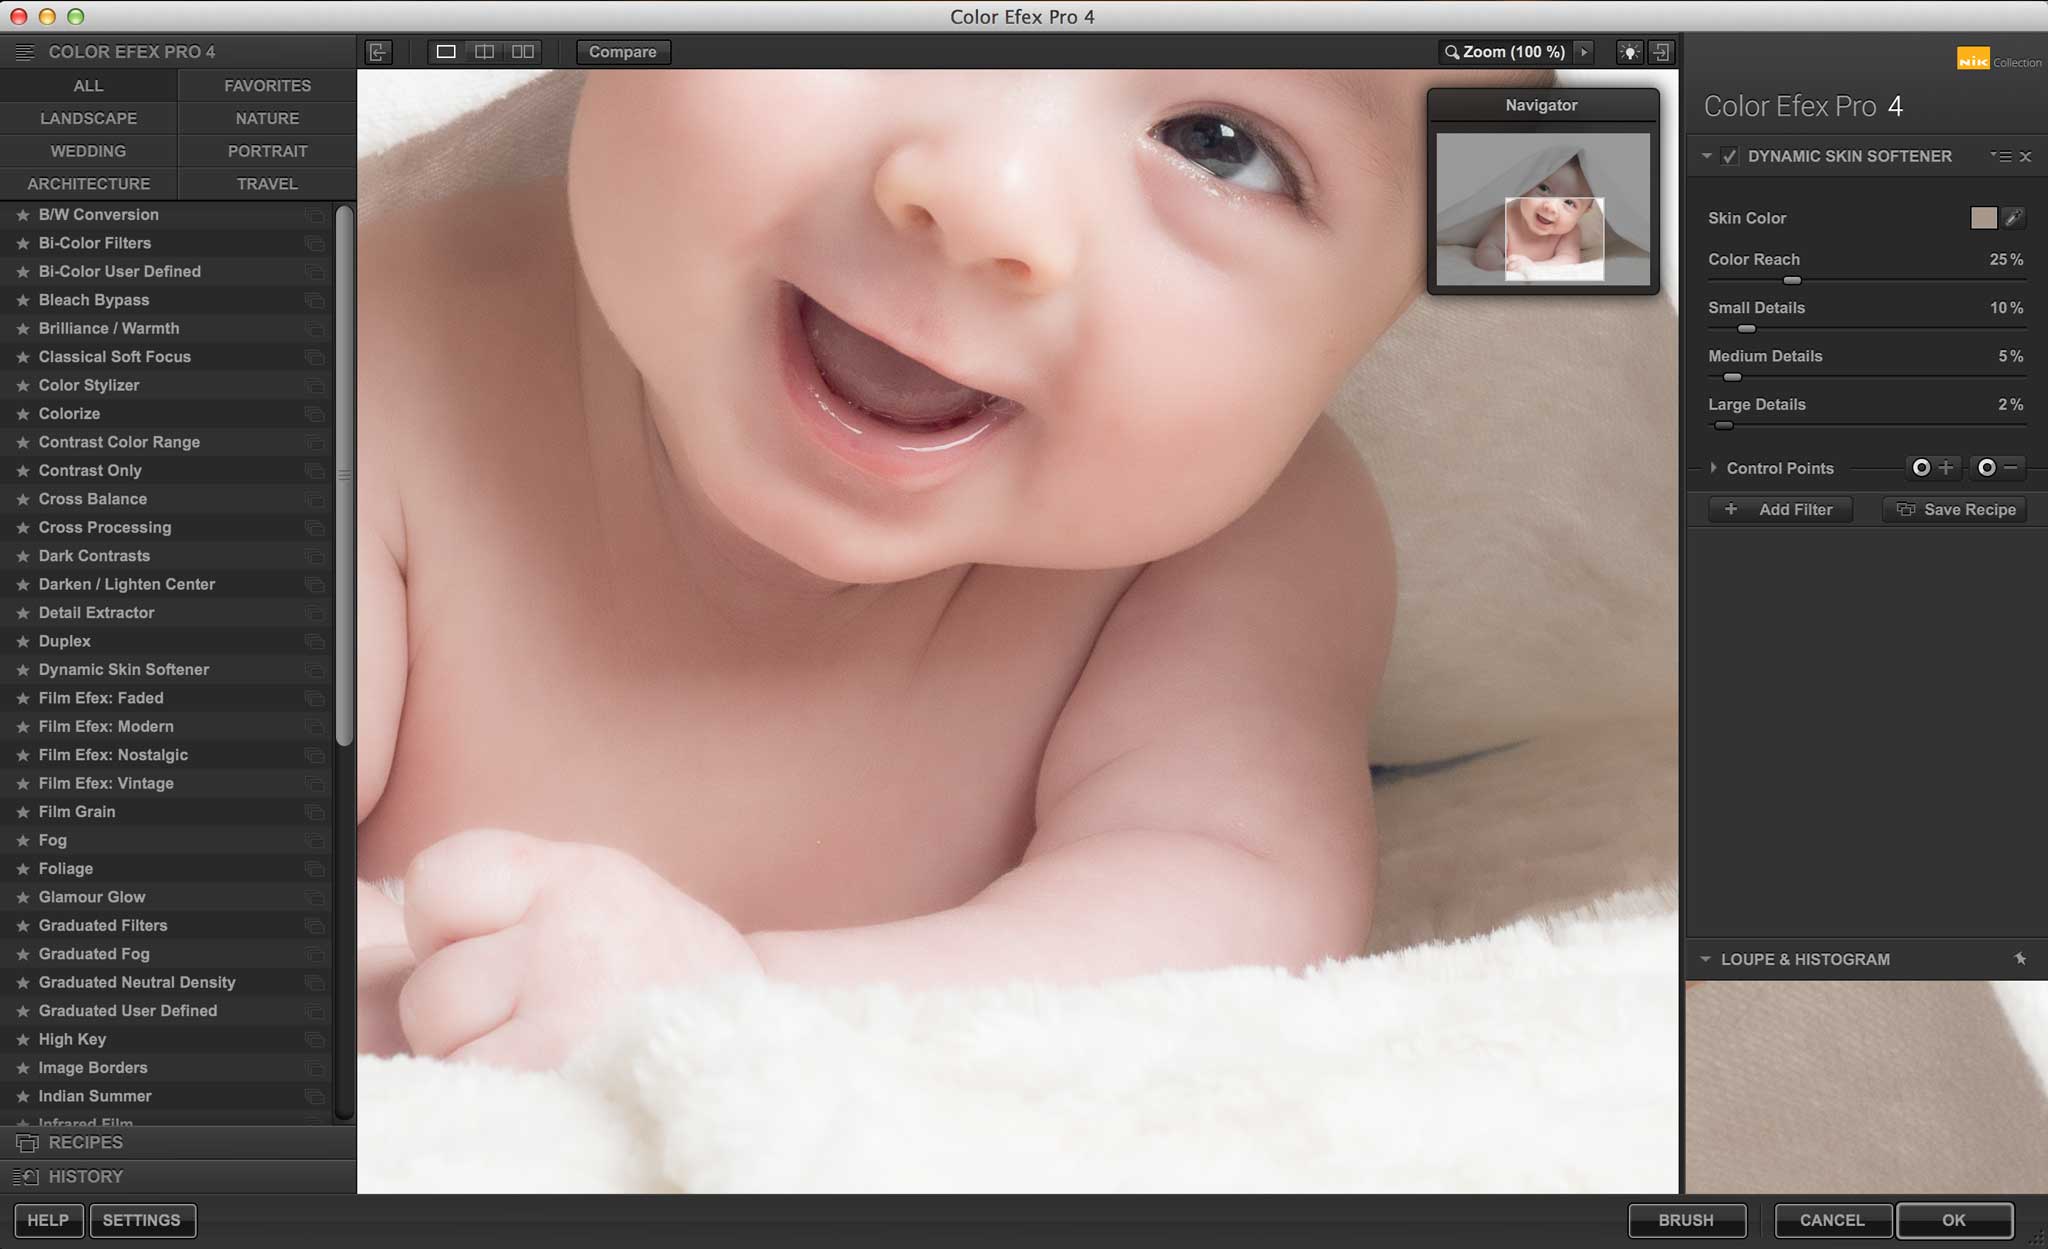
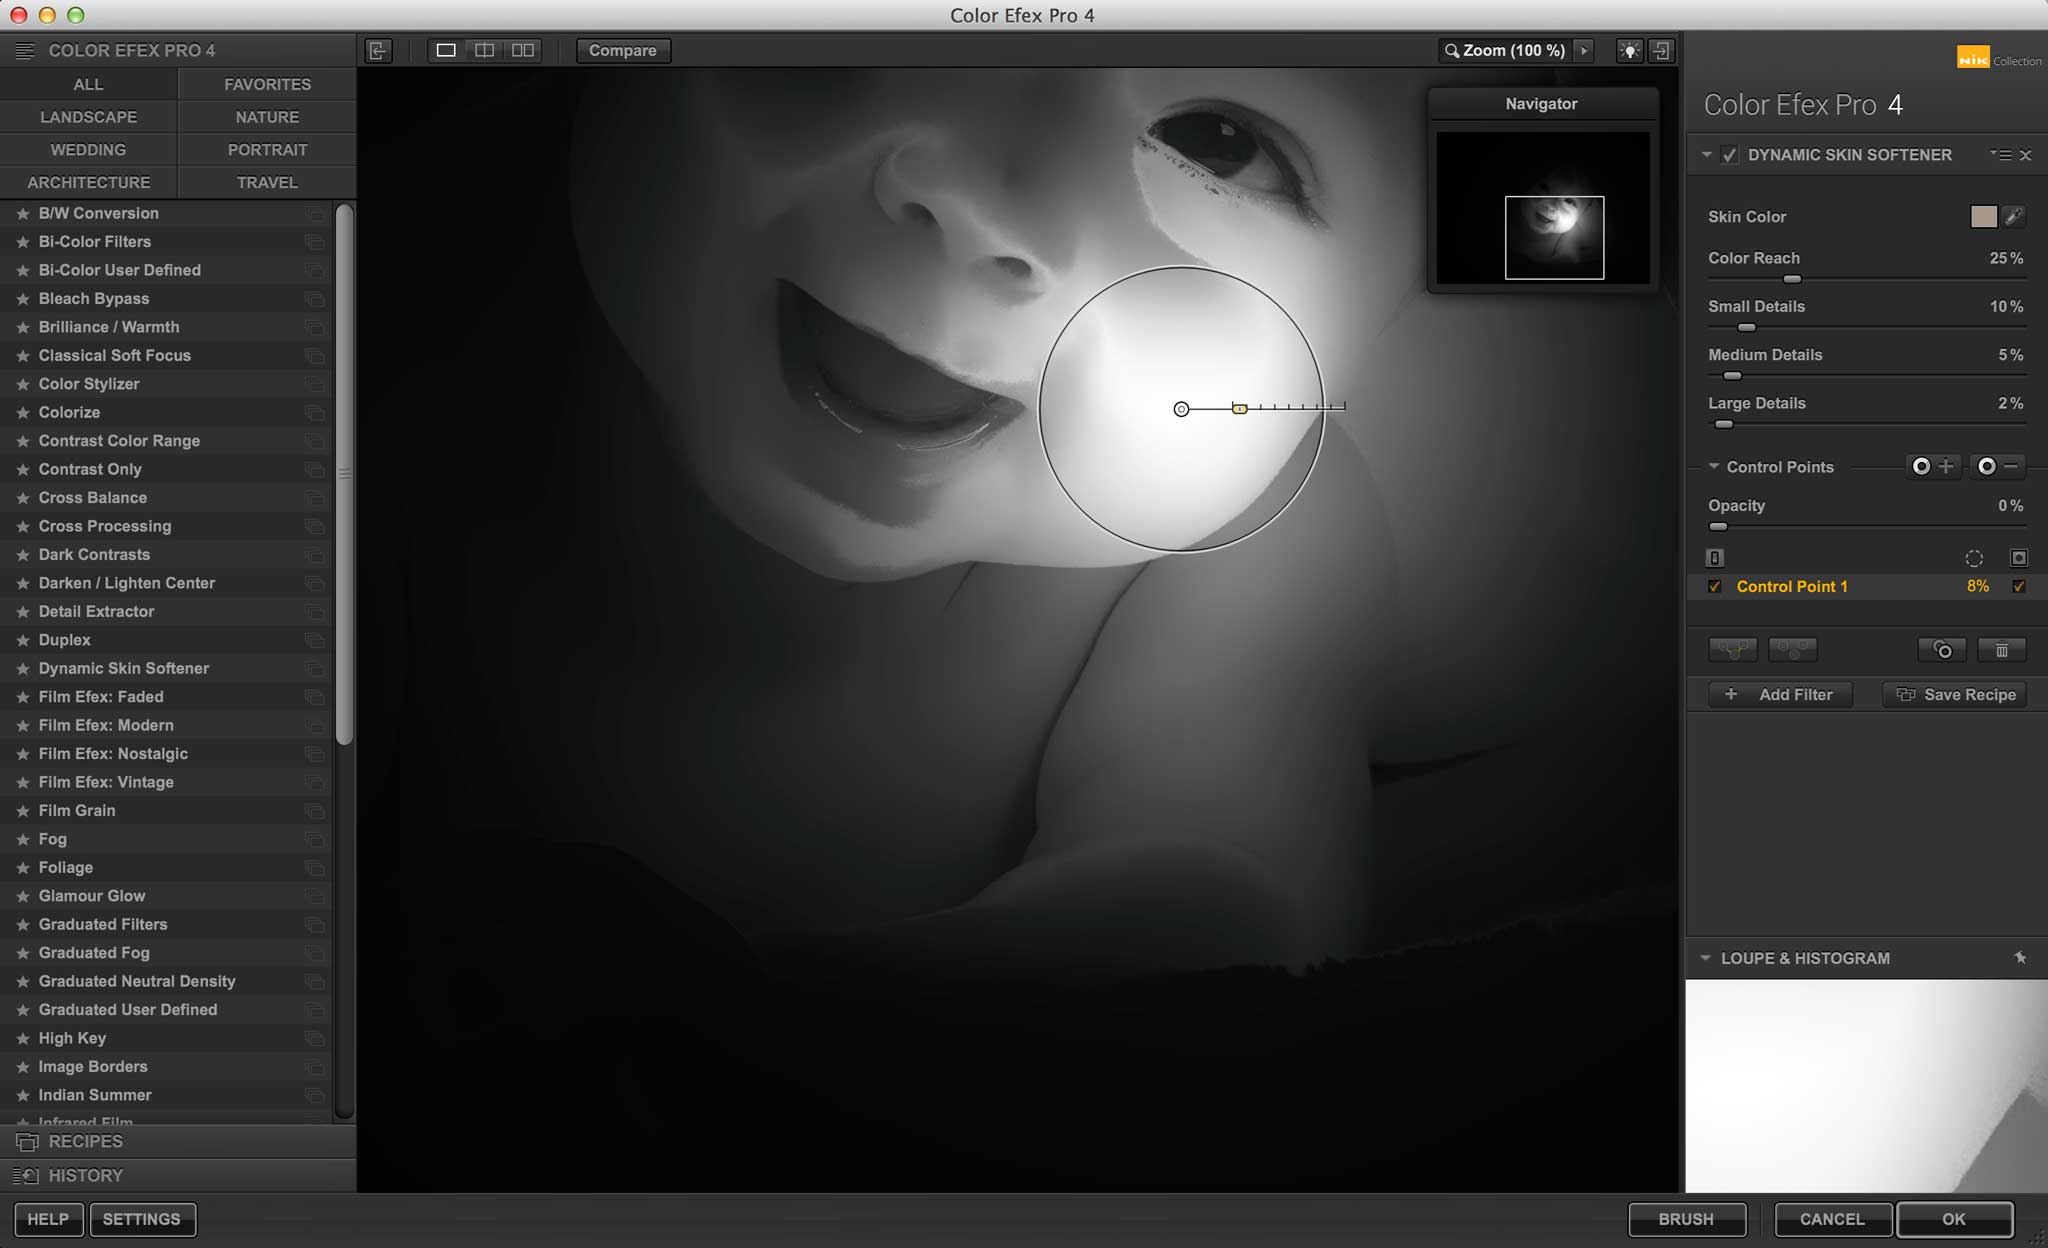
The Dynamic Skin Softener performs skin softening with a single click, and the built-in controls enable the fine-tuning of both the degree of softening and the area of the image to which softening is applied. The filters can be stacked, so that different settings can be applied to different regions of the image. This is useful for images containing people with different skin tones.
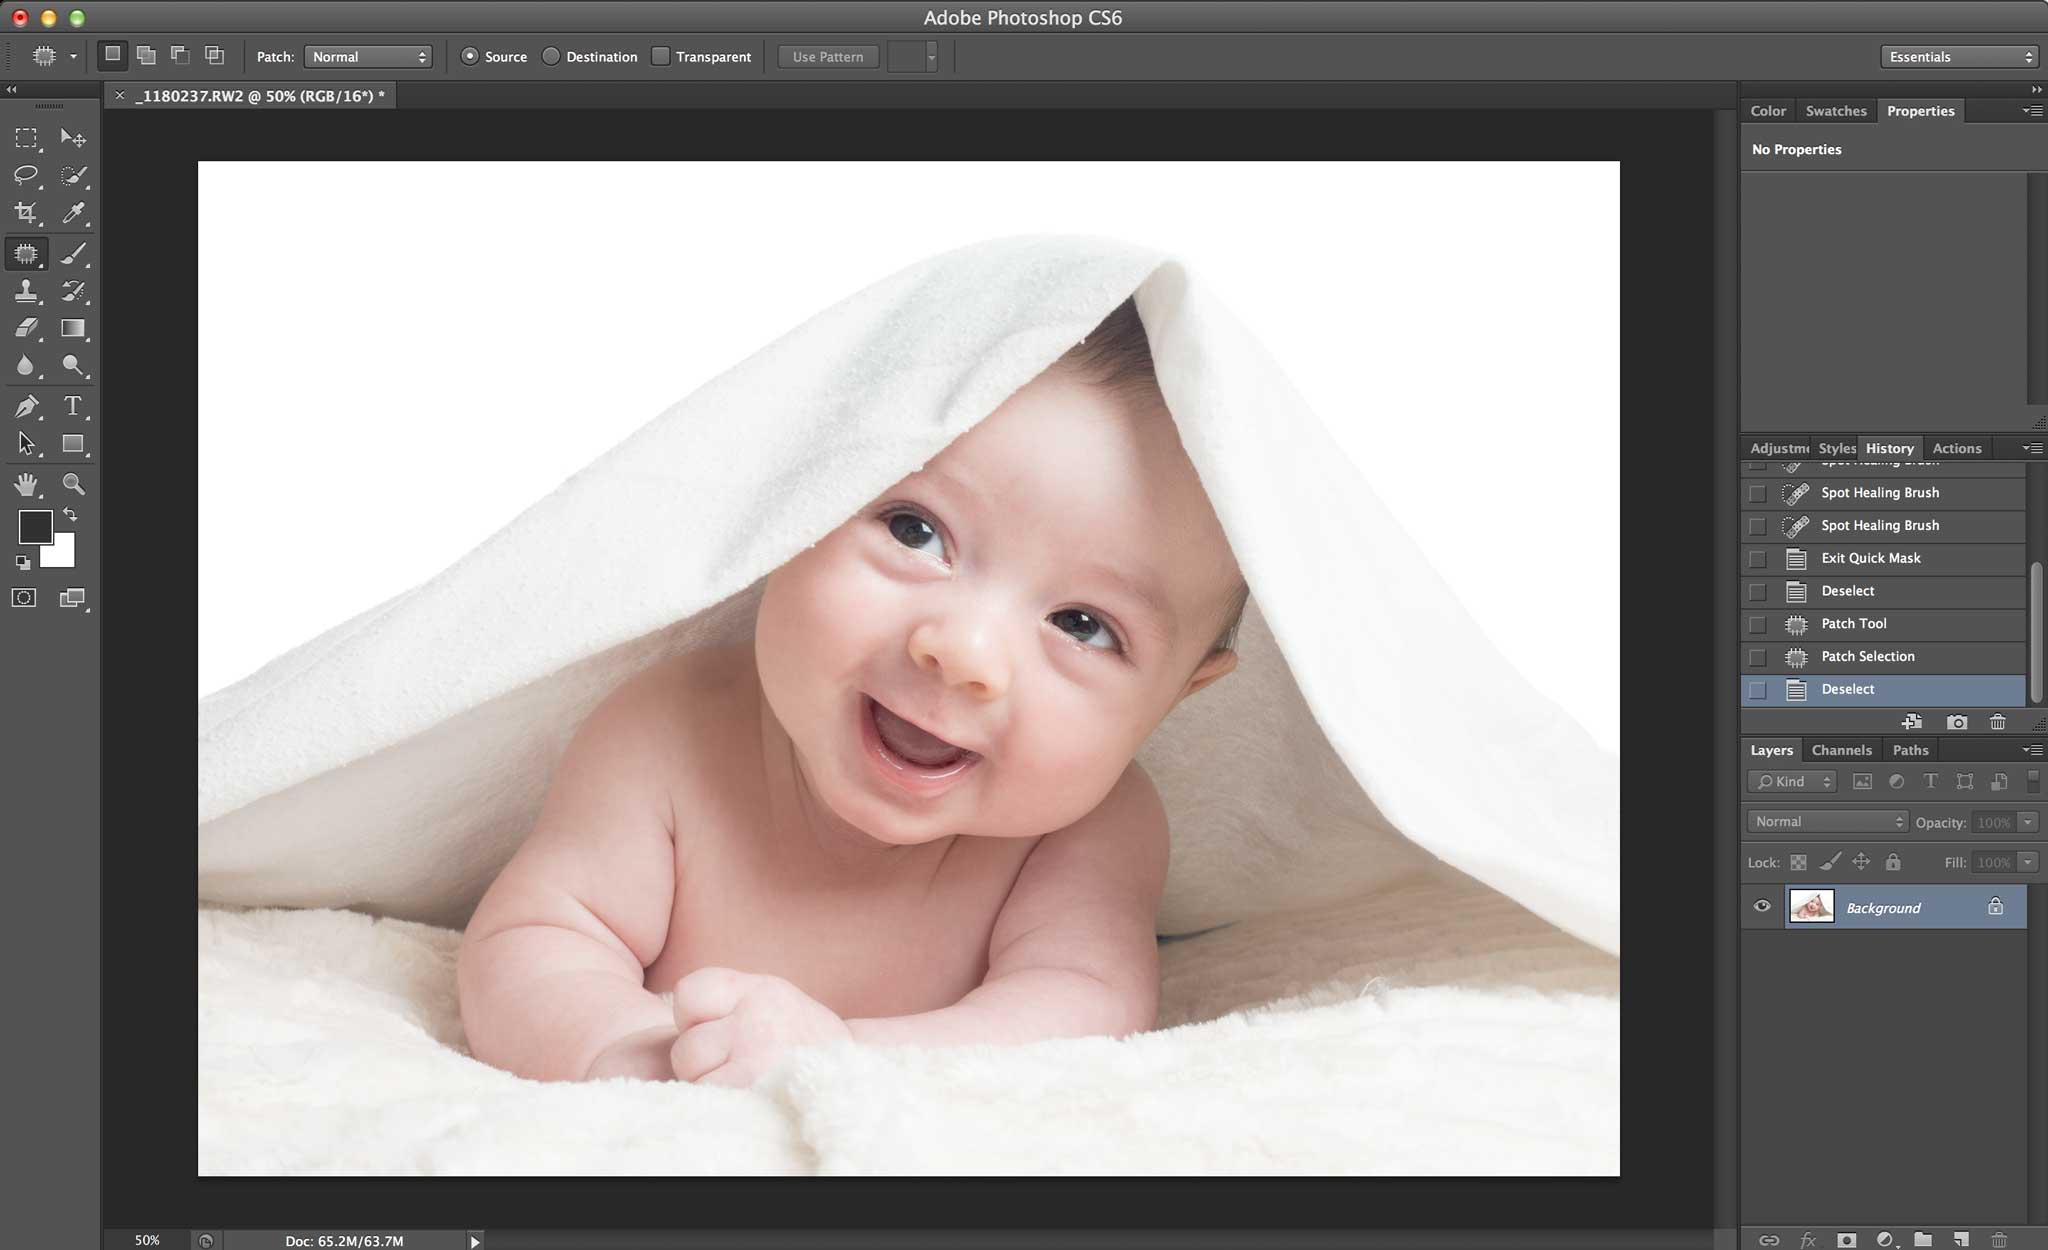
Here’s a quick example of the Dynamic Skin Softener in action. In this image, I am using the Nik Color Efex Pro 4 as a Photoshop plugin.
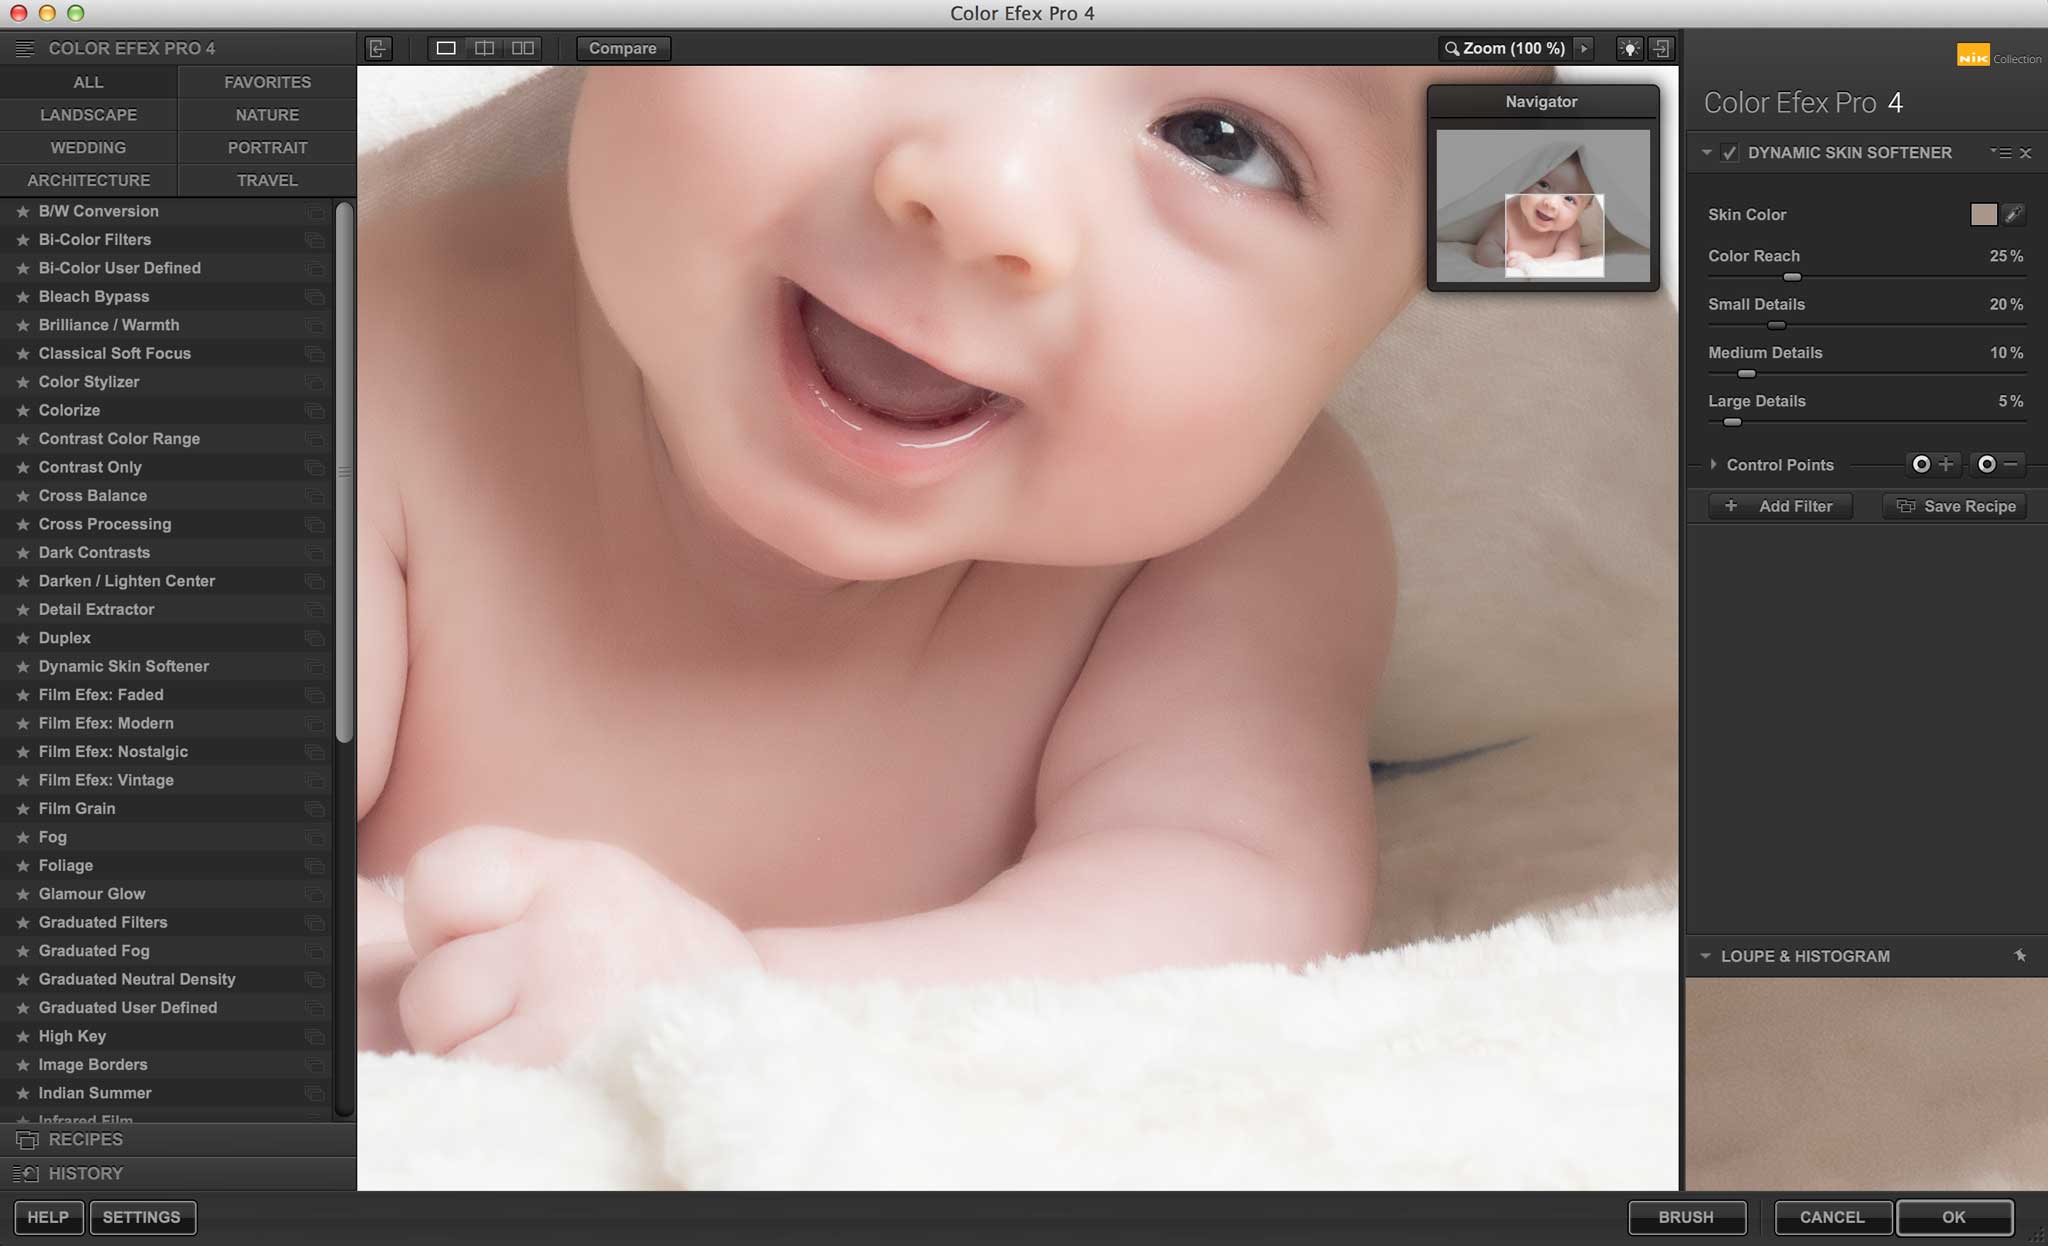
Here is the full image before and after the application of the Dynamic Skin Softener and sharpening. This task took less than 20 seconds to perform, and I use it to finish many of my family, wedding, and newborn portraits. While some applications call for more precise attention to the skin, this is a quick way of smoothing skin with decent results. And did I mention it’s free?


Join the Fstoppers community for free
-
Post comments and join in the discussions
-
Browse the site ad-free
-
Share your work and get featured in the community
-
Compete in the photo contests for fun and prizes
8 Comments
Thank you for this! I've had color Efx for a while and will definitely use this today!
You're welcome Dawn : )
Been using this for years. If careful with the blemish "sizes" you can make small earrings disappear.
I bet. I still use spot removal/patch first for major blemishes. As with any skin softening filter, when it's cranked up the result is a little too smooth and plastic-like.
I use this feature on a lot of my photos after blemish removal and color correction. It works very well if used sparingly.
I've had the Nik collection for months, never actually tried anything other than some of the artistic filters. This is fantastic and quick if used sparingly ... Thanks for this !
You're welcome Marc!
Hi Jordan, have you been able to find a way to allow Nik Collection to work on High Sierra? I've been able to get it to work with Adobe PS 2018 CC, but when I upgraded to High Sierra, PS crashes when trying to apply the Color Efex Pro changes. Thanks