
When retouching, it is not rare to come across color problems on a model’s skin. Whether it is from a sun tan, dodge & burn, spots or skin discoloration issues, it can be really painful to treat it in post. Despite being all about having it right in camera and doing as little as possible in post, there is an easy way to correct this in Photoshop -- a method that is going to make your makeup artist want to stop correcting redness, yellowness or under-eye bags. It is so easy to use you are going to wonder why you did not think of it earlier!
How Great Is It, Really?
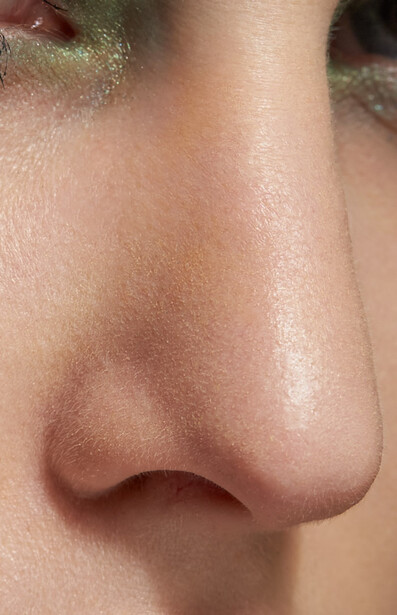
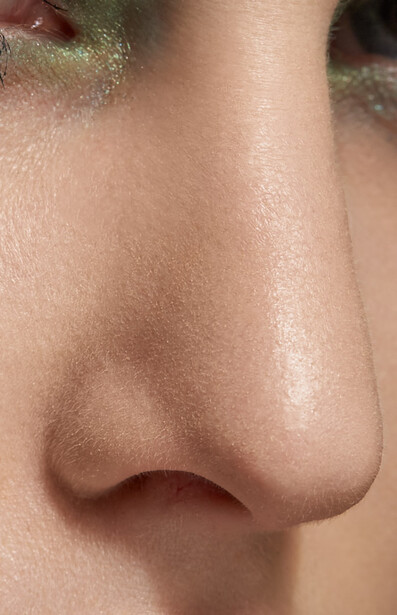
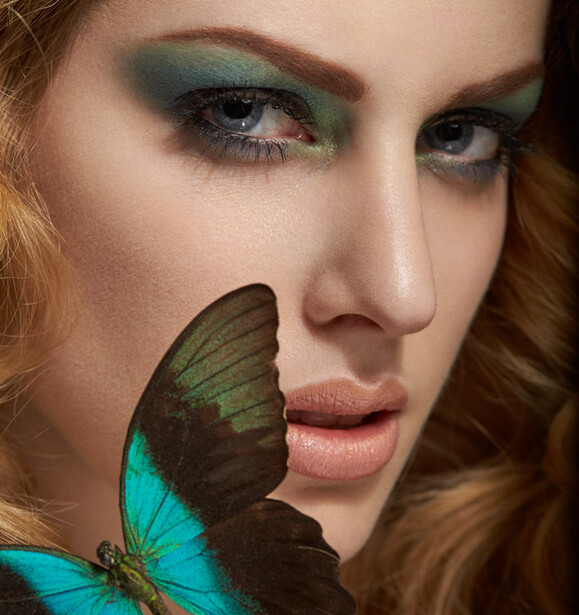
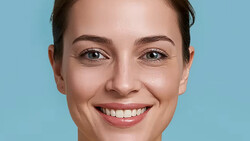
Let's start with a few examples to demonstrate the purpose of the technique before showing you how to use it. Most of the time, I use it to color correct the skin after having cleaned it with dodge & burn. When using dodge & burn to clean the skin, some colors have a tendency to change and not match the rest of the skin despite having a similar tone/brightness level. The same thing happens when a makeup artist applies too much concealer or corrector on a model's skin. See for yourself in the before and after below:
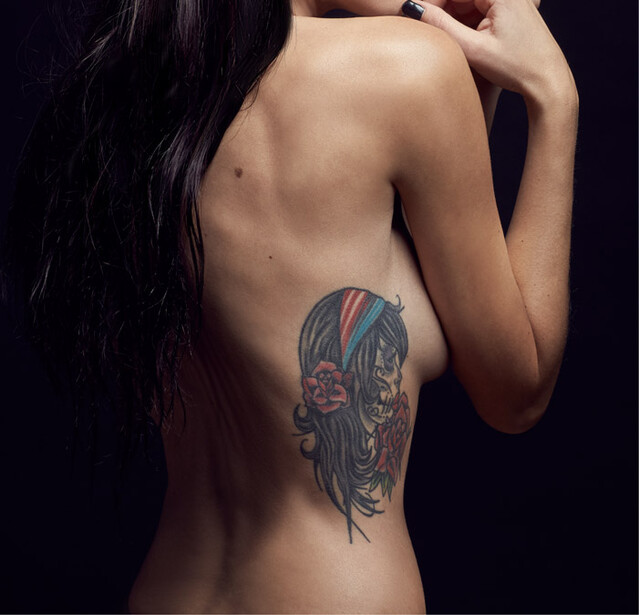
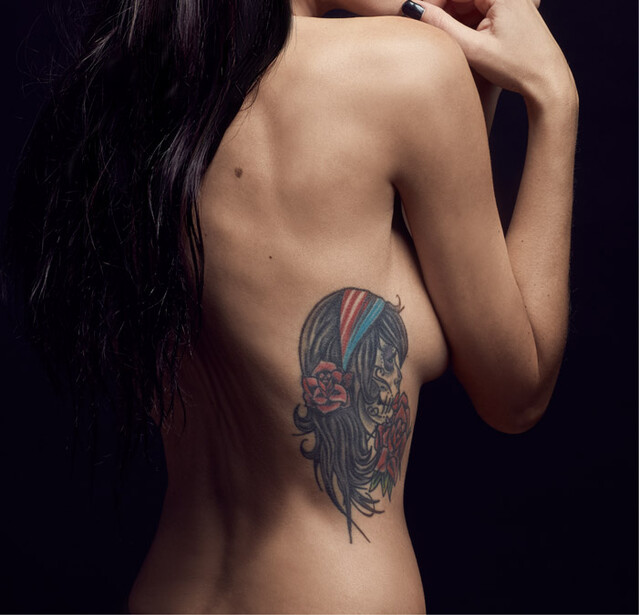
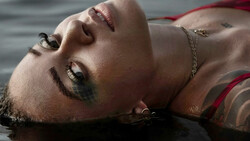
Then there is that annoying thing people call tan lines and that we, as photographers, hate so much… You know -- when your model comes in with either bra strap traces or some kind of swimwear "drawing" on her/his body. Some makeup artists might be able to cover it with foundation and a bit of time. However, it might be way easier and faster to correct these kinds of discolorations in post. Here is an example of a before/after with the same technique I am going to show you in a few seconds:
How To Correct Skin Tones/Color:
Now, you are wondering how it works… Well, it is very easy. You could lose time trying to match skin color with curves and then mask it where not needed. But this is much faster and does not really need any precise work.
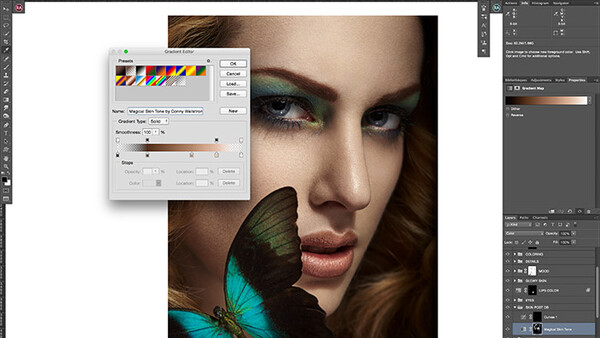
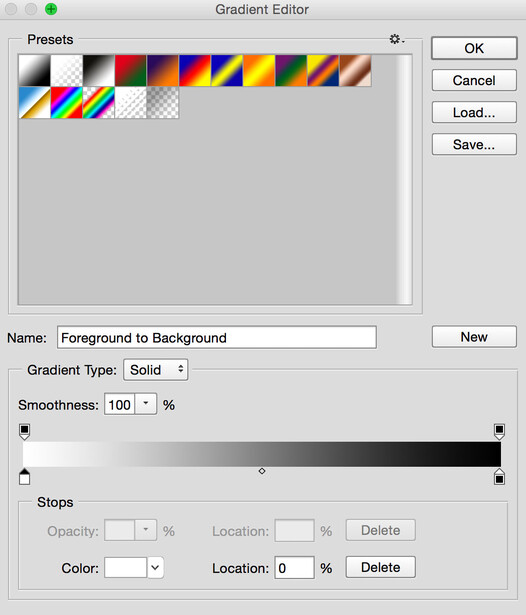
Simply create a new gradient map (Layer > New Adjustment Layer > Gradient Map), invert the mask or fill it with black and open up the gradient editor (click on the gradient in the properties window). The window should look like so :
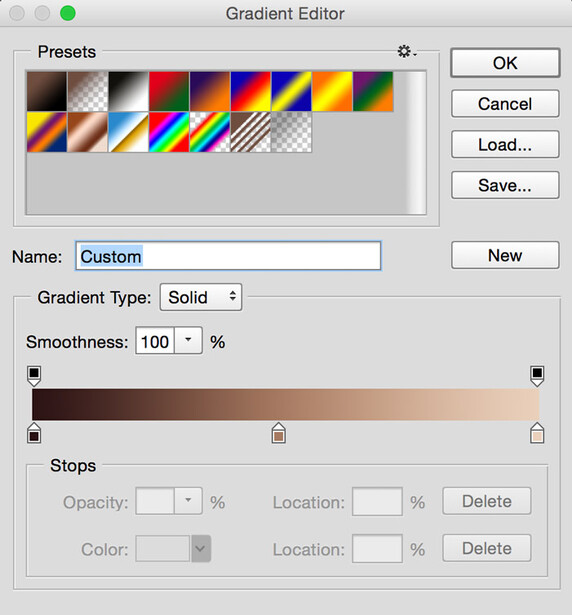
Create one new point below the gradient by just clicking below the gradient. Make each point below the gradient match a skin tone color, with the first on the left being dark tones/shadows, then the middle one mid-tones and finally the last point being highlights – to make it easy you can sample it with the eye dropper tool directly on the image. Once you have selected your tones, your gradient map should look something like that:
Note that you will probably have different colors, depending on your model's skin and color toning of your image. Then you just have to unmask where needed. Be careful, though, not to over do it. A little goes a long way and small imperfections sometimes make a picture more believable. If you want to make sure you are only touching colors and not luminosity, change the layer blend mode to color.
To improve this technique, try to play around with the sliders once you have revealed the adjustment where you want it. For example, I like to have the end and beginning of my gradient transparent in order to make keep my highlights and shadows untouched. Also, sometimes the mid-tones you thought were mid-tones are not at an exact 50% on the gradient map, so try to move it around and see where it looks best. Here is another example of the same gradient, but after I tweaked it a little bit to make my image look better:

The result of this technique is very subtle when used correctly. Here is the example with the above gradient map where I kept the layer opacity slightly higher than I would normally have just to make the difference more visible:

Nothing More Complicated Than That
This is a very quick and easy way to correct color problems on skin. No need for very precise work, and it takes only a few seconds to set it up. With some creativity you could even use it to get more consistent hair color, correct nails, clothes or even background color.
Now keep in mind this technique has its limits. While I absolutely love it for local color shift correction, I would not recommend it for correcting a full body. I know some photographers use it for creating consistent color across the model's body, but I think it looks very bizarre. Try and use it carefully, but I am sure it could save you quite some time on some pictures! Finally, do not forget that this is going to correct color and not brightness/tones. Sometimes correcting brightness/tones before applying it will be needed, especially in the case of suntan correction.
This technique along with other incredible techniques are also available in the Retouching Academy's Beauty Retouch panel for Photoshop. Within that panel is a Magic Skin Tone tool developed by Conny Walstrom, where it takes the gradient map technique described above, while also using advanced algorythms to ensure the skintone looks the absolute best. More information on the Beauty Retouch Panel can be found on Retouching Academy's website here.
If you'd like to take your photo editing to a new level, make sure to check out the variety of Photoshop tutorials and plugins that will speed up your workflow and help you create stunning, professional work. Save 15% by using "ARTICLE" at checkout.

Join the Fstoppers community for free
-
Post comments and join in the discussions
-
Browse the site ad-free
-
Share your work and get featured in the community
-
Compete in the photo contests for fun and prizes
19 Comments
Hmmm nice .
But i like the before color more then the after ;-)
Point of view only
You could then adjust the color to be more vivid and saturated using the same technique :) I like my colors to be muted a bit, but that is just personal preference.
And i forgot .. i have tried it and it works just perfect ... thanks
First bold title, How Geat Is it? Needs an "R". Spellcheck people, spellcheck.
(Layet > New - Typo again....
Is there something wrong with the before after plugin? I don't see any change :(
It should work, though depending on your screen the difference in color might not be strong enough to be visible. On the last before/after of the article, it is especially visible on the nose and on the second one especially on the shoulder.
I don't see it either. My monitor is calibrated with Spyder5pro. The difference so neglectable. No client would see a difference let alone the average-joe on FB or Instagram.
Thank you for sharing this tip! I'll definitely need to try it out sometime, as I think it'll be a quicker method than the ones I currently employ for evening out skin tone.
Thanks Quentin, I've been using this method for years and tweaking the inevitable shadow saturation with a further clipped adjustment layer. How are you dropping in the transparency at either end?
To drop the transparency you need to add points above the gradient line in the gradient editor window.
The points below the gradient are your colors and the ones above control the opacity. If you add a point at either end above of the gradient and give them a value of 0% you will create the transparency.
If done correctly your gradient should look something like the last gradient editor window's print screen of this article (4 points above the gradient with the ones placed at either end set at 0% and the two others at 100% opacity).
Ah, that makes sense. That's a brilliant step, always had to tackle oversaturated shadows before. Much appreciated, thanks for getting back to me.
If you don't already do it, also try to change the layer blend mode to color instead of normal. In some case I've found it to be quite helpful too ;)
Hey guys, the tool by Conny seems great - but it is different to the tool on Retouching Academy`s website.
Actually I bought this other panel and it works great. But I still miss some functions Coonys tool has.
I am not so happy with that! :(
So before you buy anything read twice! ;)
I have a problem. My colors in gradient doesn't change for that what I want. No mater what color I pick from there is still black or white. What am I doing wrong?
You're probably picking the color on the mask of the layer. Be sure to have your layer active and not the mask. Then you should be good to go.
superb !!!
Thanks, I've been struggling getting skin tones right for a while now. This really helps. It's amazing how powerful gradient maps are!
I feel like you've missed some explanations on how to get to certain actions and parts within the process. Don't assume that people understand your workflow. The point of a tutorial is to help not frustrate.
I really wanted to learn how to do this but in my opinion the after shots don't look any better than the befores anyway.