

Here is the paradox that stops most aspiring photographers before they start: you need a portfolio to get clients, but you need clients to build a portfolio. It feels like a locked door with the key on the other side, and plenty of talented people quit before they figure out that the door was never actually locked.
You do not need clients to build a portfolio. You do not need to have been paid for a single photograph. What you need is a collection of 15 to 25 images that demonstrate your skill, your eye, and your ability to deliver consistent results in the genre you want to work in. Everything in this article is designed to help you create those images from scratch, using resources you already have access to, without waiting for someone to hire you first.
How Many Images You Actually Need (and Why Less Is More)
The most common portfolio mistake is including too much work. A portfolio with 80 images tells a potential client that you cannot edit yourself. A portfolio with 15 to 25 strong images tells them that every frame you deliver will be excellent.
The math is simple. If someone is scrolling your website or Instagram grid, they will look at roughly 10 to 20 images before deciding whether to contact you or move on. Those images need to be your absolute best, every single one pulling its weight. The moment a viewer hits a mediocre shot, it reframes everything that came before it. One weak image in a portfolio of 20 does more damage than removing it entirely.
The rule: if you are not sure whether an image belongs, it does not belong. Remove it. You can always add it back later when you have stronger work that contextualizes it better.
Strategy 1: Photograph Friends and Family (but Treat It Like a Real Shoot)
This is the most accessible starting point, and also the one most people do wrong. The mistake is treating these sessions casually: shooting at a barbecue, snapping candids at a birthday party, and calling the best frames "portfolio material." Casual photos look casual, regardless of how good your camera is.
Instead, treat the session like a paid job from start to finish. Scout a location. Plan the wardrobe (even if "planning" just means texting your friend and saying "wear a solid-color top, no logos"). Arrive early and check the light. Direct your subject with specific instructions rather than "just be natural." Shoot a structured session with intentional compositions, not a scattershot of candids hoping something lands.
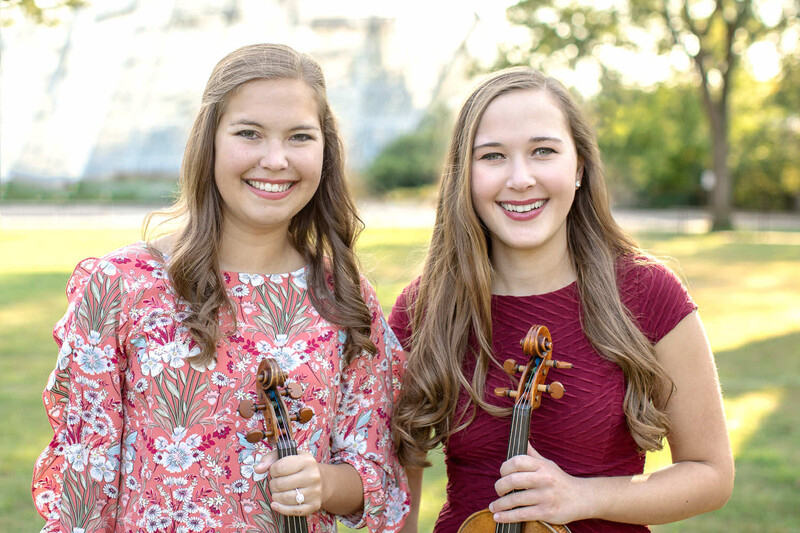
The images that come out of a deliberate, planned session with a willing friend look indistinguishable from paid work, because the process was identical. The only difference is that nobody wrote a check. Potential clients do not care about that distinction. They care about what the images look like.
If you are shooting portraits, focus on their eyes. Use Aperture Priority with a wide aperture (f/1.8 to f/2.8 on a 50mm prime) for clean background separation. Shoot during golden hour or in open shade. Direct your subject's shoulders, chin, and gaze. Twenty minutes of deliberate shooting with one cooperative friend will yield more portfolio-worthy images than a year of casual snapshots.
Strategy 2: Organize a Styled Shoot
A styled shoot is a collaborative session where a group of creatives (photographer, model, makeup artist, stylist, florist, venue) come together to create images that benefit everyone's portfolio. Nobody pays anyone. Everyone contributes their skill and walks away with usable work.
This sounds intimidating if you have never done it, but the logistics are simpler than you think. Start by identifying one or two other creatives in your area who are also building their portfolios. A makeup artist who just finished cosmetology school. A friend who has always wanted to model. A florist who needs product images for their website. Reach out, explain the concept, and propose a date and location.
The key to a successful styled shoot is a mood board. Collect 10 to 15 reference images from Pinterest, Instagram, or magazine editorials that capture the look, lighting, color palette, and mood you are going for. Share the board with every collaborator so everyone arrives with the same vision. Without a mood board, styled shoots devolve into "let's just see what happens," which produces forgettable images.
Styled shoots are particularly effective for wedding, portrait, fashion, and product photographers. A single well-planned styled shoot can produce 5 to 10 portfolio-worthy images in a few hours, and the collaborative credit structure means you can tag every collaborator when you share the work, expanding your reach to their audiences.
Strategy 3: Photograph Local Businesses for Free (Strategically)
This is not charity. This is a transaction where you trade your time for portfolio images and a testimonial. The trick is choosing the right businesses: ones whose products or spaces look good on camera and align with the genre you want to work in.
If you want to shoot food photography, approach a local bakery or coffee shop and offer a complimentary session in exchange for permission to use the images in your portfolio. If you want to shoot real estate or architecture, contact a local real estate agent and offer to photograph one listing for free. If you want to shoot product photography, reach out to a small business that sells handmade goods and offer to photograph their inventory.
Be upfront about the arrangement: you are building your portfolio, you will deliver a set number of finished images, and you would appreciate a written testimonial and permission to use the images publicly. Most small business owners are thrilled to get professional-quality photos at no cost, and the testimonial becomes social proof for your next conversation with a paying client.
Two important boundaries. First, limit the free work to one or two sessions per genre. You are building a portfolio, not establishing a reputation as someone who works for free. Second, deliver the images at the same quality level you would for a paying client. The whole point is to demonstrate what your paid work will look like. If you cut corners because you are not being paid, the images will reflect it.
Strategy 4: Personal Projects With a Specific Theme
Personal projects are the secret weapon of photographers who want a portfolio that stands out rather than blends in. A personal project is any self-assigned body of work with a unifying theme, shot and edited to a consistent standard.
The theme can be anything that genuinely interests you. A visual essay on the architecture of your neighborhood. A series of portraits of local bartenders or barbers. A documentation of the changing seasons at one specific park. A study of light in your apartment at different times of day. A collection of still-life images inspired by Dutch Golden Age paintings, shot on your kitchen table with window light.
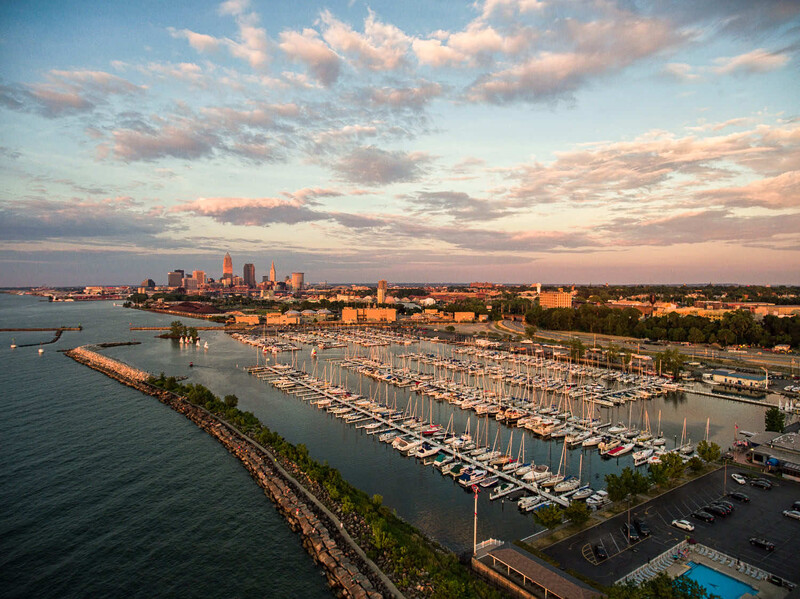
What makes personal projects powerful is intention. A random gallery of unrelated photos tells a viewer nothing about your artistic perspective. A cohesive series of 8 to 12 images around one idea tells them that you see the world in a specific way and have the discipline to execute a vision from concept to completion. That is exactly what clients are looking for.
Personal projects also give you creative freedom that client work rarely does. You set the brief, the timeline, and the aesthetic. Use this freedom to experiment, to push yourself technically, and to develop the style that will eventually become your brand.
Strategy 5: Existing Locations and Found Subjects
You do not always need a model, a business, or a collaborator. Some genres build naturally from what already exists in your environment.
Landscape and nature: Drive or walk to any scenic location within an hour of where you live. Shoot during golden hour or blue hour. Come back in different weather. A single location photographed across four seasons can produce a cohesive body of work that demonstrates patience and craft. If you want structured guidance on this process, Photographing the World: Landscape Photography and Post-Processing walks through location scouting, shooting technique, and editing in detail.
Architecture and interiors: You do not need a client to photograph buildings. Public architecture, hotel lobbies (ask permission at the front desk), interesting residential streets, and even well-designed retail stores are all fair game. Bring a tripod, shoot at f/8 to f/11, and pay attention to converging verticals.
Street photography: Go where people gather. Markets, transit hubs, festivals, downtown sidewalks. Set Continuous AF, f/5.6 to f/8, Auto ISO, and shoot candidly. Street photography requires no permission, no planning, and no gear beyond your camera and one lens. It also builds reflexes, composition instincts, and comfort shooting in public, all of which transfer to every other genre.
Macro and still life: Your house is a studio. Photograph textures, food, flowers, household objects arranged with intentional composition and window light. Still-life photography teaches you to control every variable in the frame, which is the foundation of commercial product work.
Editing Your Portfolio: The Brutal Cut
Once you have a body of work, the editing process is where most portfolios fail or succeed. "Editing" here does not mean post-processing. It means selecting which images make the cut and which do not.
Print or display every candidate image at the same size, side by side. Ask yourself three questions about each one:
Does this image represent the work I want to be hired to do? If you want to shoot weddings but the image is a landscape, it does not belong in your wedding portfolio. Genre consistency matters.
Is this image as strong as the weakest image I would accept from a photographer I admire? If the answer is no, pull it. Your portfolio is judged by its floor, not its ceiling.
Does this image add something the others do not? Five similar golden-hour portraits in the same location with the same model wearing the same outfit are not five portfolio images. They are one portfolio image. Pick the best, remove the rest.
After the first cut, you should have 15 to 25 images. If you have fewer, that is fine. Fifteen strong images are better than 25 images padded with filler. If you have more, cut harder.
Where to Put It
Your portfolio needs to live somewhere potential clients can find it. At minimum, you need a dedicated website with a clean layout, fast load times, and no distractions. Squarespace, SmugMug, Pixieset, and WordPress with a portfolio theme are all solid options. The template should be simple enough that the images are the focus, not the design.
Beyond the website, maintain a curated Instagram grid that reflects the same quality standard as your portfolio. Instagram is not a portfolio replacement, but it is often where potential clients discover you before visiting your site. Keep the grid consistent in style, tone, and quality. Delete older posts that no longer meet your standard.
If you are applying for specific jobs or submitting to publications, have a PDF version of your portfolio ready. Ten to fifteen images, high resolution, with your contact information on the first and last pages.
The Portfolio Is Never Finished
A portfolio is a living document. As you shoot more and improve, older images should cycle out and stronger ones should replace them. The portfolio you build this month will look different six months from now, and it should. Growth means your standards rise, and rising standards mean that work you were once proud of eventually becomes work you have outgrown.
If you are ready to accelerate this process with structured instruction across multiple genres, The Well-Rounded Photographer puts eight instructors in front of you, each teaching a different specialty from lighting and posing through post-processing. If you want to start with the camera fundamentals that make every portfolio image sharper and more intentional, Photography 101 covers the complete path from your first settings adjustment to a finished Photoshop edit. And when you are ready to turn that portfolio into paying work, Making Real Money: The Business of Commercial Photography covers pricing, licensing, and client acquisition for photographers who are serious about going professional. The portfolio comes after the skills. Build both.




1 Comment
Seems like so many of the contributors here are sponsored by Squarespace, and speak to how it's so easy to set up a website there. Yet when I try to integrate an ecommerce shopping cart for selling prints into a photo gallery, it's not so easy. Yes, I can create a shopping cart from uploading one product at a time. Or I can create a photography gallery subdivided into sections, such as for a region or by state. Not too hard. But if I want to make a photo gallery and offer prints for sale at various sizes and substrates directly from that gallery, it doesn't appear to be so easy.
I've looked through many of their templates without finding a good e-commerce option for selling prints. Don't want to book appointments or sell wedding packages... I just want to sell prints. I presently have a WIx website with photo galleries, but it's the same problem.... creating a shopping cart requires entering my 700 images into a new store on the site all over again. Anyone have any suggestions?