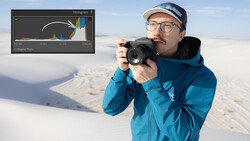
We've all done it before and I guarantee that we'll all do it again: sometimes, you just miss the mark and come home with an underexposed image. This helpful tutorial will show you how to save the photo and obtain a natural-looking result.
Coming to you from Aaron Nace over at Phlearn, this great video will show you how to rescue an underexposed image. The issue with raising the exposure on an image is that shadow areas tend to have less saturated colors than midtones and highlights, so you can end up with a bizarre-looking photo if you make drastic adjustments to the exposure. In watching the tutorial above, you might wonder why Nace chooses to use Apply Image to protect the highlights rather than tweaking the Curves layer a bit more. Notice that Apply Image automatically generates a complicated layer mask for the exposure adjustment that would have been extremely tedious to make otherwise. When you come to the saturation adjustment and need to limit that to the shadows, your mask is already ready and waiting for you to copy from the one you just created using Apply Image. It makes the overall process much more efficient. Give it a try!

Join the Fstoppers community for free
-
Post comments and join in the discussions
-
Browse the site ad-free
-
Share your work and get featured in the community
-
Compete in the photo contests for fun and prizes
8 Comments
I'm confident a 1/2 to a 2/3 stop exposure push on the raw file in the raw processor would have looked better.
Not all brands have ISO-invariant sensors and only late-model bodies that many people don’t own do.
Maybe not banding noise, but APS-C and FF Canons (which are the models that employ Canon sensor/processors) have nasty noise even at base ISO. Canon Mk IIs and Mk IIIs (the cameras I deal with professionally), are 2 cameras that make wonder why they're so popular, because they're nasty.
Any way to replicate these effects in Lightroom?
I see in other comments you are missing his point. Yes, there are a ton of ways to open the shadows, but his premise here is to balance saturation in those shadows. And yes, perhaps an adjustment brush in Bridge ACR or in Lightroom with both the shadows and saturation would work?